Author

Avery Smith

Browsing

Marigold flowers are among the most popular and versatile in Indian gardens, particularly during the holiday season. They are used to adorn homes and create a joyful mood during Diwali, Navratri, and other celebrations because of their brilliant hues. Marigolds come in a magnificent array of colors, including yellow, orange, white, red, gold, and bi-color, providing a lovely variety to your garden.

Marigold flowers are among the most popular blossoms among gardeners worldwide. Their vivid colors, simplicity of growing, and multiple benefits have made them a popular choice for both ornamental and practical gardening. Whether you are a seasoned gardener or just starting, marigolds provide unrivaled appeal and practicality to any setting.

The Asteraceae family includes marigolds (genus Tagetes), which can be either annual or perennial flowers. Marigolds, which are indigenous to Central and South America, are distinguished by their vivid colors, which range from deep reds and flaming oranges to golden yellows. These blossoms, which have a distinctive daisy-like look and potent scent, are not only lovely but also an effective way to replenish soil and control pests.

Marigold flowers, with their vibrant colors, symbolize warmth, creativity, optimism, passion, wealth, and life’s beauty. They are often used in celebrations like Día de los Muertos to remember loved ones and represent enduring strength and perseverance in many cultures.

Tagetes erecta, or African marigolds, are the largest marigolds, known for their large flowers and tall stature, making them ideal for gardens and landscapes.

French marigolds, smaller and bushier than African marigolds, bloom in bi-color patterns and are ideal for small garden beds, containers, and borders.

Signet Marigolds, small, citrus-scented plants with delicate, fern-like leaves, are commonly found in herb gardens due to their culinary applications.

Triploid marigolds, a hybrid of French and African marigolds, are sterile but have large, colorful blooms that can withstand harsh weather conditions.

Vibrant flowers are often associated with marigolds. Whether in gardens, balconies, or containers, their striking, warm-toned blooms evoke a positive mood.

Marigolds have a reputation for keeping pests like whiteflies, aphids, and nematodes away. Because of the blossoms’ potent fragrance, nearby plants are shielded from dangerous insects.

Planting marigolds alongside plants such as tomatoes, peppers, and cucumbers can increase the health of your crops by minimizing pest infestations.

Marigolds increase biodiversity in your garden by drawing in helpful pollinators like ladybugs, bees, and butterflies.

Tall African marigolds are best planted in spring after frost has passed, as they mature and flower slower than young French and signet marigolds, which can be planted from spring through July.

Plant seeds in the spring when the soil is warm, as they germinate easily outdoors. African marigolds are best purchased as young plants or started indoors four to six weeks before frost, as they germinate more readily outdoors.

In warm climates, marigolds sprout in as little as one week, and plants usually bloom in eight weeks.
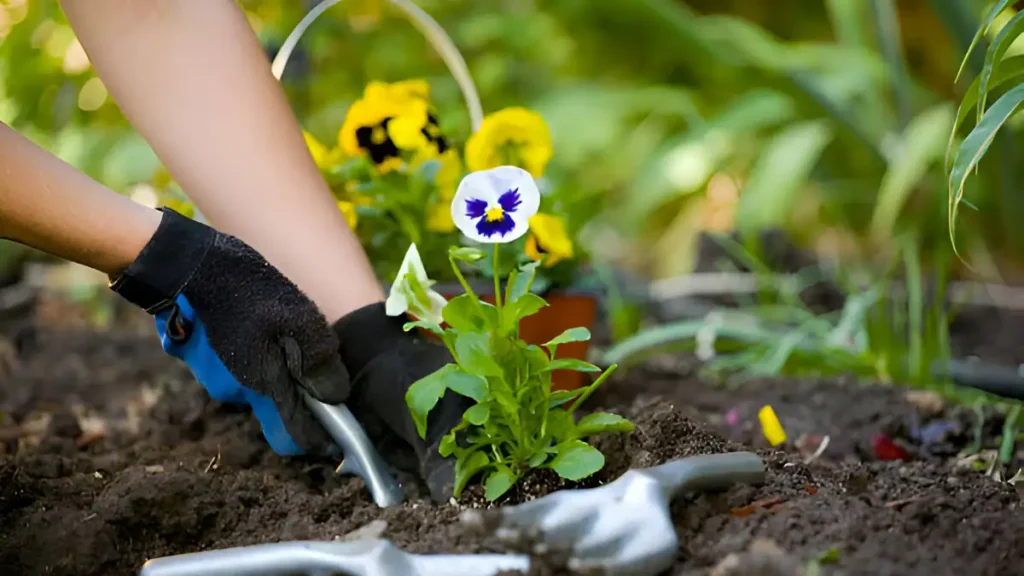
African marigolds are best started as young plants, as they take longer to flower. French marigolds are easier to start from seed. If the soil is nutrient-starved, sprinkle slow-release granular fertilizer in the planting hole. Sow seeds 1 inch apart, no deeper than 1 inch, and thin the seedlings while they are young. Keep signet and French fonts 8-10 inches apart, and separate larger African marigolds by 10-12 inches. Water each plant after transplanting.

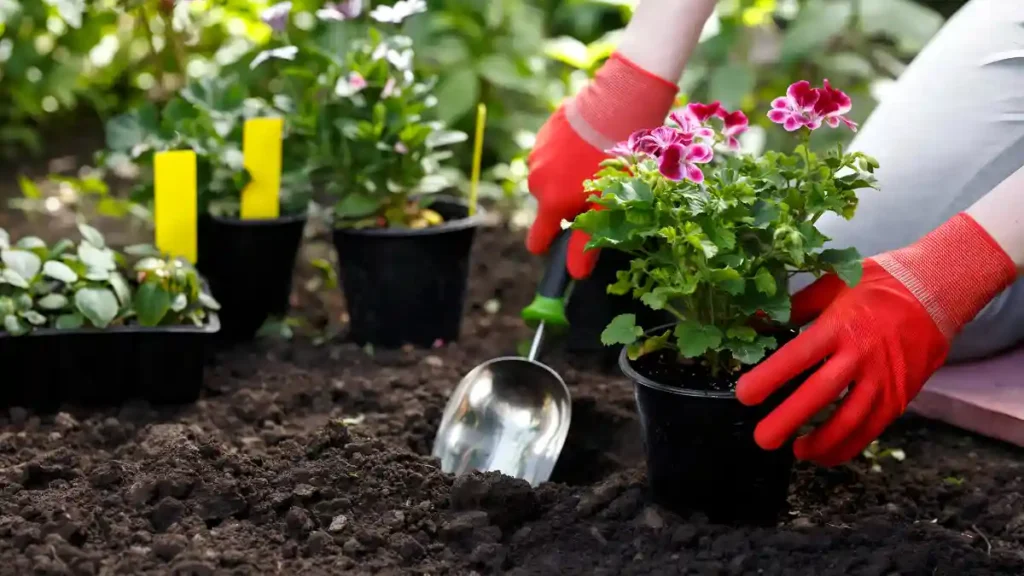
To plant marigolds in pots, use a soil-based potting mix, slow-acting granular fertilizer, or diluted liquid fertilizer frequently. Provide enough room to prevent crowded marigolds from overcrowding.

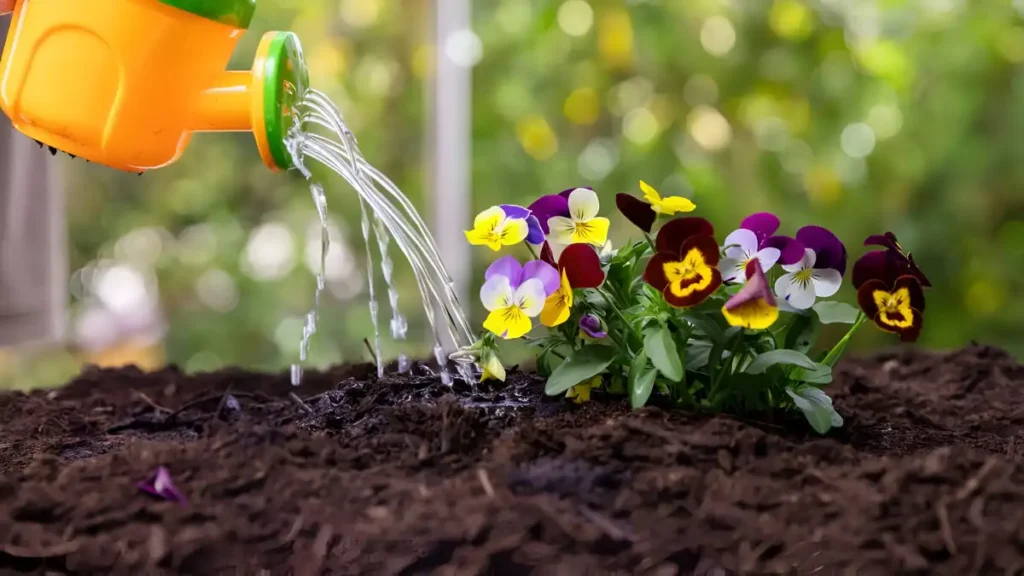
Marigolds require frequent watering until they develop a strong root system, only after the soil settles and feels dry, and avoid watering from above, focusing on the plant’s base to prevent powdery mildew.

Marigolds require a general-purpose garden fertilizer every six weeks for health, but not during growth to prevent excessive nitrogen intake, as it can lead to luxuriant foliage instead of flowers.

Deadheading is the act of removing fading blossoms from plants, such as marigolds, to prolong their flowering season and maintain their vibrant appearance. This process helps plants create additional blooms instead of wasting energy developing seeds, thereby enhancing their overall appearance. Regular removal of spent flowers is essential for continued flowering.

While marigolds are generally pest-resistant, they can be susceptible to spider mites and fungal diseases. Keep an eye out for indicators of problems and respond quickly with organic or chemical treatments.

Marigold flowers are the perfect example of a diverse and rewarding flower garden. Whether you want to add color, attract pollinators, or protect your vegetable crop, these blossoms are great options. Marigolds can easily transform your outside space into a lively and thriving oasis.

Certainly! If you’d like to learn more, please consider following our WhatsApp Channel, Facebook, Instagram, YouTube, Twitter, and Pinterest.

Q1: Are marigold flowers edible?

A1: Yes, marigold flowers are edible and are frequently used to add color and a little lemony or peppery flavor to salads, drinks, and desserts. However, only certain types, such as Calendula officinalis (pot marigold), are suitable to eat, thus confirming appropriate identification before ingestion.

Q2: Do marigolds like sun or shade?

A2: Marigolds prefer full sun and grow in direct sunshine for at least 6-8 hours every day. While they can withstand partial shade, their flowers may appear less vivid in low-light circumstances.

A Gerbera daisy is easily identified by its vibrant colors and distinctive shapes. They are one of the most widely used options for cut flowers worldwide. Growing your flowers at home will yield even more flowers for your money than purchasing a bouquet. Plant enough to fill vases indoors, and line your garden walkways with their vibrant hues. Additionally, Gerbera daisies can be grown outdoors in containers, brought indoors for the winter in all but the coldest climates, or kept as houseplants.

Gerbera daisies come in various cultivars for bloom shape and color. Choose compact plants suitable for the container or planting bed size, as compact plants have more robust flower stems.

Gerbera daisy is a great option for designing a gorgeous garden that is full of color and charm. The vibrant and cheery blossoms of these lovely flowers make them popular among gardeners. Everything you need to know to cultivate, maintain, and enjoy Gerbera daisies will be covered in this extensive book, which will turn your garden into a stunning setting.

Gerbera daisies are colorful, large flowers suitable for both indoor and outdoor gardens. They have a long blooming season and are easy to grow with minimal care. They are versatile and suitable for borders, containers, or bouquets. Gerbera daisies are pollinator-friendly, attracting bees and butterflies, and promoting biodiversity. Their vibrant colors add life to any garden design.

The gerbera daisy is a colorful flower that is frequently linked with happiness, purity, and innocence. Its bright colors and prominent look represent happiness and positivism, making it a popular way to communicate excitement and admiration. Gerberas, in floral language, convey deep emotions as well as gratitude and admiration. Their adaptability and charm make them an appropriate addition to bouquets for any occasion.

Gerbera daisies, native to South Africa, are delicate perennials that thrive in USDA Zones 8-10, particularly in warm climates like California and are cultivated as annuals in colder regions.

Gerbera daisies, growing 6-18 inches tall, are ideal for flowerbeds or pots. Display them in containers if clay soil is present, as they can grow up to 18 inches tall.

Gerbera daisies flourish in regions with lots of sunlight. Choose a site in your garden that receives at least 6-8 hours of direct sunlight per day. While they prefer direct sunlight, they may withstand some shade, particularly in hot climates.

Gerbera daisies thrive in warm weather, so they should be planted in spring after frost has passed. They require well-draining soil and sunlight for healthy growth. Start seeds indoors 8-10 weeks before frost and move them outside when warm. Gerberas can also be planted in fall in moderate winters.

Gerbera daisies thrive in well-draining, pH 5.5 to 6.5 soil, with adequate nutrient content from organic matter like compost or manure.

Dig a hole twice the height of the container and add soil if needed. Place the Gerbera daisy in the hole, crowning it over the ground. Backfill the remaining hole with soil, water the plant, and space the daisies 12-18 inches apart for optimal airflow and powdery mildew prevention.

When growing Gerbera daisies in a container, it’s better to stay away from dark ceramic pots because they retain heat and could burn the delicate roots. Place the Gerbera daisy in it with its crown slightly above the soil line after filling it with high-quality potting soil.

Gerbera daisies can be grown indoors in a wet seed-starting mix 12 weeks before frost. Plant seeds on top, gently press them in and allow light for germination. Place seeds in a warm location and cover with a plastic bag. Once seedlings appear, move them outdoors once healthy.

Gerbera daisies require consistent hydration, but overwatering can cause root rot. Soak them once a week, increase watering frequency during hot weather, and only provide light water during winter, as they become inactive.

The soil’s condition influences Gerbera daisies’ fertilizer needs. Fertilize every two weeks in spring and summer with a nitrogen-rich water-soluble fertilizer or apply compost once a month.

To encourage new flowers and keep the plant looking its best, remove spent blooms regularly. Trim any yellowed or damaged leaves to keep the plant healthy.

The Gerbera daisy, a vibrant and low-maintenance plant, is a versatile addition to any garden, making it perfect for creating flower beds, and patio decorations, and attracting pollinators, transforming your yard into a colorful masterpiece.

Certainly! If you’d like to learn more, please consider following our WhatsApp Channel, Facebook, Instagram, YouTube, Twitter, and Pinterest.

Q1: Are Gerbera daisies perennial or annual?

A1: Although Gerbera daisies are planted as perennials in most climates, they may act more like annuals in colder climes.

Q2: How long do Gerbera daisies bloom?

A2: Gerbera daisies can bloom constantly from spring to October if cared for properly.

Q3: How to propagate Gerbera daisy?

A3: Gerbera daisies can be propagated by dividing existing plants in the spring or early fall, making sure that each division has good roots and foliage. They can also be produced from seeds, although this takes longer and may result in flowers that are not similar to the parent plant.

The pansy flower is a beautiful addition to any landscape, known for its vibrant colors and endearing charm. Pansies, a versatile and durable plant, provide vibrancy and flair to your outdoor space. Pansy flowers are popular because of their bright colors, variety, and ease of growing. Whether a seasoned gardener or a newbie, adding pansies to your garden may convert it into a vivid sanctuary. This comprehensive guide covers everything you need to know about growing and caring for pansy flowers.

Pansy flowers, despite being fragile perennials, are hardy annuals that thrive in temperatures between 40-60 degrees Fahrenheit and USDA zones 7-11. They can withstand low temperatures but not high, and reseed as biennials or short-lived perennials.

Flower colors offer a seasonal palette of possibilities, including white, yellow, purple, blue, red, pink, and orange. Pansies bloom year-round when planted in the fall or spring. Fall-planted pansies can survive from winter to spring in warm climates.

The pansy flower (Viola × wittrockiana) belongs to the Violaceae family and is a hybrid plant created from wild violets. Pansies are known for their brilliant, velvety petals and come in various colors, including rich purples and reds, bright yellows, blues, and even multicolored variations. Their distinctive “faces,” generated by contrasting petal patterns, make them among the most popular garden flowers.

The pansy flower represents love, remembering, and thoughtfulness. Its name is derived from the French word pensée, which means “thought,” indicating its relationship with deep introspection and memory. Pansies, commonly given to convey affection or commemorate someone, are also associated with creativity and free thinking due to their brilliant, multicolored petals. They are popular in gardens because of their cheery appearance and capacity to flourish in milder climates.

Pansies can be planted in fall or early spring, with early spring and summer flowering starting in late winter. Seeds can be sown in late summer for fall and winter flowering. Depending on soil temperature, seeds can take a while to sprout. Planting in the ideal soil temperature range of 45°F to 65°F (7°C to 18°C) is recommended. Pansies can withstand frost, but avoid it if temperatures remain below freezing.

Growing pansy flowers successfully involves careful planning and attention. To guarantee a vibrant display of these charming flowers, follow the following instructions.

1. Choosing the right types of pansy flowers

Clear-Faced Pansies have solid-colored petals, while Blotched Pansies have unique patterns in the middle of the bloom. Trailing Pansies have a cascading growth pattern, making them ideal for hanging baskets.

2. Choosing the best site

Pansies thrive in sunlight-rich environments but can tolerate shade in hotter temperatures. Proper soil drainage and organic material content are essential for optimal growth.

3. How to plant pansy flower

To grow pansies in garden beds or containers, choose bushy, stocky plants with numerous buds, and avoid open blooms as they may be overworked and exhausted in small pots.

The garden center offers established pansy plants from August to April, so plant them in early spring or fall. Plant them in well-draining soil, add compost or a balanced fertilizer, and consider three to four plants in a 10- to 12-inch pot to avoid over-packing.

Proper care is required to keep your pansy flowers healthy and blooming. Follow these guidelines to keep their brilliant appearance.

Don’t expect your pansies to endure the entire season, but regular watering will help them hold on a little longer as the temperature heats. Pansies detest soggy circumstances but love continuously moist soil. Depending on the weather, give them a deep watering once or twice a week. Mulching the area surrounding the plants’ bases can help keep the soil moist and weeds at bay.

To maintain healthy pansies, provide them with a balanced, water-soluble fertilizer every 2-3 weeks during the growing season, avoiding overfertilization to prevent lanky growth and fewer blooms.

To promote continual blossoming, remove spent blooms regularly. Trim lanky stems to keep them bushy and compact.

Pansies are generally pest-free but can attract snails, slugs, and aphids. Using natural solutions like neem oil or introducing beneficial insects to manage pests. Maintain air circulation.

Pansies are versatile flowers that can be used for garden borders, patios, balconies, and pairings with other cool-season flowers. They also add a charming garnish to salads and desserts but should be farmed organically before consumption.

The classic pansy flower can benefit any garden and adds color and charm in the cooler months. Pansies are a must-have for gardeners looking for durable and colorful blossoms because of their many colors, ease of growing, and adaptability. Using the advice in this tutorial, you can make a gorgeous display that will make your neighborhood jealous.

Certainly! If you’d like to learn more, please consider following our WhatsApp Channel, Facebook, Instagram, YouTube, Twitter, and Pinterest.

Q1: What are the benefits of pansies?

A1: Pansy, a flowering herb, is used to treat moderate seborrheic skin conditions like acne and internal skin diseases, believed to have blood-purifying or metabolism-stimulating properties in traditional medicine.

Q2: Are pansies perennials?

A2: Pansies are technically short-lived perennials, but they are commonly cultivated annually because they prefer moderate temperatures and may not withstand intense heat or cold. They can function as biennials in mild areas, blooming over several seasons.

Q3: What is special about pansy flower?

A3: The pansy flower, known for its velvety petals and “face-like” pattern, symbolizes thoughtfulness and love, and its cool-blooming ability and antioxidant-rich petals make it a favorite garden and culinary treat.

Q4: What temperature will kill pansies?

A4: Pansies can withstand mild frosts and temperatures as low as 20°F (-6°C), but prolonged exposure to temperatures below 15°F (-9°C) would kill them. They thrive in chilly conditions but struggle in high temperatures above 80°F (27°C).

Starting a flower garden is a terrific way to add beauty to the outside of your home, establish a floral company, or find a new pastime. If you’re new to gardening, you might wonder how to start. Some inventive flower garden ideas may help you add seasonal color to your landscape whether planting in raised beds, pots, or the ground, choosing the proper flowers for your area is crucial. A well-designed flower garden never gets dull for experienced gardeners and always inspires novices to get their hands dirty.

Creating a beautiful flower garden is one of the most satisfying ways to enhance your outdoor environment’s beauty, color, and life. A well-planned flower garden not only improves the appearance of your home, but also provides a habitat for pollinators, birds, and your peace of mind. Below are some of the best flower garden ideas to help you construct a colorful and pleasant landscape.

1. Ideal location for a flower garden

A flower garden thrives in sunlight-rich, well-drained soil with wind protection, and at least six hours of direct sunlight daily. Some require partial shade, and the soil should be water-resistant to prevent root system damage.

Position the garden near water, away from high traffic or pets for easy upkeep and vibrant blooms. Use a fence or hedge for wind protection and healthy growth.

2. Which season is best for starting a flower garden?

The best time to plant a flower garden depends on the type of flowers you want to cultivate, although spring is generally great. Spring is ideal for cool-season flowers like pansies and snapdragons, while warm-season flowers like zinnias and marigolds can be planted later. Fall is also a good time to start a garden with perennials and bulbs, allowing them to settle before spring blossoming.

Choose between sowing spring and summer bulbs or seeds, annual or perennial. Perennial flowers can survive for two or more years, while yearly flowers bloom and die in one year. Spring and summer bulbs only last for their season. Let’s examine the suggested planting time for these different flowers in greater detail:

Perennial seeds require colder weather for growth, typically planted indoors six to 10 weeks before the last frost and outdoors one to two weeks after.

Annual seeds are quick growers, typically planted indoors three to eight weeks before the last frost and outdoors on the day of the last frost.

Spring bulbs, like daffodils and tulips, bloom from early spring to early summer and should be planted in the fall. Summer bulbs, like dahlias and cannas, bloom in early summer and last until early fall.

Summer bulbs bloom from early summer until early autumn, similar to cannas and dahlias, and should be planted a few weeks after the last frost in spring.

3. Which flowers are best for your flower garden?

Choose plants that thrive in your local climate and hardiness zone, such as tulips that thrive in cool temperatures and hibiscus that prefer tropical warmth.

Choose a mix of flowers blooming in different seasons, such as daffodils in spring, marigolds in summer, and chrysanthemums in fall, for year-round color.

Determine the sunlight requirements for your garden, as sunflowers and zinnias thrive in sunny environments, while impatiens and ferns thrive in shade.

1. Experiment with vertical gardening

If you’re short on space, vertical gardening ideas can help you maximize what you have. Morning glories, clematis, and jasmine are climbing flowers that can be grown in trellises, arbors, or wall-mounted pots. Your garden gains depth and dimension with these structures.

2. Inspiration from themed gardens

Create a garden with a specific theme, such as Cottage Gardens featuring various flowers like delphiniums, foxgloves, and roses, Mediterranean gardens featuring drought-tolerant plants like olive trees and lavender, or Wildflower Gardens featuring indigenous plants.

3. Choose perennial flowers

Perennials, such as peonies, hostas, and daffodils, are low-maintenance, inexpensive flowers that return year after year. They are popular for their fragrant blooms, eye-catching leaves, and adaptability.

4. Garden designs in the cottage style

Cottage-style flower gardens feature a variety of blooms, such as roses, foxgloves, delphiniums, and hollyhocks, in an organic, unstructured arrangement. The aim is to create a layered look with different heights, textures, and colors. The aesthetic is enhanced by pathways, climbing plants, and rustic features like stone borders or picket fences.

5. Add edible flowers

Create an aesthetically pleasing and useful garden with edible flowers like calendulas, violets, and nasturtiums, which can be used in salads, desserts, and drinks.

Create a vibrant flower garden in your outdoor space by carefully selecting plants, organizing layouts, and adding special elements. With imagination and consistent care, your garden will be a delightful delight for years to come.

Certainly! If you’d like to learn more, please consider following our WhatsApp Channel: Harvest Gardening

Q1: What is the easiest flower to grow in a garden?

A1: One of the simplest flowers to cultivate in a garden is the marigold, which thrives in a variety of soil types and needs little maintenance. They are great for novices and bloom brilliantly all season long.

Q2: What soil is best for growing flowers?

A2: Well-draining, nutrient-rich loam soil with a pH of 6.0 to 7.0 is ideal for flower cultivation. For the best growth, adding organic matter, such as compost, can enhance the fertility and structure of the soil.

The camellia flower is well known for its delicate blossoms, evergreen leaves, and graceful beauty, which enhance any garden. These lovely flowers, which originated in East Asia, are popular among gardeners all around the world because of their flexibility and symbolism. Indeed, the common camellia (Camellia japonica) is Alabama’s state flower.Camellias symbolize admiration, perfection, and longevity, making them a thoughtful addition to any garden.

The camellia is an evergreen shrub with large, luxuriant blossoms and dark, glossy foliage. It blooms in warmer climates from fall to early spring, and is popular in zones 7 to 9, with over 3,000 recognized varieties in various hues, shapes, and sizes, similar to peonies

To assist you in creating a flourishing and significant garden, we will examine the common types, care needs, and deep symbolic value of camellias in this post.

1. Choosing the right location

Camellias thrive in moderately shaded settings, where they are protected from the intense afternoon sun. Choose a position with dappled sunshine or morning sun for optimal growth. Proper positioning reduces plant stress, prevents leaf burn, and promotes bright flowers.

2. Soil requirements

Camellias thrive on soils that are slightly acidic, well-drained, and rich in organic matter. If necessary, add organic matter to enhance the drainage or texture of the soil. To keep the soil moist and nutritious, enrich it with organic materials like compost or leaf mold. Maintaining ideal conditions can be aided by routinely checking the pH of the soil. 

Alkaline soils can cause low iron uptake and yellowing leaves in Camellias. To increase acidity, add peat moss during planting. Consult local extension offices for soil testing and pH advice. A well-draining, acidic soil with a pH of 5.5 to 6.5 is crucial for healthy Camellias.

For heavy clayy soil in gardens, grow camellia in a container. Large pots with drainage holes and rich soil are ideal for smaller cultivars.

3. Watering instructions for healthy camellia flower

New plants require frequent watering for the first year or two, while established plants can survive with minimal watering. During dry spells, provide extra water as buds develop.

Depending on the weather, give it a deep watering once or twice a week. Strike a balance between avoiding overwatering and preventing dryness during the growing season. Mulching the area around the plant’s base aids in temperature regulation and soil moisture retention.

4. Temperature and humidity

USDA Plant Hardiness Zones 7 to 9 are ideal for camellia growth, but winter-blooming varieties may experience bud drop. Protect them against severe winds, especially near shore or Upper South’s edge, and avoid the coast due to salt spray resistance.

5. When to fertilize camellia flower

Fertilize azalea or camellia plants in spring after flowers fall. If growth slows or foliage loses color, fertilize again in late spring or midsummer. Apply at the recommended rate, avoid overdoing, and avoid feeding sick or disturbed plants.

While mature camellias need less nitrogen, younger camellias that you want to produce greater growth should use a fertilizer with more nitrogen, such as 12-4-8 or 10-10-10.

6. When to prune camellia flower

To maintain Camellias in form and promote healthy growth, prune them shortly after flowering. Eliminate diseased or dead branches to keep pests and illnesses at bay. Frequent pruning keeps your camellias looking well and encourages airflow around the plant.

Camellias come in a stunning array of varieties, offering diverse colors, shapes, and sizes to suit any garden. Below are some of the most sought-after types:

1. Camellia japonica

Camellia Japonica, known as the “Queen of Winter Flowers,” is a stunning plant with large, vibrant red, pink, and white flowers, ideal for a focal point in gardens.

2. Camellia sasanqua

Camellia Sasanqua, blooming from late fall to early January, is ideal for hedges or espalier patterns due to its delicate branches, modest blossoms, and aromatic allure.

3. Camellia reticulata

Camellia Reticulata, a popular garden plant, is known for its large, vibrant blooms, thriving in warm regions and producing a variety of colors.

4. Hybrid camellias

Hybrid cultivars, such as ‘Debutante’ and ‘Spring Festival,’ combine the best features of various Camellia species, resulting in increased hardiness, distinct bloom forms, and longer flowering seasons.

Camellias are often associated with admiration and perfection in various cultures. Their beautiful petals and luxuriant appearance make them an ideal gift for loved ones, representing great regard and admiration.

Camellias’ perennial nature symbolizes longevity and eternal love. In Japanese culture, they are connected with supernatural benefits and are commonly utilized in traditional ceremonies.

The beauty of camellias has inspired numerous works of art, poetry, and literature. From paintings to literature, these blossoms have been revered as emblems of grace and refinement.

The camellia flower is a timeless addition to any garden, providing beauty, symbolism, and variety. You may create a dynamic and meaningful garden environment by understanding their care needs, investigating the many options available, and respecting their cultural value.

Certainly! If you’d like to learn more, please consider following our WhatsApp Channel: Harvest Gardening

Q1: What is special about camellia flower?

A1: Camellia flowers, known for their delicate, rose-like blossoms in bright colors, are a symbol of love and admiration, thriving in milder areas with glossy, evergreen foliage.

Q2: What is the scientific name for camellia?

A2: Camellia is scientifically known as Camellia japonica, but other species such as Camellia sinensis (tea) and Camellia sasanqua are also well-known. These evergreen bushes are from the Theaceae family.

Q3: Can you grow camellias from cuttings?

A3: Yes, cuttings are a frequent way to propagate camellias. Semi-hardwood cuttings collected in late summer or early fall root well when placed in a wet, well-draining medium and stored in a humid climate.

Q4: Why are camellia leaves turning yellow?

A4: Camellia leaves turn yellow due to overwatering, inadequate drainage, nutrient shortages, high temperatures, or soil pH, which reduce nutrient absorption.

Poppies are among the most attractive flowers, and they can instantly enhance the beauty of any garden. With their delicate petals, brilliant hues, and symbolic meaning, poppies provide a timeless beauty that gardeners and nature lovers appreciate. Whether you are a seasoned horticulture or a beginner, adding poppies to your flower garden can turn it into a beautiful paradise. You need to know to grow and appreciate these lovely flowers.

Poppy flowers represent remembering and reverence, particularly for fallen soldiers, because of their association with World War I. They also represent peace, sleep, comfort, and beauty. Poppies can represent perseverance, endless life, or love and sacrifice in many cultures.

There is a poppy to suit every taste, ranging from the timeless red of the famous Flanders Poppy to the whimsical pastel hues of Icelandic Poppies.

Poppies give your garden depth and significance, representing resilience, peace, and remembering.

These flowers are perfect for gardeners of all skill levels because they are relatively easy to grow and flourish in various environments.

1. Oriental poppies (Papaver orientale)

A common perennial poppy for landscape applications. features intriguing pods but isn’t often used as a cut flower. Oriental poppies are popular among gardeners because of their big, showy blooms. They range in color from flaming red to delicate whites, and their petals frequently have eye-catching patterns.

2. California poppies (Eschscholzia californica)

These resilient annuals brighten any garden with their beautiful orange and gold blooms. They are ideal for cottage-style gardens or wildflower meadows and do well in sunny locations.

3. Icelandic poppies (Papaver nudicaule)

The ideal poppy variety for usage as cut flowers. Although it is technically a perennial, it is typically planted as an annual or biennial because it is short-lived and dislikes heat. If picked at the right time and treated to extend their vase life (more on that later), Iceland poppies have the longest vase life of any poppies, lasting almost five days. Icelandic poppies are great for milder regions and blossom in beautiful pastel tones with their ethereal, tissue-paper-like petals.

4. Himalayan blue poppies (Meconopsis betonicifolia)

These rare and in-demand blue poppies give shady gardens a touch of exoticism. Their stunning beauty is a prize for meeting certain requirements.

Poppies thrive in moderately fertile, well-drained soil with a loamy or sandy texture and pH between 6.0 and 7.0, and can benefit from organic matter like compost.

The majority of poppies need at least six hours of direct sunlight per day to flourish. Select a location away from high winds to avoid damaging fragile petals.

Plant annual poppies in late autumn or early spring, while perennial cultivars can be planted in fall. Spread seeds on the soil’s surface, gently press them down, and ensure they are 6-12 inches apart for optimal growth.

Poppies require moderate watering, keeping soil damp but not soggy during germination, and applying a low-nitrogen, balanced fertilizer to promote flowers during growth season.

Deadhead flowers regularly to prolong the blossoming season, then trim back leaves after flowering to refocus on root growth.

Ensure pest control by utilizing natural deterrents like diatomaceous earth or neem oil, avoid overhead irrigation, and maintain proper air circulation to prevent fungal infections.

By adding poppies to your garden, you can connect with a rich tapestry of meaning and history while also improving the garden’s aesthetic appeal. Poppies are a classic choice for gardeners all over the world because of their gorgeous blooms and low maintenance requirements.

Certainly! If you’d like to learn more, please consider following our WhatsApp Channel: Harvest Gardening

Q1: Are poppies perennials?

A1: Oriental poppies (Papaver orientale) are perennials, whereas the common corn poppy (Papaver rhoeas) is an annual. The type of poppy affects its growth cycle and longevity.

Q2: What birth month is the poppy?

A2: Poppy is the birth flower for August. It represents inventiveness, reminiscence, and pleasant sleep.

Q3: What is the best month to plant poppies?

A3: The optimum month to plant poppies varies by climate, but they are often planted in the fall or early spring. Fall planting is great in warm climates because it allows seeds to germinate and develop strong roots throughout the winter.

Q4: How to grow a poppy plant at home?

A4: To grow poppies at home, sprinkle seeds in well-drained soil in a sunny location, either in early spring or fall. Lightly press the seeds into the soil without covering them, as they require light to develop. Water sparingly.

One of the most popular flowering plants is lilies, prized for their stunning flowers, vibrant colors, and heady scent. Lilies are a great option to create a striking focal point or blend in with other flowers in your garden. This article will look at the top six types of lilies to brighten up your landscape and add charm.

The term “lily” does not refer to all botanical lily plants. Growing from bulbs, true lilies are perennial plants with a distinctive scale structure and enormous, often fragrant petals that bloom in the spring or summer. Some lilies are picky, but most are easy to grow.

Since there are more than 2,000 types of lilies, it is understandable that they have several classifications. Due to extensive cross-breeding, there are now many different types of lilies in a wide range of colors and shapes. Varieties also vary in hardiness and site requirements in addition to appearance.

1. Asiatic lilies: A splash of vibrancy

Asiatic lilies are popular due to their ease of production. They bloom early in summer and come in a variety of colors, from pastels to bright oranges and yellows. Although odorless, the vibrant hues make up for it. Popular cultivars include ‘Lollipop’ and ‘Buff Pixie,’ a dwarf variety that grows 12 inches tall and thrives in pots.

USDA Hardiness zones 3-8 require full sun to moderate shade, well-draining soil, and versatile use in garden beds or containers.

2. Oriental iilies: The fragrant showstoppers

Oriental lilies, known for their fragrant and elegant blooms, provide vibrant color throughout the season. Reaching three to six feet tall, they are ideal for cut flower bouquets due to their sturdy stems. They come in pink, white, and red hues.

Oriental lilies are ideal for gardeners who prefer full sun and partial shade, with their hardiness across USDA zones 5-9 when grown in well-drained soil. 

Top varieties to consider include ‘Stargazer’, known for its deep pink blooms and white edges, and ‘Casa Blanca’, renowned for its pure white flowers and strong fragrance.

3. Trumpet lilies: Majestic blooms with a sweet scent

Trumpet lilies, known for their trumpet-shaped blossoms, add grandeur and vertical intrigue to gardens. Growing up to 4-8 feet, they offer striking displays in pastel hues, creamy whites, and yellows. Variations like ‘Golden Splendor’ and ‘Pink Perfection’ offer vivid yellow and delicate pink blossoms, providing a refined look.

The trumpet lily, the garden’s crown jewel, blooms from late spring to early August, especially in well-drained soil and full sun. Its unique scent, particularly at dusk, fills the air and retains its fragrance even after cutting, making it perfect for bouquets or centerpieces. The lilies’ leaves create a beautiful background and sturdy stalks support their flowers.

4. Martagon lilies: The graceful woodland beauties

Martagon lilies, also known as “Turk’s cap lilies,” are a popular choice for gardens with a wooded theme due to their recurved, downward-facing petals. These lilies can reach 4-6 feet and bear multiple blooms on a single stalk. They are shade-tolerant and are best placed at the edge of a forest garden. Their subdued pink, purple, and orange hues are often flecked with freckles. The dark maroon flowers of ‘Arabian Night contrast with the deep red, golden-spotted blossoms of ‘Claude Shride’.

Martagon lilies thrive in rich, moist soil and shade, making them ideal for naturalized or woodland gardens. They bloom from late spring to early summer, creating a fragrant oasis and symbolizing the elegance and power of a single stem.

5. LA hybrid lilies: The best of both worlds

LA hybrid lilies combine Oriental lilies’ elegant scent with Asiatic lilies’ vibrant hues, making them ideal for gardeners seeking the best of both varieties. With a medium height (2-5 feet), they are adaptable and suitable for flower beds and containers. The best varieties are ‘Eyeliner’, featuring white blooms with a thin black line, and ‘Royal Sunset’, featuring bright orange flowers with golden overtones.

These cultivars are known for their resilience and versatility, thriving in full sun to moderate shade. They bloom in late spring to early summer, blending European robustness with Asian delicacy, adding an elegant touch to your landscape.

6. Tiger lilies: The iconic spotted blooms

Tiger lilies are renowned for their hardiness and characteristic speckled petals. Gardeners that value striking, eye-catching flowers will always choose these lilies. Tiger lilies are a productive addition to any garden, reaching heights of 3–4 feet and bearing many blooms on each stalk. Their black-spotted, bright orange blossoms make a dramatic contrast that draws attention. 

Tiger lilies, known for their trumpet-shaped flowers and resilient stems, are ideal for gardeners due to their aesthetic appeal. They thrive in well-drained soil and full sun, making them versatile cut flowers for bouquets. Their durable stem and long-lasting blooms make them a great choice.

Because of their great adaptability, lilies can be used in many different garden designs. They add texture and color that improve the overall design, whether they are planted in mixed flower beds, formal borders, or realistic meadows. Throughout the growth season, you can have a colorful and aromatic outdoor space by selecting one of these six types of lilies.

Certainly! If you’d like to learn more, please consider following our WhatsApp Channel: Harvest Gardening

Q1: What are the most common types of lilies?

A1: The most common types of lilies are Asiatic lilies, which are recognized for their vibrant colors but lack smell, and Oriental lilies, which are praised for their enormous, fragrant blooms. Other famous types are trumpet lilies, which are distinguished by their elongated shape, and tiger lilies, which have orange petals and black dots.

Q2: How many types of lilies are there?

A2: The genus Lilium contains approximately 80 to 100 species of real lilies, which are divided into nine major categories based on their characteristics. Furthermore, various hybrid lilies have been developed, with a wide range of colors, forms, and sizes.

Often called “sword lilies,” gladiolus flowers are a gardener’s paradise. They add unmatched elegance and appeal to any garden with their towering spikes of colorful blossoms. Although gladiolus cultivation calls for careful preparation and attention to detail, the outcome is a stunning floral arrangement. Here, we outline the best practices for cultivating gladiolus flowers and guaranteeing a successful garden.

Gladiolus bulbs, a South African archaic flower, are easy to grow and complement vibrant perennials. Their ruffled single florets can be easily cut and placed in bowls and vases. These bulbs are suitable for garden celebrations and can be sown in spring.

Gladiolus flowers stand for moral character, power, and integrity. Known as the “sword lily” because of their long, blade-like stems, they also evoke adoration and remembering. These colorful blooms are popular for romantic gestures because they are linked to love at first sight and infatuation. Gladiolus flowers are also of special importance for people born in August because they are the birth flowers for that month.

Glads, or flowering plants, belong to the iris family and come in various sizes and colors, from small container-friendly hybrids to large-flowered Grandiflora hybrids with spikes of blooms.

Gladioli, varying sizes from miniature to giant, typically grow 2 to 5 feet tall. Taller plants require staking and are typically placed at the rear of a garden to balance out shorter plants.

The best time to plant gladiolus bulbs, also known as corms, is in the spring, once the soil has warmed to at least 55°F (13°C) and the risk of frost has passed. From spring through early summer, space plantings every two weeks for continual flowering. Plant the corms 4 to 6 inches deep and spaced approximately 6 inches apart in a sunny spot with well-drained soil. Gladiolus produces gorgeous bursts of color all summer long, usually blooming 70 to 90 days after planting.

1. Getting the ideal soil ready for gladiolus

Gladiolus needs at least 6 to 8 hours of direct sunlight per day. Choose a spot that is not shaded and shielded from severe winds.

To improve soil quality, keep it to a minimum of 12 inches and add organic materials like old manure or compost. Bone meal can increase phosphorus levels, promoting root growth and colorful flowers. Test and modify pH levels using a soil test kit, adding sulfur or lime as needed.

2. How to choose and maintain gladiolus corms

To ensure a successful gladiolus garden, choose high-quality corms that are firm, plump, and free from blemishes or mold. Larger corms typically produce stronger plants with more blooms.

If planting is postponed, keep the corms somewhere dry and cool. To keep them from decaying, keep them away from dampness and direct sunshine.

3. Planting gladiolus corms

Gladiolus plants require proper planting time and depth for optimal growth. Plant corms 4-6 inches deep, pointing the pointed end up, 6-8 inches apart. Plant every two weeks from spring to early summer for uninterrupted bloom display. Thoroughly water the planting area after planting to settle soil and promote root formation.

  • Especially when the weather is dry, keep the soil consistently moist—water at the base to prevent disease-causing damp foliage.
  • When the shoots appear, apply a balanced fertilizer (10-10-10). When flower spikes start to appear, reapply. Steer clear of overfertilizing as this could result in too much foliage at the price of blossoms.
  • To avoid toppling, gladiolus flowers frequently need assistance. Plant them close to fences or use stakes. Use delicate garden ties to carefully bind the stems.
  • To lessen competition for nutrients, keep the area surrounding gladiolus clear of weeds. Mulching helps keep the soil moist and inhibit weed growth.
  • Compost enhances soil for spring planting, followed by applying balanced, water-soluble fertilizer when plants reach 10 inches tall and when flowers display color.
  • Gladiola can be grown as cut flowers or annuals, and after flowering, deadhead stems to prevent self-seeding in winter-strewn areas, and trim back remaining leaves for winter.
  • For winter protection, spread hay or straw in USDA Hardiness Zone 8 or higher, and gladiolus can remain in the ground without a hard freeze.
  • Gladioli corms should be dug up in colder climates after the first fall frost, as the leaves may be killed by frost, but the plant will survive. Failure to dig up before a hard freeze can cause severe damage.
  • Gardeners in border zones 6 and 7 have found gladiolus plants to survive when left in the ground, despite the decision based on microclimate and gladiolus variety.

These comprehensive instructions will help you cultivate captivating and motivational gladiolus blooms. Gladiolus enhances any environment with unmatched beauty, whether it is used as a stand-alone feature or as part of a mixed garden.

Certainly! If you’d like to learn more, please consider following our WhatsApp Channel: Harvest Gardening

Q1: Where is the best place to plant gladiolus?

A1: Gladiolus should be planted in a sunny spot with soil that drains well and is high in organic matter. To prevent the long flower spikes from bending or shattering, make sure they are protected from severe winds.

Q2: Do gladiolus grow in summer or winter?

A2: Since gladiolus prefers warm climates, they usually develop and bloom throughout the summer. They are planted in the spring for summer blooms in mild climes, but they can also be planted in the fall for winter blossoms in warmer climates.

Q3: How to propagate gladiolus?

A3: Gladiolus is propagated by planting corms (bulb-like structures) or cormels (little corm offsets) in well-drained soil. To produce new plants during the dormant season, separate and transplant cormels.

Azaleas are some of the most beautiful flowering plants; their rich flowers and vivid colors turn any garden into a charming retreat. Many gardeners turn to various azalea varieties for plants that tolerate shade and have magnificent flowers. It is critical to select types of azalea suited to the environment in which they will be placed. Azaleas are a visually striking and adaptable addition to your environment. Here, we’ll look at the six greatest types of azalea for adding beauty to your flower garden while being easy to care for and alive.

Azalea shrubs, native to the United States, provide a vibrant display of color in late March and early April. With hundreds of species found throughout the Northern Hemisphere, thousands of cultivars have emerged, with Western China home to several important progenitor species. Hybridization has led to new varieties suitable for northern climates.

1. Encore azaleas: The perennial showstoppers

Encore Azaleas are renowned for their multi-seasonal flowering cycles, which include summer and fall blooms in addition to spring. These resilient shrubs are a great addition to any landscape design because they are available in a range of hues, including white, pink, red, and purple. Throughout the season, the blossoms will draw pollinators such as hummingbirds and butterflies to your garden.

The plant comes in dwarf and medium-sized varieties, with a variety of bloom colors. It thrives in regular watering and full sun to partial shade. USDA growth zones are 5-8, with common types like “Autumn Royalty” and “Autumn Sunset” featuring deep purple and golden-orange petals.

2. Kurume azaleas: The compact beauties

Kurume Azaleas are native to Japan and are distinguished by their small blooms and thick growth habit. Because of their vivid colors and manageable stature, these evergreen shrubs are popular for making formal hedges and topiaries.

This plant grows 2-4 feet tall and produces vibrant pink, white, orange, and red blooms. It thrives in full to partial shade and steady moisture. Common types include Coral Bells with bright coral-pink flowers and Hershey Red with glossy green foliage.

3. Southern indica azaleas: The garden’s classic choice

Indica from the South Azaleas are known for their enormous blooms and striking size, which makes them a garden focus point. Traditional Southern gardening frequently uses these azaleas since they thrive in warmer areas.

Southern Indicas can grow up to 12 feet and are suitable for well-draining, slightly acidic soil in partial shade. They bloom in white, pink, red, and lavender hues and are popular for their deep purple flowers and vigorous growth habit, as well as their pale pink with lavender tones.

4. Deciduous azaleas: A wild and natural charm

Deciduous azaleas provide seasonal diversity and brilliant fall hues when they shed their leaves in the fall. These bushes frequently look more organic and like they belong in a woodland.

This plant grows 4-8 feet tall and produces bright yellow, orange, pink, and white blooms. It thrives in well-draining soil and cooler regions. Common types include “Golden Lights” and “Fireball,” which are brilliant red flowers.

5. Satsuki azaleas: The artistic touch

Because of its beautiful blooms and moderate growth, satsuki azaleas are highly valued and frequently employed in carefully planned landscapes or bonsai art. These Japanese azaleas add beauty to your yard by blooming longer in the season.

Dwarf shrubs typically grow no taller than two feet and have a wide variety of bloom colors, often bi-colored, with complex designs. Ideal conditions include acidic, moisture-retaining soil and shade. Popular varieties include Shinnyo-no-tsuki and Kinsai.

6. Native azaleas: Perfect for natural landscapes

Native azaleas grow well in both naturalized and wild settings. They add a genuine touch to your outside area and are resilient and low-maintenance.

moderate growth, with a height range of 3 to 8 feet. delicate pink, orange, white, and yellow hues. Choose shady spots and soil that is humus-rich and acidic. “Rhododendron arborescens” (white blooms with a sweet perfume) and “Rhododendron canescens” (pink blossoms with a subtle scent)

You can create an azalea garden that is vibrant with color and texture throughout the year with these six amazing types of azaleas. Azaleas offer unparalleled elegance and versatility, regardless of your preference for a wild and natural design or a formal environment.

Certainly! If you’d like to learn more, please consider following our WhatsApp Channel: Harvest Gardening

Q1: How do I know what type of azalea I have?

A1: Examine the flower shape, leaf size, blooming season, and whether the azalea is deciduous or evergreen to determine its type. It can be narrowed down by comparing these characteristics to local azalea cultivars or by speaking with a gardening specialist.

Q2: What are the easiest azaleas to grow?

A2: Due to their hardiness and low maintenance requirements, Encore azaleas and native deciduous kinds such as Florida flame or Piedmont azaleas are the simplest to grow. They do best in somewhat shaded, well-drained soil that receives little trimming.

Azaleas are popular among gardeners because of their colorful blooms and luxuriant foliage. Azaleas are prone to some illnesses, though, which can harm their health and appearance, just like any other plant. Maintaining the health of your azaleas depends on your ability to recognize and manage these diseases. The top five azalea diseases are listed here, along with successful treatment methods.

Identifying azalea diseases necessitates a thorough examination of the plant’s symptoms. Leaf discoloration, such as yellowing or browning, is a common problem that could be a sign of fungal infections like rust or powdery mildew. Blackened stems, wilting, or stunted growth could be signs of Phytophthora dieback or root rot. Inconsistent patches on leaves or flowers may indicate petal blight or Cercospora leaf spot. 

Look for pests like lace bugs on the underside of leaves, as they can make illnesses worse. Environmental elements that frequently contribute to the development of disease, such as excessive watering or inadequate air circulation, must be taken into account for a proper diagnosis.

1. Azalea lace bug infestation

Lace bugs are a widespread insect that infects azaleas, but they are not officially a disease. Look for black, tar-like patches underneath leaves and yellow or white specks on their upper surfaces.

infected plants can be treated with horticultural oil or insecticidal soap, introduced as natural predators, or systemic insecticides for severe infestations, following label directions.

2. Leaf gall (Exobasidium vaccinii)

In the early spring of azaleas, a common fungal disease is leaf gall (Exobasidium vaccinii). Infected plants’ leaves and buds begin to grow distortedly in April and May. The leaves and potentially the stems become plump, thick, and curled, turning from pale green to white. A white, powdery substance covers the galls in the later stages of the disease. The galls become hard and brown with age.

To prevent fungus spread, prune diseased leaves promptly, avoid composting, use a mancozeb or chlorothalonil fungicide in early spring, and ensure proper plant spacing to increase airflow and prevent infection.

3. Leaf spot azalea diseases

Azalea leaves develop fungal patches of different colors, including Cercospora, Septoria, Phyllosticta, and Colletotrichum species, which can impact the plant’s aesthetic value but can cause early leaf drop, potentially lowering its overall health.

To prevent damage to foliage, remove fallen leaves and ensure dryness when watering plants. Fungicide treatments, such as copper hydroxide, copper-based fungicides, thiophanate-methyl, or chlorothalonil, are recommended for azaleas and propiconazole, thiophanate-methyl, chlorothalonil, or mancozeb for Cercospora leaf spot on rhododendron. Follow label instructions before applying these fungicides.

4. Petal blight

Ovulinia azaleae is a fungus that causes a disease that primarily affects azalea blossoms, rhododendron, and mountain laurel flowers. It is particularly vulnerable to Indian and Kurume azaleas. The disease begins as tiny, asymmetrical spots on flower petals, which become softer and more watery as they decay. The infection can be easily transferred between blossoms, and the fungus survives winter on Earth.

Regularly deadhead and discard diseased blooms, apply captan or thiophanate-methyl fungicides when symptoms appear, and water the plant’s base to reduce moisture.

5. Phytophthora root rot

This soil-borne pathogen, Phytophthora cinnamomi, causes root rot. Wilting, reduced growth, and yellowing leaves are some of the symptoms. In extreme situations, the plant can perish.

Properly drain soil at planting locations, remove severely afflicted plants to prevent illness spread, use phosphorous acid or mefenoxam fungicides, and avoid water logging by only watering when needed.

  • To avoid root rot, make sure the soil is well-drained and refrain from overwatering. To keep the foliage dry, water the plant’s base.
  • To increase air circulation and lower the danger of fungal infections, prune overloaded branches.
  • Following the directions on the package, use fungicides such as sulfur- or copper-based treatments as soon as an infection appears.
  • Control pests that could weaken the plant, such as spider mites or lace bugs, with horticultural oil or insecticidal soap.
  • To stop infections from spreading, remove and discard any diseased leaves, blossoms, or stems as soon as possible.
  • For moisture retention and weed control, use acidic, well-draining soil and think about adding organic mulch.
  • Moderate use of balanced fertilizers can help avoid stress, which might increase a plant’s susceptibility to disease.
  • Throughout their active growing season, give azaleas routine inspections and preventative care.
  • To lessen vulnerability to common diseases, plant azalea varieties that are resistant to disease.
  • To reduce plant stress, modify shade arrangement and watering based on the weather.

Understanding these common azalea diseases and adopting preventative treatments can ensure that your azaleas remain vibrant and healthy throughout the year. Implementing these recommendations will not only improve the appearance of your garden but will also reduce future problems.

Certainly! If you’d like to learn more, please consider following our WhatsApp Channel: Harvest Gardening

Q1: What is azalea bark disease?

A1: Azalea bark disease is a fungal illness causing dieback, cankers, and wilting in azalea bark, often triggered by environmental stress or damage allowing the fungus to enter the plant.

Q2: What is the best treatment for azalea bark scale?

A2: The most effective treatment for azalea bark scale is to smother overwintering scales using horticultural oil or insecticidal soap during the dormant season, followed by systemic insecticides such as imidacloprid or dinotefuran during active infestation. Pruning and discarding of badly affected branches can also help control the bug.

Q3: How to treat white spots on azaleas?

A3: White spots on azaleas are frequently caused by powdery mildew or lace insect infestations. Powdery mildew can be treated with fungicides such as neem oil or sulfur, and air circulation can be improved, while lace bugs can be controlled using insecticidal soaps or systemic insecticides.

Azaleas are valued for their brilliant blooms and rich foliage, making them a favorite choice among gardeners. Proper trimming is critical for maintaining their health, promoting development, and producing a stunning display of flowers year after year. In this article, we present complete advice on when and how to prune azaleas for best results, even if you are a newbie.

Pruning azaleas can enhance their appearance, promote healthy growth, and increase flower production. Techniques include removing diseased or damaged branches, maintaining the plant’s size and form, making targeted cuts for air circulation, and, if necessary, revitalizing overgrown plants.

Pruning azaleas can be a simple yet effective method to remove diseased, dead, crossing, and damaged branches, or rejuvenation pruning if an established plant is struggling.

Pruning is a crucial process that promotes healthy growth by removing dead or unhealthy branches, allowing plants to focus on healthy sections. It also encourages more blooms by increasing light penetration and air circulation, while preserving size and shape in azaleas.

Azaleas should be pruned within three weeks of blooming, as waiting until mid-July may remove flower buds and reduce floral show the following year, as the buds for the following year form in the summer before blossoming.

In late summer or fall, avoid pruning any azaleas. It promotes delicate new growth that winter conditions can easily harm.

When pruning azaleas, there are a few exceptions. If you see a branch that is broken or sick, cut it off at any time of the year, leaving a cut slightly above another branch, leaf, or leaf bud. This stops the spread of illness and aids in the plant’s recovery. Any sick plant material should be disposed of in the trash rather than in your compost pile.

Evergreen azaleas don’t require pruning after flowering, as they don’t require pruning. To prune tall shoots, reach deep inside the plant and pull them out.

The purpose of pruning azaleas is to enhance their beauty and promote healthy growth. To do this, determine the type of azalea (deciduous or evergreen) and adjust the pruning strategy accordingly. Use clean, sharp shears to avoid damage and disease spread, and bypass pruners for accurate cuts.

  • Start by checking for diseased, dead, or damaged branches on your azalea. You can concentrate your efforts where they are most required by identifying these areas.
  • Any dead or diseased branches should be clipped off at the base with pruning shears. Cut cleanly to stop additional harm.
  • Cut off branches that go beyond the plant’s intended shape. Make a cut directly above a leaf node to encourage new development. 
  • To increase light penetration and ventilation, prune overloaded branches. Pay attention to branches that are developing inward or crossing.
  • To reroute energy to the main branches, remove any suckers or shoots that are emerging from the plant’s base.

It is no need to be afraid to prune azaleas. You can maintain your plants healthy, shaped, and blooming with the correct time, equipment, and methods. Season after season, your azaleas will repay you with a breathtaking show of color if you follow this easy-to-follow plan.

Certainly! If you’d like to learn more, please consider following our WhatsApp Channel: Harvest Gardening

Q1: What month do you prune azaleas?

A1: In most areas, the best time of year to prune azaleas is between May and July, though this will vary according on your location and environment. To prevent cutting off the flower buds for the following year, always prune soon after the blossoms fade.

Q2: How to prune azaleas in pots?

A2: Pruning potted azaleas involves cutting off any dead or lanky branches with clean, sharp shears and shaping the plant as soon as it has finished blooming. Steer clear of excessive pruning and concentrate on preserving ventilation and a pleasing shape.

Q3: What is the best tool for pruning azaleas?

A3: For accurate cuts on short branches, a pair of clean, sharp bypass pruners is the ideal instrument for azalea trimming. To prevent harming the plant, use pruning shears or loppers for thicker stems.

Q4: How to fertilize azaleas?

A4: In early spring and late summer, fertilize azaleas with a plant fertilizer that prefers acid, spreading it evenly around the base without getting any fertilizer on the roots. After fertilizing, thoroughly water the soil to aid in the absorption of nutrients.

One of the most popular blooming shrubs, azaleas add vivid blooms and luxuriant foliage to gardens. Since azaleas are easy to grow, a nutritional or environmental imbalance is nearly always the cause of poor performance from these shrubs, which are prized for their early, eye-catching blooms. Even though store-bought fertilizer isn’t always necessary for azaleas to produce stunning flowers, selecting the correct fertilizer and applying it at the right time and method will help these vibrant shrubs grow to their full potential.

However, to maintain their finest appearance throughout the year, appropriate fertilization is necessary. The difference between an azalea that thrives and one that struggles to bloom can be determined by knowing when and how to fertilize azaleas plant. This thorough guide will assist you in scheduling your endeavors to achieve optimal appearance.

Azaleas flourish in acidic, well-drained soil with balanced nutrients. They require focused feeding at the appropriate intervals, as excessive fertilization might harm the plant. Nitrogen is essential for leaf growth, phosphorus for root development and flower output, and potassium for vigor and stress resistance.

Knowing when to fertilize azaleas will help them grow to their full potential.

Best time to fertilize azaleas

1. Early spring (Before bud break)

Azaleas require nutrient increase during dormancy to sustain growth and bloom. Fertilize before buds open and as soon as they expand using a slow-release acid fertilizer, ensuring moist soil to prevent root burn.

2. Post-bloom (Late spring to early summer)

After blooming, Azaleas need to restore their nutritional stores by using balanced fertilizers to encourage root and leaf growth but avoid high-nitrogen fertilizers as they may cause buds to form later in the season.

3. Late summer to early fall (Optional)

Fertilize azaleas in late summer to alleviate stress and nutritional shortage symptoms, and avoid encouraging new growth that may not harden off before winter, avoiding stunted development.

There are granular, liquid, and spike forms of both organic and inorganic fertilizers designed especially for azaleas and other acid-loving plants.

Best inorganic fertilizer for azaleas

Choose an acid-forming product specifically labeled for azaleas, camellias, and rhododendrons with an NPK of 10-5-4 or 10-6-8, as the right balance may be included in certain fertilizers.

Excessive use of inorganic fertilizer can reduce the natural soil fungus that promotes nutrient uptake, leading to plant reliance on additional feeding. Azaleas require nitrogen for foliage, but excessive use can burn roots and build up salts.

Organic fertilizer for azaleas

Organic fertilizers like compost, cottonseed meal, coffee grounds, and fish emulsion are beneficial for azaleas, promoting healthy development and blooms. Pine needle mulch also helps retain moisture and suppress weed growth, while slowly releasing nutrients for long-term plant health.

Organic fertilizer with a balanced NPK ratio is recommended for yearly spring-feeding azaleas, hollies, and evergreen shrubs, specifically 4-3-4.

  • Select the Proper Fertilizer Choose a fertilizer made for plants that prefer acid. To maintain soil acidity and vital nutrients in proper quantities, these blends usually incorporate iron or sulfur.
  • Apply at the Base Avoid getting the fertilizer in direct touch with the stem by distributing it evenly around the base of the plant. Pay attention to the drip line where nutrients are actively absorbed by the roots.
  • Thoroughly water To aid nutrients in penetrating the soil and reaching the roots, properly water the area after fertilizer application.
  • Don’t Fertilize Too Much Excessive fertilization may cause the soil to become salted, which could be detrimental to the plant. Never deviate from the fertilizer’s recommended dosage as stated in the container.

Fertilize azaleas at the proper time and with the right methods is essential for anybody hoping to create gardens that exude beauty. Your azaleas will reward you with colorful flowers year after year if you follow the instructions provided here.

Certainly! If you’d like to learn more, please consider following our WhatsApp Channel: Harvest Gardening

Q1: What are the benefits of fertilizing azaleas?

A1: Azaleas benefit from fertilization because it supplies vital nutrients that support robust root systems, colorful flowers, and healthy growth. Additionally, it strengthens the plant’s defenses against environmental stress, illnesses, and pests.

Q2: What is the best fertilizer for azaleas?

A2: An acid-forming, slow-release fertilizer with balanced nutrients—like a 10-10-10 or 12-6-6 formulation—is the ideal fertilizer for azaleas. To maintain the pH of the soil and promote ideal growth, look for fertilizers that are specially labeled for plants that prefer acid.

Q3: How to make homemade fertilizer for azaleas?

A3: Compost coffee grounds, bone meal, and cottonseed meal—which supply nitrogen, phosphorus, and acidity—can be combined to create a DIY fertilizer for azaleas. To improve the soil and encourage strong development, spread this mixture around the plant’s base.