Author

Avery Smith

Browsing

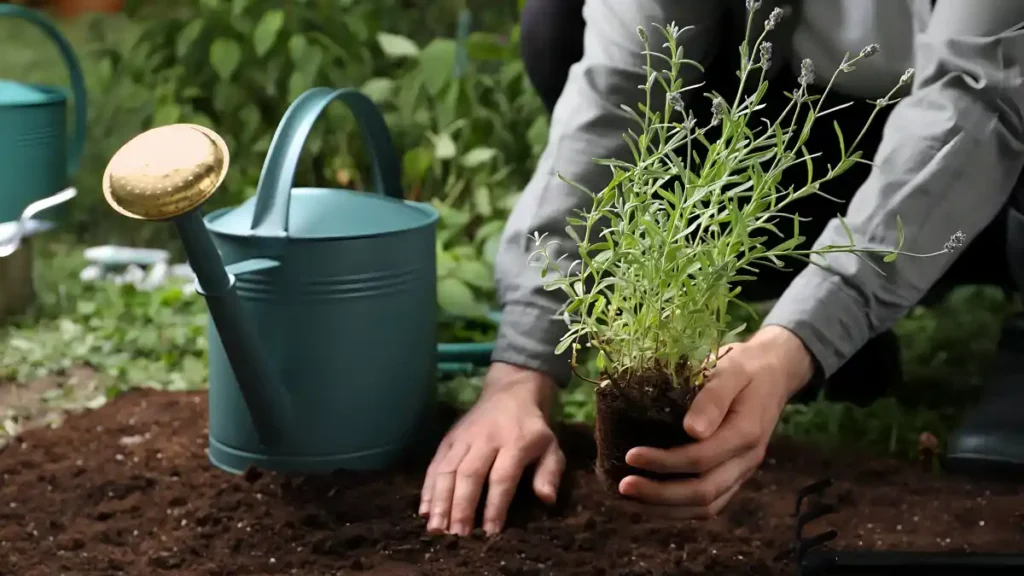
Growing lavender in your yard is a pleasant way to use this tough and scented herb. There are various ways to grow lavender, such as seeds, cuttings, and division. Every technique has benefits of its own: division enables the duplication of established plants, cuttings offer a quicker path to mature plants, and seeds offer an economical approach to developing several plants. Lavender successfully propagates and adds beauty and scent to any garden or home with the right care. This post will explain how to propagate lavender.

Depending on the method, there is a best time to propagate lavender. New or solely semi-hardwood propagation procedures should be carried out in the spring. This also applies to softwood cuttings, which now have a significantly higher chance of rooting. This scheduling guarantees that the new plants have enough time to establish themselves before the colder temperatures of fall and winter, while also allowing for optimal root development. It is preferable to propagate lavender later in the season, when roots have time to form, and to allow the plant matter to become more mature.

Growing fresh plants is a fantastic way to propagate lavender from cuttings. Here’s a helpful step-by-step guide:

1. What you’ll require:

  • thriving lavender plant
  • Clean, sharp pruning shears or scissors
  • A little pot or container
  • Potting mix (ideally a blend of sand and peat or one intended for herbs)
  • Hormone for rooting (optional, but helpful)
  • A tiny greenhouse or a plastic bag (optional)

2. Procedure for propagating lavender from cuttings:

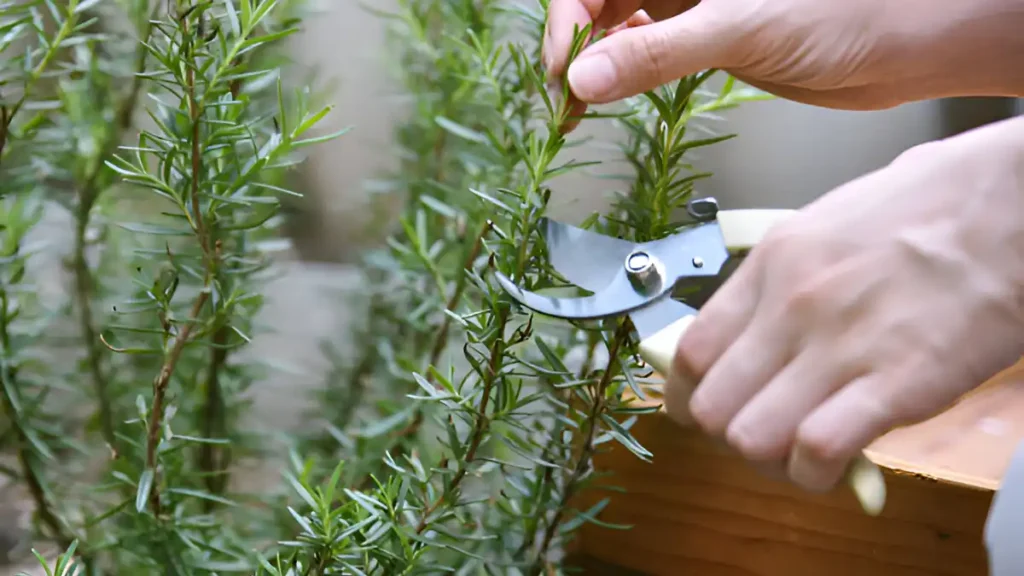
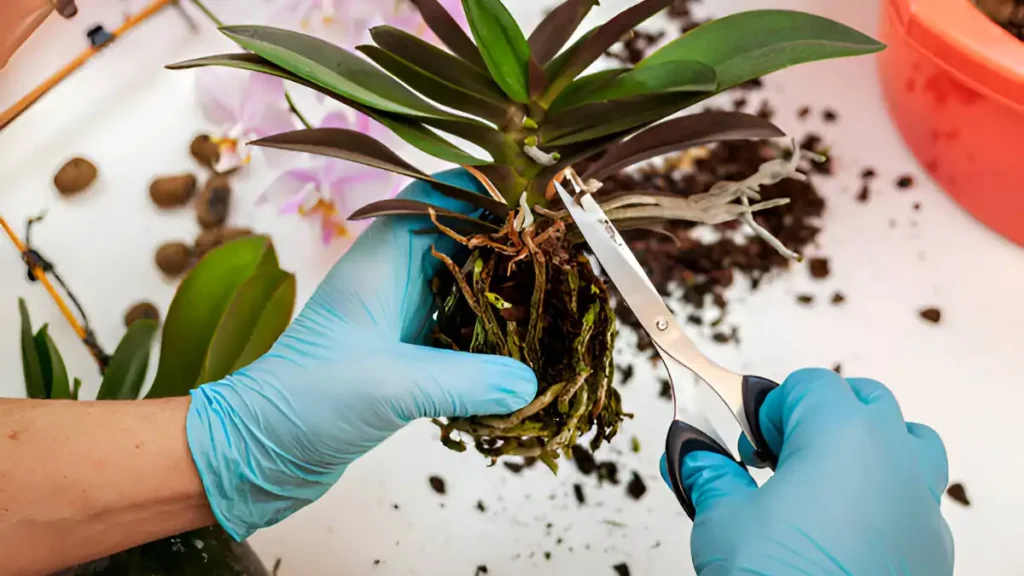
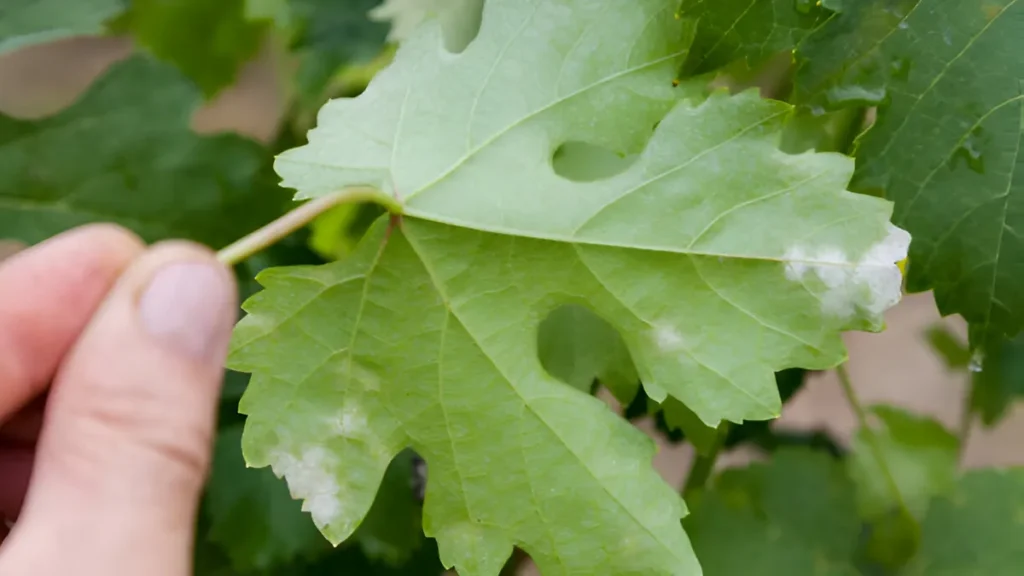
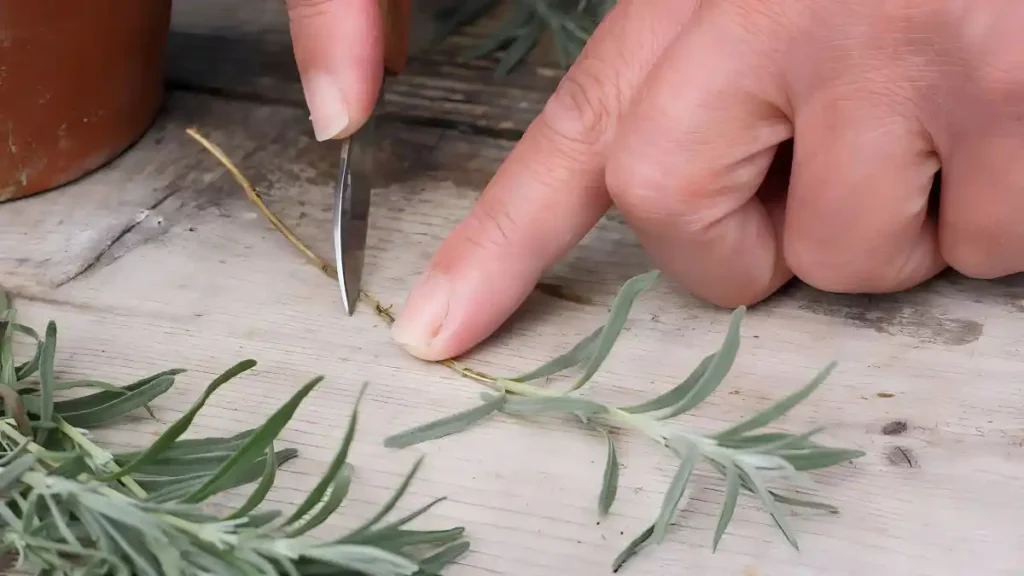
  • Look at your mature lavender plant’s stalks. Look for straight, healthy stems that are free of pests and have a nice color but no buds. Choose a long stem and mark the point at which the old growth gives way to the new growth. It needs to be between 4 and 6 inches long. Slice slightly below a leaf node, which is the junction of a leaf and stem.
  • Clear the lower two inches of the stem of all leaves to give the new cutting enough room to develop strong roots. Those leaves will no longer be able to photosynthesize since this portion of the stem will be buried in the ground.
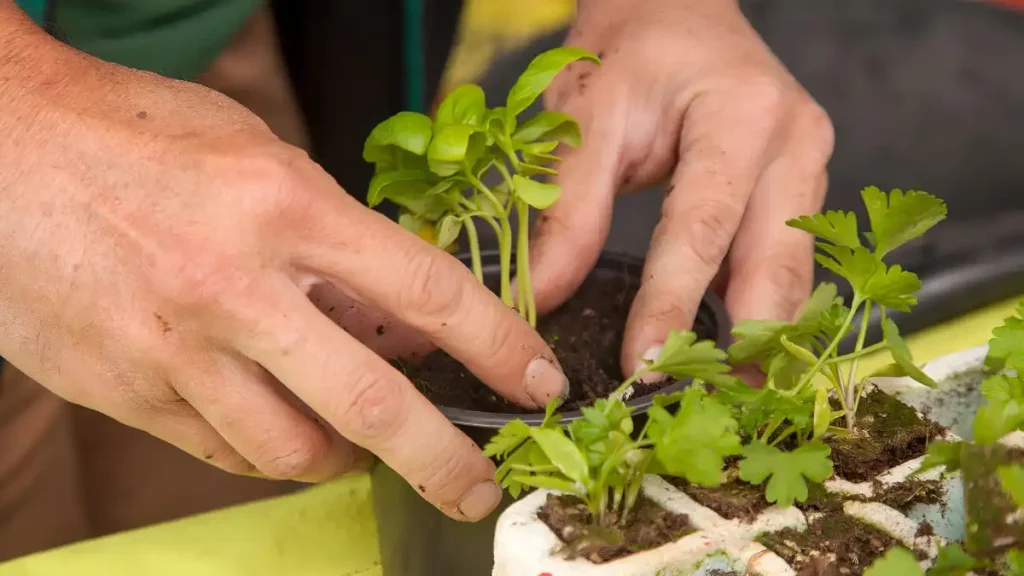
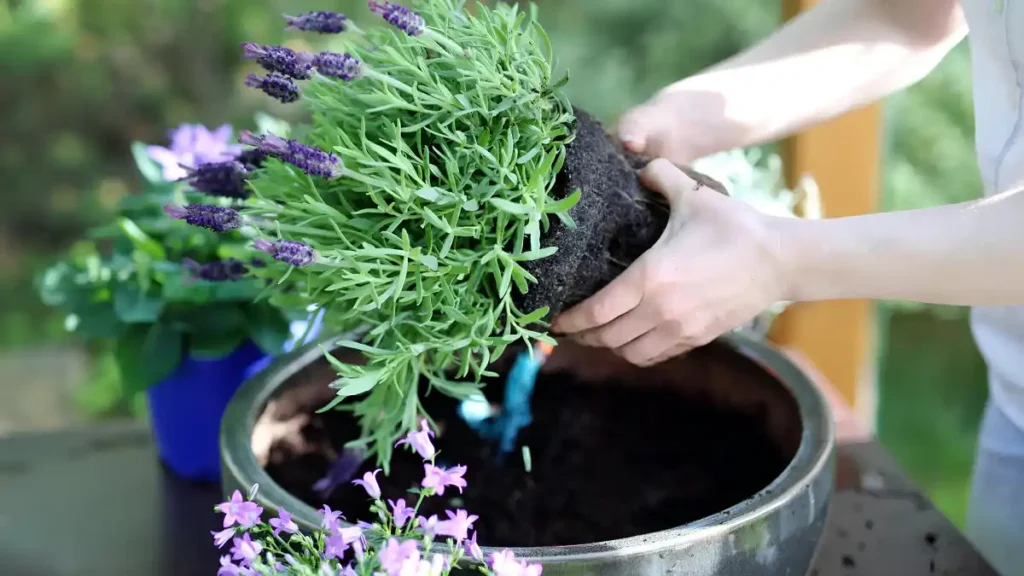
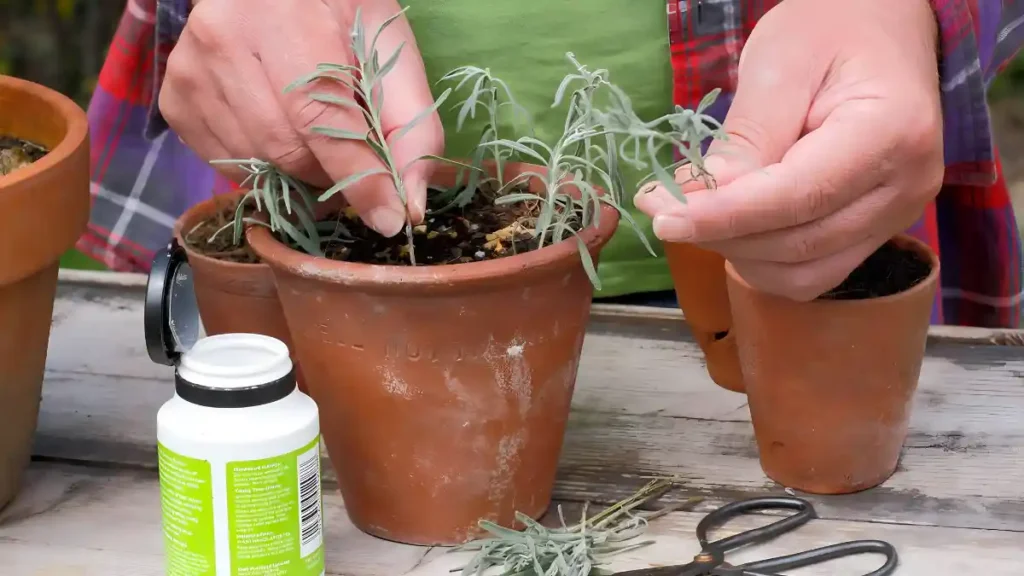
  • Add potting mix to the pot until it reaches an inch below the rim. Wet the potting mix slightly. Using a pencil or stick, make a small hole in the mixture, and then place the cutting into it. To keep the cutting in place, compact the dirt surrounding it.
  • Dip the cut end in rooting hormone if you’re using it—this is an optional step. Lavender can root without it, however this can aid in promoting root growth.
  • Make sure the exposed stems of each cutting are buried beneath the earth as you plant it. To assist hold each cutting in place, carefully compact the dirt around it with your fingertips.
  • Place the pot in a warm area that receives plenty of indirect sunlight. Keep the soil moist but not too wet and soggy. Over the following two to four weeks, keep an eye on the cuttings.
  • The cuttings should begin to establish roots within 4-6 weeks. To check for root growth, you can gently tug on them to see if there is any resistance. The cuttings can be moved into bigger pots or straight into the garden once they have established a robust root system.

To sum up, growing new plants from old ones is a satisfying way for gardeners to propagate lavender, guaranteeing a steady supply of this aromatic and adaptable herb. By employing appropriate methods, including as harvesting cuttings in the appropriate season, utilizing soil that drains properly, and giving the plants enough light and moisture. Gardeners can easily learn how to propagate lavender plants by following these instructions. This technique supports the sustainability of lavender cultivation for future enjoyment and use, in addition to adding to the beauty and fragrance of gardens.

Certainly! If you’d like to learn more, please consider following our WhatsApp Channel: Harvest Gardening

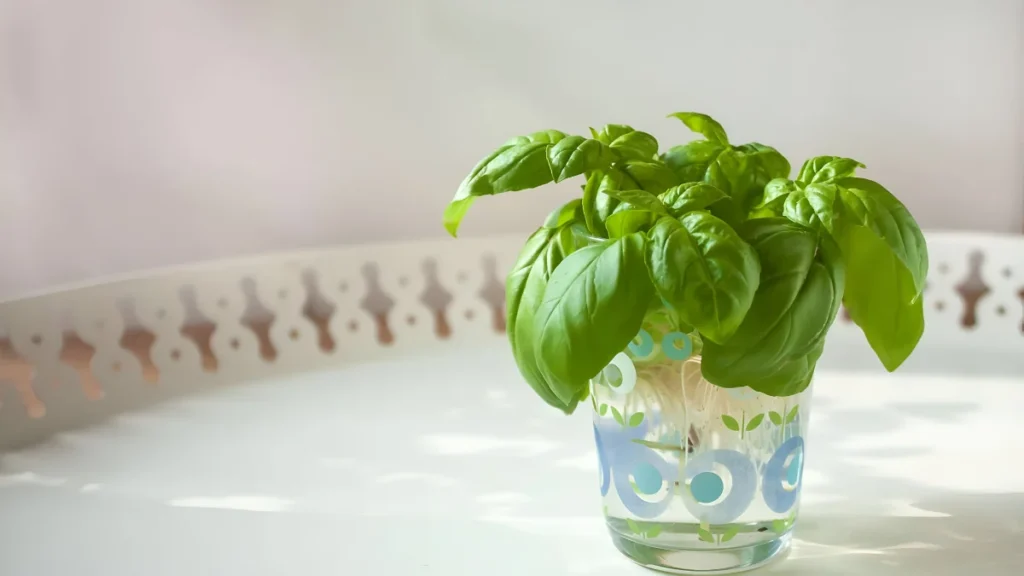
Q1: How to propagate lavender in water?

A1: Cut a healthy 4-6 inch stem just below a leaf node, remove the lower leaves, and lay the stem in a glass of water with the node submerged to propagate lavender in water. In a few weeks, roots should start to form if the water is changed frequently.

Q2: What is rooting hormone?

A2: A chemical known as “rooting hormone” encourages the formation of roots in plant cuttings, facilitating the quicker and more successful establishment of roots. Auxins and other plant hormones are usually present.

Q3: What is the easiest way to propagate lavender?

A3: Lavender is most easily propagated by taking softwood cuttings in the spring or early summer and rooting them in wet, well-drained soil.

A quick and easy method for creating new plants from old ones is to propagate basil. Basil cuttings are typically taken below a leaf node, concentrating growth hormones. Soaked or inserted into the soil, they grow roots and establish themselves for transplantation. This technique increases basil production and ensures consistent harvests throughout the growing season. This is a step-by-step tutorial on how to propagate basil.

When the basil plant is actively growing, late spring or early summer, is the ideal time to propagate it. Basil has enough energy right now to grow new roots, which facilitates the establishment of cuttings. You may reproduce basil plants by seed or cuttings at any time of year if you cultivate them indoors or in a greenhouse. Start basil seeds 6–8 weeks before your area’s last frost if you wish to start from seed indoors and transplant them outside later. Wait to spread the seed until all chance of frost has passed and the temperature is beyond 50 F (10 C) if you want to direct sow outside.

If you’ve ever stored freshly cut basil stems in water for cooking as needed, you’ve probably observed that after about a week, the stems start to sprout new roots. Basil grows easily in water and has to be regularly watered and refreshed. You’ll need a clear container, clean water, and a sharp, sterilized snipper.

  • Choose fresh, leafy basil stems that are green in abundance. Stems that are weak or blooming should not be clipped.
  • Using a clean, sharp knife or scissors, cut the stems slightly above a node, which is the point where a leaf meets the stem. Make a 45-degree cut.
  • The top two or three sets of leaves remain after removing the lower leaves from the cutting.
  • Wet the potting mix or add water to a clean glass or jar.
  • Make sure the node is completely submerged before inserting the stem’s cut end into the rooting liquid.
  • If using rooting hormone, apply it as directed on the product label to the cut end of the stem.
  • The glass or jar should be placed in a bright, warm area—not in the direct sun.
  • Cover the glass or jar with a clear plastic bag or a cloche to maintain humidity.
  • Roots should develop within 1-2 weeks. Once roots have developed, you can transplant the new basil plant into a pot or garden bed.

Growing basil cuttings in soil bears similarities to growing them in water. Both approaches are easy to use and typically work well. assemble a sterile, sharp snipper, fresh leaves on stalks of basil, Planting mix, tiny pots or cell trays (minimum 1-2 inches deep), water, and liquid or powdered rooting hormone (Optional).

  • Moistened potting mix should be added to the small pots or cell trays.
  • Bury the chopped end of the stem in the ground until it reaches the node (the place where the cut was made). Gently compact the earth.
  • Apply rooting hormone to the cut end of the stem as directed by the product’s instructions, if using it.
  • Thoroughly but gently water the soil.
  • The pots or cell trays should be placed in a bright, warm area away from direct sunlight.
  • To keep the humidity levels stable, place a cloche or a clear plastic bag over the pots or cell trays.
  • It should take 1-2 weeks for roots to appear. You can take off the cloche or plastic bag once the roots have grown.

To sum up, propagating basil is an easy and efficient method of creating new plants from older ones. You can quickly reproduce your basil plants and guarantee a steady supply of fresh herbs by employing techniques like stem cuttings or seed sowing. The young plants will flourish if the propagation procedure is handled properly, which includes giving them enough light, water, and warmth. Whether you’re a novice or an expert gardener, you understand how to propagate basil by following this guide.

Certainly! If you’d like to learn more, please consider following our WhatsApp Channel: Harvest Gardening

Q1: How to propagate basil from flowers?

A1: Gather the seeds from the dried flower heads of the basil plants after letting the blossoms dry on the plant. Sow the seeds in the ground and make sure they stay moist until they sprout.

Q2: Is it better to root basil in water or soil?

A2: Basil is best rooted in water because it’s easier to keep an eye on it and avoid overwatering; that being said, rooting in the soil can produce thicker, more durable roots that can be transplanted later.

Q3: Can basil propagate in water?

A3: Yes, basil can propagate in water. All you have to do is put a cutting of basil in a glass of water, and after a few weeks, it will start to grow roots.

Famous for its calming effects and daisy-like blossoms, chamomile is a pleasant and adaptable herb. It grows well in sunny, well-drained soil and is perfect for novice and expert gardeners. Growing chamomile requires planting seeds directly in the ground or beginning them indoors before moving them outdoors. This hardy plant is ideal for garden beds, containers, or even as a companion plant to ward off pests because it needs very little maintenance. Chamomile is a lovely addition to any garden because of its pleasant scent and wide range of applications, which include natural skincare products and soothing drinks.

Chamomile is a well-known herb with various types, each with its benefits. The two most popular varieties are German chamomile (Matricaria chamomilla) and Roman chamomile (Chamaemelum nobile). German chamomile is frequently used in drinks and cosmetics products because of its relaxing and anti-inflammatory properties. Roman chamomile, with its slightly sweeter scent, is commonly used for stomach problems and aromatherapy. While they both have calming qualities, their functions and traits are different. You may cultivate chamomile indoors or outdoors. Here’s some excellent tips on how to grow chamomile depending on the environment:

1. Instructions for growing Chamomile indoors:

  • Pick a pot that is at least 6 to 8 inches deep and has sufficient drainage. A huge pot is not necessary for chamomile, but make sure it has adequate room to spread.
  • Use potting soil that drains properly, preferably with a pH of 5.6 to 7.5.
  • Your chamomile should be placed in an area that gets at least four to six hours of sunlight per day. The perfect window faces south. Use grow lights if there is not enough natural light.
  • Don’t overwater the soil; just a gentle misting is enough.
  • The ideal temperature range for chamomile is 60–68°F (15–20°C).

2. Guidelines for growing chamomile outdoors:

  • In your garden, pick a bright spot—though chamomile can also grow in some partial shade. It does best in moderate climates.
  • Sandal or loamy soils with good drainage are ideal for chamomile growth. If you have thick soil, you might want to add some compost or sand to help with drainage.
  • When there is no longer a chance of frost, sow seeds straight into the garden in the early spring. Gently press the seeds into the earth after scattering them there. Water sparingly so as not to remove the seeds.
  • When seedlings are big enough to handle, thin them to 6–8 inches apart. By allowing for adequate air circulation, this space lowers the chance of illness.
  • Once established, chamomile can withstand drought; but, to maintain its health during dry spells, give it regular watering.
  • Cover the plants with a light layer of mulch to keep moisture in and keep weeds out.

3. Basic maintenance advice for growing chamomile:

  • It doesn’t take much fertilizer to grow chamomile. A light springtime application of a balanced fertilizer can help improve poor soil conditions.
  • Regularly deadhead wasted flowers to promote ongoing blooming. After the first bloom, trim the plants back to encourage a second flush of flowers.
  • Although chamomile is often pest-free, watch out for spider mites and aphids. Use insecticidal soap to manage infestations as needed.

A straightforward and satisfying gardening project, chamomile has calming qualities, may be used in a variety of teas and cosmetics items, and is a natural treatment. It needs little care and grows well in a variety of temperatures. Growing chamomile is a rewarding way to experience nature’s calming qualities and establish a connection with it. Following these guidelines will help you learn how to grow chamomile inside or outdoors, allowing you to enjoy its beauty and advantages all year round.

Certainly! If you’d like to learn more, please consider following our WhatsApp Channel: Harvest Gardening

Q1: How to grow chamomile in Texas?

A1: In Texas, chamomile should be planted in full sun to partially shaded, well-drained soil. Water frequently, and think about sowing just after the last frost or beginning seeds indoors in the early spring.

Q2: When to harvest chamomile?

A2: When the chamomile blooms completely open, which is usually in the early morning after the dew has evaporated, harvest it. Just before the flowers begin to wilt is the ideal time.

Q3: How do I start growing chamomile from seeds indoors?

A3: First, add seed starting mix to tiny pots or seed trays. Lightly scatter the chamomile seeds on top, pressing them into the ground without packing them in. Place the pots in a warm, sunny spot and make sure the soil stays moist.

The proper timing of planting lavender is critical to its optimum growth. Springtime, when the risk of frost has passed and the ground has warmed up, is the best time to grow lavender. In this way, during the growing season, the young plants can establish their roots. Lavender can also be planted in the fall to give it a head start before the next spring in areas with moderate winters. When lavender is planted at the right time, it flourishes and produces fragrant foliage and lovely blooms. We’ll help you determine when to plant lavender with this guide.

Growing lavender from seeds is most effective in late winter to early spring, usually between February and April. Because of this timing, the seeds can sprout as the days become longer and the weather gets warmer. To give the seedlings a good start before moving them outside, start the seeds indoors approximately 10 to 12 weeks before the final anticipated date of frost. After the risk of frost has gone, the seedlings can be transplanted to a sunny, well-drained area in the garden.

1. Springtime (late April–early May)

  • Lavender is best planted in the spring, especially after the last frost. Lavender can form robust roots before the extreme summer heat since the soil is starting to warm.
  • Lavender has a full growth season to mature and adjust to its surroundings when planted in the spring. Because there is less chance of waterlogging the soil, this timing also lowers the risk of root rot.

2. Fall (late September – early October)

  • Early fall is another suitable time, particularly in warmer climates. The cooler weather helps the plant focus on root development rather than top growth.
  • Planting in fall gives lavender a head start for the next growing season. The roots can establish in the cooler months, leading to stronger growth in spring.

3. Avoid planting in summer and winter

  • Midsummer plantings may cause stress to the plant because of the dry, hot weather. If planting in the summer is necessary, make sure the lavender has enough water to establish itself.
  • Winter is not the best time to plant lavender because of the low temperatures and risk of frost, which can harm young plants without established roots.

The proper timing of planting lavender is critical to its optimum growth. Lavender is best planted in the spring, once the risk of frost has passed and the ground has warmed. In this way, during the growing season, the young plants can establish their roots. Lavender can also be planted in the fall to give it a head start before the next spring in areas with moderate winters. When lavender is planted at the right time, it flourishes and produces fragrant foliage and lovely blooms. You can discover why and when to plant lavender at its finest by adhering to these suggestions.

Certainly! If you’d like to learn more, please consider following our WhatsApp Channel: Harvest Gardening

Q1: How do I prepare the soil for planting lavender?

A1: Lavender grows well on slightly alkaline, well-drained soil. Healthy growth requires the incorporation of organic matter into the soil and the maintenance of adequate drainage.

Q2: When to plant lavender zone 7?

A2: The optimum time to plant lavender in Zone 7 is usually in the spring, following the last frost, which falls between April and May. This enables the plant to develop roots ahead of the summer’s heat.

Q3: Can lavender be grown in containers?

A3: It is possible to cultivate lavender well in pots. Use a potting mix that drains properly and select a pot with adequate drainage. Containers are an excellent choice for regions with colder winters and for managing soil conditions.

Q4: When to plant lavender in Texas?

A4: Lavender grows best in Texas in the early spring, following the last frost, or in the fall, when the roots have time to take hold before the summer heat. Make sure the soil has good drainage and an abundance of sunlight.

Pruning rosemary is vital for keeping the plant healthy and alive and fostering new development. Regular pruning of rosemary, a tough evergreen plant, prevents it from being too woody and encourages a bushier shape. These are some crucial guidelines on how to prune rosemary.

To keep rosemary healthy and encourage rapid development, pruning is necessary. Frequent pruning reduces disease risk, promotes bushier growth, and keeps the plant from getting too woody or lanky. It also enhances air circulation. Furthermore, pruning ensures that the plant produces more fragrant leaves that are ideal for culinary usage and help form the plant, making it more aesthetically beautiful.

When the rosemary plant has done flowering, prune it in late spring or early summer. This time promotes healthy new development and enables the plant to recuperate swiftly. As you shape the plant to the right size, concentrate on cutting off any dead or broken branches. Stems can be slow to regrow from woody, older sections of the plant, so try to avoid cutting into them. Pruning rosemary regularly keeps it bushy and keeps it from getting too woody or overgrown.

  • For precise cuts, use scissors or pruning shears with sharp edges. Illnesses are stopped from spreading by clean instruments.
  • To maintain the health of your rosemary, wipe the blades with rubbing alcohol both before and after pruning.
  • To keep the plant bushy or spherical, trim the outer branches. Try not to remove too much of the center.
  • Prune to increase the plant’s internal airflow, which helps ward off fungus-related illnesses. Eliminate any branches that are dead, broken, or crossing.
  • Never cut a leaf close to its node or where new growth is beginning. This promotes the growth of new branches.
  • Stems that are woody and aged should not be cut into since rosemary does not grow well from these locations. Concentrate on pruning flexible, green stems.
  • Plants should never have more than one-third removed at once. Pruning a plant too much might cause stress and impede its growth. Rejuvenate your overgrown or woody rosemary by pruning a little more each year instead of all at once.
  • After cutting, give the plant plenty of water to aid in its recovery and promote new growth. To encourage healthy regrowth, treat sparingly with a balanced organic fertilizer

Trimming rosemary is an easy yet necessary operation to maintain the plant’s health and productivity. By regularly pruning the plant, you may keep it from getting too woody, promote new growth, and preserve its shape. Pruning is best done in the spring or early summer when a third of the plant should be trimmed back. Dead or overgrown branches should be removed in particular. You may learn how to prune rosemary properly by following these tips.

Certainly! If you’d like to learn more, please consider following our WhatsApp Channel: Harvest Gardening

Q1: How to prune rosemary in a pot?

A1: Trim back the upper third of the rosemary plant in a pot, paying particular attention to removing any woody stems and cutting slightly above a leaf node. This keeps the plant from growing lanky and promotes bushier growth.

Q2: Can I prune rosemary in winter?

A2: Winter pruning should be avoided as much as possible, especially in colder regions where plants are more vulnerable to frost damage. If necessary, light pruning of damaged or dead branches is acceptable.

Q3: What should I do if my rosemary becomes too woody?

A3: If your rosemary becomes too woody, you can cut it back hard in early spring. However, be careful not to cut into the oldest wood, as this might not regenerate. Focus on cutting back to where you see some green growth.

Q4: Is it okay to prune rosemary flowers?

A4: You can trim the blossoms of rosemary, yes. This can promote increased leaf growth and keep the plant from expelling too much energy in the process of producing seeds.

Because of its zesty and refreshing flavor, cilantro—also referred to as coriander in some regions of the world—is a popular herb used in various cuisines. Whether you aim to add color to your garden or enjoy fresh herbs in your home, growing cilantro can be rewarding. However, cilantro has a reputation for being a little finicky, especially when it comes to bolting or going to seed prematurely, in hot weather. This guide provides you with the best tips on how to grow cilantro successfully. 

Growing cilantro can be rewarding if you know how to create the right conditions. Here are some of the best tips for growing cilantro:

Now let’s see how to grow cilantro:

  • Sow cilantro in early spring or late autumn. Planting should be avoided during the hottest months since it struggles in the heat.
  • Full to partial sun is ideal for cilantro growth. A little afternoon shade helps keep plants from bolting, or going to seed too soon, in hotter climes.
  • Use organic matter-rich, well-draining soil. Soil with a pH of 6.2 to 6.8 is ideal for cilantro, as it is somewhat acidic. Plant seeds 6 to 8 inches apart at a depth of about 1/4 inch. After seedlings are well-established, thin them to 12 inches apart.
  • Cilantro needs water just like all other plants do. Throughout the growing season, the plants require steady, uniform hydration. Before you water it again, make sure to thoroughly wet the soil and let it dry out.
  • It is light to feed cilantro. Use a balanced fertilizer sparingly, or amend the soil before planting with compost. For improved development, think about utilizing organic fertilizers like fish emulsion or compost tea. A diet like 12-4-8, which has a high nitrogen ratio, is recommended. Another great choice is a time-release formula.
  • The ideal temperature range for cilantro is between 50°F and 85°F (10°C and 29°C). If the weather rises, give it some shade or think about planting somewhere colder.
  • The main issue with cilantro is bolting, which detracts from the quality of the leaves. Young plants are prone to damping off, and frequent visits by sap-sucking leafhoppers may result in the development of Aster’s yellow disease in the plant. In this instance, the plant turns infertile and its blooms and leaves turn yellow. Leaf spots can also affect cilantro.

You can have fresh herbs all year long by growing cilantro indoors. You can grow cilantro inside in containers. Verify the pot’s drainage system. It needs a bright area, preferably close to a window that receives four to six hours of sunlight each day. Make sure the soil drains adequately and maintain a constant moisture level, but don’t overwater it. Because cilantro can be a bit picky, keep the temperature cool—between 60 and 70°F (15 and 21°C)—to avoid it bolting too soon. You may have a consistent supply of aromatic cilantro leaves for your cooking with proper care.

Cultivating cilantro from cuttings is an easy and effective technique to spread this aromatic herb. Begin by taking healthy, 4-6 inch-long stems from an established cilantro plant. Make sure the cuttings are above the water line in a glass of water after trimming the bottom leaves. The emergence of roots will occur in a few days. The cuttings can be planted in soil and kept in a sunny area until the roots are one to two inches long. In a few weeks, your cilantro will be ready for harvest with regular watering and care.

For people who appreciate using fresh herbs in their cuisine, growing cilantro may be a fulfilling experience. All things considered, planting cilantro may be an easy and efficient method to add fresh, locally grown herbs to your food preparations with the right care and attention. You may enjoy fresh cilantro from your garden for a large portion of the year if you follow these recommendations.

Certainly! If you’d like to learn more, please consider following our WhatsApp Channel: Harvest Gardening

Q1: What type of soil is ideal for growing cilantro in Texas?

A1: Loamy, well-draining soil with a pH of 6.5 to 7.5 is ideal for cilantro growth. The fertility and structure of the soil can be enhanced by adding organic matter.

Q2: What is the best time to harvest cilantro?

A2: Harvest cilantro three to four weeks after planting, before the plant flowers and leaves are vibrant green.

Q3: What is the best nutrient solution for growing cilantro hydroponically?

A3: When growing cilantro hydroponically, the ideal fertilizer solution should have a balanced pH of 6.5 to 6.0 and be high in potassium, phosphorus, and nitrogen.

Q4: What is bolting in cilantro?

A4: Bolting in cilantro refers to the rapid flowering and seed production of the plant, often triggered by heat or stress, which can result in bitter leaves.

For thousands of years, people have cultivated and utilized herbs for their culinary and therapeutic properties. Any landscape is made aesthetically beautiful and fragrant by its fragrant and ornamental features. You won’t go back after you’ve experienced the flavor difference between fresh and dried herbs. Fresh herbs taste better and are more nutrient-dense than store-bought varieties. Growing and harvesting your herbs also costs less. Here are some pointers on how to grow herbs in your garden at home.

  • Basil: Known for its potent flavor and scent, basil is a widely used herb. It grows nicely indoors with lots of sunlight and soil that drains properly. Growing basil in your own house, be it on a sunny windowsill, garden, or balcony, may be a fulfilling experience.
  • Parsley: Growing parsley indoors is simple and flexible. It likes frequent watering and shaded spots.
  • Chives: Chives are hardy herbs that thrive in indoor environments. They need wet soil and mild sunlight.
  • Mint: Mint is a hardy herb that grows well indoors but may easily take over outdoor gardens. It likes soil that is regularly moist and partially shaded.
  • Rosemary: A fragrant herb, rosemary lends a savory flavor to a variety of meals. It needs well-drained soil and lots of sunshine.
  • Oregano: With enough sunlight and well-drained soil, oregano is a hardy herb that can grow indoors. Growing oregano indoors is an easy and rewarding process, regardless of your level of gardening experience.
  • Select an interior location that receives 6 to 8 hours of sunlight per day, such as a window facing south.
  • As long as they have adequate drainage, use containers with holes for drainage to avoid waterlogging and root rot. Some examples of such containers are repurposed jars, plastic containers, and terracotta pots.
  • Make sure the potting mix you use is well-drained.
  • Let the soil dry out a little bit in between waterings. It’s time to water if the soil is dry to a depth of one inch.
  • Every two weeks, use an all-purpose water-soluble fertilizer at half the suggested strength.
  • Arrange the herbs in a well-ventilated space with a temperature between 60 and 75 degrees Fahrenheit.
  • Select a location in your garden that gets at least 6 to 8 hours of sunlight per day as most herbs prefer full sun. Make sure the soil in the region drains properly to avoid waterlogging.
  • Add organic matter, like compost or manure, to the garden soil and make sure it has enough drainage. The pH needs of different types of herbs vary. For window boxes, hanging baskets, and containers, use premium, well-draining soil like Proven Winners Premium Potting Soil.
  • Herbs grown outdoors can need to be watered more frequently, particularly in hot, dry weather. Make sure to keep the soil uniformly moist but not soggy by giving it regular, deep watering.
  • The majority of herbs require little to no additional fertilizer. When planting, incorporate a slow-acting fertilizer into the soil, such as cottonseed meal, blood meal, or bone meal fertilizer spikes; add more water-soluble fish emulsion as needed.
  • For the best flavor, pluck outdoor herbs in the morning when their essential oils are concentrated, and trim them frequently to encourage bushy growth and prevent legginess.

To sum up, there are a few important aspects that need to be considered when learning how to grow herbs. These tips can help you maintain a healthy herb garden that will bring you fresh flavor and aromatic delights all year long, whether you want to grow it indoors or out. Growing herbs is a fun and satisfying project, whether you’re using them to make tea with freshly picked mint or as a garnish for foods made with basil.

Certainly! If you’d like to learn more, please consider following our WhatsApp Channel: Harvest Gardening

Q1: How do I prevent pests and diseases in my indoor herb garden?

A1: To prevent fungal illnesses, regularly check herbs for pests, keep the indoor garden area clean, apply neem oil or insecticidal soap, and refrain from overwatering.

Q2: How to grow herbs in winter?

A2: If you want to cultivate herbs in the winter, you can use grow lights or indoor pots placed near windowsills that receive plenty of sunlight to ensure good growth.

Q3: How often should I water my outdoor herb garden?

A3: Water when the top inch of soil feels dry to the touch since herbs enjoy slightly moist soil. Watering strongly and seldom is preferable to watering softly every day.

The Kentia palm, sometimes referred to as the thatch palm or Forster Sentry palm, is a laid-back houseplant that grows slowly and is a tropical native. The senator from New South Wales, William Forster, inspired the name Kentia Palms. Howea forsteriana is the scientific name for it. Under the right circumstances, this species can reach a height of 40 feet. In this article, we shall learn more about the development and maintenance of Kentia palms.

California and Hawaii are the two US states where it may be grown. A detailed guide is provided here.

How to plant Kentia palms:

  • Choose a spot outside with sandy to loamy, well-draining soil that receives some shade. Pick a pot with adequate drainage holes if you’re planting in one. Add more gravel or broken pottery to the bottom for more drainage, then fill in around the roots, leaving room at the top for watering.
  • When the top inch of soil dries out, prepare to water. However, take care to prevent the soil from getting too wet, as this may cause root rot. Kentia palms can withstand temperatures as high as 100 degrees Fahrenheit and, for small periods, as low as 25 degrees Fahrenheit.

A little extra attention to humidity, temperature, watering, and a little care will be needed for indoor Kentia palm plants.

Kentia palm fertilizer

  • Since it grow slowly, they don’t require a lot of fertilizer. Use a slow-release fertilizer in the spring and summer to support growth if you decide to fertilize these palms. Choose a fertilizer designed especially for palm trees and adhere to the directions on the label.

Pruning

  • It should require very little pruning. However, you may need to cut off affected fronds as soon as they develop to prevent the disease from spreading. Only trim fronds that are unhealthy or dead. Using sharp pruning shears, remove these. Once the fronds get brown and dry, trim them off. 

Propagating Kentia Palm

  • Though spring or summer are the ideal seasons, you can do this at any time. Release the root ball from the pot by gently pulling it loose. Next, decide which palm you wish to be excluded from the group. Replant your split palm in a good location for growth. The remaining palms can then be separated or replanted together as before. 

Potting and Repotting of these palms

  • This palm grows slowly, so you may only need to repot it every few years. Make sure the container has enough drainage holes before planting this palm in it. Plant the same depth in a pot that is a few inches wider around. Add more fresh potting soil that drains properly to fill in. 

Common illnesses and their therapy

  • Spider mites, mealybugs, and scale are common pests that can harm this palm. A light misting of a powerful stream of water can occasionally cure a mild infestation. If not, you can apply neem oil or insecticidal soap. A suitable fungicide may typically effectively treat diseases that affect these palms, such as leaf spots and other fungal problems. 

Kentia palms are popular indoor and outdoor plants, recognized for their delicate, fluffy fronds and ability to flourish in low-light environments. They can grow up to 10 feet inside and grow slowly. It makes these palms a popular option for bringing some greenery into different areas. You can properly care for this palm tree by adhering to the above-described directions.

Certainly! If you’d like to learn more, please consider following our WhatsApp Channel: Harvest Gardening

Q1. What is the best fertilizer for Kentia palms?

A1. For these palms, the best liquid fertilizer is one that is balanced and has equal amounts of potassium, phosphate, and nitrogen. During the growing season, fertilize it every four to six weeks.

Q2. Is Kentia palm toxic to cats?

A2. No, it is okay for your cat to gnaw on a this palm, therefore there’s no need to be concerned.

Q3. Why are the leaves of my Kentia palm turning yellow?

A3. On a Kentia palm, yellowing leaves are frequently an indication of overwatering. Make sure the soil drains well, and let it dry out a little bit in between waterings.

Q4. How to grow Kentia palm indoor?

A4. Due to their tolerance for poor light, container growth, and even occasional neglect, kentia palms can thrive inside. Use potting soil that drains properly. Water your Kentia palm every one to two weeks, or when the top inch of soil becomes dry. 

Q5. What are the main differences between a Kentia palm and a Majesty palm?

A5. The Kentia palm is easier to maintain indoors due to drought resistance and low light, while the Majesty palm requires more humidity, increased light, and regular watering for flourishing.

One thing unites every type of pothos, they are excellent indoor plants. These low-light-tolerant vining plants are well-liked options for hanging baskets. It is also incredibly low-maintenance when added to a larger indoor garden, and it always looks excellent, making it perfect for novices. Although many other pothos varieties are available, the most desirable are the following ones, about which we shall go into great length regarding upkeep.

Usually, pothos plants are categorized as types of Epipremnum aureum. All of the other vining plants that are often called “pothos” require comparable maintenance, though. 

Different types of pothos plants:

  1. Jade pothos: 

The huge, thick, heart-shaped leaves and deep green color of the jade satin pothos make it a popular plant. Like other of its pothos relatives, it can be more expensive and more difficult to locate.

  • An area with bright, indirect light is ideal for this pothos. Select a well-draining, rich, and open soil mixture. Let the top two to three inches dry out in between waterings to avoid overwatering. At 60 to 85 degrees Fahrenheit, keep the temperature stable.
  • When new growth occurs, use a balanced liquid fertilizer once every three to four weeks. A jade satin pothos can be pruned to regulate growth and appearance, while it’s not required to do so at first. Pruning should wait until the plant is actively growing, which occurs in the spring and summer. 
  1. Lemon Meringue Pothos: 

The meringue with lemon flavor pothos is a well-liked houseplant with vividly variegated leaves. Similar to the hues of lemon meringue pie, the leaves of this pothos type are heart-shaped and have a blend of vivid yellow and green. 

  • Although it can withstand low light, lemon meringue pothos likes bright, indirect light. Use potting soil that drains properly. Don’t overwater your plants to avoid root rot.  It is best if you place it on a countertop or table near windows.
  • The range of ideal temperatures is 65°F to 85°F. Once a month during the growing season, apply a water-soluble, balanced fertilizer. Trim to maintain proper size and form, and get rid of any yellowed or broken leaves. Bushier growth will be encouraged by this.
  1. Dragon’s Tail Pothos: 

The huge, glossy, heart-shaped leaves of the dragon’s tail pothos are dark green. There are varieties with broad, heavily serrated edges and others with thin, smooth-edged leaves. Larger kinds can reach up to 60 feet in height outside, with leaves as long as three feet.

  • The dragon’s tail pothos can be grown in either part sun or part shade. Placing it to the side of a window that receives decent sun exposure will allow you to obtain the ideal lighting conditions: bright but indirect sunlight. Sandy or clay soils are not suitable for this plant, it prefers rich soil that is comparable to what it may find in its natural habitat. 
  • It should be enough to water these plants once a week. A dry surface of the soil is required before irrigation. Dragon’s tail pothos prefer temperatures between 65 and 75 degrees Fahrenheit. Although this plant doesn’t require much fertilizer in general, you can apply a liquid fertilizer that is soluble in water during the busiest portion of the plant’s growth season.
  1. Glacier Pothos: 

The glacial pothos, a cultivar of the well-known marble queen pothos, is a delicate pothos variant with oval-shaped leaves and striking green and white colors. 

  • Despite this, glacial pothos can also thrive under moderate lighting. While this is not a pothos kind that does well in low light, many do. The right soil mixture must drain adequately and retain some moisture to plant glacier pothos. Water thoroughly after letting the top two to three inches of soil dry out.
  • Native to warm, humid climates, pothos thrive in temperatures between 65 and 75 degrees Fahrenheit. For optimal results, apply a monthly balanced liquid fertilizer in the spring and summer. Since the plant isn’t growing actively in the fall and winter, stop fertilizer. Though it can be done sometimes to manage its growth, pruning is not required for maintaining glacial pothos. 
  1. Baltic Blue Pothos:

Once established, the huge, deep blue-green leaves of the Baltic blue pothos fenestrate, making it a fast-growing, low-maintenance pothos.

  • A mixture of equal parts indoor potting soil and perlite is an excellent choice for Baltic blue pothos, which thrive in abundant mild to strong indirect light. Incorporate ample watering after letting the soil nearly dry up entirely.
  • Temperatures above 55 degrees Fahrenheit are ideal for these tropical houseplants as they are not tolerant of cold or frost. To promote growth, fertilize Baltic blue pothos once a month while they are actively growing. While it’s not required, pruning can be done to manage growth or improve the appearance of the plant.

Pothos plants are renowned for their adaptability and ease of maintenance. They are available in a variety of forms, each with distinct qualities. The best varieties are neon pothos, dragon’s tail pothos, jade, etc. For collectors and aficionados, more complex variegation can be found in varieties like Manjula and Glacier. You can successfully cultivate different pothos varieties by adhering to the preceding criteria.

Certainly! If you’d like to learn more, please consider following our WhatsApp Channel: Harvest Gardening

Q1. Can you plant different types of pothos together?

A1. Pothos varieties can be grown together as they require similar maintenance, provided they follow the same care instructions.

Q2. What are the key differences between Philodendron and Pothos varieties?

A2. Pothos have thick, waxy leaves and vine-like growth, while philodendrons have heart-shaped, thinner leaves and vine-like growth.

Q3. What are the most popular Silver Pothos varieties?

A3. The most widely grown Silver Pothos cultivars are ‘Exotica,’ ‘Argyraeus,’ and ‘Silvery Ann.’ Everyone has different patterns of silver on the leaves.

Q4. What are some common white Pothos varieties?

A4. Common types of white Pothos are ‘Marble Queen,’ ‘N’Joy,’ and ‘Pearls and Jade.’ The leaves of these cultivars are green with white or cream veining.

The orchid family comprises over 28,000 species that have been recognized and distributed among 800 genera. It is an incredibly extensive group of plants. One economical and enjoyable method to expand your collection of houseplants is to learn how to propagate orchids. Like other plants with rhizomes, orchids are divided and propagated from rear bulbs. Alternatively, they can be developed from babies and aerial roots. Successful methods are listed below for how to propagate orchids at home that home gardeners are most likely to find successful.

Segment the pseudobulbs:

An orchid produced by plant division is alive and could flower the following year.

  • After loosening the potting media with a little spade or knife around the inside of the pot, carefully remove the orchid. To split the plant, cut the rhizome with sterile scissors or a knife, making sure that each division contains a minimum of three to four pseudobulbs and sound roots.
  • Repot each division in fresh orchid media after examining the pseudobulbs and roots and giving it a gentle watering. Remain connected to the main rhizome via three or four rhizomes. Next, eliminate groups of three or four that are actively growing by moving down the leads with a sterile, sharp cutting tool. 
  • Plant your division in a fresh pot that is just big enough to hold its size in the orchid medium. Every day, mist the potting mix and stems lightly; do not add water. Keep the pot in indirect light.

Backbulbs:

Older pseudobulbs without leaves called back bulbs are nevertheless useful for starting new plants.

  • When splitting a plant, make sure the back bulbs are healthy. Utilizing a sharp, sterile knife, remove the rhizome with the back bulb of the orchid from the parent plant to propagate an inactive orchid. 
  • In a pot, place the back bulb on top of a covering of sphagnum moss. To maintain the moisture levels in the moss and bulb, place the pot in an indirect light, warm, and humid area. As you begin the typical care routine for an existing orchid, place the newly acquired orchid in its permanent home.

An infant plant known as a keiki emerges from the stem node of its parent plant.

  • Use a sharp, sterilized cutting tool to remove a keiki once new roots have grown. Hold off until the keiki has grown at least two to three roots that are two to three inches long. The cut on the mother plant where the keiki was extracted as well as the cut ends of the keiki should both be treated with a fungicide.
  • Make sure the roots of the keiki are covered by orchid media when you put them in a little pot. Water sparingly at first to give the roots time to grow.

An orchid ready to flower is created through aerial root division over the years.

  • Remove the orchid from its pot; don’t injure the aerial roots. Shake out any loose potting medium by inverting the pot. Extract the root ball from the main stem using a clean, sharp knife. 
  • Cover the roots with the orchid mix after placing the root portion in a pot with the long roots pointing downward. The pot should be placed in an area with lots of bright indirect light, on a tray filled with wet stones. Retain the pot damp, but do not overwater it.

Although it can be difficult, some orchid species can be propagated from cuttings, especially those that grow from pseudobulbs or have aerial roots.

  • Select the Proper Orchid by selecting a robust, healthy stem that has multiple nodes. Ten-inch-long keiki stems should be cut, right above a leaf node. Eliminate any foliage close to the cutting’s base.  
  • After covering the tray with film or a plastic bag, set the container in direct, bright sunlight. Maintain adequate humidity in the container and ensure that the moss remains moist by keeping an eye on the cuttings. To moisten the medium, softly water it, but do not soak it.

In conclusion, the proper conditions, including enough light, humidity, and temperature, are essential for optimal orchid propagation. Using sterile, clean instruments is also crucial to avoiding infections. With practice and careful attention to detail, one can become proficient in the delicate process of propagating orchids. The section above goes into detail on how to propagate orchids. 

Certainly! If you’d like to learn more, please consider following our WhatsApp Channel: Harvest Gardening

Q1. When to propagate orchids?

A1. It is recommended to propagate orchids in the spring or early summer, which is after the blossoming period.

Q2. How to propagate orchids in water?

A2. A healthy root or stem cutting can be grown in water by putting it in a container with water. For optimal growth, the water should be replaced every few days. When propagating orchids in water, it can take many weeks before new roots show. 

Q3. How to propagate orchids from stem?

A3. To promote root growth, cut a healthy stem with two or more nodes with sterilized scissors and submerge the stem in water or a moist growing medium. The time it takes for roots to form can vary based on the type of orchid.

Q4. How to propagate orchids from roots?

A4. The orchid should first be gently taken out of its pot, and any dead roots should be removed to leave only healthy ones. Once propagated, put the new orchid in a well-lit spot, give it a little water, and wait to fertilize until new growth shows.

A fungus called white spots on leaves damages several crops, especially brassicas like canola, kale, and cabbage. When a downy leaf spot first appears, it looks tiny, with pale green spots on the upper surface of the leaves and white, fuzzy patches on the underside. If not handled appropriately, it might result in a large loss of crops. The upper sides of the leaves develop chlorotic, or yellowish blotches that eventually turn brown, as the downy spot gets bigger. To avoid white spots on plant leaves, use the following tips.

Pseudocercosporella capsellae is the fungus that causes white leaf spots on plants. Here’s how to recognize it.

Identifying white spots on leaves:

  • Initially, leaves may develop white patches. These lesions, which typically measure 1-2 mm in diameter and may have a brown or dark border, commonly occur around the margins of leaves. Downy mildew may be mistaken for the lesions. 
  • Large purple to grey-speckled stem and pod lesions are the signs of grey stem disease, which manifest later in the canola crop’s growth. The patches may combine to produce larger, asymmetrical lesions as the condition worsens. 
  •  During harvest, some plants may be entirely discolored, and the entire field may turn purple or grey. The patches may disappear and the afflicted areas may turn necrotic. Lesions appear on lower leaves in the early summer after infection. 
  • Most often, the illness appears on the lower leaves and spreads upward during cool, rainy weather. Leaves with severe infection may turn yellow and drop off early. Usually, seeds do not spread the illness, a broad variety of cruciferous weeds are hosts to the disease.

A fungus called white leaf spot attacks many types of plants, including vegetables. This article describes how to prevent, manage, and treat white spots on leaves. 

White spots on plant leaves treatment

Infections with diseases

To stop the fungus from spreading, routinely pick and discard infected leaves. One of the most frequent causes of white spots on plant leaves is fungal diseases, which include powdery mildew and other fungi. Another common ailment that causes white spots is downy mildew. 

Enhance air circulation

Maintain adequate plant spacing to improve air circulation, and water plants from the base rather than the top to reduce leaf wetness, promoting fungi growth. Plants should be sufficiently spaced to allow for appropriate air circulation. This could aid in stopping outbreaks in the future. 

Fungicide therapy

Fungicides are currently the most effective technique to treat powdery mildew. generally, mancozeb, copper-based fungicides, or chlorothalonil are used as active components. As far as timing and application rates are concerned, follow the manufacturer’s guidelines. Before the illness gets worse, use fungicides early in the growing season. 

Healing with nutrients

Consider doing soil tests to find out which nutrients are deficient if it’s a nutrient problem. Use a balanced fertilizer that includes a variety of vital nutrients if you are unsure of which ones are missing from your plant. Choose varieties with resistance. Refrain from yearly planting of the same vulnerable plants in the same location.

Insect destroyer

Upon first inspection, it appears to be white and fuzzy. The presence of insects is another factor contributing to white leaf spots, but, as you examine the plant leaves more closely. Mealybugs are one example; their white, grainy covering may initially lead one to believe that the insects are fungi, and they frequently gather in clusters that resemble white mold. Use neem oil or other organic therapies, such as pesticides, to address insect-related issues. Until the issue is fixed, isolate the impacted plants.

The fungus Pseudocercosporella capsule is the source of white spots on plant leaves, which usually appear as tiny, white, or grayish dots on the leaves. Over time, these spots may combine and result in more extensive tissue damage. The chance of these issues can be reduced by taking preventive actions such as regular feeding, sufficient hydration, and appropriate spacing. 

Certainly! If you’d like to learn more, please consider following our WhatsApp Channel: Harvest Gardening

Q1. How to remove the tomato white leaf spot?

A2. Apply a fungicide made especially for tomato plants after removing any diseased leaves. Through the use of crop rotation, adequate ventilation, and dry foliage maintenance.

Q2. How to treat white spots on shamrock plants?

A2. Usually, fungal infections are the source of white patches on shamrock plants. Maintain adequate air circulation, refrain from overwatering, and keep the leaves dry to prevent it. To address white spots, spray a fungicide designated specifically for powdery mildew and remove any leaves that are infected.

Q3. What are the white spots on plant leaves?

A3. Pests like spider mites, mineral shortages, and fungal illnesses like powdery mildew are frequently the causes of white patches on plant leaves. For the right course of treatment, the precise cause must be determined.

Q4. What causes white spots on plant leaves outdoors?

A4. Outdoor fungal infections, such as powdery mildew, are frequently responsible for white spots on plant leaves since they like warm, dry weather. 

Q5.  How can I prevent white spots on plant leaves indoors?

A5. Maintain adequate air circulation, refrain from overwatering, and keep the humidity levels around your plants low to prevent white spots.

Plant diseases known as downy mildew are brought on by a variety of oomycetes, which are fungi-like organisms. Leaf loss, stunted development, or plant death are possible outcomes of the illness, which appear as yellow, brown, or purple patches on the upper surfaces of leaves. Due to its propensity for spreading quickly in chilly, damp environments, downy mildew can cause large losses in agricultural output. A thorough discussion is had on how to diagnose and control downy mildew. 

Plant diseases include downy mildew. These methods will help you recognize it with ease.

  • Upright leaves with downy mildew have angular, light green to yellow patches; these lesions eventually dry out and turn brown. Curling, twisting, or distortion are possible in affected leaves.
  • To induce symptoms, the virus has to infect lettuce and grow in damp, chilly circumstances with moisture on the leaves. Smaller leaves and fewer blooms or fruits could indicate a stunted overall growth of the plant.
  • First to be attacked are older leaves. If the infection is severe enough, the plant may wilt, especially in warm, humid weather, or its leaves may turn brown and eventually drop prematurely.

Leaves, stems, and even flowers or fruits are especially affected by downy mildew. This page describes its rapid treatment procedure.

Downy mildew treatment:

  • Watering your plants from below will help avoid downy mildew since it need water to survive. The downy mildew cannot get to or infect your plants if the leaves of your plants are dry. Eliminate plants that are seriously damaged. Keep the area around your plants well-ventilated by avoiding dense planting and controlling weeds.
  • Consider using selective trimming to increase air circulation if at all possible. Adjust the temperature and humidity levels to lessen the growth of downy mildew indoors or in a greenhouse. Open vents to increase ventilation since high humidity might lead to fungal issues.
  • When selecting plants, look for kinds that are resistant to downy mildew. Cucumbers, grapes, and lettuce are among the crops where this works quite well. Use fungicides that are made especially for it. 
  • Raindrops scatter the disease-causing spores that are secreted from the underside of contaminated leaves. Since downy mildew infections require prolonged leaf wetness, serious outbreaks are most likely to happen outside during rainy summers. 
  • Low air humidity causes rapid transpiration in plants, which increases the danger of wilting if water is lost from the leaves before it can be absorbed by the roots. To help control downy mildew, think about utilizing biological therapies that contain beneficial microorganisms like Bacillus subtilis or Trichoderma species.
  • Eliminating dead plant matter from your garden in the fall will help stop the illness from spreading the following spring. This disease overwinters on dead plant material. To prevent pathogen accumulation in the soil, avoid planting sensitive plants in the same spot every year.

In conclusion, preventing the growth of downy mildew in your garden also requires good garden hygiene. It mostly damages plants’ leaves, stems, and fruits, which results in decreased photosynthesis, slowed development, and in extreme situations, plant mortality. Utilizing resistant plant cultivars, crop rotation, and appropriate spacing to promote air circulation are just a few of the cultural practices that go into the control and prevention of downy mildew. The solutions listed above can help you solve your downy mildew issue.

Certainly! If you’d like to learn more, please consider following our WhatsApp Channel: Harvest Gardening

Q1. What is downy mildew?

A1. Plants that are afflicted by a fungal-like disease called downy mildew develop brown or yellow patches on their leaves as well as a white to grayish fuzz on their undersides. It spreads by way of infected plant waste and airborne spores.

Q2. What is basil downy mildew?

A2. Peronospora belbahrii is the culprit behind the fungal disease known as “basil downy mildew,” which causes yellowing leaves and a grayish mold to develop on the undersides of basil plants. Via spores dispersed by the wind, water, or tainted objects and vegetation, it spreads.

Q3. Is downy mildew harmful to humans?

A3. It is not harmful to people to have downy mildew. However, these plant diseases are detrimental to plants; they can wipe out an entire crop and destroy the majority of the plants in a matter of weeks.

Q4. What is the difference between downy mildew vs powdery mildew?

A4. On the upper leaf surface, downy mildew shows as yellowish patches, while on the underside, it takes the form of grayish mold. Conversely, powdery mildew has a white appearance. Usually affecting the bottom of leaves, downy mildew causes yellowish patches on the upper surface of the leaves.

Q5. What are the early symptoms of downy mildew in cucumbers?

A5. Pale yellow patches on the upper surface of cucumber leaves are one of the early signs of downy mildew. These patches turn brown as the disease worsens, and the leaves may curl and eventually die.