Growing potatoes on your own allows you to experiment with different varieties and they are quite easy to grow. Growing potatoes is economical and gratifying. When to harvest potatoes is determined by geography and growing type. Since potatoes are underground plants, it’s critical to understand when and how to harvest them. With the help of this instruction, you can harvest potatoes in 5 simple steps and maximize your crop’s production.
Step 1: Understanding when to gather potatoes:
When it comes to picking potatoes, timing is everything. There are two primary stages to potato harvesting:
- New potatoes: While the plants are still green and in bloom, these are harvested early. Small and soft, they are perfect for eating in the early part of the season. New potatoes are typically ready two to three weeks after the plant flowers.
- Mature potatoes: These are harvested two to three weeks after the tops of the plants have become yellow and wilted, or once the foliage has fallen back. Mature potatoes have thicker skins that make them better suited for long-term storage.
Indications that potatoes are ready to be harvested
The foliage is the best indicator of when your potatoes are ready. Your potatoes are ready to be harvested when the leaves start to turn yellow and the stems get dry. The skins of mature potatoes get thicker and less likely to peel. It’s best to begin searching for fresh potatoes as soon as the blooms bloom.
Step 2: Get your equipment ready to harvest potatoes:
Obtaining the right tools is crucial for successful harvesting, as they protect the crop and ensure optimal potato conditions.
- The ideal instrument for carefully taking potatoes out of the ground without cutting or bruising them is a digging fork. You can also use a shovel, but take care not to cut into the potatoes.
- Wear strong gloves to protect your hands, especially when working on stony or uneven ground.
- Prepare receptacles to gather the harvested potatoes. Ensure that they are dry and clean to prevent infection.
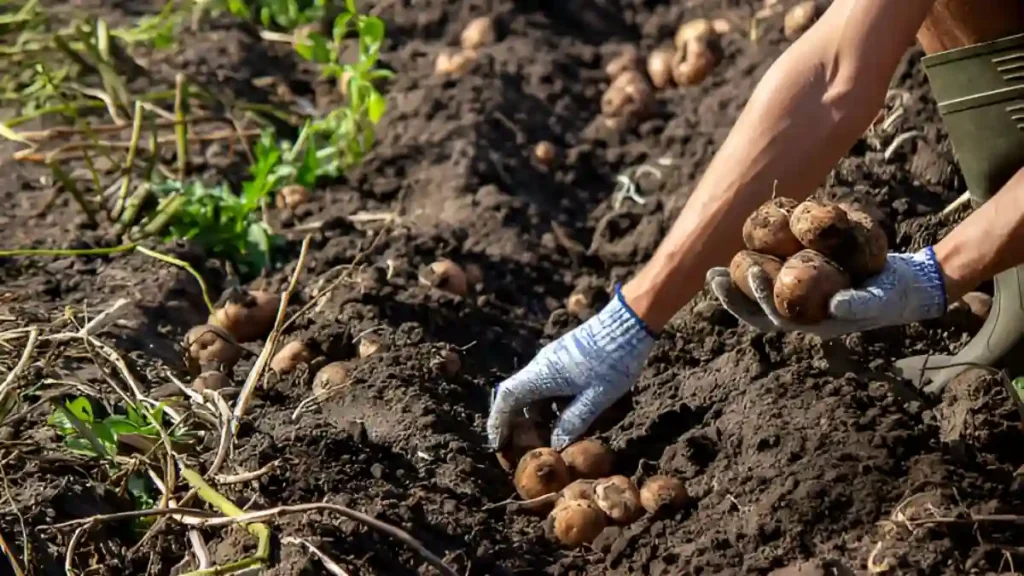
Step 3: Learn how to harvest potatoes:
Prepare your tools for harvesting potatoes. Dig gently and avoid damaging tubers, as potatoes spread around the plant. Handle them gently to prevent punctures or bruises.
- Place a digging fork or spade feet away from the plant, shake it back and forth, and carefully remove the plant from the ground, ensuring several tubers are connected to the roots.
- Remove plants and gather potatoes, sort through dirt with your hands, and be cautious when handling new potatoes, as they are more sensitive and prone to harm.
- After harvesting, any potatoes that have been cut or punctured should be consumed immediately. The remainder of your harvest will be spoiled because these don’t store well and can rot in storage.

Step 4: How to cure and store potatoes:
After harvesting, potatoes should be cured for long-term preservation, as cured skin potatoes are more resistant to illness and have a longer shelf life.
- Place potatoes in a well-ventilated, cool, and dark area at 50-60°F for a week to two weeks to cure, harden skin, and heal minor cuts.
- Before storage, inspect potatoes for disease or rot symptoms and discard damaged or diseased tubers to ensure the rest of the harvest is free from contamination.
- After curing, store potatoes in a well-ventilated box, mesh bag, or wooden crate at 40-50°F (4-10°C) in a dark, cool place, to avoid refrigerating as starches can change flavor.
Step 5: Some advice for extending your potato crop:
Proper storage is crucial for preserving potatoes and using long-term storage strategies can ensure a long-lasting enjoyment of your harvest.
- Keep potatoes dark in storage and check frequently to prevent greening due to solanine, a hazardous chemical, and light exposure, which can cause a bitter taste.
- The optimal conditions for potato storage are high humidity levels (85–90%). But much moisture might cause decay. To avoid this, make sure the place you use for storage is dry and well-ventilated.
- Some potatoes will inevitably go bad, even in the finest of circumstances. Every few weeks, inspect your stored potatoes for symptoms of sprouting, shriveling, or decay. Take immediate action to remove any impacted potatoes so as not to ruin the remainder of your harvest.
Conclusion:
It’s easy and satisfying to learn when and how to harvest potatoes, especially if you follow these 5 simple steps. Your harvest of fresh, homegrown potatoes will be abundant if you give it the right care and attention. Time and method are critical to success when growing potatoes, whether you’re searching for young ones for an early harvest or older ones for long-term preservation.
Certainly! If you’d like to learn more, please consider following our WhatsApp Channel: Harvest Gardening
A frequently asked questions:
Q1: How do I know when potatoes are ready to harvest?
A1: The plants’ foliage turns yellow and starts to die back when potatoes are ready to be harvested. If you want to make sure the tubers are the right size, you may also verify by carefully excavating a couple of them.
Q2: In which month potato is harvested?
A2: Depending on the variety and growing conditions, potatoes are normally planted in the spring, from mid-March to late April, and harvested in the late summer or early fall, usually between August and October.
Q3: How to cure potatoes after harvest?
A3: After harvesting potatoes, cure them for one to two weeks at 50–60°F (10–15°C) with high humidity (85–90%) so that small wounds can heal and the skins can thicken.