The orchid family comprises over 28,000 species that have been recognized and distributed among 800 genera. It is an incredibly extensive group of plants. One economical and enjoyable method to expand your collection of houseplants is to learn how to propagate orchids. Like other plants with rhizomes, orchids are divided and propagated from rear bulbs. Alternatively, they can be developed from babies and aerial roots. Successful methods are listed below for how to propagate orchids at home that home gardeners are most likely to find successful.
Segment the pseudobulbs:
An orchid produced by plant division is alive and could flower the following year.
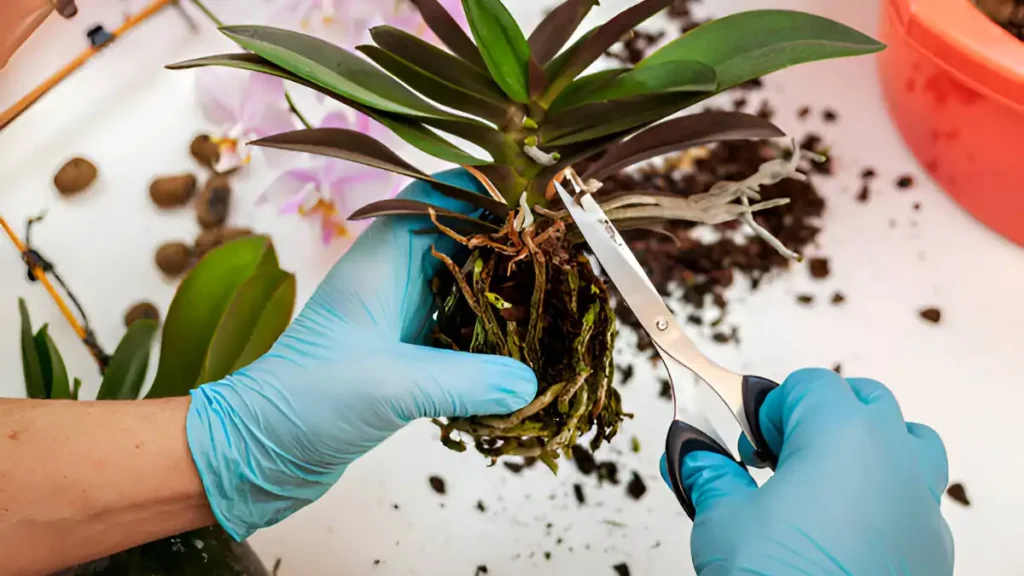
- After loosening the potting media with a little spade or knife around the inside of the pot, carefully remove the orchid. To split the plant, cut the rhizome with sterile scissors or a knife, making sure that each division contains a minimum of three to four pseudobulbs and sound roots.
- Repot each division in fresh orchid media after examining the pseudobulbs and roots and giving it a gentle watering. Remain connected to the main rhizome via three or four rhizomes. Next, eliminate groups of three or four that are actively growing by moving down the leads with a sterile, sharp cutting tool.
- Plant your division in a fresh pot that is just big enough to hold its size in the orchid medium. Every day, mist the potting mix and stems lightly; do not add water. Keep the pot in indirect light.
Backbulbs:
Older pseudobulbs without leaves called back bulbs are nevertheless useful for starting new plants.
- When splitting a plant, make sure the back bulbs are healthy. Utilizing a sharp, sterile knife, remove the rhizome with the back bulb of the orchid from the parent plant to propagate an inactive orchid.
- In a pot, place the back bulb on top of a covering of sphagnum moss. To maintain the moisture levels in the moss and bulb, place the pot in an indirect light, warm, and humid area. As you begin the typical care routine for an existing orchid, place the newly acquired orchid in its permanent home.
Learn about how to propagate orchids Keiki:
An infant plant known as a keiki emerges from the stem node of its parent plant.
- Use a sharp, sterilized cutting tool to remove a keiki once new roots have grown. Hold off until the keiki has grown at least two to three roots that are two to three inches long. The cut on the mother plant where the keiki was extracted as well as the cut ends of the keiki should both be treated with a fungicide.
- Make sure the roots of the keiki are covered by orchid media when you put them in a little pot. Water sparingly at first to give the roots time to grow.
Propagate with aerial root division:
An orchid ready to flower is created through aerial root division over the years.
- Remove the orchid from its pot; don’t injure the aerial roots. Shake out any loose potting medium by inverting the pot. Extract the root ball from the main stem using a clean, sharp knife.
- Cover the roots with the orchid mix after placing the root portion in a pot with the long roots pointing downward. The pot should be placed in an area with lots of bright indirect light, on a tray filled with wet stones. Retain the pot damp, but do not overwater it.
How to propagate orchids from cuttings:
Although it can be difficult, some orchid species can be propagated from cuttings, especially those that grow from pseudobulbs or have aerial roots.
- Select the Proper Orchid by selecting a robust, healthy stem that has multiple nodes. Ten-inch-long keiki stems should be cut, right above a leaf node. Eliminate any foliage close to the cutting’s base.
- After covering the tray with film or a plastic bag, set the container in direct, bright sunlight. Maintain adequate humidity in the container and ensure that the moss remains moist by keeping an eye on the cuttings. To moisten the medium, softly water it, but do not soak it.
Conclusion:
In conclusion, the proper conditions, including enough light, humidity, and temperature, are essential for optimal orchid propagation. Using sterile, clean instruments is also crucial to avoiding infections. With practice and careful attention to detail, one can become proficient in the delicate process of propagating orchids. The section above goes into detail on how to propagate orchids.
Certainly! If you’d like to learn more, please consider following our WhatsApp Channel: Harvest Gardening
A frequently asked questions:
Q1. When to propagate orchids?
A1. It is recommended to propagate orchids in the spring or early summer, which is after the blossoming period.
Q2. How to propagate orchids in water?
A2. A healthy root or stem cutting can be grown in water by putting it in a container with water. For optimal growth, the water should be replaced every few days. When propagating orchids in water, it can take many weeks before new roots show.
Q3. How to propagate orchids from stem?
A3. To promote root growth, cut a healthy stem with two or more nodes with sterilized scissors and submerge the stem in water or a moist growing medium. The time it takes for roots to form can vary based on the type of orchid.
Q4. How to propagate orchids from roots?
A4. The orchid should first be gently taken out of its pot, and any dead roots should be removed to leave only healthy ones. Once propagated, put the new orchid in a well-lit spot, give it a little water, and wait to fertilize until new growth shows.