Tag

Houseplant

Browsing

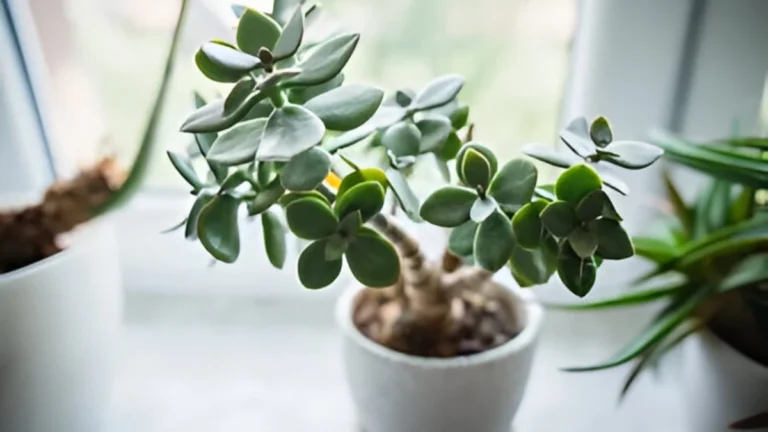
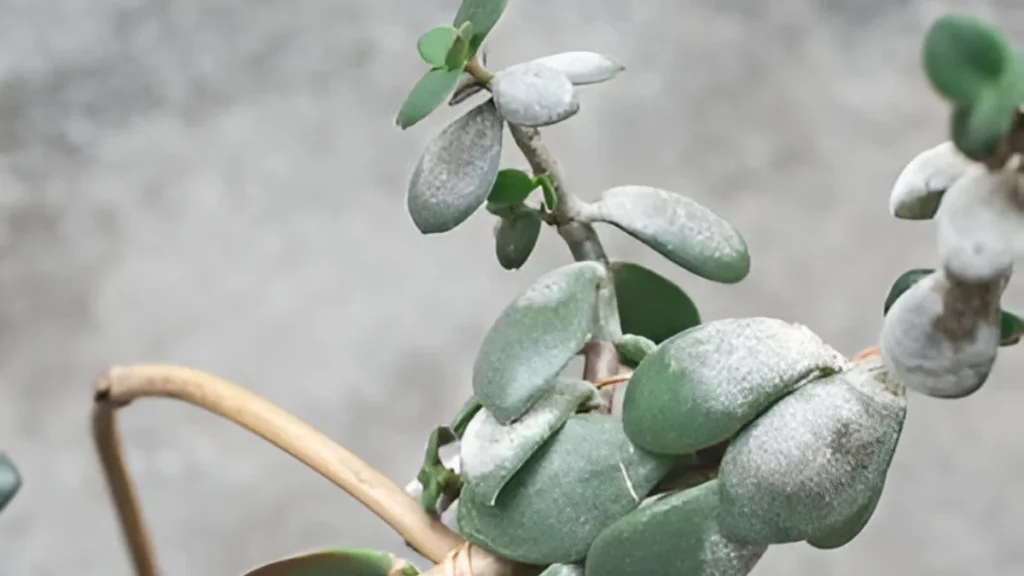
Jade plants are succulent plants that are usually referred to as money plants or lucky plants. The majority can withstand dry spells, intense light, and high temperatures. On the other hand, plant owners may be concerned when they notice white patches on their leaves—recognizing the reasons behind these white patches and the beauty of your jade plant. To learn the reasons behind white spots on jade plants and how to remove them, read this article in its entirety. 

  • A fungus may be the cause of the white spots. Additionally, fungal, dusty specks are probably powdery mildew. Initially, the leaves will have tiny, round white spots that grow across the entire plant. 
  • Geological development in the compost can happen to any of your potted plants as a result of their gradual nutrient absorption. especially after years of it being in the same pot! A mineral imbalance that results in insufficient nutrients to support a healthy plant can be caused by this. 
  • These stains are the remaining salt deposits on the leaves, which evaporate with the extra water. It’s not very thirsty for the crassula family of plants, and if you see any soft leaves or leaf drops, your plant is probably drinking too much water. 
  • Another reason is overfertilization. It is important to ensure that you are not “double feeding” if your compost contains slow-release fertilizer. However, it’s important to remember that these patterns do not damage the plant; they often only appear on the margins and tips of the leaves, not the entire plant. 

Pests, illnesses, or environmental conditions are some of the causes of white patches on jade plants. The following actions can be used to reduce white spots on your jade plant

Fungal diseases

  • Detailed monitoring is necessary to diagnose fungal infections. Application of fungicidal sprays made especially for decorative plants may be essential to therapy in situations where fungal infections have already begun. Jade plants can be free of the white patches linked to fungal infections in a well-ventilated atmosphere.

Infestations of pests

  • A major cause of white markings on jade plants is infestations of pests. Make sure your plant receives adequate air circulation and is not congested. Keep the leaves and stems clean regularly to get rid of dust and other bug-hiding places. To get rid of the white spots, carefully clean each leaf. An equal quantity of vinegar and water can be used for more stubborn stains. 

Rotting root:

  • Your plant may develop root rot if the white spots are accompanied by black or yellowing leaf patches. A common cause of this is overwatering. Let the soil dry up a little and stop watering your plant for a while.

Considering the Soil:

  • Plant growth may be hampered by the soil’s eventual compaction and nutrient depletion. Select a succulent-specific soil mix that drains well, usually consisting of a blend of sand, perlite, and potting soil. 

Heartburn: 

  • Sunburn could be the cause of the white patches if they are limited to the leaves that receive direct sunlight. Transfer your plant to an area with good, diffused light.

Periodic cleaning and trimming:

  • Maintaining the health and beauty of your jade plant requires regular pruning and cleaning. Since they can serve as a breeding ground for pests and diseases, remove any yellowed or shriveled leaves. This keeps the plant healthy overall and in its best possible shape for photosynthesis.

Repotting: 

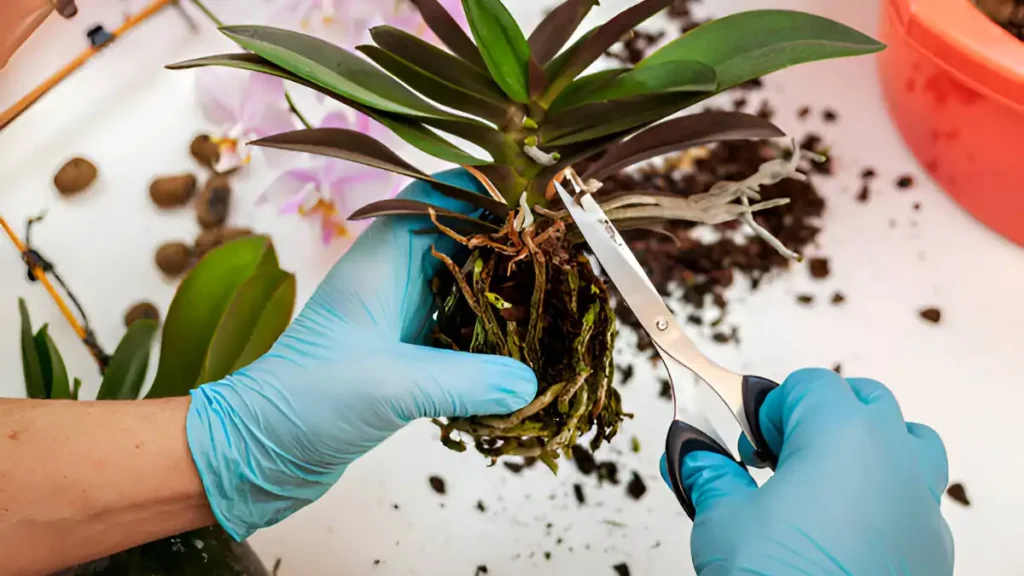
  • When repotting, choose a pot that is somewhat larger than the existing one. Remove any extra soil by shaking it off, look for any illness or rot in the roots, and cut as needed. After placing the plant in the freshly filled pot, lightly water it to settle the soil around the roots.

Seasonal care tips:

  • They benefit from periodic feedings with a balanced, high-quality feed during the growing season, which is usually spring and summer. They also need more regular irrigation. A plant might be harmed by overfeeding, so be sure to follow the directions on the fertilizer package.
  • Jade plants lessen how frequently they are watered in the fall and winter, allowing the soil to dry out more in between treatments. There is no need for extra nutrients during dormancy, so avoid fertilizing.

Jade plants, with their hardiness and appealing appearance, make great houseplants. They are not completely impervious to problems like white spots, though. Your jade plant can remain healthy and vibrant if you maintain ideal humidity levels, make sure it receives adequate light, prune it frequently, and clean it. A jade plant can bring prosperity and a touch of greenery to your house or place of business when given the proper care and attention for many years to come. The jade plant’s leaves won’t get white spots if the aforementioned instructions are correctly followed.

Certainly! If you’d like to learn more, please consider following our WhatsApp Channel: Harvest Gardening

Q1. Why are my jade leaves turning yellow?

A1:Overwatering causes jade plant leaves to frequently turn yellow, which causes root rot.

Q2. Why is my jade plant dropping leaves?

A2.  Your jade plant may be losing leaves because of overwatering, underwatering, or abrupt changes in light or temperature. Make sure the soil drains well, give it enough sunlight, and give it a modest amount of water.

Q3: How to propagate jade leaves?

A3: Cut a healthy leaf from the plant, allow it to dry for a few days until a callus forms, then put it on well-draining soil and water it sparingly until roots and new growth show up. This is how jade leaves are propagated.

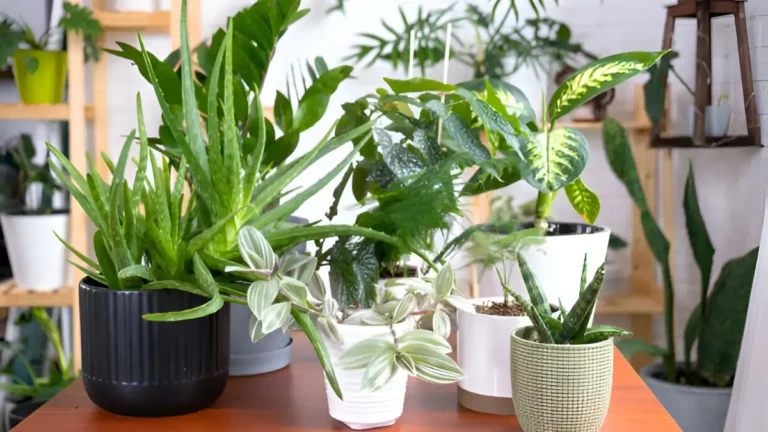
Growing indoor plants has become a popular way to improve the air quality and aesthetic appeal of living areas. Bright-light-loving varieties of all indoor plants are especially prized for their colorful growth and eye-catching appearance. This guide offers advice on how to take care of and enjoy some of the best indoor plants for bright light.

Plants sometimes seem to be best placed indoors in areas with patio doors or windows facing the south or west. Some well-known instances of indoor plants that adore bright light include.

Aloe vera:

Aloe Vera, which has several health benefits, needs lots of sunlight to develop healthily.

  • Use a sturdy terracotta pot for your aloe vera planting to support its top-heavy growth and promote airflow.  
  • Put your plant outside as the weather warms up in the summer to promote flowering, or position it in the bright light of a south-facing window.
  • Prefers arid weather, and avoids flooding. Fertilization is usually not necessary for aloe vera.

Philodendron:

Large plants like philodendron trees are indigenous to South America’s tropical states, including Brazil, Bolivia, Argentina, and Paraguay. 

  • The ideal conditions for the tree philodendron are areas with medium to bright indirect sunshine or dappled shade. 
  • When the top two inches of the soil become dry, water your philodendron tree. The soil should never be too wet, but it should be continuously moist. 
  • To promote robust, healthy development, use a balanced fertilizer once a month during the growing season. 

Papyrus: 

The natural habitat of the papyrus plant is Egypt’s marshy Nile River boundaries. It is a tall, stately shrub that can reach a height of eight feet. 

  • These plants can withstand some shade, particularly in extremely hot locations but prefer full sun.
  • Fertile soil is necessary. In shallow bodies of water, papyrus is a marginal aquatic plant that grows. You will need to water papyrus every day in any area that isn’t continuously damp.
  • Papyrus plants often don’t need fertilizer if they are grown in good, fertile soil.

Sansevieria:

This is a well-liked, resilient houseplant with stiff, sword-shaped leaves. It will tolerate low light, temperature changes, and periods of insufficient watering even though it likes bright light.

  • The ideal growing conditions for snake plants are eight to ten hours of indirect sunshine or a few hours of early morning sunlight.
  • Snake plants thrive in loose, well-drained potting soil mixes when kept inside. Watering the plant just once a month may be sufficient. Give it some water right away if you see that the leaves are dry and fragile.
  • Provide a balanced, slow-releasing fertilizer to your snake plant once in the spring and once in the summer. In the winter, avoid fertilizing.

Coral Cactus:

This sculptural, otherworldly-looking plant is the result of grafting two different kinds of succulents together. 

  • Position the cactus in a spot that receives four hours or more of direct sunlight each day, or in some shade.
  • When planting the plant, use cactus and succulent soil or light, well-draining soil. Water your garden frequently if the top two inches of soil appear dry. 
  • Apply fertilizer every month throughout the summer and spring. Stems growing out from the base should be pruned.

Alocasia:

Large heart- or arrow-shaped leaves that emerge from tuberous rhizomes characterize Alocasia, a popular indoor plant. Their leaves, however, are harmful to humans and animals, so if you have pets or children, avoid them completely. 

  • Bright indirect light keeps alocasia leaves from scorching, however, the kind and quantity of light required varies according to the species or cultivar.
  • Plant in well-draining soil in a slightly acidic container. When the soil is completely damp, water it, but cut back during the winter months when it is dormant. 
  • These are heavy feeders, especially the larger specimens. Therefore, while the plant is growing, feeding once or twice a month is a sensible approach. When your alocasia is dormant, stop feeding it.  
  • Take seasonal variations in light into consideration. Remember that during certain seasons, shading from outside trees and window awnings can obstruct the light reaching your interior plants. Try moving your plants to a brighter area of your house if they aren’t doing well, even for a few hours each day.
  • Regularly dust the leaves. Dust can accumulate on plants, particularly those with big leaves, which will make it harder for them to absorb light. To keep them dust-free, dust them with soft cloths, feather dusters, or moist microfiber towels. 

Adding indoor plants for bright light to your house or office can dramatically improve the environment. These plants not only provide aesthetic value to the room but also make it healthier and more comfortable. Enjoy the many advantages these lovely green companions have to offer by choosing the right plants and giving them the attention they need. 

Certainly! If you’d like to learn more, please consider following our WhatsApp Channel: Harvest Gardening

Q1. What are the best grow lights for indoor plants?

A1. The three types of grow lights that work best for indoor plants are fluorescent, HID, and LED. Depending on the particular requirements of the plants, each variety has advantages.

Q2. Does direct sunlight damage indoor plants that like direct sunlight?

A2. Indeed, direct sunshine benefits many indoor plants; nevertheless, excessive exposure, particularly through windows, can result in sunburn or leaf scorching.

Q3: What are the benefits of having large indoor plants?

A3: Huge indoor plants can lower stress levels, boost the aesthetic attractiveness of a room, and improve air quality. They can also aid in controlling humidity levels and fostering a cozier, more welcoming environment.

Q4: How often should I water indoor plants for bright light?

A4: Watering schedules vary depending on the type of plant and indoor environment. Bright light generally causes plants to dry out more quickly. When the top inch of soil feels dry, water it. Verify the soil’s moisture content regularly.

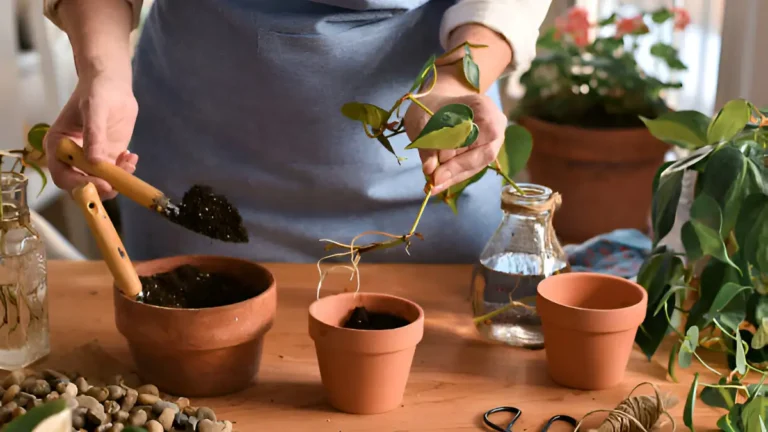
The most well-liked and low-maintenance houseplants are these pothos plants. You may grow new plants from a single parent plant by following a simple method called propagation. Water, soil, and sphagnum moss are the most common media used for the effective propagation of these tropical plants. We will go over all three approaches so you can choose the one that works best for you. To learn the full process, read this article from beginning to end.

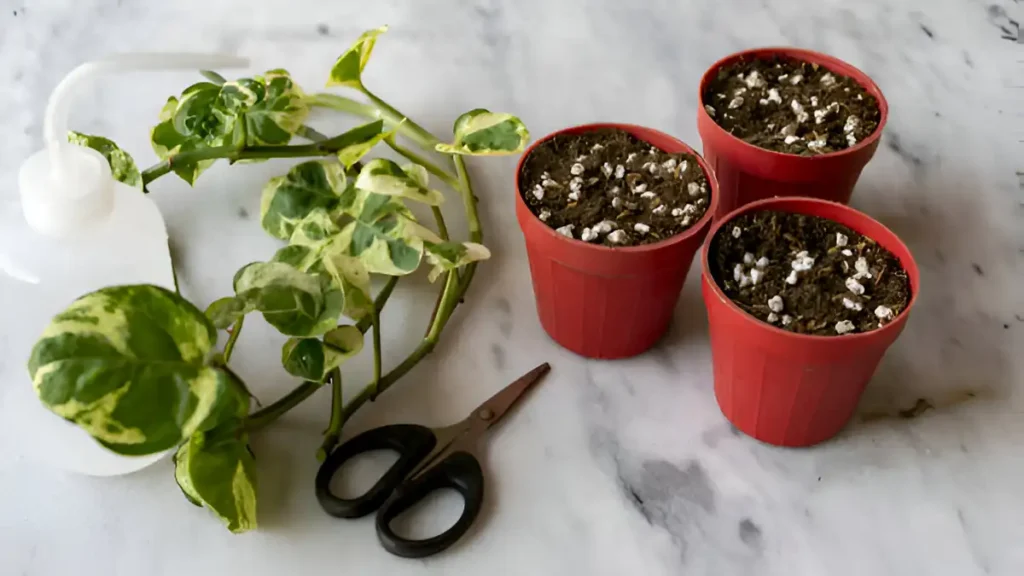
  • Take stem cuttings from your parent plant using a pair of sterile, sharp pruning scissors or shears. After taking your stem cuttings, you’ll need to remove the lower leaves from the cuttings since water will be at the bottom of the cuttings. Ensure that every cut has a minimum of one or two leaves at the tip.
  • Remove the bottom leaves from a pothole stem by cutting it. Once a week, replace the water in the little container with fresh water and add the stem cuttings. In a few weeks, roots will start to emerge from the stem’s nodes.
  • Transferring pothos cuttings-filled pure water into a glass container. In the ground, plant the rooted cuttings. Plant the cuttings in a little container with drainage holes and use a soil mixture that drains well. With indirect sunlight, place your cuttings in a bright area. 
  • Using a pencil, dig a hole in the ground. Insert the cutting that has been immersed in rooting hormone into the hole. Plant the stem cuttings in a clean, well-draining container with a pre-moistened potting mix. Push the cuttings into the soil, ensuring the top leaves are above the soil and the stem nodes are hidden.
  • For propagation, a pothos clipping is put in the dirt. Maintain Soil Moisture. A strong, indirect light source should be available for the potted cuttings, and they should be well-hydrated. 
  • You can also use perlite, vermiculite, or coarse sand initially when growing plants from cuttings, and then move them to potting soil once roots have grown.
  • Choose a pothos vine with multiple nodes and cut 4-6 inches long, 4-5 leaves, using sharp scissors or pruning shears. Remove the bottom two to three leaves to reveal nodes, and use rooting hormone to encourage quicker root growth. 
  • Make sure the nodes of the cutting are immersed by placing them in a glass of water. The glass should be placed in an area with strong indirect light. Maintaining freshness requires changing the water every few days.
  • Fill a tiny pot with well-draining potting soil. Make sure the nodes are buried when you plant the cutting in the ground. After giving the dirt a good soak, position the pot in an area with bright, indirect light.

The procedure of propagating pothos is simple and fruitful. Stem cuttings are a simple way to multiply it. You can have more of these lovely plants in your house by propagating pothos, which also make wonderful gifts to give to loved ones. You can easily increase the number of pothos plants in your collection by following these methods. 

Certainly! If you’d like to learn more, please consider following our WhatsApp Channel: Harvest Gardening

Q1.When to Propagate Pothos plant?

A1. When the plants are just starting to emerge the spring is the ideal time to propagate pothos. As opposed to propagating these plants in the fall and winter, when it is less likely to succeed, you can propagate pothos at any time during the growing season. 

Q2. How to propagate pothos cutting?

A2. Remove the lowest leaves from a 4- to 6-inch part of pothos, then plant the cutting in soil or water to begin the propagation process. Keep the medium moist until roots form, and make sure the node is buried in the soil or submerged in water.

Q3. What kind of lighting is ideal for propagating pothos?

A3. Bright, indirect light is ideal for pothos propagation. Low light might hinder the process of roots, while direct sunshine can be excessively harsh and harm the cuttings.

Q4: How to propagate pothos in sphagnum moss?

A4: Plant a cutting with at least one node into moist sphagnum moss, making sure the node is submerged and the moss stays damp but not soggy, to propagate pothos in sphagnum moss. under a few weeks, roots should start to grow if you keep the setup under indirect light.

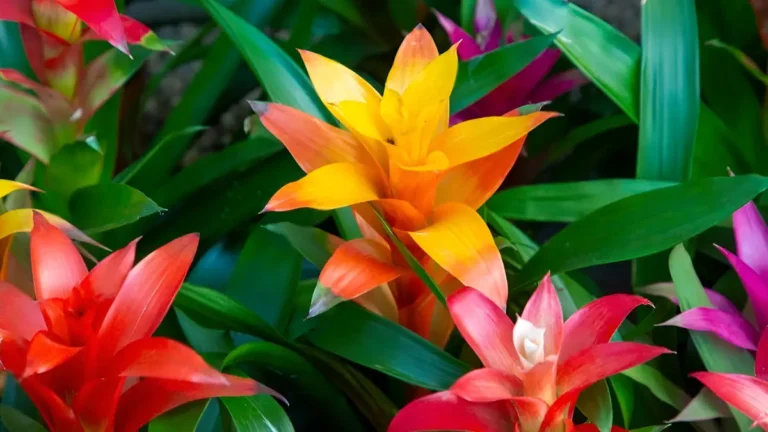
A genus of bromeliad-blooming plants Indigenous to the tropical regions of the Americas is called Guzmania. These plants have pointy leaves and a cup-shaped core where they store water. They grow in rosette form. Bromeliads and pineapples are members of the same plant family. Popular among interior decorators and plant aficionados, guzmania are valued for their spectacular look and very minimal maintenance requirements. Here’s what you should know if you want to cultivate a Guzmania garden.

  • Locating the Ideal Site. The type of bromeliad you have will determine how much sun exposure it needs.
  • The sun can scorch the foliage, so stay out of it. Positioned to get bright, indirect light during the day, certain species exhibit superior performance.
  • Add potting mix to the pot up to half full. As you place the plant in its new container, make sure that its base is either level with the soil’s surface or slightly above it. It’s crucial to select a porous mixture that drains properly if you plan to grow them in soil.

Watering

  • During the growing season, give the soil a good irrigation every one to two weeks, allowing it to dry out in between. For the winter, cut back on frequency to once every two or three weeks. Guzmania works best when kept somewhat dry. Plant loss and root rot are the outcomes of soggy soil.

Fertilizer

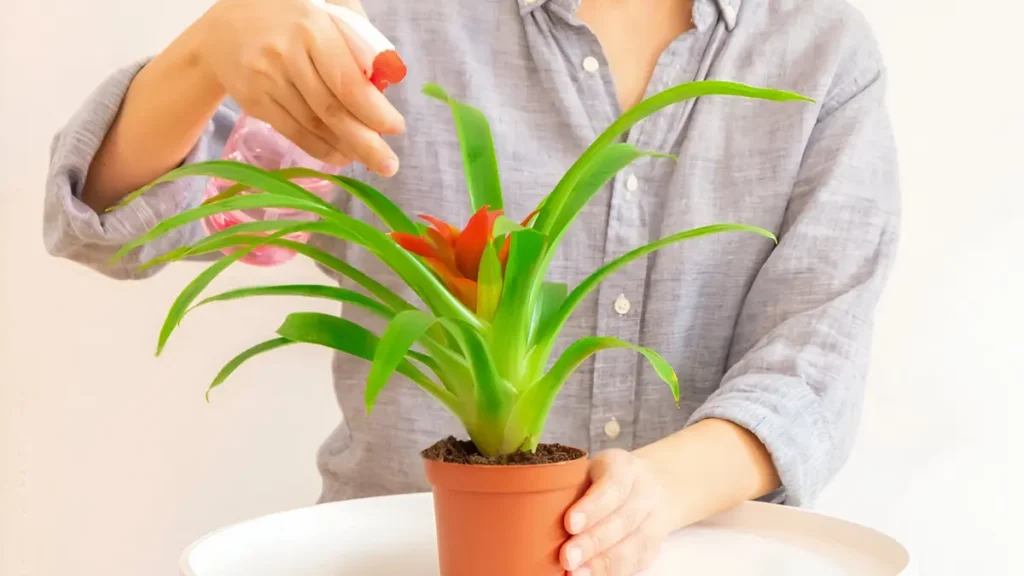
  • Feed an orchid fertilizer diluted to half strength once or twice during the growing season. Apply fertilizer to the leaves using a spray bottle. In the summer, when the plant is dormant and not actively growing, do not fertilize.

Pruning of guzmania 

  • Trimming is not necessary for guzmania bromeliads until they reach maturity and blossom. Leaves that are dead or damaged can be pulled off the main stem at any time of year by pulling them off or trimming them. As a result, the plant is encouraged to focus its energy on producing offspring.

Propagating 

  • Using your sharp, sterile instrument, cut the faded bloom close to the base and remove it from the mother plant. Plant it in loose, well-draining soil in 4-inch pots. Maintain a little damp but not saturated soil and gradually let in more indirect light for newly planted areas. 

Potting and Repotting 

  • Replace the soil with a new medium if it starts to get compacted. It could require an 8-inch pot, though clay and plastic pots work well. Repotting is rarely required because of its four to five-year lifespan.

Heating and Humidity 

  • Bromeliads from Guzmania do well in warm climates with lots of humidity. Place them somewhere where the evening low is still above 60°F. In summer, mist the plant to increase air humidity. Alternatively, the plant’s container could be set on a saucer that has water and pebbles in it.

Normal Pests and Plant Disorders

  • Pests that are common to most houseplants, such as mites, aphids, scale, and mealybugs, can be drawn to Guzmania, which can lead to stunting and plant yellowing and dropping. Remove the blackened, wet roots and repot in a new, dry medium if you suspect root rot.

Guatemal Guzmania species, which are native to Central and South America, love warm, humid climates and frequently grow as epiphytes on trees in rainforests. Their eye-catching, long-lasting blooms and diverse foliage make them popular in gardening. Worldwide, gardens and houses enjoy these plants for their decorative qualities, which also help to maintain the biodiversity of their original ecosystems. Give them the proper care as outlined in the above guidelines, and you can grow guzmania successfully. 

Certainly! If you’d like to learn more, please consider following our WhatsApp Channel: Harvest Gardening

Q1. Is bromeliad guzmania toxic to cats?

A1. Indeed, the bromeliad Guzmania is thought to be toxic to cats. If your pet enjoys eating plants, you can use safe repellent sprays for both your cat and the plant, or you can put your bromeliad out of reach. 

Q2. How to cultivate guzmania indoor?

A2. Guzmania should be grown indoors in bright, indirect light with soil that is routinely moist but not soggy. Direct sunlight should be avoided, and the leaves should be misted frequently. 

Q3. How long does guzmania plant live?

A3. Depending on the growing conditions, a Guzmania plant’s lifespan might range from four to seven years. 

Q4: How should I care for my guzmania plant after flowering?

A4: To promote fresh development, cut off the spent flower stalk after flowering. Keep the lighting bright and indirect and the humidity between 60 and 70 percent.

Q5: What are the ideal growing conditions for guzmania lingulata?

A5: Guzmania lingulata thrives in indirect light, high humidity, and temperatures between 60-80°F (16-27°C). It prefers well-draining soil and regular misting to maintain moisture without waterlogging.

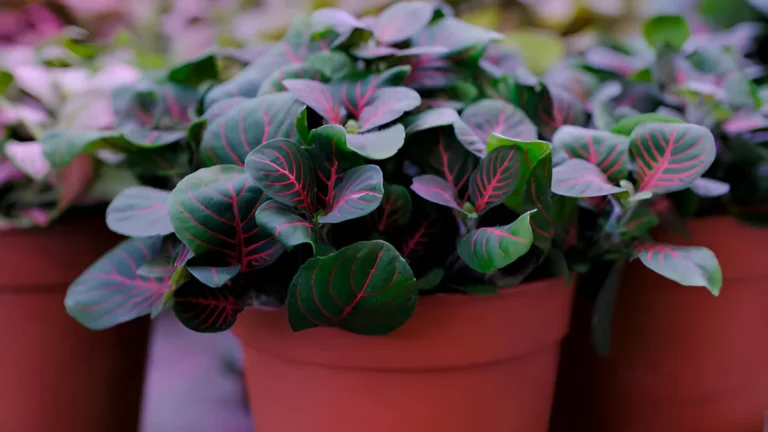
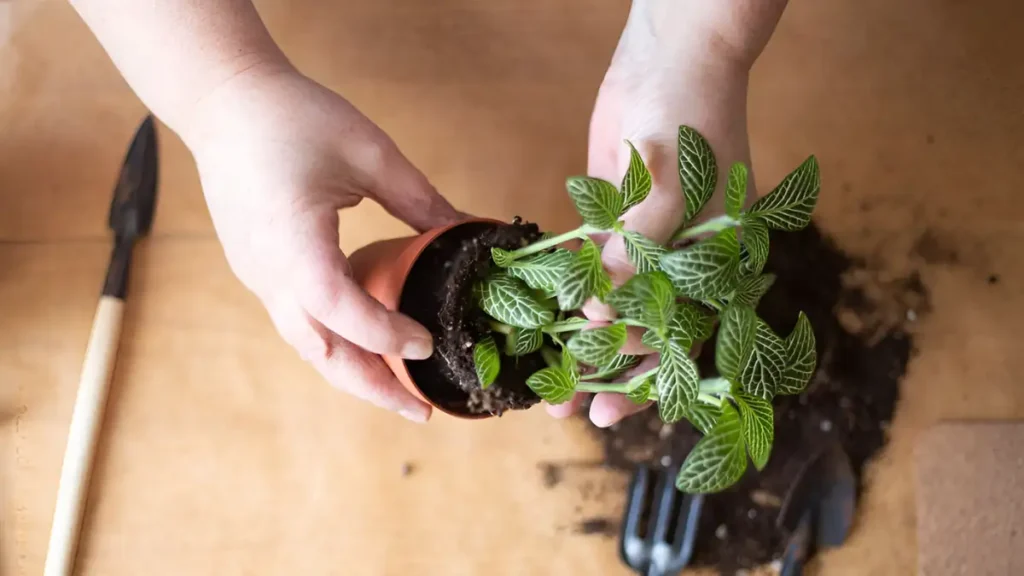
Fittonia is a genus of flowering plants of the Acanthaceae family, also referred to as nerve plant or mosaic plant. It is known by the scientific name Fittonia albivenis. Native to South America, Peru, and Columbia’s jungles, the nerve plant is a tropical evergreen. It is perfect for restrooms and other damp locations because it enjoys high humidity and thrives in low to medium light levels. The plant may be grown as a creeping ground cover in areas with filtered sun if the conditions are correct. This section will go into great length about cultivating and caring for fittonia.

Fittonia, despite its beauty, is a finicky and challenging houseplant to grow. It is necessary to spritz the plant frequently or set it in a tray with water and stones to maintain a high degree of ambient humidity and moisture levels for the plant.  

Fittonia care

  • Light:

It prefers bright, indirect sunshine, like that provided by windows facing north, and detests direct sunlight. Nerve plants thrive in additional humidity, so even with limited light, washrooms are excellent places to cultivate them. Fluorescent illumination works well for it.

  • Soil:

Fittonia thrives on regular potting soil that has a peat moss foundation. Its ideal soil pH is 6.5, which is slightly acidic. In addition to having good drainage, the soil should hold onto some moisture. 

  • Water:

Fittonia requires constant moisture at all times. When the top inch of soil appears dry, water the plant. Excessive watering might cause root rot. 

  • Fertilizing:

Provide a small amount of liquid fertilizer designed for tropical plants to plants every four to six weeks during their growing season. Cut back on feeding in the winter and fall.

  • Pruning:

When grown in the proper conditions, nerve plants grow swiftly. If the stems get lanky, prune them back to maintain a bushy appearance and promote new growth.

  • Propagating fittonia plant:

Take an angled stem cutting in late spring or early summer, ensuring that it includes two nodes at least, to propagate your nerve plant. After potting the cutting, ensure the soil is damp but not soggy. Roots should start to appear in two to three weeks.

  • Temperature and Humidity:

As nerve plants are indigenous to rainforests, dampness is a major attraction for them. A room humidifier could be useful in dry winter months or desert locations. Most cultivators discover that growing these gorgeous but finicky plants in terrariums or covered gardens, where they can receive the high humidity and soft light they adore, is the easiest way to raise these beautiful but finicky plants. 

  • Typical issues and their fixes:

Aphids, mealy bugs, and fungus gnats are examples of insects that cause issues. Treatment for infestations should begin right away. Neem oil or insecticidal soap should be applied directly on infestations.

In conclusion, fittonia is comparatively simple to maintain, as long as it gets the proper humidity and water levels. It can be a pleasant addition to terrariums and is suited for tiny places due to its modest size. All things considered, Fittonia is a lovely and easy-to-care-for plant that can liven up any interior space with a pop of color. You can successfully create a fittonia garden if you adhere to the aforementioned criteria. 

Certainly! If you’d like to learn more, please consider following our WhatsApp Channel: Harvest Gardening

Q1. Are fittonias toxic to cats?

A1. Fittonia does not poison cats, no. Cats can safely be around them.

Q2. How long do fittonias live?

A2. When given the right care, fittonias usually live for several years.

Q3. Why are my fittonia leaves turning yellow?

A3. The main causes of fittonia leaf yellowing are cold drafts, overwatering, and inadequate light. To avoid yellowing leaves, check the moisture content of the soil, make sure the plant receives indirect light, and keep it away from cold drafts.

Q4. Is fittonia an appropriate indoor plant?

A4. In bright indirect light, Fittonia performs incredibly well indoors. You can place the plant anywhere in the room as long as it doesn’t obstruct your view of the window if your room faces south or west.

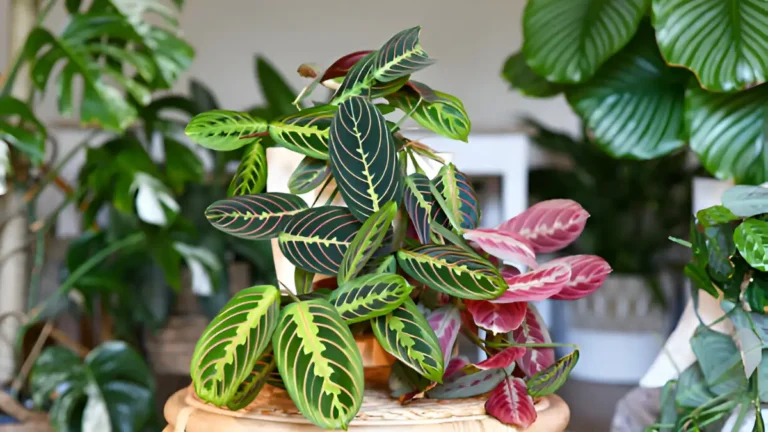
Prayer plants, scientifically known as Maranta leuconeura, are common tropical plants valued for their beautiful, ornamental leaves. These plants originated in the thick, humid jungles of Central and South America, especially Brazil, and are highly recognized for their unusual behavior and beautiful leaf patterns.

Light:

Bright, indirect light is ideal for prayer plant growth. Their leaves can become damaged by direct sunshine and lose their vivid colors and patterns from insufficient light. Position near a north or east-facing window.Deficient light levels and direct sunshine.

Soil:

The best soil for prayer plants is peaty, well-draining soil that holds moisture without becoming drenched. Utilize potting soil, perlite, and peat moss in combination.

Watering:

When the soil seems dry in the top inch, water it. This usually entails watering once a week or so. To avoid tap water’s harmful fluoride and chlorine, which can affect plants, use room-temperature, distilled, or rainfall instead.

Temperature and Humidity:

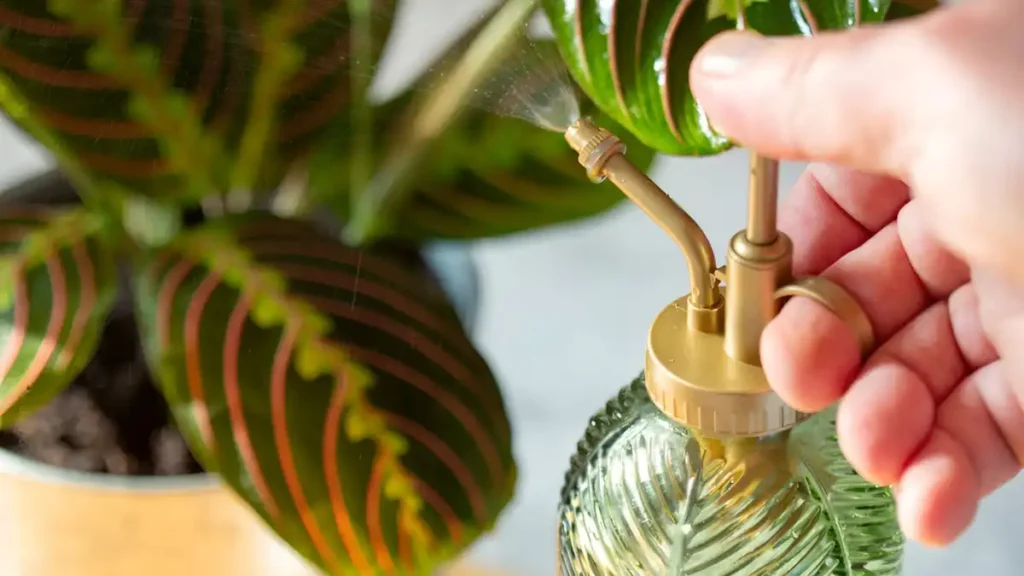
Keep the environment around your prayer plant warm and damp. Normal home temperatures, which range from 60 to 80 degrees Fahrenheit, are normally acceptable; however, you might need to feed your plant with more humidity. Your plant can benefit from an increase in humidity if you put a small humidifier close by or place it on a tray with water and little stones on it.

Fertilizing: 

During their growing season, prayer plants benefit from regular feeding. every four to six weeks throughout the summer and spring. Apply a half-strength solution of a water-soluble, balanced fertilizer.

Pruning of Prayer plant:

Trim away any leggy or dead growth. It is possible to multiply prayer plants by division or Stem cuttings should be soaked in water until roots format, then planted in soil.

Typical Problems and their solutions: 

 Usually an indication of overwatering. Adjust your watering schedule and make sure everything drains properly. Usually brought on by using tap water or low humidity. Turn up the humidity and use rainwater or distilled water instead. Aphids, mealybugs, and spider mites can all be drawn to prayer plants. Check your plant frequently, and if needed, treat it with insecticidal soap.

Tips for Seasonal Care:

Water the plant more frequently, but make sure it stays out of direct sunlight. Make sure the plant is not near any chilly drafts and water it less frequently. It’s very important to maintain humidity during the winter.

In conclusion, it can be said that by following these care guidelines, your prayer plant will flourish, showcasing its beautiful foliage and fascinating nightly movements. Whether you are a seasoned plant enthusiast or a beginner, prayer plants are a rewarding addition to any indoor garden.

Certainly! If you’d like to learn more, please consider following our WhatsApp Channel: Harvest Gardening

Q1: How to propagate the prayer plant?

A1: A prayer plant can be multiplied by dividing it during repotting or by rooting stem cuttings in soil or water.

Q2: What is the Red Prayer Plant?

A2: The tropical plant known as Maranta leuconeura, or “red prayer plant,” is distinguished by its eye-catching red veins on its leaves and the ability to fold its leaves upwards at night.

Q3: How to take care of a prayer plant at night?

A3: Consistent maintenance is beneficial for prayer plants. This care includes keeping the soil damp but not soggy, letting in indirect light during the day, and regulating the nighttime temperature between 65 and 75°F.

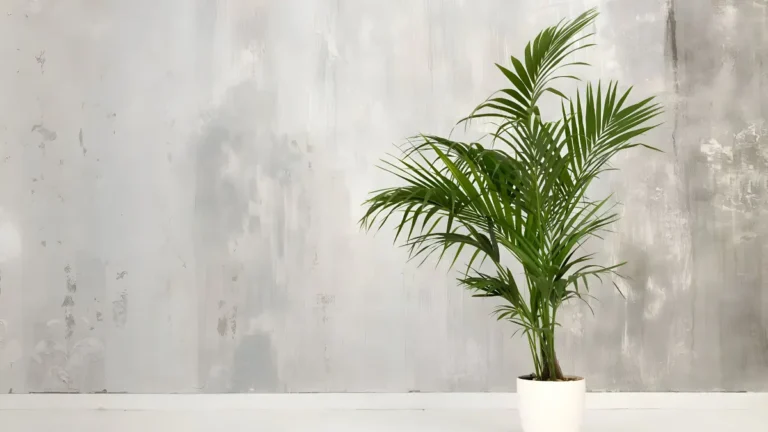
The Parlor Palm, or Chamaedorea elegans as it is scientifically named, is a well-liked houseplant that is appreciated for its sophisticated look and little upkeep. It comes from the southern Mexican and Guatemalan rainforests, where it grows best in warm, humid conditions. For this reason, it is a great plant to grow inside.

  • To avoid waterlogging, which might result in root rot, choose a pot with drainage holes, and make sure the potting mix drains well. Peat moss, perlite, and sand combined are a good combination.
  • When planting numerous palms in one pot, be sure to leave enough space for growth and place the first palm at its original depth.
  • Put your parlor palm in an indirect, well-lit area. Although it can withstand low light, it grows well in strong, indirect light. Leaf scorching can be possible in direct sunlight.
  • Higher humidity is preferred by parlor palms. Frequently mist the leaves or apply a humidity tray.
  • Keep interior temperatures between 18 and 27°C (65 and 80°F). Stay away from chilly drafts and abrupt temperature swings.
  • Keep the soil wet but not saturated. Water the soil when it appears to be the top inch dry.
  • Watering once a week is usually plenty, however the interior climate and season can affect this.
  • During the spring and summer growing seasons, fertilize your parlor palm once a month with a half-strength solution of a balanced, water-soluble fertilizer. Cut back on fertilizer in the winter and fall.
  • To maintain the health and aesthetic appeal of the plant, remove any yellow or brown fronds.
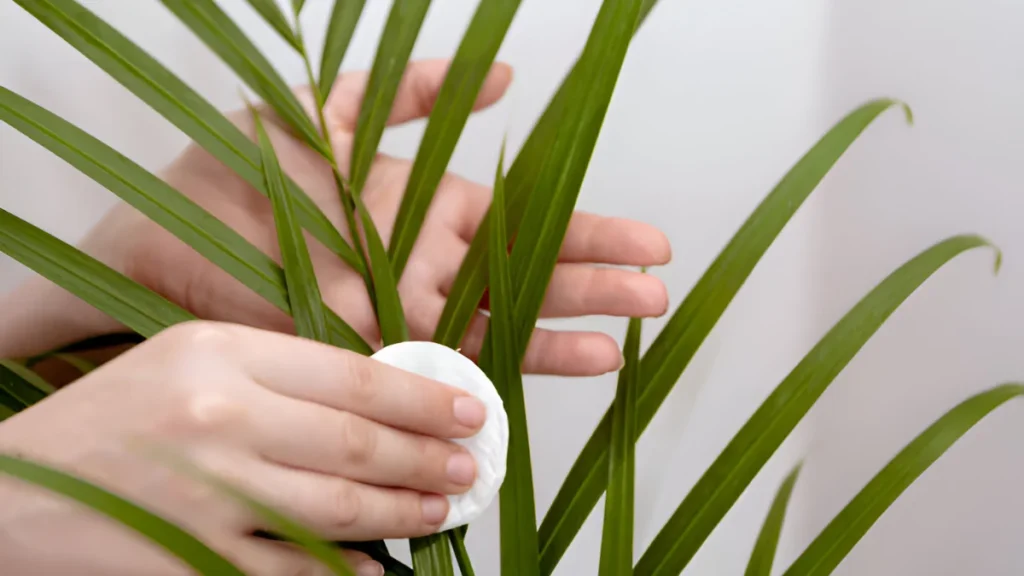
  • Periodically wipe the leaves to maintain their luster and health by removing dust.
  • Every two to three years or when it starts to get root-bound, repot your parlor palm. Select a pot that is one size bigger than the one you have now, and add fresh soil.
  • Seek out mealybugs, scale insects, and spider mites. Neem oil or insecticidal soap are good treatments for infestations.

Parlor palms demand careful consideration when it comes to light, humidity, watering, and general upkeep. Your parlor palm can flourish and bring a touch of refinement to your interior area if you give it the proper environment and maintenance.

Certainly! If you’d like to learn more, please consider following our WhatsApp Channel: Harvest Gardening

Q1: Are Parlor Palms safe for pets?

A1: Parlor Palms are a pet-friendly option for homes with dogs or cats since they are non-toxic to animals.

Q2: Can Parlor Palm flowers tolerate low light conditions?

A2: Yes, parlor palm flowers thrive in low light, which makes them perfect for inside spaces with little natural light. They do, however, also adjust well to indirect, stronger light.

Q3: My Parlor Palm’s growth is very slow. What could be the reason?

A3: Parlor palms may develop slowly as a result of inadequate light or nutrition. During the growing season, fertilize the plant once a month with a balanced, water-soluble fertilizer and place it in bright, indirect light.

The Asparagaceae family includes the yucca plant. Their tall, spiky leaves and distinct rosette structure are what set them apart. While some yucca plants grow into shrubs, others produce a trunk like a tree. In the south, where they receive lots of sunshine, yuccas thrive organically. However, cultivating yucca in a container garden is a wonderful way to bring the outside in. If you take proper care of your houseplants, you can prolong the life of these powerful figures. We will delve into the intriguing world of indoor yucca plant in this in-depth guide, and we’ll look at how they can completely transform the look and feel of your living area.

  • Light: Bright, indirect light is preferred by yucca plants. Avoid placing them directly in the sun, especially during the hottest part of the day; instead, place them close to a window where they may get enough of natural light.
  • Water: Although the indoor yucca plant can withstand drought, consistent watering will promote optimal growth. Watering the leaves directly could encourage fungal illness, so avoid doing so. When the top third of the compost is dry, it requires watering. In winter, cut back on watering by half.
  • Soil: Soil and compost are two of the main problems in caring for yucca plants indoors. Yuccas like well-draining soil, so choose compost wisely for your indoor plants. To provide proper drainage and avoid waterlogging, choose cactus or sandy soil.
  • Temperature and Humidity: Yuccas can tolerate a wide range of temperatures, though they do best in warmer climates. Although they can withstand dry indoor air, they will enjoy the odd mist in hot, dry weather.
  • Fertilizing: To promote healthy development, feed your yucca plant a balanced fertilizer throughout the spring and summer. For information on application rates, refer to the fertilizer package directions.

Understanding the unique requirements of indoor yucca plants and creating the right environment for growth is key to mastering their care. Indoor yuccas may flourish and make eye-catching accents to interiors when given the right care and attention to soil, light, temperature, and watering. You can easily maintain a gorgeous and healthy indoor yucca plant with little work if you adhere to these easy-care guidelines.

Certainly! If you’d like to learn more, please consider following our WhatsApp Channel: Harvest Gardening

Q1: How can I deal with pests on my indoor yucca plant?

A1: If your indoor yucca plant has pests like scale insects or spider mites, gently wipe the afflicted leaves with a moist cloth or sponge to get rid of the pests. Use neem oil or insecticidal soap as prescribed for severe infestations.

Q2: What are some indoor yucca plant problems?

A2: Overwatering can cause root rot in indoor yucca plants, while inadequate light can limit growth or cause yellowing of the foliage.

Q3: How do I propagate red yucca plant?

A3: You can multiply red yucca plants by dividing them or by gathering and sowing their seeds. The best times to divide plants are in the spring or early summer, although seeds can be put indoors in late winter and moved outside following the last freeze.

Q4: What are some common indoor yucca plant varieties?

A4: Yucca guatemalensis, or Guatemalan yucca, Yucca aloifolia, or Spanish bayonet, and Yucca elephantipes, often called spineless yucca or huge yucca, are some typical types of yucca plants grown inside.

The string of pearls plant (Curio rowleyanus) is a wonderful illustration of the diversity and variety seen in the world of succulents. The plant, often called string of beads, looks just like its namesake. Unique leaf structures that resemble peas adorn cascading stems, evoking the image of a delicate string of pearls. You’ve come to the perfect location whether you’re a novice wishing to add a distinctive plant to your collection or an experienced succulent fan. We’ll cover all you need to know in this guide to take care of and grow string of pearls (Senecio rowleyanus), an eye-catching succulent with trailing stems decorated with leaves that resemble beads.

Light

This string of beads, which belongs to the aster family, was discovered growing wild in South Africa’s eastern Cape. In its natural habitat, the plant grows in bright, sunny spots. String of pearls are a great houseplant that do best in bright, indirect sunshine. Especially during the hottest times of the day, place them close to a window so they may get sufficient of light without being directly exposed to the sun. A plant that receives insufficient light may grow lanky and lose its distinctive shape.

Water

Although String of Pearls is a drought-tolerant succulent, over watering can cause root rot. In between waterings, let the soil almost fully dry out. During the growing season (spring and summer), water sparingly, usually once every two to three weeks, and even less frequently during the dormant season (autumn and winter). To keep the fragile pearls from decaying, irrigate the soil directly rather than above.

Temperature

Temperatures between 70 and 80 degrees Fahrenheit (21-27 degrees Celsius) are optimal for growth. This plant does not withstand freezing temperatures and is hardy in zones 9 through 11 of the US Department of Agriculture’s hardiness map. In winter dormancy, the plant can tolerate temperatures as low as 50°F (10°C).

Soil

The soil around a string of pearls plant needs to drain extremely well. Choose a succulent potting mix or a well-draining cactus for your indoor plant. Sand or perlite can also be added to enhance drainage. Steer clear of dense, water-retaining soils since they may cause root rot.

Fertilizer

During the growing season, which spans the spring and summer, feed String of Pearls approximately once a month with a diluted, balanced liquid fertilizer. Don’t fertilize when the plant is dormant.

Pruning

As part of the upkeep of your string of pearls, you can occasionally discover that pruning plants is required to keep its size or attractiveness. It’s easy to accomplish this. Cut off any pearls that have fallen off the stems and any stems that have lost a significant amount of beads. Plants that are fuller and more compact will benefit from pruning back.

Pests and Diseases

Although overwatering can cause fungal problems and root rot, String of Pearls are comparatively resistant to pests and illnesses. Look out for symptoms of overwatering, such as burnt roots or mushy stems. These plants can also occasionally become infested by mealybugs and aphids; treat infestations as soon as possible with neem oil or insecticidal soap.

As we get to the end of our comprehensive guide to string of pearl plants, it is clear that these unusual succulents have low care needs and visual appeal. Fans may grow healthy specimens indoors or out by knowing their particular requirements for light, water, soil, and temperature. These lovely plants may beautify living areas with their cascading strands of spherical leaves, giving a touch of whimsy and beauty to any atmosphere with a little patience, care, and nurturing.

Certainly! If you’d like to learn more, please consider following our WhatsApp Channel: Harvest Gardening

Q1: What is a string of pearls plant?

A1: Senecio rowleyanus, commonly known as the string of pearls plant, is a succulent plant distinguished by its trailing branches that are covered in spherical, pearl-like leaves.

Q2: Can I propagate my string of pearls plant?

A2: Yes, a string of pearls plant is readily propagated by taking stem cuttings and letting them callus for a few days before planting them in a soil that drains properly. To encourage root development, make sure the cuttings are exposed to oblique sunlight and give them occasional mists.

Q3: How can I encourage my blue string of pearls plant to grow and trail?

A3: Enough sunlight, sporadic fertilization during the growing season, and frequent pruning to stimulate branching are all necessary to encourage growth and trailing. To promote trailing growth, you can also gently guide the stems along a support structure.

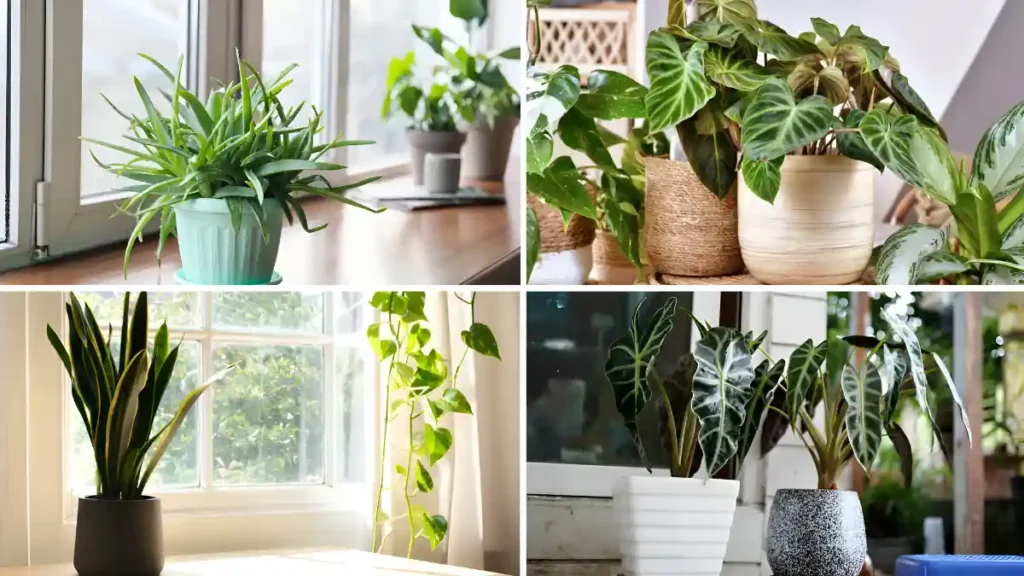
Including plants indoors improves the beauty of the area while also improving the air quality and general health. However, only some indoor spaces have abundant natural light, which might make some plant species difficult to keep alive. Thanks to the abundance of indoor plants that survive in low light, you can bring nature within, even in the darkest corners of your house or office. We’ll look at some of the best indoor plants for low-light conditions in this article.

  • Snake Plant (Sansevieria): is well-suited for low-light environments due to its resilience and capacity to flourish in nearly any lighting circumstance. It can easily withstand neglect and needs very little attention.
  • Chinese Evergreen (Aglaonema): These evergreens can withstand low light levels and have very pleasing variegated foliage. They require little upkeep as well.
  • ZZ Plant (Zamioculcas zamiifolia): Another hardy plant that can withstand low light, the ZZ plant has glossy, dark green leaves that are resistant to drought.
  • The Parlor Palm (Chamaedorea elegans) is a tiny plant that thrives in low light, making it a great choice for bringing some greenery into dimly lit areas.
  • Spathiphyllum, or peace lily, is a plant prized for its exquisite white blossoms and rich green foliage. They can function well in low light and contribute to air purification.
  • Philodendron: Heartleaf philodendron (Philodendron hederaceum) and sweetheart plant (Philodendron scandens) are two of the philodendron kinds that can grow in low light.
  • Spider Plant (Chlorophytum comosum): Spider plants are easy to maintain and can survive in low to moderate light levels. They are excellent for multiplication because they produce spiderettes, which are offshoots.
  • Pothos (Epipremnum aureum) is a versatile plant that can endure low light but also thrives in moderate to bright indirect light. It features heart-shaped leaves on cascading vines.

To summarize, choosing the best indoor plants for low-light situations can significantly improve the ambiance and air quality of your room. Upon evaluation of attributes including maintenance-friendliness, visual appeal, and ability to purify air, a few exceptional choices become apparent. Ultimately, it’s important to take into account aspects like your level of care commitment, personal tastes, and space limits when choosing indoor plants for low-light settings. Even the most gloomy areas of your house may come alive with greens when you choose the appropriate plants for them.

Certainly! If you’d like to learn more, please consider following our WhatsApp Channel: Harvest Gardening

Q1: Can I use artificial light for indoor plants in low-light conditions?

A1: Indeed, artificial light can be added to natural light to support indoor plant growth in low-light conditions. An increasingly common option for supplying the light spectrum required for plant growth is an LED grow lamp.

Q2: What are the best indoor plants for clean air?

A2: Peace lilies and snake plants are the finest indoor plants for cleaning the air. They help eliminate typical indoor pollutants like ammonia and xylene. Peace lilies effectively remove formaldehyde and benzene toxins, while snake plants filter out these pollutants renowned for their capacity.

Q3: What are the best indoor plants for health?

A3: Some of the greatest indoor plants for health are aloe vera, which is well-known for its air-purifying qualities and possible skin-soothing effects, and snake plants, which filter the air by eliminating pollutants.