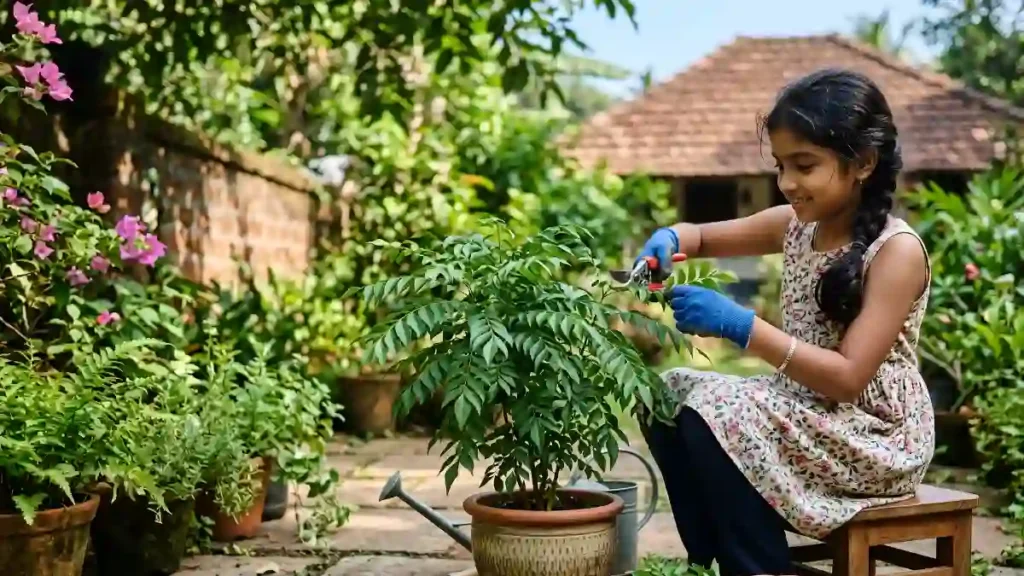
You’re on a path when you notice a beautiful flower you’ve never seen before. Or maybe something’s sprouting in your garden, and you have no idea if it’s a weed — or worse, something toxic. You pick out your phone, take a picture, and within seconds, you have a name, care instructions, and even a toxicity warning.
Welcome to the era of plant identification apps, which have never been smarter.
Whether you’re a seasoned horticulturist, a curious hiker, or a new plant parent, these apps have quietly become one of the most useful tools on your smartphone. In this guide, we break down everything you need to know: what they are, which ones are genuinely worth your time, and how to pick the right one for you.
What are plant identification apps?
Plant identification apps employ artificial intelligence (AI), primarily image recognition and machine learning based on millions of botanical photos, to identify plants from photographs. Point your camera at a leaf, blossom, bark, or even a seed, and the app will cross-reference visual data against enormous plant databases to provide a match, usually with a confidence percentage.
Modern apps go far beyond just naming a plant. The best ones offer:
- Care and watering guides tailored to your climate
- Toxicity alerts for pets and children
- Disease and pest diagnosis from leaf photos
- Invasive species warnings
- Community forums for gardening advice
- Offline modes for use in remote areas
The technology has matured significantly. Top apps now claim accuracy rates above 95% for common species, and even rare plants are increasingly within reach.
Why use plant identification apps?
For gardeners
Gardening has exploded in popularity over the past few years, and with more people growing their own food and curating home gardens, knowing what’s in your soil matters. Apps may help you detect sick-looking leaves before they spread, identify mystery seedlings that appear unexpectedly, and determine exactly what fertiliser or watering schedule a plant requires.
For hikers and nature lovers
Plant identification apps can also serve as safety tools when hiking. Knowing whether a fruit is edible or a plant is harmful may practically save lives. They also make wildlife walks more instructive and enjoyable, particularly for youngsters.
For new plant parents
The houseplant trend isn’t slowing down. New owners sometimes struggle to match a name to their green acquisition; applications address this problem immediately and walk beginners through maintenance procedures with no botanical knowledge necessary.

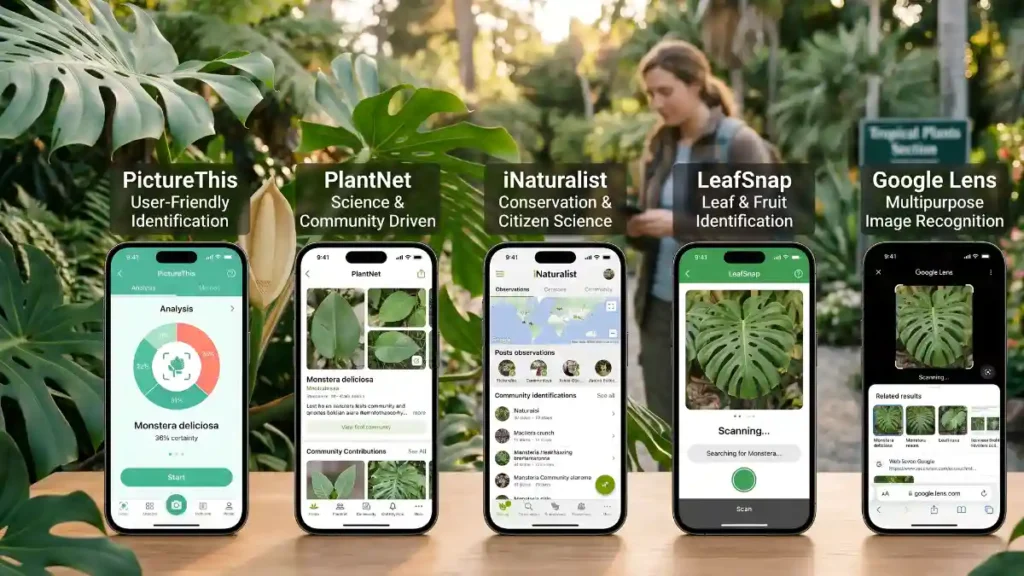
The 6 best plant identification apps in 2026
1. PictureThis — best overall
PictureThis is frequently rated as the most accurate and comprehensive plant identification app available. It recognises plants with remarkable precision, thanks to a database of over 1 million plant species and an AI engine improved over years of real-world use.
Standout features:
- Real-time identification with the camera viewfinder
- Detailed care reminders with push notifications
- Plant doctor tool for diagnosing diseases and pests
- Watering schedules and seasonal care advice
Best for: Plant parents, gardeners, and beginners who want an all-in-one solution.
Pricing: Free with limited identifications; premium subscription unlocks unlimited use.
2. PlantNet — best free option
PlantNet, created by a partnership of French research institutes, is a scientifically rigorous, community-driven software that is absolutely free to use. Although it lacks the polish of expensive programs, its botanical correctness for wild and native species is remarkable.
Standout features:
- Completely free with no paywall
- Identified by flower, leaf, fruit, or bark
- Contributes data to real scientific research
- Works well for European and North American flora
Best for: Budget-conscious users, students, and nature enthusiasts who want scientific reliability.
3. iNaturalist — best for community and science
iNaturalist is more than just an identification tool; it’s also a citizen science platform where your observations help to advance global biodiversity study. Naturalists and AI collaborate to crowd-verify identifications.
Standout features:
- Community verification adds a second layer of accuracy
- Connects users to local naturalist groups
- Documents sightings with GPS and timestamps
- Observations fed into global biodiversity databases
Best for: Hikers, citizen scientists, and anyone who wants their nature observations to mean something beyond their phone screen.
4. Seek by iNaturalist — best for kids and families
Seek is iNaturalist’s family-friendly branch, with a focus on safety, education, and gaming. Children earn badges for identifying various species, and no account is necessary.
Standout features:
- Real-time identification using live camera view
- Age-appropriate interface with no social features
- Challenges and badges to encourage exploration
- Works without an account — no data privacy concerns
Best for: Parents, teachers, and families exploring nature together.
5. LeafSnap — best for trees
If trees are your priority, LeafSnap is unrivalled. Developed by Columbia University, it specialises in recognising trees based on leaf form and contains an extremely extensive database of North American and European tree species.
Standout features:
- Precise leaf identification algorithm
- Detailed tree profiles, including ecology and timber use
- High-resolution image galleries for comparison
- Ideal for arborists and forestry students
Best for: Anyone with a specific interest in trees, forests, or dendrology.
6. Google Lens — best quick-glance tool
Google Lens isn’t a plant identification app, but it deserves to be on our list since it’s so convenient. Built into Android cameras and available for iOS, it identifies plants quickly and links directly to Google Search results for deeper research.
Standout features:
- No download required on most Android devices
- Instant results with Wikipedia and Google links
- Free with no subscription
- Useful for quick checks when you don’t have a specialist app open
Best for: Casual users who want a zero-friction option without installing another app.
How accurate are plant identification apps?
Accuracy is the first question everyone asks — and the honest answer is: it depends.
Top-tier apps like PictureThis and PlantNet routinely hit 90–97% accuracy for common species. Factors that affect results include:
- Photo quality — clear, well-lit, close-up images dramatically improve results
- Part of the plant photographed — flowers typically yield more accurate IDs than bare stems
- Geographic region — apps trained on North American and European data may struggle with tropical or rare species
- Species commonality — widespread plants are identified more reliably than obscure regional varieties
Tips for getting the best results from plant identification apps
1. Shoot in natural light. Avoid flash — it flattens texture and colour. Morning or overcast-day light is ideal.
2. Fill the frame. Get close. A leaf that fills 70% of the photo will ID far better than one in the corner.
3. Photograph multiple parts. Leaf, flower, stem, and fruit together give the AI more data to work with.
4. Note your location. Many apps use GPS data to narrow results to regionally plausible species, cutting out false matches from other continents.
5. Cross-check for safety. If you’re identifying something you plan to eat or handle, always verify with a second app or a local expert. No app is 100% infallible.
Are plant identification apps safe to trust for foraging?
This is critically important: use plant identification apps as a starting point, not a final authority for foraging.
Several examples have been documented worldwide when people used plant applications to identify wild mushrooms or berries and made hazardous errors. Apps are clever, but lookalike species—plants that superficially resemble each other but range greatly in toxicity—remain a barrier for AI.
If you forage, always:
- Cross-reference with at least two independent sources
- Consult a printed field guide specific to your region
- Join a local foraging or mycology group
- If in doubt, don’t eat it
Conclusion:
Plant identification apps have changed how individuals connect with the natural environment. What used to take years of study or a worn-out field guide now takes three seconds and a smartphone camera. Whether you’re saving a drooping houseplant, touring a national park, or educating youngsters about wildlife, there’s an app for that.
Begin with a free alternative like PlantNet or iNaturalist to investigate the concept, then consider upgrading to Picture.This is if you find yourself reaching for it on a daily basis. Your garden—and your curiosity—will reward you.
Certainly! If you’d like to learn more, please consider following us on WhatsApp, Facebook, Instagram, YouTube, Twitter, and Pinterest.
Frequently asked questions about plant identification apps
Q1: Can plant identification apps work offline?
A1: Some premium apps, including PictureThis (with a subscription), offer limited offline identification. Most free apps require an internet connection to query their databases. If you hike in remote areas regularly, check offline capability before downloading.
Q2: Are plant identification apps free?
A2: Many are free with limitations. PlantNet and iNaturalist are fully free. PictureThis, LeafSnap, and others offer free tiers with a limited number of daily identifications, with premium plans for unlimited use.
Q3: Can these apps identify poisonous plants?
A3: Yes — most plant identification apps flag toxic and poisonous plants prominently and warn about dangers to humans, pets, and children. However, always treat this as supplementary information and consult a medical professional or poison control centre in any suspected poisoning situation.
Q4: Do plant identification apps work for houseplants?
A4: Absolutely. In fact, houseplant identification is one of the most popular use cases. Apps like PictureThis excel here and provide detailed care schedules, watering reminders, and light requirement guides once a houseplant is identified.
Q5: Which plant identification app is best for beginners?
A5: PictureThis is the most beginner-friendly thanks to its intuitive interface, care guides, and notification reminders. Seek by iNaturalist is the top pick for younger users or families due to its gamified, account-free approach.


 Is Missing")

")