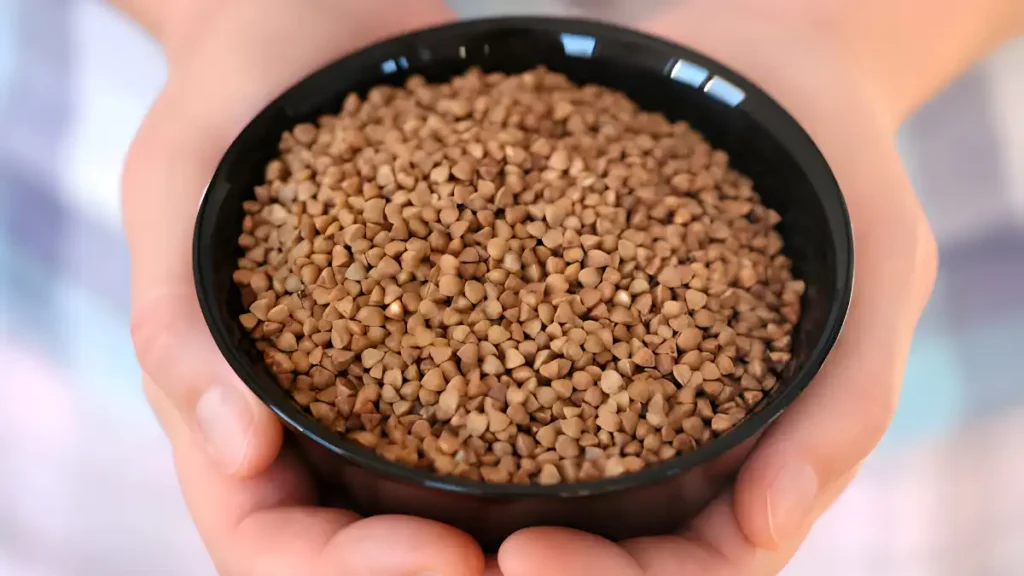
Author

Avery Smith

Browsing

One of the first crops to be produced, peas (scientifically known as Pisum sativum) are prized for their nutritious content and sweet flavor. Growing peas may be a wonderful experience, regardless of gardening expertise level. Peas are widely cultivated in home gardens and commercial farms due to their ease of growing and flexibility in culinary applications. Growing peas at home in containers is a delightful and accessible way to enjoy fresh, crisp peas right from your garden, even if you have limited space.

Picking the ideal type of peas

  • Select a pea variety that is appropriate for your garden’s climate and size. There are three primary varieties: snow peas, which are edible pods with nearly flat immature peas, snap peas, and shelling peas, which are for fresh consumption.

Best timing for growing peas

  • Plant peas as soon as the soil can be worked in the spring, as they prefer milder temperatures. Depending on your location, you can even plant them in late summer for a fall harvest.

Preparing the soil

  • Peas grow best in rich, well-drained soil that has a pH of 6.0 to 7.0. Dig a deep hole and add lots of organic matter (old manure, compost) to promote drainage and fertility.

Sowing peas

  • Directly sow pea seeds into the ground, allowing 1-2 inches between each one in rows that are 18–24 inches apart, or as required by the variety. Plant seeds 1 inch deep, then lightly cover with dirt. Consider installing a trellis or other support structure if you’re planting in rows so the vines can climb it.

Watering and mulching

  • Maintain a constant moisture content in the soil, particularly during germination and flowering. Water well to promote root development, but don’t overdo it, as wet soil might cause peas to rot.
  • Mulch the area surrounding the pea plants to help with soil temperature regulation, weed suppression, and moisture retention. Straw and shredded leaves are excellent examples of organic mulches.

How to support growing peas

  • Since pea plants are climbers, they will require assistance as they develop. Set up pea fences, trellises, or stakes for the vines to climb up and cling on. This lessens the chance of decay by keeping the pods from coming into contact with the ground.

Fertilizing for growing peas

  • Although they are light feeders, peas might gain from a well-balanced fertilizer when planted. Steer clear of fertilizers with high nitrogen content since they may promote excessive leaf growth at the price of pod development.

Management of Diseases and Insects

  • Pests include powdery mildew, pea moths, and aphids should be observed. Examine plants regularly, and if needed, apply natural pest control techniques like handpicking, insecticidal soap, or neem oil.

Gathering peas

  • The ideal time to harvest peas is when the pods are full and plump but still sensitive. Pick them frequently to promote continuous output. To prevent harming the plant, use scissors or squeeze the pods off the vine.

Growing peas is an incredibly fruitful activity with dual agricultural and culinary value. Growers can reap the benefits of a plentiful production of this adaptable legume by paying close attention to the planting, nurturing, and harvesting processes. Peas also bring nutrition to a variety of cuisines around the world and help maintain the health of the land by fixing nitrogen. In conclusion, cultivating peas is a worthwhile endeavor for both farmers and gardeners because it improves the soil, fosters sustainability, and results in more delicious meals.

Certainly! If you’d like to learn more, please consider following our WhatsApp Channel: Harvest Gardening

Q1: What type of soil is best for growing peas indoors?

A1: Peas like their soil to be loose, well-draining, and rich in organic materials. It is best to combine garden soil, compost, and either vermiculite or perlite.

Q2: What type of container is best for growing peas?

A2: Select planters with a minimum depth of 12 inches and a width that permits sufficient room for plant spacing. Excellent options for providing appropriate drainage and aeration for the roots are wooden crates, fabric grow bags, and terracotta pots.

Q3: Can I save pea seeds for next year’s planting?

A3: You can save pea seeds for the following season. Let certain pods on the plant mature all the way through until they become dry and brown. After that, take the seeds out of the pods, let them dry fully, and store them somewhere cool and dry.

Meta: Ready to take your garden to the next level? Explore our proven methods for growing peas and enjoy a fruitful harvest.

Once a specialized industry, mushroom farming has become more and more well-known due to its accessibility, sustainability, and the growing desire for fresh, organic produce. Growing mushrooms provides a satisfying experience and a source of nutrient-dense food, whether for home use or commercial endeavors.

Choose a method for growing mushrooms:

There are several ways to cultivate mushrooms: you can use kits, grow them outside or indoors, or even build a space specifically for growing mushrooms. Select a technique based on your available time, space, and commitment level.

Pick your mushroom types:

Select the varieties of mushrooms you wish to cultivate. Button, oyster, shiitake, and portobello mushrooms are among the common types that are grown at home. Every variety has different needs when it comes to growth environments.

Create an environment for growing mushrooms:

Dark, humid environments are ideal for mushroom growth. Using grow bags, containers, or even a separate growing chamber, you may need to create an appropriate environment depending on the approach you choose. Make sure the humidity is controlled and that ventilation is adequate.

Origin spores or spawns:

To begin the growing process, you will need to gather mushroom spawn or spores. Spores are the fungus’s reproductive cells, whereas spawn is just the “seeds” of the mushroom that have already begun to grow. Spells and spawns can be bought from specialized vendors or internet merchants.

Get the growing substrate ready:

Different growing surfaces are needed for different species of mushrooms. Typical substrates consist of compost, sawdust, straw, and coffee grounds. To prepare the substrate, follow the directions unique to the variety of mushrooms you have chosen.

Immunization:

After preparing your substrate, inject it with spores or mushroom spawn. To carry out this process, the spawn or spores must be mixed with the substrate and allowed to colonize it. During this stage, take appropriate hygiene precautions to avoid contamination.

Maintain the following conditions for growing mushrooms:

Keep an eye on and preserve the growth circumstances that your preferred variety of mushrooms requires. This entails sustaining the right temperature, humidity levels, and ventilation. If necessary, water the substrate regularly; however, do not overwater, since this can promote the formation of mold

Harvesting:

When your mushrooms are fully grown, harvest them. Depending on the species of mushroom, this can occur at different times, but generally speaking, it does so when the caps are fully formed but not quite ready to release spores. Cut the mushrooms near the base of the stem using a sharp knife.

In conclusion, cultivating mushrooms has a lot of advantages and can be a fulfilling, sustainable project. A flexible and eco-friendly solution is provided by mushroom cultivation, whether for commercial, culinary, or personal use. Furthermore, the growth of regional economies, trash reduction, and biodiversity conservation are all aided by the growing of mushrooms. Anyone may start growing mushrooms and enjoy all of their benefits if they have the necessary information, tools, and commitment.

Certainly! If you’d like to learn more, please consider following our WhatsApp Channel: Harvest Gardening

Q1: What are the basic requirements for growing mushrooms?

A1: For healthy growth, mushrooms need a good substrate (such as sawdust, straw, or compost), enough humidity, the right temperature, and darkness. To avoid contamination, sterile conditions are also essential.

Q2: Are there any potential health risks associated with growing mushrooms at home?

A2: Although it’s normally safe to cultivate mushrooms at home, you must handle them carefully to prevent contamination and any health hazards. It’s also important to be aware of any sensitivities before consuming mushrooms, as some people may be sensitive to specific varieties.

Q3: What conditions are needed for growing mushrooms in coffee grounds?

A3: In general, mushrooms need a humid atmosphere with good ventilation and indirect lighting. Keep the temperature between 18–24°C (65–75°F). Make sure the substrate is damp but not soggy.

Dahlias are brilliant and adaptable flowers that bring color and charm to any garden or outdoor environment. Dahlias are often cultivated in the ground, but they also grow well in pots, which makes them a great option for people who enjoy container gardening or have a small garden. You may have a gorgeous dahlia display on your patio, balcony, or porch with the correct upkeep.

Usually in the spring, these are best planted once the last frost has passed and the soil has warmed up. In most places, this occurs in late April or early May. Planting dahlias too early, while the soil is still cold, might result in poor growth or tuber rotting since dahlias need warm soil temperatures. Planting them earlier might be possible if you live in a warmer region, but you should always wait until there is no longer a chance of frost.

  • Select a pot with a minimum diameter and depth of 12 inches (30 cm). Ensure the bottom has drainage holes to avoid waterlogging, which can cause root rot.
  • It come in a variety of forms, including dwarf cultivars that are good for container planting. Seek a patio or compact kids so they don’t get too big or tall for your container.
  • Pick an organic-rich, well-draining potting mix. To enhance drainage, add some perlite or coarse sand. Garden soil should not be used in pots since it can compress and impede root development.
  • When the chance of frost has passed in the spring, plant your dahlia tubers in the pot. Plant the tubers approximately 4-6 inches (10-15 cm) deep, with the “eye” or growth tip facing upward. Multiple tubers should be spaced under the variety you’re growing’s recommended spacing.
  • Keep the soil wet but not saturated. When the top inch (2.5 cm) of soil feels completely dry to the touch, water deeply. Steer clear of overhead irrigation to avert fungal infections. When you water in the morning, extra moisture can escape over the day.
  • Dahlias thrive in full sun, so ensure they receive six to eight hours of direct sunlight daily, and provide afternoon shade in hot regions.
  • Throughout the growing season, give your potted dahlias a balanced fertilizer that is soluble in water every two to three weeks. 

For gardeners of all skill levels, growing dahlias in pots can be a fulfilling and joyful experience. This adaptable flowering plant adds a beautiful variety of colors, shapes, and sizes to any outdoor space or garden. Gardeners can successfully develop gorgeous dahlias in containers by following the necessary planting and care instructions, which include choosing the ideal pot size, using well-draining soil, and providing adequate sunlight and water.

Certainly! If you’d like to learn more, please consider following our WhatsApp Channel: Harvest Gardening

Q1: How do I propagate dahlias?

A1: Dahlias can be multiplied by taking stem cuttings during the growing season or by splitting tubers in the spring before planting. Plant divisions and cuttings in well-draining soil, ensuring they have viable growth points in each.

Q2: How do I prevent diseases and pests in dahlias?

A2: Dahlia illnesses and pests can be avoided by following excellent garden hygiene practices, such as clearing away trash, avoiding overhead watering to minimize fungal problems, and routinely checking plants for pest or disease symptoms. If necessary, you can also apply chemical or organic therapies; just be sure to properly follow the label’s directions.

Q3: What is the best time to plant dahlias?

A3: Dahlias grow best in the spring when the ground has warmed and the risk of frost has passed.

Hellebores lend a sense of elegance to any garden setting with their exquisite blooms and evergreen foliage. Hardy perennials like these are a favorite among gardeners since they require little care and are quite lovely. If you’re thinking about planting hellebores in your garden, you need to know when and how to plant them for optimal growth and establishment.

Planting hellebores is best done in early spring or early fall. These seasons give the plants ideal growing conditions without exposing them to severe temperatures. But these are hardy plants that can be planted any time of the growing season—just make sure the weather stays steady and mild.

Choosing the proper site

Select a good spot before planting them. Since hellebores prefer full to partial shade, they are perfect for planting behind trees or on the north side of buildings where there is minimal sunshine. To encourage healthy growth, make sure the soil is well-drained and rich in organic matter.

Getting ready to plant hellebores

To improve soil fertility and structure, prepare the planting area by loosening the soil to a depth of at least 12 inches (30 cm) and adding compost or aged manure. Clear the area of any weeds or rubbish to avoid competing with them for nutrients.

Planting method

Dig a hole that is just a little bit bigger than the hellebores’ root ball when planting them. Being cautious not to harm the roots, carefully remove the hellebore from its container. Make sure the top of the root ball of the plant is level with the surrounding soil before placing it in the center of the hole. To remove any air pockets, backfill the hole with dirt and gently press it down.

Watering and blending

Water the hellebore well after planting to let the dirt surrounding the roots settle. To encourage establishment, give regular watering during the first growth season. To keep moisture in the plant and keep weeds at bay, cover the base of the plant with a layer of organic mulch, like compost or shredded bark.

Upkeep of the hellebores plant properly

After they are established, hellebores require very little upkeep. To promote ongoing blooming, remove wasted flowers and, if necessary, cut back any damaged or yellowing foliage. Every few years, divide overgrown clumps to keep the plants vigorous and revitalized.

Defense against insects and diseases

Hellebores, despite being resistant to pests, can be affected by aphids, slugs, and fungal infections. To prevent infestations, monitor plants and use organic insecticides.

It is important to plant hellebores at the proper time and with the proper technique to guarantee their good establishment and growth. Frequent fertilizer and irrigation—especially during dry spells—will encourage robust growth and profusion of flowers. Hellebores are plants that may flourish in your yard and produce lovely blooms year after year with the right maintenance and attention to planting time and method.

Certainly! If you’d like to learn more, please consider following our WhatsApp Channel: Harvest Gardening

Q1: What are Hellebores flowers?

A1: Also referred to as Lenten roses or Christmas roses, these are perennial flowering plants that are indigenous to Europe and Asia. They bloom in a range of colors, including white, pink, purple, and green, and usually do so in late winter or early spring.

Q2: Can Hellebores flowers be grown indoors?

A2: Although they are usually grown outside, these flowers can be cultivated indoors in pots with the right maintenance. Give them regular watering, some indirect sunlight, and a potting mix that drains properly. Keep them away from drafts and very cold or very hot conditions.

A great method to make the most of available space and add greenery to even the smallest spaces is through vertical gardening. Vertical gardening gives you the ability to produce lush, vivid displays without taking up valuable floor space, whether you have a tiny balcony or a large backyard. We’ll look at some imaginative and useful vertical gardening ideas in this post to help you turn your area into a lush haven.

Planters installed on walls:

Installing wall-mounted planters is one of the easiest ways to begin vertical gardening. These can be as elegant as contemporary metal grids or as simple as reused pallets. Plant a range of plants in them to give any wall texture and color, from small herbs to trailing vines.

Arbors & trellises:

Essential components of vertical gardening are trellises and arbors, which offer support for climbing plants like beans, tomatoes, and cucumbers. Use them to create living walls by placing them up against walls or fences, or you can use them to mark off distinct zones in your garden. If you want your outdoor space to have more visual appeal, go for decorative patterns.

Hanging containers:

Make use of the vertical space over your head by suspending baskets from pergolas, tree branches, or even ceilings. Fill lightweight baskets with appropriate drainage with cascading plants such as petunias, ferns, or ivy. In addition to adding visual interest, hanging baskets give your garden a sense of depth.

Hydroponic systems for vertical gardening ideas:

Vertical hydroponic systems are a practical option for urban gardeners or those with little outside area. These systems are perfect for balconies, patios, or even indoor spaces because they grow plants without soil by using water-based nutritional solutions. Grow a range of herbs, leafy greens, and strawberries in a vertical garden to get the most produce in the least amount of room. Hydroponic gardening is an effective and sustainable method of farming that has several advantages, including higher yields, less water use, and more control over the health of the plants.

To sum up, vertical gardening provides a flexible and room-saving way to grow plants in confined spaces. These vertical gardening ideas will motivate you to create a lush haven in your home. Its many advantages include optimizing green areas, improving appearance, and making upkeep simple. Adopting vertical gardening is a highly satisfying undertaking for gardeners of all skill levels because it not only adds vibrancy to environments but also encourages sustainability and builds a closer connection with nature.

Certainly! If you’d like to learn more, please consider following our WhatsApp Channel: Harvest Gardening

Q1: Can I create a DIY vertical garden?

A1: Yes, vertical gardens built at home are both common and adaptable. Online resources abound with guides and inspiration for building vertical gardens out of inexpensive or recycled materials. Just make sure your plants have enough drainage and support.

Q2: Can you share some vertical gardening ideas for small spaces?

  • Make a vertical herb garden using a hanging shoe organizer; this is ideal for tiny balconies or kitchen windows.
  • For a space-saving gardening solution, turn an old wooden pallet into a vertical planter by adding soil to each level and adding tiny flowers or succulents.

Exploring the fastest growing vegetables can help you achieve a quick and rewarding harvest, perfect for impatient gardeners or those with shorter growing seasons. Do you want to see immediate improvements in your garden? Planted vegetables that overgrow yield a plentiful crop quickly. These veggies will surprise you with their quick development and mouthwatering flavors whether you’re an experienced gardener or a novice. Look at some of the fastest-growing vegetables you may begin planting today for garden success.

  • Bok Choy (Pak Choi): Approximately 6 to 8 weeks after sowing, this rapidly growing Asian green is ready for harvesting.
  • Baby Carrots: In the square-foot garden, we harvest baby carrots 30 to 40 days earlier than regular carrots after planting. We rotate crops every season in different sectors to prevent soil depletion and pest problems.
  • Kale: We prevent soil depletion and pest problems by rotating crops every season in different sectors.
  • Arugula: This leafy green can grow quickly and people can harvest it in four to six weeks after sowing. Arugula is usually grown outside, but you can grow arugula indoors in the comfort of your own home.
  • Cucumbers: Pick bush-type, compact varieties that are specially bred to grow fast. However, proper fertilization is required for your cucumber plants. You can start picking fresh, crisp cucumbers in just 50-60 days if you meet the necessary conditions. Support vining varieties to make the most of available areas and produce more.
  • Lettuce: After sowing, varieties such as butterhead and looseleaf lettuce can be harvested in 3–4 weeks.
  • Radishes: One of the veggies that mature the fastest is the radishes, which may be harvested in as little as three weeks. These crunchy, spicy treats are ideal for giving salads and sandwiches a flavor boost. Radish seeds can be planted straight in the ground and will sprout in a few days.
  • Green Onions: These onions grow fast and you can pick them in about 3 to 4 weeks, or when they get to the right size.

Finally, choosing the fastest growing vegetables for your garden will greatly improve your gardening results. Always keep an eye on your plants, give them enough water and nutrients, and take quick action to resolve any problems that may come up. You may increase the productivity of your garden and reap the rewards of a plentiful crop of quickly growing veggies with careful planning and attention to detail.

Certainly! If you’d like to learn more, please consider following our WhatsApp Channel: Harvest Gardening

Q1: Are the fastest growing vegetables suitable for container gardening?

A2: Yes, a lot of the veggies that grow the fastest, especially the small ones, do well in containers. Just make sure the containers have sufficient area for roots to grow and proper drainage.

Q2: What are some of the fastest growing vegetables indoors?

A2: The veggies that grow the fastest inside are green onions, lettuce, spinach, radishes, and microgreens.

Q3: What are some of the fastest growing vegetables from seed?

A3: Radishes and lettuce varieties like looseleaf and mesclun mixes grow the fastest from seed, with radishes ready to harvest in just 3-4 weeks and lettuce in about 4-6 weeks after planting.

Ginger, with its strong aroma and numerous culinary applications, is a popular spice and a plant that can be readily grown in your yard or inside. How to grow ginger can be a satisfying and joyful activity, regardless of your level of gardening experience. With its luxuriant foliage and lovely blooms, it not only provides you with fresh ginger for cooking and herbal medicines, but it also gives your garden a hint of tropical charm.

  • Begin by selecting a robust ginger rhizome from a reputable supplier or supermarket. Examine rhizomes that are firm, fat, and have produced growth buds or eyes.
  • To promote sprouting, immerse the ginger rhizome in water for the entire night before planting. This facilitates the growth process’ activation.
  • Depending on the climate where you live, you can grow ginger indoors or outside. Choose a broad, shallow pot with adequate drainage holes if growing indoors. If cultivating outside, pick a spot with partially shaded soil and good drainage.
  • Add rich, well-draining potting soil to the pot. The top of the ginger rhizome should be just below the soil’s surface when it is positioned horizontally in the ground, with its eyes facing upward. Dust it with soil.
  • Keep the soil wet but not saturated. After planting, give the ginger a little watering, and then give it regular watering thereafter. Refrain from overwatering as this can cause decay.
  • When planted outdoors, ginger prefers partial sunlight; when grown indoors, it prefers bright, indirect light. Make sure the plant gets four to six hours of sunlight every day.
  • Warm temperatures between 75°F and 85°F (24°C and 29°C) are ideal for ginger growth. Keep it out of the cold and away from anything below 50°F (10°C).
  • During the growing season, provide vital nutrients to the soil every few weeks by spreading an organic compost or balanced fertilizer.
  • Lightly mulch the soil’s surface to help keep it moist and prevent weed development. Straw and shredded leaves are excellent examples of organic mulches.
  • When the ginger plant is ripe, which is normally after 8 to 10 months of growth, it can be harvested. Dig around the rhizome carefully, removing some while leaving some for future growth. Ginger harvested can be preserved for later use or utilized fresh.

Finally, for both gardeners and aficionados, learning how to grow ginger may be a gratifying experience. It is a fairly low-maintenance plant that grows well indoors in colder climates or warm, tropical climates. Ginger is also a useful addition to any garden due to its flexibility in culinary, medicinal, and ornamental applications. Anyone may successfully plant ginger and reap its many advantages with the right care and attention. knowing how to grow ginger can transform your gardening experience and enhance your culinary creations.

Certainly! If you’d like to learn more, please consider following our WhatsApp Channel: Harvest Gardening

Q1: When is the best time to growing ginger?

A1: Under the right circumstances, ginger can be planted indoors all year long. Wait until after your area’s last frost before planting outside.

Q2: How to grow ginger at home?

A2: To cultivate ginger at home, put a ginger rhizome in soil that drains well and gets some sunlight. Verify that the soil is moist but not drenched. Ginger may be grown outside in a protected place but needs warmth.

Q3: What kind of soil is best for growing ginger indoors?

A3: Utilize a potting mix that drains well and is high in organic materials. For optimal drainage, potting soil combined with sand or perlite works well.

Q4: How to grow ginger in water?

A4: A fresh ginger root should first be soaked for a full night before being placed in a shallow dish of water with its eyes facing up and kept in a warm, bright position. The water should be changed often until roots and branches start to develop.

One of the easiest and most satisfying veggies to raise in your yard is radishes. Their flavor is sharp and spicy, giving salads, sandwiches, and other meals a delicious punch. Growing radishes successfully is both doable and satisfying, regardless of gardening experience level. You can reap the rewards of an abundant crop of these colorful root vegetables with the correct methods and a little perseverance.

  • Choose a kind of radish that will grow well in your climate. There are other kinds to choose from, such as winter, summer, and spring variants.
  • Loose, well-drained soil with lots of organic matter is ideal for radishes. To prepare the soil, loosen it down to a minimum depth of 6 inches and add old manure or compost to provide nutrients.
  • Sow the radish seeds straight into the garden bed. Plant the seeds in rows 6–12 inches apart, ½ inch deep, and 1–2 inches apart. Make sure the soil is properly hydrated after planting.
  • Keep the soil’s moisture content consistent without letting it get too wet. Particularly in the early stages of germination and root development, radishes require uniformly damp soil. To avoid leaf diseases, don’t water your leaves from above.
  • Light fertilization is adequate for radishes, provided the soil is well-prepared. A compost or balanced fertilizer side dressing can accelerate growth mid-season.
  • Remove radish beds to reduce weed competition, use mulch to prevent weed development, or regularly hand-pull weeds to maintain healthy plants.
  • Remove any weeds from the radish bed to lessen competition for water and nutrients. Use mulch to prevent weed development, or pull weeds regularly by hand.
  • Radishes develop 3-4 weeks post-sowing, reach a diameter of about an inch in roots, and should be harvested radish immediately.

Growing radishes successfully needs attention to several essential variables, including proper soil preparation, adequate watering, timely thinning, and pest and disease prevention. With these tactics, you can enjoy a consistent supply of tasty radishes throughout the growing season.

Certainly! If you’d like to learn more, please consider following our WhatsApp Channel: Harvest Gardening

Q1: When is the best time to growing radishes?

A1: It’s better to grow radishes in early spring or late summer/early fall since they prefer chilly temperatures.

Q2: What type of soil do you prefer for growing radishes?

A2: Loose, well-draining soil with lots of organic matter is ideal for radishes. A pH of 6.0 to 7.0 in sandy loam soil is good for their growth.

Q3: What type of container is best for growing radishes?

A3: To allow for radish roots, choose containers that are at least 6 to 8 inches deep. Pots made of clay or plastic with holes for drainage work well. Additionally, window boxes and repurposed containers like buckets and wooden crates can be used.

Q4: Can I grow radishes in containers?

A4: Growing radishes in pots is successful.

Learning how to grow sunflowers can add a touch of sunshine to any garden. Sunflowers are a delight to grow as well as a pleasure to behold with their vivid colors and tall stalks. Growing sunflowers may be a gratifying and satisfying hobby for anyone, regardless of gardening expertise level. These happy flowers can flourish in gardens, on balconies, or even in pots indoors with the right maintenance, adding a little sunshine to any area. Join us on this trip as we discover how to grow sunflowers.

  • Select a sunflower variety appropriate for the size and climate of your garden. Dwarf Sunspot, Lemon Queen, Velvet Queen, and Giant Russian are common types. When choosing seeds, take into account elements like bloom size, height, and color.
  • Select a location in your garden that gets at least 6 to 8 hours of direct sunshine every day for sunflowers, as they love full sun.
  • Sunflowers like their soil to have a pH of 6.0 to 7.5 and to be well-drained. To enhance fertility and drainage, till the soil to a depth of around two feet and supplement it with aged manure or compost before planting.
  • Sunflower seeds can be started inside and then transferred, or they can be placed directly into the ground. If beginning indoors, plant seeds in biodegradable pots two to four weeks before the last anticipated date of frost. Wait until the risk of frost has passed and the soil has warmed to at least 55°F (13°C) before planting directly outside. Depending on the kind, plant seeds 6–12 inches apart and 1 inch deep.
  • During the germination stage, keep the soil moist but not waterlogged for seven to ten days. Sunflowers can withstand some drought after they are established, but they will need frequent watering when the weather gets dry. Mulch should be applied to the plant’s base to keep moisture in and keep weeds at bay.
  • To keep tall sunflower types from tipping over in severe winds, they may need to be staked or supported. To support the stems as they grow, set up stakes or a trellis.
  • Although sunflowers don’t require much fertilizer, planting time is a good time to give them a balanced fertilizer treatment. Steer clear of overfertilizing, since too much nitrogen can encourage lush foliage at the price of producing flowers.
  • Keep a frequent eye out for common pests like caterpillars, snails, and aphids on sunflowers. To manage infestations, hand-pick pests or apply organic insecticidal soap. Rotate your crops and maintain good garden hygiene to stop the growth of soil-borne illnesses.
  • Sunflowers mature between 70-100 days, with firm, plump seeds and yellow or brown flower heads. Harvest when heads are attached, dry upside down, and store seeds in cool, dry conditions for later use or eating.

To summarize, mastering the art of how to grow sunflowers takes careful attention to a variety of aspects, including soil preparation, sunlight exposure, a watering schedule, and insect management. Gardeners may grow vivid sunflowers that enhance the beauty and happiness of any landscape by following the instructions provided in this handbook.

Certainly! If you’d like to learn more, please consider following our WhatsApp Channel: Harvest Gardening

Q1: How to grow sunflowers from seeds?

A1: Sunflower seeds should be planted in well-drained soil in a sunny location, watered frequently, and exposed to lots of sunlight for best growth.

Q2: When is the best time to plant sunflowers?

A2: Sunflowers grow best when planted in late spring or early summer, which is usually beyond your area’s last frost date.

Q3: How to grow sunflowers in a pot?

Q3: Sunflower seeds should be planted one inch deep in a large container with well-draining soil, and they should get at least six hours of sunlight each day to thrive in a pot.

You may find everything you need to prepare homemade fertilizer in your kitchen and yard, which can help you achieve lush, colorful plants. These homemade mixtures save money, encourage sustainable gardening methods, and lessen the need for dangerous pesticides.

Homemade fertilizer made from banana peels:

  • Potassium is abundant in banana peels, encouraging plants to blossom and bear fruit.
  • To make a potassium-rich liquid fertilizer, just slice up banana peels and bury them around the base of your plants or soak them in water for a few days.

Using compost Tea:

  • For your plants, compost tea is like liquid gold because it offers a variety of nutrients in an easily absorbed form.
  • Fill a bucket with water, then top it off with compost. Stir it once in a while as you let it steep for several days. Use the nutrient-rich liquid that remains after straining out the sediments to water your plants.

Fish emulsion fertilizer:

  • A powerful fertilizer high in phosphorus, nitrogen, and trace minerals is fish emulsion.
  • Fish heads or leftovers should be blended with water until liquefied. To fertilize your plants, strain out any sediments and dilute the mixture with water.

Homemade Fertilizer with eggshells:

  • Calcium from eggshells is excellent for preventing blossom end rot in tomatoes and peppers.
  • Dried eggshells can be ground into a fine powder and added to the soil before planting, or they can be sprinkled around the base of your plants.

Fertilizer made of weed tea:

  • Make good use of those annoying weeds by converting them into fertilizer rather than throwing them out.
  • Add a good handful of weeds to a bucket of water. For a few weeks, let them break down, stirring now and then. Use the resulting “weed tea” as a plant food by diluting it with water.

You may lessen your need for chemical fertilizers and provide your garden with natural, nutrient-rich solutions by using these homemade fertilizer tips. Try out a variety of recipes and methods to see what suits your plants and soil the best.

Certainly! If you’d like to learn more, please consider following our WhatsApp Channel: Harvest Gardening

Q1: Can I fertilize any kind of plant with homemade fertilizer?

A1: A vast range of plants, including decorative plants, fruits, vegetables, and flowers, can be fertilized with homemade fertilizer. However because overfertilization can damage plants, it’s imperative to use it sparingly. It’s also a good idea to investigate your plants’ needs before applying homemade fertilizer, as some delicate plants could need particular kinds of fertilizer.

Q2: What are the benefits of using homemade fertilizer?

A2: A few advantages of homemade fertilizer are affordability, sustainability, and the capacity to adjust nutrient levels to meet the requirements of certain plants.

Q3: Can I use coffee grounds as homemade fertilizer for indoor plants?

A3: It is possible to use coffee grinds as indoor plant fertilizer. All you have to do is scatter the coffee grounds around the base of your plants, making sure they don’t bunch together. Nitrogen, potassium, magnesium, and other minerals that are good for plant growth can be found in coffee

Blueberries are delicious fruits that are high in antioxidants and offer other health advantages. It can be a fulfilling experience to grow your blueberries because you can enjoy a fresh supply of these tasty berries straight from your backyard. A thorough tutorial on growing blueberries from seed to harvest is provided here.

Selecting the best variety:

  • There are several types of blueberries, and each has special qualities like size, flavor, and growth requirements. Choose a cultivar that is compatible with your soil type and climate. Prominent cultivars comprise ‘Bluecrop,’ ‘Chandler,’ and ‘Patriot.’

Choose your site for growing blueberries:

  • Blueberries prefer soil that is between 4.0 and 5.5 pH, which is considered acidic. Select a sunny spot with soil that drains properly. You can lower the pH of your soil by amending it with things like peat moss or sulfur if it’s not acidic enough.

Get the Soil ready:

  • Clear the soil of any rubbish and weeds before planting. Compost or other organic matter can help your soil become more fertile and structurally sound. Because blueberries are prone to root rot, verify that there is adequate drainage to avoid waterlogging.

Planting:

  • You can plant blueberries from seed or from plants that have been produced in nurseries. When starting from seeds, it’s crucial to stratify them for a few weeks before planting by putting them in a moist medium in the fridge—plant ½-inch deep seeds or seedlings, spacing them 2-3 feet apart in rows.

Watering and mulching for growing blueberries:

  • Maintain a constant moisture content in the soil, particularly in the first growing year. Because blueberry roots are shallow and might decay in wet weather, avoid overwatering them. To retain moisture and inhibit the growth of weeds, cover the plants with a layer of mulch, such as wood chips or pine bark.

Cutting:

  • To keep plants healthy and increase fruit output, pruning is necessary. Eliminate any low-hanging or crowded growth, as well as any dead or unhealthy branches. Before new growth appears, prune in late winter or early spring.

Fertilizing for growing blueberries:

  • Particular dietary needs for blueberries include those for potassium, phosphorus, and nitrogen. Apply a fertilizer designed for plants that prefer acidic soil, and pay attention to the dosage advised by the findings of the soil test. Steer clear of fertilizers with high nitrogen content since they may encourage excessive vegetative growth at the expense of fruit output.

Harvesting:

  • Depending on the species and region, blueberries normally mature from late spring to early summer. When berries are completely mature and have taken on their distinct blue hue, harvest them. Pick the berries by hand gently, taking care not to harm the surrounding plant or the fragile fruit.

In conclusion, growing blueberries is a gratifying and complex process that calls for patience and close attention to detail from seed to harvest. A successful harvest depends on some factors, including choosing the best blueberry variety, preparing the soil, and caring for the plants with appropriate watering, fertilization, and pest control. 

Certainly! If you’d like to learn more, please consider following our WhatsApp Channel: Harvest Gardening

Q1: How do I protect my blueberry bushes from birds?

A1: Ripe blueberries draw birds in large numbers. Using scare tactics like luminous tape or predator decoys, or covering your bushes with bird netting, will help keep your bushes safe.

Q2: Which diseases and pests are most frequent in blueberry bushes?

A2: Aphids, spider mites, and blueberry maggots are common pests, and blueberry bushes can also be harmed by diseases including powdery mildew and anthracnose. Numerous pest and disease issues can be avoided with the use of appropriate cultural techniques, such as good cleanliness and appropriate plant spacing.

Q3: When is the optimal time to start growing blueberries from seed?

A3: Growing blueberries from seed is usually best done in the spring when the soil is starting to thaw and temperatures are rising, which creates ideal circumstances for early development and germination.

Cucumbers are a popular addition to salads, sandwiches, and drinks because of their crisp texture and refreshing flavor. However, have you ever thought of cultivating your own? Imagine picking crisp, nutrient- and flavor-packed cucumbers right off the vine. It’s rather easy and gratifying to grow your cucumbers if you know a few tricks up your sleight of hand. How to Grow Cucumbers As your guide, you’ll easily unlock the secrets to cultivating vibrant cucumber plants and enjoying a plentiful harvest.

Select the proper variety:

  • Cucumbers come in a wide range of variations, including as pickled, slicing, and specialty varieties. Select a cultivar that fits both your requirements and the local growth environment.

Prepare the soil:

  • Cucumbers love this type of soil, rich in organic content and with good drainage. To improve the fertility and structure of the soil, amend it with compost or well-rotted manure before planting.

How to grow cucumbers at the right time:

  • Warm-season veggies like cucumbers should be planted once there is no longer a chance of frost. In most places, this usually happens in the spring, once the soil has warmed up.

Proper space is essential:

  • For cucumber plants to grow healthily, proper spacing is necessary. Depending on the variety, space the rows of cucumber seeds or seedlings 3–5 feet apart, spacing them 12–24 inches apart.

Give the sun plenty of light:

  • In direct sunlight, cucumbers grow well. Make sure the area you have picked for your planting gets at least 6 to 8 hours of direct sunlight each day.

How to grow cucumbers while maintaining soil moistness:

  • For them to grow, cucumbers require constant hydration. Particularly when the plant is in the flowering and fruiting stages, keep the soil uniformly moist. Mulching the area surrounding the plants can help keep the soil moist and keep weeds at bay.

Be aware of diseases and insects:

  • Pay attention to typical pests that affect cucumbers, such as spider mites, cucumber beetles, and aphids. To manage infestations, remove any afflicted leaves or apply organic pest control techniques.

How to grow cucumbers with fertilizer regularly:

  • Because they are heavy eaters, cucumbers gain from routine fertilization. To supply nutrients throughout the growth season, use compost tea or apply a balanced fertilizer to the directions on the box.

Gather frequently:

  • When cucumbers get to the right size, harvest them frequently. Mature fruits left on the vine may prevent new fruit from developing. Take care not to harm the plant when removing the cucumbers from the vine using a sharp knife or pair of scissors.

Finally, discovering how to grow cucumbers easily entails understanding the ideal conditions for their growth, such as supplying adequate sunlight, water, and nutrients, as well as adopting suitable spacing and support structures. Furthermore, methods such as insect control, trimming, and routine upkeep are essential for guaranteeing robust cucumber plants and plentiful harvests. Gardeners can achieve optimum success with minimal labor and a plentiful harvest of delicious cucumbers by heeding these expert suggestions.

Certainly! If you’d like to learn more, please consider following our WhatsApp Channel: Harvest Gardening

Q1: Do cucumbers need support as they grow?

A1: Support helps keep some cucumber varieties—particularly vining varieties—off the ground and away from decay. Stakes, cages, or trellises can be used as supports.

Q2: How to grow cucumbers vertically?

A2: Install trellises or stakes for support and train the vines to climb higher to grow cucumbers vertically. Make sure to leave enough space between plants for healthy growth.

Q3: How to grow cucumbers in pots?

A3: When growing cucumbers in pots, pick a sizable container with adequate drainage, give the vines support, and make sure the plants receive regular sunlight and watering to promote healthy growth.