Author

Avery Smith

Browsing

How to start a vegetable garden? is a fruitful adventure that encourages a closer bond with nature and provides fresh products. Getting started in gardening may seem difficult to novices, but anyone can grow a healthy vegetable garden if they have the correct information and techniques. Here, we’ll provide six crucial tips on how to start a vegetable garden that will help you create a fruitful and lovely space.

1. Selecting the proper site: Matter of light, soil, and space

  • The first step towards a successful vegetable garden is choosing the right spot. Vegetables require six to eight hours a day of direct sunlight at the very least. Before selecting a location, note how much sun your yard receives in different parts of the day.
  • Soil quality is crucial for vegetable growth. Organic, well-draining soil is ideal for vegetables. A quick soil test can determine the ideal pH range of 6.0-7.0. To increase nutrient content, amend with compost, manure, or organic fertilizers.
  • Finally, ensure sufficient space for plants to grow, as crowded plants may need more competition for resources like light, water, and nutrients. Provide plants with space according to their specific requirements, as listed on seed packs or plant tags.

2. Provide your vegetable garden with careful thought

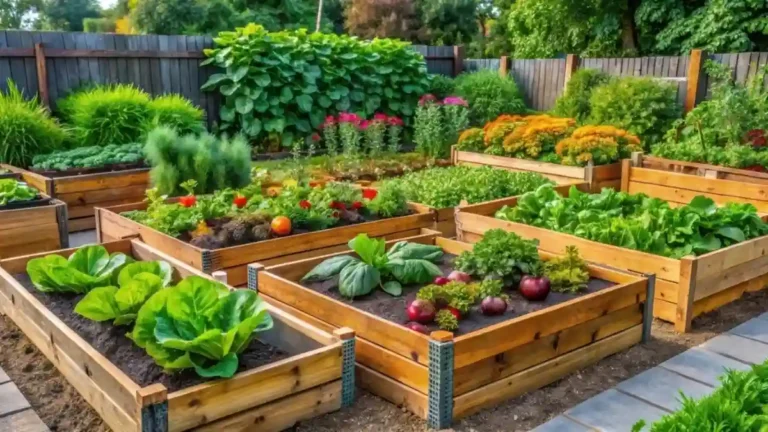
  • A flourishing garden requires a carefully thought-out arrangement. First, determine if you have enough area for raised beds, direct-to-ground planting, or container gardening. While container gardens are perfect for patios and balconies, raised beds provide greater drainage and soil control.
  • To increase yields and keep pests away from your crops, think about utilizing companion planting strategies when designing your layout. For example, growing basil close to tomatoes enhances their flavor and keeps harmful insects away. In a similar vein, marigolds planted next to crops like beans and carrots can help keep worms away.
  • Implementing a crop rotation strategy can maintain soil health by preventing pests and illnesses specific to a vegetable from accumulating. This can be achieved by rotating crops from different plant families annually.

3. Choosing the proper vegetables: Season and climate matter

  • To ensure success, determine your hardiness zone, which is based on average yearly temperatures, to select the right vegetables for your growing region, as not every climate is suitable for every vegetable.
  • Crops like lettuce, spinach, and peas thrive in cooler weather, while zucchini, tomatoes, and peppers thrive in warm climates. To prevent stunted growth or crop failure, follow the appropriate planting timetable for your area.
  • The heirloom variety offers a more flavorful, centuries-old product, and may be more resilient to disease and better suited to the environment compared to hybrids.

4. Effective, deep, and regular watering methods

  • Proper irrigation is crucial for a healthy vegetable garden, ensuring water is deeply and infrequently sourced to the roots, preventing issues like bitter cucumbers and tomato blossom-end rot.
  • To reduce evaporation and prevent powdery mildew, use a drip irrigation system or soaker hose to directly water the soil. Water plants early in the morning to allow them to absorb moisture before the heat sets in.
  • Mulch, like straw or leaf shreds, is essential for garden maintenance, controlling soil temperature, weed suppression, and moisture retention, making the garden healthier and increasing water efficiency.

5. Fertilizing for success: Understand what your plants need

  • All plants require nitrogen, phosphorus, and potassium for survival. Potassium improves plant health, phosphorus promotes root and flower growth, and nitrogen stimulates leaf growth.
  • Test soil nutrient levels to select appropriate fertilizers, such as compost, manure, and bone meal. For long-term soil health, side-dress plants with compost tea or a balanced organic fertilizer during the growing season.
  • Excessive fertilization can cause nutrient imbalances and burn plants. Use slow-release fertilizer and follow container directions for proper nutrient intake.

6. Handling insects and illnesses: Avoid, track, and manage

  • Preventing pests and illnesses in vegetable gardens requires careful management. Start by keeping the garden tidy and pest-free. Avoid growing vegetables too close together, as this encourages poor air circulation and promotes fungal infections.
  • Regularly inspect plants for pests like aphids, caterpillars, and beetles, which can cause severe damage. Use insecticidal soap, hand-pick, or introduce beneficial insects like lacewings and ladybugs for environmentally friendly pest management.
  • Crop rotation, companion planting, dry leaves, mulching, watering plants near bases, and promptly removing damaged plants are crucial preventive measures against diseases, reducing the risk of fungal infections.

Learning how to start a vegetable garden may be difficult, but by following these six vital principles, you’ll put yourself on track for success. With the appropriate site, careful planning, soil management, adequate watering, and good pest control, your garden will thrive and offer you fresh, home-grown produce.

Certainly! If you’d like to learn more, please consider following our WhatsApp Channel: Harvest Gardening

Q1: How to start a vegetable garden indoors?

A1: To begin an indoor vegetable garden, select a sunny location, use containers with adequate drainage, and plant vegetables such as herbs, lettuce, or tomatoes in well-drained soil. Ensure that they receive adequate light (supplement with grow lights if necessary) and water consistently.

Q2: What is the best vegetable garden for beginners?

A2: The greatest vegetable garden for beginners comprises plants that are simple to grow, such as lettuce, radishes, tomatoes, and herbs like basil or mint. These vegetables thrive with little effort and are ideal for both indoor and outdoor gardens.

Q3: How to start a vegetable garden in Australia?

A3: Plant veggies that are suited for the season, such as tomatoes, spinach, or carrots, in a sunny spot with well-draining soil if you’re starting a vegetable garden in Australia. Pay attention to the weather in your area and water frequently to ensure wholesome growth.

One of the most extensively farmed crops in the world, corn is valued for its adaptability, nutritional content, and place in the world’s food systems. Homegrown produce usually tastes the finest, especially if you know when and how to harvest corn at its prime. One of the most common vegetables planted in backyard gardens is sweet corn. A good corn harvest depends on planning, ability, and using the right tools. This article will walk you through the most important components of harvesting corn, allowing you to get the most yield and quality out of your crop.

The initial step in corn harvesting is determining if the corn is mature enough to be harvested, as late or early harvesting can result in starchy or flavorless kernels.

1. The appropriate stage of kernels: Denting and black layer development

  • Denting: In most corn varieties, kernels will begin to form a dent at the crown when they achieve physiological maturity. When the moisture level falls to between 30 and 35 percent, the kernel shrinks somewhat, and this “dent” forms.
  • Black Layer Formation: This happens when the moisture content is between 25 and 35 percent and the kernel has reached its maximum dry weight. The development of a black coating at the base of the kernel is an important indicator of full maturity and readiness for maize to be harvested.

2. Moisture content monitoring

Grain corn should be harvested with a moisture content between 20-25%, as extremely dry kernels may be difficult to prepare and higher moisture content may increase spoilage during storage. A moisture meter can be used to determine the precise moisture content, and regular checks should be conducted before harvest to prevent over-drying or under-wetness, affecting quality and production.

3. The look of the husk and ear

  • The corn is almost ready for harvest as the husks start to dry up and become brown. The husks should no longer be vivid green, but they also shouldn’t be excessively dry.
  • The kernels should be completely developed and closely packed, and the ears should feel firm to the touch.

Proper corn harvesting ensures optimal yield and quality, despite being labor-intensive. The best methods are outlined below.

1. Suitable tools and equipment

Selecting the right tools and equipment is crucial for successful harvesting. Hand harvesting requires a sharp knife or specialized instrument, while larger-scale operations use a combined harvester. Proper calibration and maintenance of equipment reduce crop damage and ensure kernels remain whole.

2. Cutting stalks

In small-scale corn harvesting, cut the stalks above the ground with a sharp knife or sickle, ensuring clean cuts and avoiding damaging the stalk to prevent nutrient storage before final maturation.

3. Picking the ears

Gently pluck corn ears after cutting stalks, twisting and drawing them down. Remove mature ears easily, but handle with care to avoid breaking kernels or harming the ear.

4. Using a combine for mechanical harvest

Adjust the harvester settings to your corn’s moisture content, ensure the combine’s height is suitable for maize type, and run it at the recommended speed to prevent kernel loss. Ensure moisture levels are checked and adjusted accordingly for efficient harvesting.

Freshly picked corn, like all veggies from the farm, has its greatest flavor. When the corn is at its sweetest, a week is the ideal time to consume it after harvest. Because the sugars have more time to turn into starches, the longer your corn rests, the more it will taste like store-bought corn. No matter the type of sweet corn, ears taste the finest straight from the plant because most of it loses 50% of its sugar content in 12 hours. Store shucked cobs in a gallon plastic bag in the refrigerator and cook within two days if you are not going to use the corn right away. Freezing corn in a plastic bag with paper towels can prevent moisture buildup, making it a tasty treat during winter months and a daydreaming summer treat.

Whether planting popcorn, sweet corn, or field corn, knowing when and how to harvest corn is essential to getting high-quality crops. You can guarantee a successful corn crop by keeping an eye on growth phases, moisture content, and adhering to recommended harvesting and post-harvest procedures. These pointers will direct you toward a plentiful and superior crop, whether it is for fresh eating, feed for cattle, or storage.

Certainly! If you’d like to learn more, please consider following our WhatsApp Channel: Harvest Gardening

Q1: In which month is corn harvested?

A1: Depending on the region and temperature, corn is normally harvested in late summer or early fall, usually between September and November. The corn variety and growing circumstances affect the timing.

Q2: What is the difference between corn and maize?

A2: Maize and corn are globally and scientifically synonymous, with maize used globally and corn more commonly in North America, referring to the same grain crop, Zea mays.

Q3: How to harvest corn seeds?

A3: Corn seeds are harvested by drying corn ears until husks turn brown and kernels firm, then shelling them off the cob, allowing them to dry completely before storage.

It’s a satisfying experience to grow sweet corn in your yard since you can eat the freshest, tastiest corn right from the stalk. Sweet corn grows quickly, forming towering stalks with vivid green leaves. One corn plant typically yields one or two ears in a home garden; you can select types with kernels that are yellow, white, bicolored (yellow and white), or even rainbow-colored. Although it is usually eaten raw on the cob, it can also be frozen, tinned, or used in other recipes. Sweet corn, a favorite summer crop, is high in fiber, vitamins, and antioxidants. It tastes great cooked, grilled, or added to soups and salads. Growing sweet corn properly needs careful planning and attention to detail, regardless of gardening experience level. We’ll cover everything in this tutorial, from planting to harvesting, so you’ll have all the information you need to grow impressive sweet corn.

1. Selecting the proper type of sweet corn

Choosing the correct variety of sweet corn is critical to success. Three main types of sweet corn exist: 

  • Standard (su): The standard variety with a more conventional taste. It is less delicious than newer varieties, but it matures faster and is more hardy in cooler areas.
  • Sugar-enhanced (se) – These varieties have a higher sugar content, resulting in a sweeter taste while maintaining the soft texture of regular corn.
  • Supersweet (sh2) – This kind contains the most sugar, producing a significantly sweeter and crunchier texture. However, it is more sensitive and needs warmer growing conditions.

2. When to grow sweet corn: Best season

Sweet corn thrives in warm conditions, so planting should occur in late spring or early summer after the last frost when soil temperatures are around 60°F (15.5°C). In regions with shorter summers, plant as soon as the soil warms up to ensure crop maturity before fall frosts.

3. Where to grow sweet corn: optimum place for planting

  • Corn, a sun-loving plant, requires a location with full light for six to eight hours daily. Properly position it in well-draining soil to prevent waterlogging, which can hinder root growth.
  • Since corn is a heavy feeder, it is important to have rich soil that is rich in nutrients, particularly nitrogen. To increase soil fertility before planting, incorporate well-rotted manure or compost into the soil.
  • Remember that the shorter crops are shaded by the tall stalks. Plant it next to crops like Asian greens or lettuce that benefit from shade from the summer sun. Steer clear of windy areas as high gusts may topple the long stalks.

4. The secret to a healthy crop is soil preparation

  • Sweet corn thrives in well-drained, loamy soil with a pH of 6.0 to 6.8, so it’s essential to prepare the soil before planting. Check pH and nutrient levels, make amendments, add organic matter, ensure adequate drainage, and use balanced or high-nitrogen fertilizer for corn development. Improve structure and nutrient availability.

5. Planting Advice: Proper timing and spacing are important

  • To plant sweet corn, space the seeds in rows 30 to 36 inches apart, 1-2 inches deep, and 8 to 10 inches apart. Plant in blocks of four rows side by side for best pollination. Plant one variety at intervals of 12 to 14 days, or plant other types that mature at different dates. To choose early, mid-, and late-season cultivars for a longer harvest season, compare days to maturity.
  • Sweet corn requires weekly watering, ideally, 1 to 1/2 inches, to thrive during germination and silking stages. Overhead watering can cause fungal diseases, while mulching helps control soil temperature, prevent weed growth, and preserve moisture.
  • Sweet corn requires a significant amount of nutrients for rapid growth, even in compost-treated soil. To ensure growth, mix balanced fertilizer with well-rotted manure or compost before planting. Side treat rows with high-nitrogen fertilizer when stalks reach 8 inches tall.
  • Growers of corn may face issues due to a few pests. Before or while the seeds germinate, crows and other birds may peck the ground and take them. Use a row cover to protect your plants from birds and attach it with pins, soil, or rocks for young seedlings. After three or four weeks, take off the cover to give the plants room to grow.
  • Harvesting sweet corn is crucial for achieving the best flavor and texture. It’s ready when silks turn brown but husks remain green. Press a kernel to determine ripeness, and when a creamy fluid emerges, the corn is ready for gathering.

Grow sweet corn in your yard yields fresh, tasty corn for your meal, making it a rewarding and fun activity. By following the advice in this article, from selecting the appropriate type to harvesting at the perfect time, you’ll be well on your way to a good sweet corn crop.

Certainly! If you’d like to learn more, please consider following our WhatsApp Channel: Harvest Gardening

Q1: How long does it take to grow sweet corn?

A1: Sweet corn typically takes 60-100 days from planting to harvest, with most varieties ready for harvest in 75 days.

Q2: Can you grow sweet corn in raised beds?

A2: Raised beds can grow sweet corn if they are deep enough, 12 inches deep, and spaced appropriately for pollination and air circulation.

Q3: How to grow sweet corn in containers?

A3: Use big pots (at least 12 inches deep and wide) to produce sweet corn in containers, and put multiple seeds in each to ensure adequate pollination. Make sure the soil drains well, give the pots regular waterings, and position them in direct sunlight.

A member of the brassica family, which also includes Brussels sprouts, broccoli, and cauliflower, cabbage is a versatile and nutrient-rich vegetable. Cabbage, which has thick, leafy heads, is available in different varieties, including red, green, and savoy, each with distinct tastes and textures. Learning how to grow cabbage is simple, and it is used in a variety of meals around the world, from salads and soups to fermented foods like sauerkraut and kimchi. Cabbage is tasty and a great source of vitamins, fiber, and antioxidants, making it a nutritious complement to any dish. Thus, growing cabbage from seed is a satisfying endeavor that enables you to produce healthy, fresh heads in your garden. Cabbage grows well in cool climates and is easy to cultivate with the right care, whether you plan to harvest it in the spring or fall. 

The environment and variety will determine the best time to sow cabbage. Cabbage planting season is fairly long. Since cabbage is a cool-season crop, early spring or late summer are the ideal times to sow it. You can plant it in the fall for a winter harvest in areas with mild winters. When planting in the spring, sow seeds indoors six to eight weeks before the last anticipated frost date, then move them outside once the ground is suitable for planting. Planting cabbage in late summer helps minimize bolting in milder climates by allowing the vegetable to mature in cooler fall temperatures. Transplanting early cabbage will enable it to mature before summer heat waves arrive.

With the correct method, growing cabbage from seed in the garden can be easy and productive. Here are some proven strategies for growing cabbage from seed outdoors:

1. See how to grow cabbage from seed

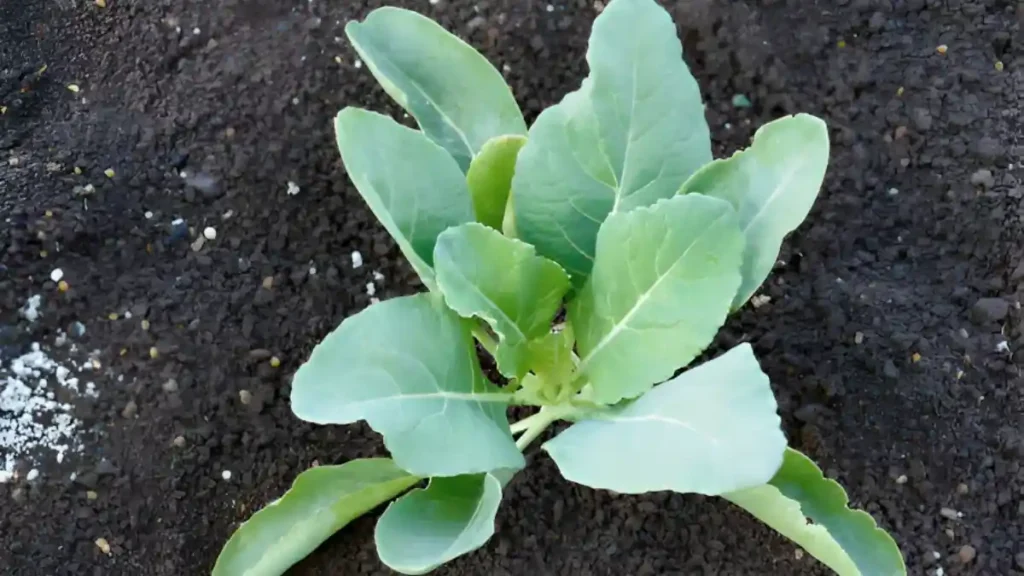
  • Cabbage seedlings can be grown from seed in early spring. Sow seeds 50-60 days before frost, planting three or four seeds per cell. To thrive, plants need bright, full sunlight. Use grow lights to start many plants. After seedlings emerge, divide larger plants by thinning them. To ensure proper growth, divide larger plants into smaller ones. To prepare for autumn crop planting, direct-sow seeds in mid-late summer or sow seeds under lights for early July planting.

2. How to sow seeds in the garden for growing cabbage

  • Cabbage, a cool-season crop, can be planted earlier than tomatoes due to its frost-free date. Seed packaging helps count frost-free dates, but hardening is still recommended before planting.
  • To start growing cabbage from seed in the garden, pick a sunny location with friable, well-draining soil. A week or so before planting, amend the soil with a large quantity of compost. When digging time comes, plant your cabbage seedlings in rows separated by 24 to 36 inches (60 to 90 cm), or around 15 to 23 inches (38 to 60 cm). Even though the plants might appear tiny right now, you want to give them enough space to grow into that dense cluster of leaves during the season!
  • After planting and throughout the growing season, give cabbage plants some water. As they age, cabbages need nitrogen and organic fertilizer. Don’t let the soil get too wet. Weed the area and thin the seedlings for appropriate spacing to keep weeds from competing for nutrients. Lightly cover the planting space with straw or crushed leaves for extra nutrients.

3. Watching for harm caused by pests

  • Pests like cabbage worms, flea beetles, cabbage root maggots, cabbage loopers, and cutworms can harm cabbage plants. A small white butterfly circling them may be a cabbage moth, but they lay cabbage worm eggs in brassicas and can quickly consume your vegetables.

4. How to know when to harvest cabbage

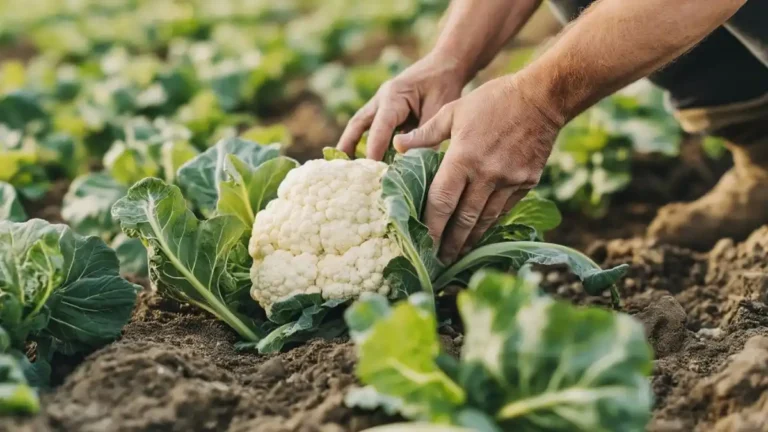
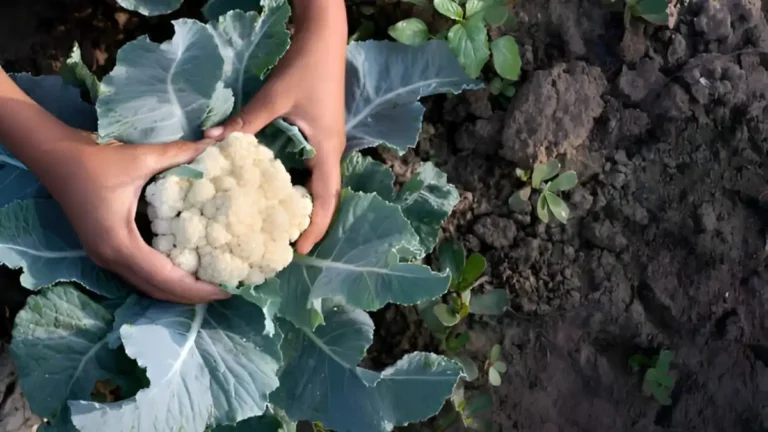
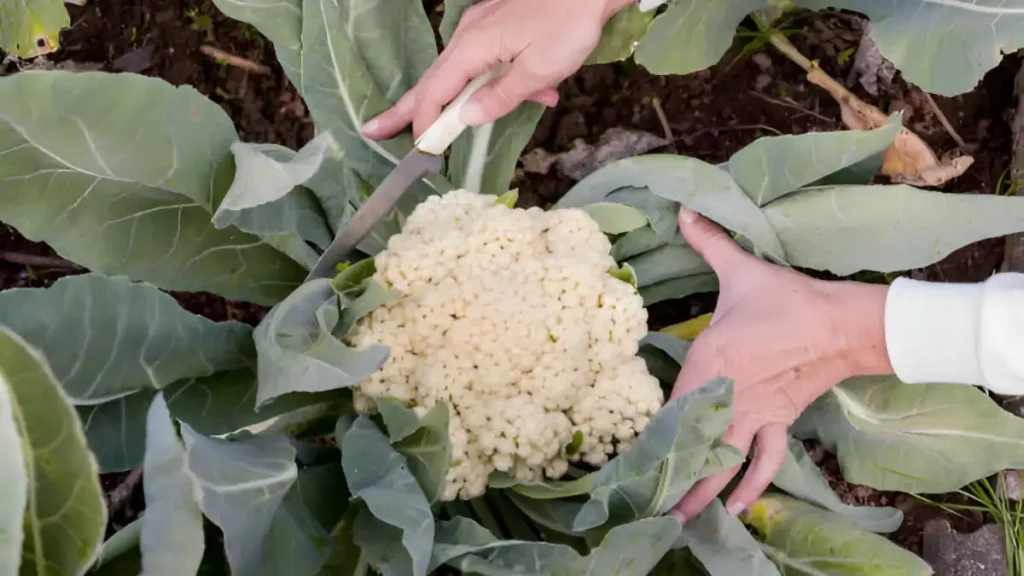
  • After 70–100 days of transplanting, harvest cabbage, making sure the heads are firm and suitable for the variety. Using a sharp knife, cut at the base, leaving the outer leaves whole. Eliminate any yellowing or damaged leaves. To maintain freshness, store in a cold, humid location. Depending on the type and conditions, freshness can endure for weeks to months.

Growing cabbage from seed in your yard can be a fun and productive experience if done right. These are some recommendations to help you choose healthy and bountiful cabbage varieties, prepare the soil, transplant seedlings, and control pests. For many months to come, your garden will produce robust, tasty cabbage heads if you pay close attention to this cool-season vegetable’s requirements.

Certainly! If you’d like to learn more, please consider following our WhatsApp Channel: Harvest Gardening

Q1: What is the best fertilizer for cabbage?

A1: A balanced fertilizer (10-10-10) that has equal amounts of nitrogen, phosphorus, and potassium is the best for cabbage. But for leafy development, cabbage also needs extra nitrogen, so 15-10-10) is a slightly greater nitrogen fertilizer that can yield better results.

Q2: What is the trick to growing cabbage?

A2: Providing ample light, well-drained soil, and steady moisture is essential for successful cabbage growth. Mulch and appropriate plant spacing are other ways to help conserve moisture and keep the roots cool.

Grown in various climates, cabbage is a versatile and nutrient-rich crop. This vegetable grows in your garden, and you can also grow cabbage in containers indoors or outdoors. However, harvesting it at the proper time is crucial to savoring its entire flavor and nutritional advantages. When you know when and how to harvest cabbage from your garden, you may savor the maximum flavor and freshness of this versatile crop. There are various types of cabbage, each of which matures during a certain season. This post will discuss when is the best time to harvest cabbage, giving you the information you need to select it when the flavor and quality are at their highest.

  • Cabbage growth phases affect flavor, texture, and storage.
  • Harvest time varies by variety and area.
  • 60–100 days after planting, ready for harvesting.
  • While late types take longer to mature but are resistant to frost, early kinds mature quickly.

Time is crucial when harvesting cabbage, as underdeveloped heads and split or cracked heads can result. Key signs include:

  • A cabbage head that is completely grown will have a firm texture when touched. When the cabbage feels firm and compact after being gently pressed with your hands, it is ready to be harvested. A mushy or loosely packed head suggests that the cabbage requires additional maturing time.
  • Cabbage heads, varying in size, typically measure 6-10 inches in diameter. To ensure correct harvesting, consult the seed packet or plant label to determine the expected size of your variety.
  • Cabbage outer leaves, varying in color, should be vibrant and healthy, with withering or yellowing indicating over-maturity or nutrient deficiency.
  • To accurately monitor cabbage growth, consult the seed packet’s maturity days and keep track of the planting date to ensure proper growth tracking.

Harvesting cabbage in the spring or fall during mild weather is optimal for its cool season growth, as it yields sweeter, less bitter leaves and prevents premature flowering, making it a suitable crop for the growing season.

Spring harvest

Spring-grown cabbage heads should be checked for maturity and firmness in late spring or early summer, with April through June being ideal for collection. Monitor temperature changes to prevent splits.

Fall harvest

Fall cabbages, grown in late September or early November, are known for their natural sweetness and ability to withstand light frosts. The cooler weather increases the sugar content in cabbage heads, giving it a sweeter taste. Many gardeners wait for a little frost before harvesting fall cabbage.

Winter harvest

You may even produce and harvest cabbage in the winter in warm areas. Certain types of winter cabbage can be harvested in December and February and are frost-hardy. Despite their sluggish growth, these cultivars are prized for their deep flavor and resistance to cold.

The best possible state for storage or immediate use of cabbage depends on careful harvesting methods. To efficiently harvest cabbage, follow these steps:

  • Use a sharp knife to cut the cabbage head off the stem, leaving approximately 1 to 2 inches of the stem remaining. Make sure not to harm the nearby leaves when cutting the base of the head.
  • Peel off any damaged or yellowing outer leaves to reveal the sharp, clean head underneath after harvesting. It’s advisable to remove these outer leaves since they may have been exposed to pests or inclement weather.
  • Avoid removing the entire cabbage plant from the ground for cooking purposes and avoid damaging the root system by pulling the plant for multiple harvests.
  • There are types of cabbage that permit a second harvest. Smaller heads may develop near the base of the plant after the primary head is removed, offering more harvesting chances. Although they won’t be as big as the main head, these tiny heads can still have a lot of flavor.
  • Harvest cabbage when it feels hard and strong to avoid over-maturity and broken heads, ensuring a consistent and delicious harvest.
  • Harvest cabbage in cooler weather to avoid bitterness, ideally in later hours or less warm temperatures.
  • Ensure cabbage is free from common pests like slugs, cabbage worms, and aphids by inspecting outer leaves and disposing of any damaged ones before harvesting.

Understanding when to harvest cabbage at the ideal time will help you acquire the greatest flavor and extend the vegetable’s shelf life. The secret is to closely watch the plant’s growth and harvest the cabbage when the heads are firm and at their largest size, regardless of whether you’re growing it for fresh consumption, storage, or preservation. You’ll get the benefits of a tasty and nourishing cabbage harvest every season if you follow these suggestions.

Certainly! If you’d like to learn more, please consider following our WhatsApp Channel: Harvest Gardening

Q1: What are the best methods for storing cabbage after harvest?

A1: Cabbages can be stored in the fridge without washing, wrapped in a zip-top bag. Whole cabbage plants with attached roots can be kept in a cellar, hanging from the ceiling, or placed between layers of newspaper.

Q2: How to harvest cabbage seeds?

A2: Let the cabbage plant flower and produce seed pods, then wait for the pods to dry and become brown in order to collect the seeds. Slice the pods, let them dry more, and then crack the pods open to retrieve the seeds.

The tropical plant known as lemongrass (Cymbopogon citratus) is prized for its flavor and citrus perfume. It is an ingredient in many foods, herbal medicines, and essential oils. For maximum flavor, scent, and health benefits, knowing when and how to harvest lemongrass is important. The ideal time to harvest lemongrass will be discussed in this article, along with a straightforward, three-step procedure that will guarantee you maximize your yield.

When fully grown, lemongrass is a perennial herb that grows quickly, reaching heights of three to six feet. The most often gathered components are its green stalks, which are rich in essential oils; nevertheless, the leaves can also be used to make teas and herbal remedies. You can also grow lemongrass at home or indoors.

Harvesting lemongrass at the right time is crucial for obtaining the best-quality crop, as late harvesting may cause stalk toughness and weak flavors, while early harvesting may reduce oil content.

  • Lemongrass’s oils and flavor take time to develop, so harvesting should be postponed until the plant is four to six months old. Younger plants may lack the strong flavors and oils of lemongrass. Harvest stalks are at least half an inch thick.
  • If you grow lemongrass in a tropical or subtropical climate, you may be able to harvest more often because the plant may stay active all year round. Nevertheless, the plant will wither away in the winter in colder areas. Make sure to harvest lemongrass before the first fall frost occurs, as this will kill the plant if you reside in a frost-prone area. Alternatively, move the plant indoors for the winter in a pot. You can take the plant outside again in the spring when the weather warms up again and start harvesting again after the young stalks have reached the proper thickness. Pay attention to this seasonal shift and pick every stalk before the temperature drops too much.
  • Lemongrass stems turn pale green to yellow when ready for pruning, while top leaves may turn light brown. Staples feel sturdy and robust. Plants reach three to five feet tall and upright, ready for cutting.

Now that you know when to harvest lemongrass, let’s walk you through the three easy processes of gathering your produce.

Step 1: Select the right tools

  • As bruising and tearing can lower the quality of your lemongrass stalks, a clean, precise cut helps avoid these problems.
  • Although lemongrass is generally non-toxic, the sharp edges of its leaves can cause minor skin irritation. Wearing gloves while working will shield your hands.

Step 2: Cutting the stalks

  • Cut the stalks at an angle of one to two inches above the earth. This preserves the base of the plant for future growth while giving you the firmest and most tasty piece of lemongrass.
  • Sections that are cut higher up the stalk will be weaker and less delicious.
  • Slice off the tougher outer part of the stem from the plant, exposing the soft white sections that resemble tiny green onions. Take out the green leaves as well, and dispose of them in a compost or make tea with them.
  • When gathering leaves for tea or medicinal purposes, make sure they are fresh and green by trimming them from the top of the stalk.

Step 3: Get the plant ready for more growth

  • Keep the younger inner stalks growing and only cut off the older outer stalks.
  • Ensure the plant receives sufficient water and nutrients post-harvesting to promote new stalk growth, and organic fertilizer can aid in regrowth, especially after a large harvest.

In summary, utilizing appropriate practices and understanding when and how to harvest lemongrass can guarantee a plentiful yield as well as a variety of culinary and medicinal uses. These instructions will allow you to enjoy this fragrant plant all year long.

Certainly! If you’d like to learn more, please consider following our WhatsApp Channel: Harvest Gardening

Q1: How do you harvest lemongrass without killing it?

A1: Cut the stalks of lemongrass about one inch above the ground, leaving the base whole, in order to harvest it without killing it. As a result, the plant can continue to produce new stalks for harvests in the future.

Q2: How to use fresh lemongrass leaves?

A2: You may add fresh lemongrass leaves to soups and broths for a zesty flavor or use them to make tea by boiling them in water. Make sure the leaves are slightly bruised to release their oils.

Q3: How to harvest lemongrass seeds?

A3: After the flower heads turn brown and dry up, carefully shake or rub them to extract the seeds. This is how lemongrass seeds are harvested. Gather the seeds and keep them somewhere dry and cool so you may plant them later.

Growing potatoes on your own allows you to experiment with different varieties and they are quite easy to grow. Growing potatoes is economical and gratifying. When to harvest potatoes is determined by geography and growing type. Since potatoes are underground plants, it’s critical to understand when and how to harvest them. With the help of this instruction, you can harvest potatoes in 5 simple steps and maximize your crop’s production.

When it comes to picking potatoes, timing is everything. There are two primary stages to potato harvesting:

  1. New potatoes: While the plants are still green and in bloom, these are harvested early. Small and soft, they are perfect for eating in the early part of the season. New potatoes are typically ready two to three weeks after the plant flowers.
  2. Mature potatoes: These are harvested two to three weeks after the tops of the plants have become yellow and wilted, or once the foliage has fallen back. Mature potatoes have thicker skins that make them better suited for long-term storage.

Indications that potatoes are ready to be harvested

The foliage is the best indicator of when your potatoes are ready. Your potatoes are ready to be harvested when the leaves start to turn yellow and the stems get dry. The skins of mature potatoes get thicker and less likely to peel. It’s best to begin searching for fresh potatoes as soon as the blooms bloom.

Obtaining the right tools is crucial for successful harvesting, as they protect the crop and ensure optimal potato conditions.

  1. The ideal instrument for carefully taking potatoes out of the ground without cutting or bruising them is a digging fork. You can also use a shovel, but take care not to cut into the potatoes.
  2. Wear strong gloves to protect your hands, especially when working on stony or uneven ground.
  3. Prepare receptacles to gather the harvested potatoes. Ensure that they are dry and clean to prevent infection.

Prepare your tools for harvesting potatoes. Dig gently and avoid damaging tubers, as potatoes spread around the plant. Handle them gently to prevent punctures or bruises.

  1. Place a digging fork or spade feet away from the plant, shake it back and forth, and carefully remove the plant from the ground, ensuring several tubers are connected to the roots.
  2. Remove plants and gather potatoes, sort through dirt with your hands, and be cautious when handling new potatoes, as they are more sensitive and prone to harm.
  3. After harvesting, any potatoes that have been cut or punctured should be consumed immediately. The remainder of your harvest will be spoiled because these don’t store well and can rot in storage.

After harvesting, potatoes should be cured for long-term preservation, as cured skin potatoes are more resistant to illness and have a longer shelf life.

  1. Place potatoes in a well-ventilated, cool, and dark area at 50-60°F for a week to two weeks to cure, harden skin, and heal minor cuts.
  2. Before storage, inspect potatoes for disease or rot symptoms and discard damaged or diseased tubers to ensure the rest of the harvest is free from contamination.
  3. After curing, store potatoes in a well-ventilated box, mesh bag, or wooden crate at 40-50°F (4-10°C) in a dark, cool place, to avoid refrigerating as starches can change flavor.

Proper storage is crucial for preserving potatoes and using long-term storage strategies can ensure a long-lasting enjoyment of your harvest.

  1. Keep potatoes dark in storage and check frequently to prevent greening due to solanine, a hazardous chemical, and light exposure, which can cause a bitter taste.
  2. The optimal conditions for potato storage are high humidity levels (85–90%). But much moisture might cause decay. To avoid this, make sure the place you use for storage is dry and well-ventilated.
  3. Some potatoes will inevitably go bad, even in the finest of circumstances. Every few weeks, inspect your stored potatoes for symptoms of sprouting, shriveling, or decay. Take immediate action to remove any impacted potatoes so as not to ruin the remainder of your harvest.

It’s easy and satisfying to learn when and how to harvest potatoes, especially if you follow these 5 simple steps. Your harvest of fresh, homegrown potatoes will be abundant if you give it the right care and attention. Time and method are critical to success when growing potatoes, whether you’re searching for young ones for an early harvest or older ones for long-term preservation.

Certainly! If you’d like to learn more, please consider following our WhatsApp Channel: Harvest Gardening

Q1: How do I know when potatoes are ready to harvest?

A1: The plants’ foliage turns yellow and starts to die back when potatoes are ready to be harvested. If you want to make sure the tubers are the right size, you may also verify by carefully excavating a couple of them.

Q2: In which month potato is harvested?

A2: Depending on the variety and growing conditions, potatoes are normally planted in the spring, from mid-March to late April, and harvested in the late summer or early fall, usually between August and October.

Q3: How to cure potatoes after harvest?

A3: After harvesting potatoes, cure them for one to two weeks at 50–60°F (10–15°C) with high humidity (85–90%) so that small wounds can heal and the skins can thicken.

Root vegetables like carrots are beloved for their crisp, sweet flavor and high nutritious content. Carrots come in an amazing array of colors—orange, golden, or purple—that you may grow carrots in your vegetable garden. How to determine when to harvest carrots remains the question, though. To maximize flavor and texture, it is therefore essential to know when and how to harvest carrots. Everything from knowing when to harvest your carrots to useful methods for gathering and storing them will be covered in this article.

Carrots are ready to be harvested when their shoulders are 1/2 and 3/4 inches in diameter and start to show above the ground, usually two to three months after planting. Fresh carrots are best, as they turn woody if left in the ground, and to maintain their sweetness, they should be harvested before the first frost.

1. Understanding the growth cycle

  • Carrot maturity takes 70-80 days, depending on the cultivar and growing environment. Shorter cultivars like “Nantes” reach maturity faster, while longer ones like “Imperator” require more time. Pick carrots when they’re fully grown but before they turn bitter and woody, as the root has gathered enough natural sugars.

2. Knowing the symptoms of maturity

  • Harvest carrots when half to one inch in diameter at the top, with bright, uniform color indicating root potential, as larger ones may be tougher or blander.
  • To find out how long it will take for your specific variety to mature, always consult the seed packet. Remember that too-early harvesting carrots might result in underdevelopment while too-long rooting can cause fibrous growth and flavor loss.
  • Carrots can withstand frost better due to their ability to convert starches into sugars, but timing is crucial as strong frost can harm roots.

3. The best time to harvest carrots

  • Although they can be planted in the spring or the fall, many gardeners find that the roots are sweeter in the latter season because of the lower temperatures. Carrots picked in the fall can, in many areas, be left in the ground until the first few months of winter—that is, provided the ground does not freeze solid. Carrots can be planted and harvested all year round in warmer climes. 

Carrot harvests mature quickly, but they don’t become woody or starchy like radishes, staying fresh longer. Harvesting as needed preserves their flavor and texture, making them ideal for garden cultivation.

  1. To harvest carrots safely, prepare the soil by moderately watering it the day before, especially if it’s dry or compacted, to prevent the tops from breaking off and the roots from sticking.
  2. Gently loosen dirt around carrot tops using a spade or garden fork, starting at least 6-8 inches away from the tops and working inward. Carefully remove the carrots from the soil once it has been worked loose.
  3. At the base, where the greens meet the root, firmly grasp the carrot tops. To extract the carrot from the ground, gently wiggle the plant back and forth while tugging upward. Carrots should be easily removed if the soil is well-prepared and moist. If resistance is encountered, loosen the dirt surrounding the roots even further using the garden fork.
  • Timing is crucial when harvesting carrots, as too soon can result in underdeveloped roots, and too long can lead to woody and bland results.
  • Gardeners often mistakenly remove carrots from compacted soil, resulting in trapped and damaged tops. Always work the surrounding soil free before removing them.
  • Carrots that are incorrectly stored can quickly go bad. Carrots should not be left in the open or exposed to sun or air as this can cause them to sprout or dry out. For optimum durability, always store them in a cold, dark, and damp location.

Knowing how to harvest carrots at the right time and with the proper practices can considerably increase crop quality and flavor. These pointers and techniques can help you enjoy crisp, delicious carrots that keep for months. For optimal outcomes, don’t forget to monitor the growth environment and pay attention to the harvest window.

Certainly! If you’d like to learn more, please consider following our WhatsApp Channel: Harvest Gardening

Q1: How do I know when carrots are ready to harvest?

A1: Carrots are ready to harvest when their shoulders (the tops of the roots) are about 1/2 to 3/4 inch in diameter and visible above ground. If you want to be sure it has grown to the right size, you can simply carefully pull one up.

Q2: Can I leave carrots in the ground over winter?

A2: Carrots can be left in the ground in winter as long as the soil doesn’t freeze completely, and can be protected from freezing by mulching with straw or leaves.

Q3: How do I know if my carrots are too woody?

A3: Overgrown or cold carrots develop a woody texture, often characterized by fibrous or hard roots and a harsh taste lacking the sweetness of timely harvests.

A well-liked root vegetable, carrots are best recognized for their vivid orange hue, though they are also available in purple, yellow, red, and white forms. If you’re wondering how to grow carrots (Daucus carota), you ought to know that they thrive in cool conditions such as early spring and late fall. Growing carrots in your garden can be a wonderful experience. Carrots grown in-house have not only better flavor and texture, but you also have the assurance of knowing the specific farming practices used. Throughout, you can effectively grow carrots in containers. In this article, we’ll share professional advice on how to grow carrots, from selecting the appropriate seeds to harvesting a plentiful crop.

The first step of growing carrots is choosing the correct type of carrots. Carrots are available in a variety of sizes, shapes, and colors, and they grow well in a range of temperatures and soil types. Common variations consist of a few of the following: 

  • Danvers: Adapted to heavy soils and with tapered roots.
  • Nantes: Carrots with a blunt tip and a cylindrical shape that thrive on sandy soils.
  • Imperator: Slender, long carrots that are frequently grown for market.
  • Chantenay: Stocky, short carrots that grow well in rocky or clay soils.
  • Baby carrots: These smaller cultivars are ideal for pots and shallow soil.
  • Carrots can be harvested early in summer by planting seeds two to three weeks before the final date of spring frost, and then waiting three weeks to plant again. For a fall harvest, seeds should be planted ten weeks before the first frost date, as carrots that develop in the fall are sweeter.
  • Loosen the soil to 12 inches deep, clear the ground of stones and rubbish, and incorporate organic matter like compost or well-rotted manure. Carrots prefer light, nutrient-rich soils, so avoid fresh manure. Ensure the soil’s pH is between 6.0 and 6.8, and adjust with lime or sulfur if necessary. Avoid fresh manure to prevent hairy roots and branching.
  • Sow carrot seeds directly into the garden, 2 inches apart and 1/4 inch deep, sparingly in shallow rows. Maintain a 12-inch spacing for easy weeding and root development. Soil should be kept moist until seeds germinate, which typically takes 10-21 days.
  • Carrots require regular, deep watering, aiming for one inch per week. Waterlogging should be avoided since too-wet soil will cause carrots to rot. Proper soil drainage is crucial. Mulch the surrounding area with leaves or straw to keep the soil moist and cool. Water only when necessary and ensure proper drainage.
  • Thin carrot seedlings are carefully at the base to avoid damaging nearby plants’ roots. Gradually thin carrots to avoid harming young ones, starting with the weakest ones to be removed first.
  • Avoid applying too much nitrogen fertilizer, as it can promote top growth at the expense of root growth. Avoid too much phosphorous fertilizer, as it may cause root splits. Side dress carrot greens after reaching 4 inches height with organic fertilizer with minimal phosphorus and moderate nitrogen.
  • Floating row coverings over carrot plants can prevent disease-carrying insects from biting or laying eggs, resolving pest and disease issues. Carrots don’t require pollination, so cover can be left on throughout the growing season. Rotating crops and eliminating weeds can also reduce pests.

The best flavor and texture come from knowing when and how to harvest carrots. When carrots are 1/2 to 1 inch in diameter, harvest them. Before removing the roots, loosen the soil surrounding them. By doing this, you can prevent uprooting the roots. After carrots are fully grown, don’t let them stay in the ground too long. When kept in the ground in hot weather, carrots can become bitter.

Growing carrots may require some patience, but with the appropriate techniques and care, you may reap a plentiful harvest of crisp, delicious carrots directly from your garden. By choosing the right variety, preparing the soil properly, watering consistently, and managing pests, by following these steps you’ll learn how to grow carrots successfully.

Certainly! If you’d like to learn more, please consider following our WhatsApp Channel: Harvest Gardening

Q1: How to grow carrots in a raised bed?

A1: Make sure the soil in an elevated bed is loose, well-drained, and at least 12 inches deep before planting carrots. Keep the soil continually moist, sow seeds thinly, and thin out seedlings to give them room to thrive.

Q2: How to grow carrots at home without seeds?

A2: Using the cut tops of store-bought carrots, you may grow carrots at home without seeds. Just put the chopped tops in a shallow dish filled with water, position them in a sunny spot, and keep changing the water until the carrots start to take root before planting them in the soil. As an alternative, you can use the “regrowth” method, which involves directly inserting carrot scraps into the soil while the roots are still connected.

Rich soil, regular rainfall, and prolonged cool weather in the spring and fall (or winter months in milder climates) are all necessary for growing broccoli, making it difficult to grow. Brussels sprouts, cauliflower, and kale are members of the cruciferous family, which also contains broccoli (Brassica oleracea), a nutrient-rich vegetable. Although this plant is considered an annual, it has a two-year life cycle and will bloom in its second year. A cluster of flower buds is the portion of the plant that can be eaten. Broccoli can also be found in sprouting form, which grows faster than head broccoli. Furthermore, growing broccoli is not tough if you adhere to some basic guidelines.

We provide extensive instructions on how to grow broccoli in your backyard garden, covering everything from soil preparation to harvesting.

1. Knowledge of broccoli growth environments

  • Broccoli thrives in chilly climates, ideal for spring and fall. Temperature is crucial for growth, with optimal temperatures between 65°F and 75°F. Overheating can cause bolting, reducing yields. Broccoli may not thrive in hot summer regions.
  • Broccoli will grow strongly and produce huge heads if planted in full sun. To shield the plants from the intense sun, partial shade may be required in extremely hot locations.

2. Broccoli planting locations

  • Choose a planting location that receives full sun and has healthy, well-drained, slightly acidic to neutral soil. If you want to grow broccoli in containers or raised beds you can easily do it.
  • Broccoli should not be planted in the same area as other cruciferous vegetables (kohlrabi, cabbage, cauliflower, kale, and Brussels sprouts) that you have produced within the last two years, or more. Because soil-borne infections and other illnesses are very common in members of the brassica family, including broccoli, crop rotation must be followed.

3. How to prepare soil for growing broccoli

  • Broccoli thrives in rich, well-draining soil with a pH of 6.0 to 7.0. To ensure nutrient-rich soil, amend it with organic matter like compost or manure, providing the necessary nutrients and a loamy texture.
  • Broccoli requires high nitrogen content, so mix a balanced fertilizer before planting. Test soil for amendments and adjust accordingly for a strong start.

4. Growing broccoli: When and how to do it

  • Timing is crucial when planting broccoli. Start indoors 6-8 weeks before frost, transplant when soil is workable, and direct sow in mid- to late-summer for fall crop.
  • Plant broccoli seedlings 18-24 inches apart, and 24-36 inches apart, and ensure deep planting for optimal growth, with the topmost set slightly above the ground.
  • When directly sowing seeds in the garden, make sure the soil is continually moist and the seeds are sown ½ inch deep to promote germination.
  • Broccoli requires regular watering, ensuring a week-round watering of 1 to 1/2 inches, and maintaining soil moisture and temperature stability through mulching.
  • Broccolioves require multiple fertilizer applications, starting with a starting fertilizer like 2-4-2 (nitrogen-rich fertilizer P-N-P) and then a high-nitrogen fertilizer like 21-0-0 three weeks later and once more after forming a central head. Organic fertilizers like fish emulsion or blood meal can ensure a consistent supply of nutrients.
  • Broccolioves are susceptible to pests like cabbage worms and flea beetles. Use non-toxic biological pesticides or manually remove caterpillars. For the protection of young plants, use a floating row cover.
  • The idea of growing broccoli is to promote the formation of firm, big heads. To achieve this, it’s essential to harvest broccoli at the right time. It’s time to harvest when the buds are tight and the head is compact. If you wait too long, the broccoli’s quality may suffer when the buds open into blossoms.

There are several benefits to growing broccoli in your backyard garden. You may have a plentiful harvest of this nutrient-dense produce by adhering to the above advice, which includes knowing the ideal growing conditions, preparing the soil, and controlling pests. Your backyard broccoli can thrive and provide fresh vegetables for months if given the proper care.

Certainly! If you’d like to learn more, please consider following our WhatsApp Channel: Harvest Gardening

Q1: How many days does broccoli take to grow?

A1: From seed to harvest, broccoli usually takes 70–100 days, depending on the type and growing environment.

Q2: How to grow broccoli in summer?

A2: Select a heat-tolerant type, plant in part shade, and keep the soil regularly moist to avoid bolting while growing broccoli in the summer. Adding more water and mulching the ground will help control the temperature.

Q3: What is the ideal soil type for growing broccoli in raised beds?

A3: Broccoli grows best on rich, well-drained soil with a pH of 6.0 to 7.0. Composting can aid in enhancing the quality of the soil.

For maximum flavor, texture, and nutritional value, broccoli must be harvested at the right time. It is a highly nutritious vegetable. For optimal results while growing broccoli in your garden, it’s important to know when to harvest. Harvest broccoli usually happens just before the blossom buds emerge, but before the center head reaches its full size. Additionally, you may maximize your crop by selecting the proper broccoli variety and type. Certain types of broccoli can withstand higher temperatures, while others develop swiftly, allowing them to be planted over a short growing season. We will look at the important indicators and best procedures for knowing when to harvest broccoli in this comprehensive guide.

The ideal time to harvest broccoli can be determined by taking into account many criteria. You can make sure that your broccoli is harvested at its best by being aware of these signs.

1. Size of the head

One of the most crucial indicators to look out for is the size of the broccoli head. Before harvesting, the head should ideally have a diameter of 4–7 inches. But, certain types have the potential to grow larger, so it’s critical to identify the exact variety you’re growing.

2. Compactness of the head

The compactness of the broccoli head, with no yellow flowers or closely packed florets, is crucial for determining its quality. Harvest immediately when the head loosens, as this can deteriorate the flavor.

3. Color of the florets

Broccoli florets should be deep green, without yellowing, indicating ripeness for harvesting. Yellowing signifies buds ready for bloom, while late harvesting can result in a harsh taste.

Depending on the cultivar, broccoli is normally ready for harvesting 50–70 days after planting, or when the heads are tight and solid. When the florets are compact and before any yellow blooms appear—a sign of over-maturity—that is the ideal time to harvest. The broccoli harvesting period is determined by many factors, mostly type, and variety, but also local conditions. Broccoli is harvested in late June or early September and October in various places.

Early morning broccoli harvesting ensures the best flavor and texture, maintaining its crispness and wetness. Later harvests may result in a slightly wilted texture due to water loss, so it’s best to avoid this method.

Proper harvesting methods are crucial for maintaining plant health and promoting side shoot growth, and following these steps ensures a successful harvest of broccoli.

  • Use garden shears or a sharp knife to trim the broccoli head off the plant, as this trim reduces disease risk and ensures plant vitality.
  • Harvest broccoli by leaving 5-6 inches of stem attached to the head, promoting side shoot growth and simplifying handling.
  • Gather broccoli early in the morning for optimal flavor and maintain its moisture content and stiffness due to its lower temperature.
  • Gardeners often mistakenly wait too long to harvest broccoli, as it deteriorates quickly if the florets loosen or turn yellow, so it’s crucial to gather it promptly.
  • Gardeners often overlook lateral shoots, focusing solely on the main head. Gathering smaller heads can increase harvests and extend broccoli season by extending the plant’s lifespan.
  • Harvest plants with a sufficient stem connected to the plant to avoid reducing yield by cutting too close to the main stalk, which can inhibit side shoot growth.

When you harvest broccoli at the correct time, the plants will yield the highest quality in terms of flavor, texture, and nutrition. You can have a plentiful and prolonged broccoli harvest by employing appropriate harvesting procedures and keeping a careful eye on the florets’ size, color, and compactness.

Certainly! If you’d like to learn more, please consider following our WhatsApp Channel: Harvest Gardening

Q1: When is it too late to harvest broccoli?

A1: When broccoli florets turn yellow and buds bloom into flowers, it’s too late to harvest, as the broccoli loses its perfect texture and tastes bitter.

Q2: How long does it take to harvest broccoli?

A2: From seed to harvest, broccoli usually takes 70–100 days to mature. The variety and growing environment will determine the precise time.

A climbing bean plant known as a pole bean grows vertically and is frequently supported by poles, trellises, or other structures. Because of their great production and ability to grow more beans in a smaller space than bush beans, they are popular in home gardens. But any summer vegetable garden must contain these sweet, starchy green beans (Phaseolus vulgaris). There are several types of pole beans, including runner, snap, and green beans. Although they usually take longer to mature, they provide a consistent harvest over a few weeks, which makes them a great option for prolonged fresh bean output. 

Pole beans are climbing plants that need help to flourish, in contrast to bush beans. They are renowned for their prolonged growing season and capacity for continuous bean production. The beans are perfect for vertical gardening since they grow on vines that may reach heights of six to ten feet. These beans can grow in a range of climates and produce large yields when given the right care.

  • These beans have various benefits, especially for people with small gardens, but bush beans also have their perks. Pole beans are a great choice for gardeners working in tiny spaces since they grow vertically and need trellises or other structures to climb.
  • These beans also yield beans continually during the growing season. In contrast to bush beans, which usually yield all at once, pole beans provide a consistent crop that allows you to enjoy fresh produce for several weeks.
  • One of the most popular types, Kentucky Wonder is renowned for its long, straight pods and delicious flavor.
  • Blue Lake: A delicate, highly prolific, stringless cultivar.
  • Scarlet Runner: A decorative bean that yields tasty pods and has vivid scarlet blooms.
  • Purple Podded: Known for its purple pods, which become green when cooked and have a delightful flavor, this variety is distinctive.

Regardless of your level of gardening experience, following this guide will enable you to produce many nutritious pole beans. Come with me as we investigate all the data you need.

1. The best time to plant pole beans

These beans thrive in warm, regularly temperature soil between 15°C and 29°C. They can be planted in India from October to March during the Rabi season or June to September during the Kharif season, ensuring frost risk is eliminated.

2. Learn how to plant pole beans

  • Pole beans thrive in warm, regularly drained soil between 15°C and 29°C, and can be planted in India between October-March or June-September, ensuring frost risk is eliminated.
  • Plant seeds in rows, one inch deep and three inches apart, or create mounds or hills with five to six seeds, leaving three feet between each. Trim out seedlings when they reach 3 inches tall.
  • To support these beans, provide immediate assistance by constructing a fence, teepee, or trellis, and using poles or posts at least 6-8 feet high. Proper support prevents sprawl, making harvesting challenging and reducing production.

3. How to care for pole beans

  • A weekly inch of water is all that beans need, but they shouldn’t be watered overhead as this can encourage leaf diseases. To prevent problems like powdery mildew and to keep leaves dry, water the base of the plants.
  • Mulch around pole bean plants to maintain soil temperature, control weed growth, and preserve moisture. Use organic mulch like shredded leaves, straw, or grass clippings.
  • Pole beans, nitrogen-fixing plants, absorb nitrogen from the atmosphere and convert it into beneficial form. A balanced organic fertilizer at planting time is beneficial, but high-nitrogen fertilizers should be avoided to prevent excessive foliage growth and bean production.
  • Companion planting helps repel pests like aphids and Mexican bean beetles by eliminating them with water and hand-plucking larger insects. Maintaining healthy airflow between vines prevents mildew.

Growing pole beans in your backyard may be a fruitful and fulfilling experience. These climbing plants can provide you with abundant crops throughout the growing season if you give them the proper care. Pole beans may increase the yield and visual appeal of your garden, whether you use attractive kinds like Scarlet Runner or more classic varieties like Kentucky Wonder.

Certainly! If you’d like to learn more, please consider following our WhatsApp Channel: Harvest Gardening

Q1: How to grow pole beans in a raised bed?

A1: Plant the seeds 3 inches apart in full sun and well-draining soil to cultivate pole beans in an elevated bed. To keep the soil damp but not soggy, provide strong trellises or poles for support and water regularly.

Q2: When to harvest pole beans?

A2: Pole beans are ready to harvest when the pods are 4 to 6 inches long and firm, but the beans inside have not yet bulged. Depending on the type, this stage normally happens 60 to 70 days after planting.

Q3: How to harvest pole beans?

A3: Pole beans can be harvested by holding the vine in one hand and carefully snapping off the pods with the other to prevent harming the plant. It’s crucial to pick the beans frequently—at least once or twice a week—to stimulate the plant to continue producing.