Dill, with its fluffy leaves and unique flavor, not only infuses your recipes with a dash of freshness but also grows well in container gardens. Explore our tutorial on how to grow dill in pots to add some spice to your cooking efforts. As an annual herb, dill will wither away after flowering or if it experiences a frost, but the seeds are reusable.
How to grow dill in pots, step by step:
Types of dill:
- Fernleaf: Compact, takes around 20 days to develop. Due to its small size, it is perfect for indoor growing and container planting.
- Bouquet: Another choice that grows quickly, has a lot of leaves, and tastes good.
How to Grow Dill With Perfect Soil:
- Add well-balanced organic fertilizer to the soil to supply the necessary nutrients for healthy growth.
- How to grow dill? Make sure pots have holes for drainage to keep water out of the container and encourage strong root growth.
- Choose a pot with bottom drainage holes that are at least 12 inches deep. Due to its deep taproot, dill requires a deep container.
Planting Seedlings or Seeds of Dill:
- Plant them straight in the ground, about 1/4 inch deep. Divide the seeds into 18–24-inch sections.
- If using seedlings, plant them with the same spacing between each seed and make sure the dirt surrounding the seedlings is packed down gently to remove any pockets of air.

Essential tips on how to grow dill:
- Don’t overwater; instead, keep the soil consistently moist to avoid root rot. When it appears that the top inch of soil is dry, water it.
- The pot should be placed in an area with full to partial sun exposure. Dill grows best in direct sunshine.
- During the growing season, after the dill plants have established themselves, which normally takes a few weeks, add a balanced liquid fertilizer every four to six weeks.
- Consider using stakes to provide support if you’re planting a taller variety of dill to keep the plants from bending or toppling over.
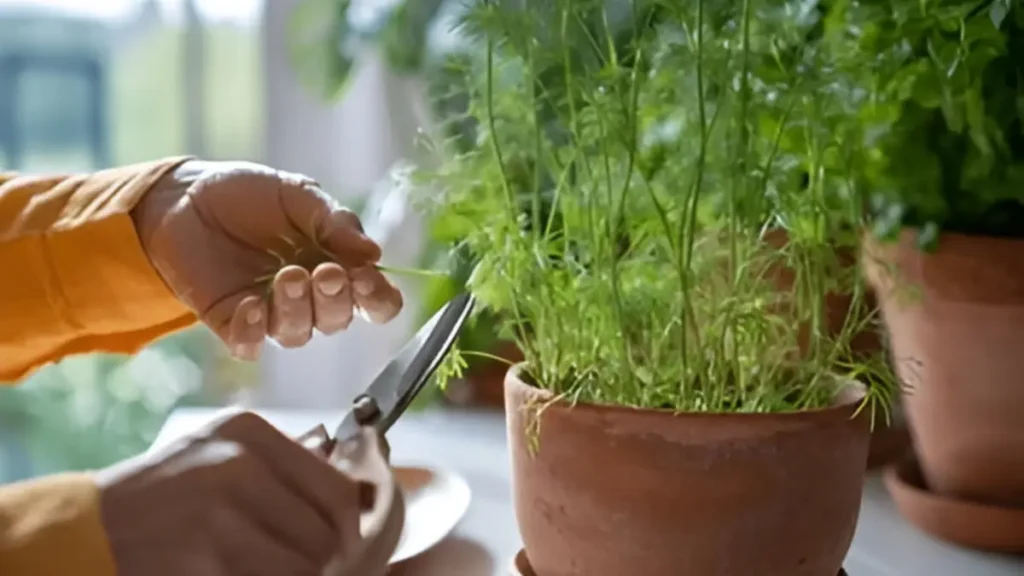
- Larger growth is encouraged by regular harvesting. Trim fronds from the outer borders so that growth can proceed in the center. For the finest flavor, harvest before blossoming.
- Regular harvesting decreases the need for pruning because the plant retains a compact and productive shape.
How to grow dill without Pests & Diseases:
Diseases and pests rarely attack dill. Use Defender Slug & Snail Pellets or beer traps (saucers loaded with beer) around your plants if slugs and snails start to cause problems for your young dill seedlings.
Conclusion:
By following these steps on how to grow dill in pots successfully, start by selecting a suitable pot with good drainage to prevent waterlogged soil, ensuring the dill plants receive adequate moisture without the risk of root rot. Use a well-draining potting mix enriched with organic matter to provide the necessary nutrients for healthy growth. When dill is dried, dehydrated, frozen, or kept in salt, it keeps its flavor nicely. For year-round use, you can store the leaves or the seeds. You can freeze-dry your dill to make it last for twenty years. We choose dehydrated dill because we adore the flavor of dried dill seed or dill plant.
Certainly! If you’d like to learn more, please consider following our WhatsApp Channel, Facebook, Instagram, YouTube, Twitter, and Pinterest.
A frequently asked questions:
Q1: When is the best time to take dill cuttings?
A1: When the dill plant is actively developing, the spring or early summer is the ideal time to take cuttings. Select a mature, healthy plant to cut.
Q2: What are the basic requirements for growing dill leaves?
A2: Well-drained soil with a pH of 5.5 to 6.5 is ideal for dill growth. It needs six to eight hours of direct sunlight per day, along with a reasonable amount of water.
Q3: When is the best time to plant dill seeds?
A3: When the soil temperature hits about 60°F (15°C), in the spring or early summer, it is ideal to plant dill straight from seeds.
Q4: How to grow dill leaves at home?
A4: To grow dill leaves at home, sow the seeds in well-drained soil in a container at least 12 inches deep and place it in direct sunlight. Maintain a steady moisture level in the soil, prevent transplanting (dill has sensitive roots), and harvest the leaves on a regular basis to promote new development.
Q5: Does dill regrow after cutting it?
A5: Yes, dill regrows after being cut, as long as at least one-third of the plant remains. Regular picking promotes bushier growth, but once it blossoms and goes to seed, leaf output decreases.