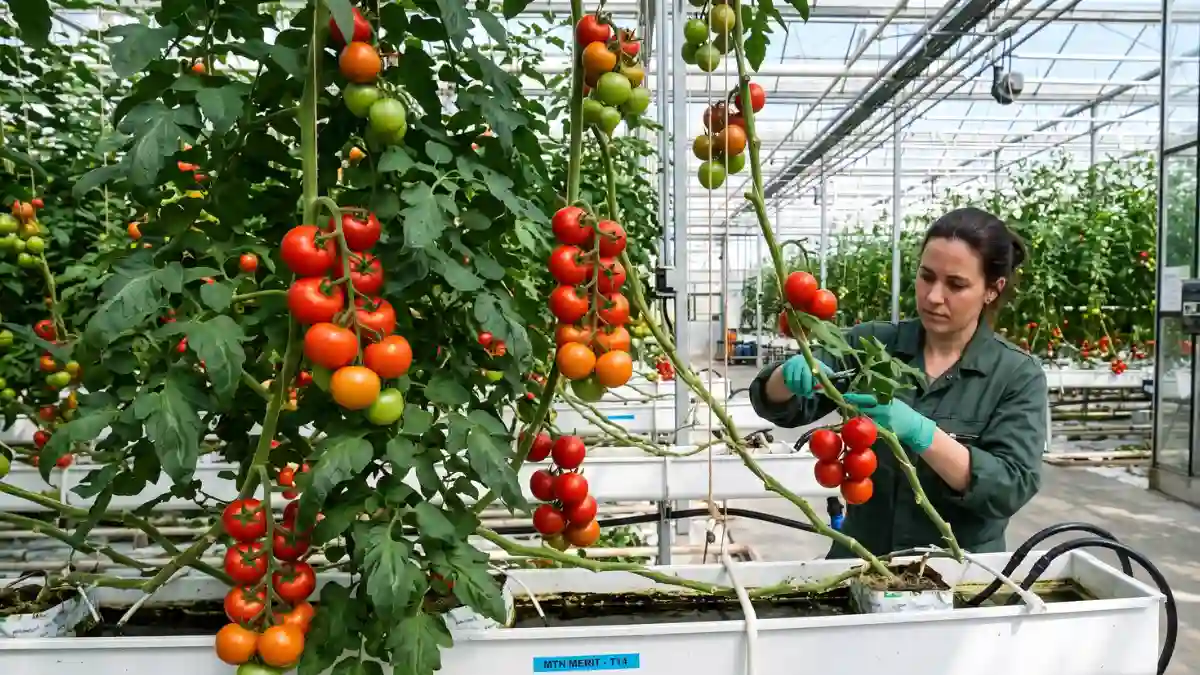
Imagine plucking a sun-ripened tomato from a vine that never touched a speck of soil — grown twice as fast, twice as juicy, and with almost none of the pest headaches you’d get in a backyard garden. That’s the promise of hydroponic tomatoes, and it’s exactly why home growers and commercial farms alike are ditching dirt for water-based systems.
Whether you’re a curious beginner with a sunny windowsill or a committed grower considering a greenhouse setup, this guide will take you through all you need to know, from selecting the perfect system to harvesting your first cluster of vine-ripened fruit.
What are hydroponic tomatoes?
Hydroponic tomatoes are tomato plants cultivated without soil, with a nutrient-rich water solution providing all the roots require directly. Instead of looking for nutrients in the soil, the roots sit in (or are occasionally flooded with) a perfectly balanced combination of water, minerals, and oxygen.
Traditional gardening requires a lot of guesswork and waiting, but our direct-delivery system eliminates both. Plants spend less energy looking for food and more energy making fruit, which is why hydroponic tomato growers frequently report 30-50% faster growth and much larger yields per plant than soil-grown competitors.
Why tomatoes thrive in hydroponics
Tomatoes are one of the most popular hydroponic vegetables for a reason: they’re strong, fast-growing, and perform exceptionally well in regulated root conditions. Here are a few reasons why tomatoes are ideal for hydroponics:
- They have an active root system that readily adapts to water-based cultivation.
- They are heavy feeders, and hydroponics allows you to precisely control nutrient levels.
- They greatly benefit from regular moisture—no more feast-or-famine watering.
- Indoor and greenhouse hydroponic systems protect them from soil-borne diseases and pests.
Benefits of growing tomatoes hydroponically
Before we get into the setup instructions, it’s important to understand why this method has become popular among both home and commercial growers.
1. Faster growth and higher yields
Because nutrients are given directly to the root zone in a readily absorbable form, plants do not use energy establishing large root systems to find food. That saved energy is used straight into vegetative growth and fruit production.
2. Water efficiency
Unlike what you would think, hydroponic systems often use up to 90% less water than soil cultivation. Recirculating systems utilise the same nutrient solution repeatedly, resulting in negligible water loss due to runoff or deep soil percolation.
3. Year-round growing
You can produce tomatoes 365 days a year, regardless of season or climate, with the correct indoor setup, which includes grow lights, temperature control, and a consistent nutrient system.
4. Fewer pests and diseases
Soil is home to countless pathogens, nematodes, and fungal spores that can devastate a tomato crop. Hydroponic systems, especially indoor ones, largely sidestep these problems.
5. Space efficiency
Vertical hydroponic towers and densely spaced systems allow you to grow more plants in a smaller area, which is great for urban gardeners, balconies, and small greenhouses.
6. Precise control over flavor and nutrition
Because you control exactly what nutrients reach the roots and in what concentration, you can actually influence the sweetness, acidity, and firmness of your tomatoes.
Best hydroponic systems for growing tomatoes
Not all hydroponic systems are made equal—and tomatoes, as huge, heavy-feeding plants, do better in some setups than others.
Dutch bucket (Bato bucket) system
This is the gold standard for hydroponic tomatoes, particularly in large enterprises. Each plant grows in its own bucket filled with an inert medium (such as perlite or clay pebbles) and is fed by a drip line that connects to a common fertiliser reservoir.
Why it works well: Individual buckets make disease isolation easier, provide robust root support for tall vining plants, and simplify nutrition management.
Deep water culture (DWC)
In DWC, plant roots are directly immersed in an oxygenated nutritional solution. It’s easy, inexpensive, and works well for smaller determinate tomato varieties, but it may struggle to hold very large indeterminate plants without additional staking.
Drip systems
Drip irrigation systems supply fertiliser solution to the base of each plant at regular intervals. They’re incredibly adaptable and can scale from a single plant to a whole commercial greenhouse.
Nutrient film technique (NFT)
NFT involves a thin film of nutrient solution flowing continuously across plant roots in a sloped channel. It’s great for leafy greens, but less so for tomatoes because their massive root systems require more substrate support — hybrid NFT-drip setups can work.
Ebb and flow (Flood and drain)
This method periodically fills a grow tray with fertiliser solution before draining it back into a reservoir. It’s easy for beginners to use and works well with smaller tomatoes.
| System | Best For | Difficulty | Cost |
| Dutch Bucket | Large indeterminate tomatoes | Moderate | Medium |
| Deep Water Culture | Determinate/dwarf varieties | High | Low |
| Drip System | Scalable commercial growing | Moderate-High | Medium-High |
| Ebb and Flow | Beginners, smaller plants | High | Low-Medium |
| NFT | Not ideal alone for tomatoes | Moderate | Medium |
Choosing the best tomato varieties for hydroponics
Not all tomato varieties do equally well in hydroponic systems. Here are some grower favourites, arranged by type.
Determinate varieties (Compact, Bushy)
Great for smaller systems and limited vertical space.
- Better Bush – Compact, high-yielding, disease-resistant.
- Roma – Ideal for sauces and paste; adapts well to hydroponics.
- Patio Tomato – Perfect for tight indoor or balcony setups.
Indeterminate varieties (Vining, Continuous Growth)
Best suited for Dutch bucket or drip systems with vertical trellising.
- Beefsteak – Large, juicy fruit; a favorite for flavor.
- Cherokee Purple – Rich, complex flavor; heirloom favorite.
- Sungold Cherry – Extremely sweet, prolific, and fast-growing.
- Big Beef – High yield, disease-resistant hybrid.
Cherry and grape varieties
Smaller-fruited types tend to be more forgiving for hydroponic beginners since they’re less prone to issues like blossom end rot.
- Sweet 100
- Tomatoberry
- Black Cherry
Setting up your hydroponic tomato system: Step-by-step
Step 1: Choose your growing location
Tomatoes require at least 8-10 hours of light per day, whether natural or supplemented. Decide whether you’ll grow indoors under LED grow lights, in a greenhouse, or outdoors in a hydroponic system.
Step 2: Select and assemble your system
Choose a system based on your available area, money, and number of plants (Dutch buckets are the most reliable option for professional tomato producers).
Step 3: Prepare the growing medium
Use an inert, well-draining medium such as:
- Perlite
- Expanded clay pebbles (LECA)
- Coconut coir
- Rockwool cubes
These mediums provide root support and help retain moisture and oxygen without breaking down like soil.
Step 4: Start seeds or transplant seedlings
Germinate seeds in rockwool cubes or a seed-starting media until they sprout true leaves, then transplant into your hydroponic system.
Step 5: Mix your nutrient solution
Use a hydroponic fertilizer designed for fruiting plants (increased potassium and phosphorus levels during flowering/fruiting). Follow the manufacturer’s dilution ratios closely.
Step 6: Monitor and adjust pH and EC
Check your nutrient solution’s pH and electrical conductivity (EC) regularly — this is arguably the single most important habit in hydroponic tomato growing (more on this below).
Step 7: Provide support and trellising
Tomatoes, particularly indeterminate kinds, require vertical support. Stakes, cages, or a trellis-and-clip system can help keep plants erect and fruit clusters off the ground.
Step 8: Pollinate (If growing indoors)
Without wind or bees, indoor hydroponic tomatoes need manual pollination. Gently shake flowering trusses daily or use a small electric toothbrush/vibrating tool to mimic “buzz pollination.”
Nutrient management: The heart of hydroponic success
Understanding NPK for tomatoes
Tomatoes have shifting nutritional needs throughout their life cycle:
- Seedling/Vegetative stage: Higher nitrogen (N) to support leaf and stem growth.
- Flowering stage: Balanced nutrients with increased phosphorus (P) to support blooming.
- Fruiting stage: Higher potassium (K) to support fruit development, size, and flavor.
Essential micronutrients
Beyond N-P-K, tomatoes require calcium, magnesium, sulphur, iron, zinc, and boron. Calcium deficiency, in particular, is the major cause of blossom end rot, a common and irritating problem among hydroponic tomato producers.
The critical role of pH
Tomatoes prefer a nutrient solution pH between 5.8 and 6.3. Outside this range, plants struggle to absorb key nutrients even if those nutrients are present in the water — a phenomenon called nutrient lockout.
pH Management Tips:
- Test pH daily using a digital pH meter or reliable test strips.
- Adjust using pH-up or pH-down solutions in small increments.
- Recheck 30–60 minutes after adjusting, since pH can drift.
Understanding EC and TDS
Electrical Conductivity (EC) measures the concentration of dissolved nutrients in your solution. For tomatoes:
- Seedlings: 1.0–1.5 EC (mS/cm)
- Vegetative growth: 2.0–2.5 EC
- Flowering/fruiting: 2.5–3.5 EC
Too low, and plants become nutrient-deficient. Too high, and roots can suffer from nutrient burn or osmotic stress.
Optimal growing conditions for hydroponic tomatoes
Temperature
- Daytime: 70–80°F (21–27°C)
- Nighttime: 60–65°F (16–18°C)
Consistent temperatures encourage steady flowering and fruit set. Sudden swings can cause blossom drop.
Humidity
Maintain relative humidity between 50 and 70%. Excess humidity raises the danger of fungal infections such as powdery mildew, whilst too low humidity can stress plants and impair pollination success.
Lighting
If growing indoors, full-spectrum LED grow lights are the most efficient option. Tomatoes are considered “high-light” plants and generally need:
- PPFD (light intensity): 400–600 µmol/m²/s during fruiting
- Photoperiod: 14–18 hours of light per day during vegetative growth, slightly reduced during fruiting
Oxygenation
Roots require oxygen as much as nutrients. To keep the nutrient solution oxygenated and prevent root rot, DWC and related systems require air stones or air pumps.
Water temperature
Keep your reservoir between 65–75°F (18–24°C). Water that’s too warm holds less dissolved oxygen and encourages harmful bacterial and algae growth.
Common problems in hydroponic tomato growing (and How to fix them)
Blossom end rot
Cause: Calcium deficiency, often triggered by inconsistent watering or pH imbalance rather than an actual lack of calcium in the solution. Fix: Stabilize pH, ensure calcium is included in your nutrient mix, and maintain consistent moisture levels.
Blossom drop
Cause: Temperature extremes, low humidity, or lack of pollination. Fix: Keep temperatures stable, hand-pollinate flowers, and maintain humidity in the optimal range.
Yellowing leaves (Chlorosis)
Cause: Nitrogen or iron deficiency, or pH lockout preventing nutrient uptake. Fix: Test and correct pH first, then adjust nutrient concentration if the issue persists.
Root rot
Cause: Low oxygen levels, warm water temperatures, or pathogen buildup in the reservoir. Fix: Add or upgrade air stones, keep reservoir water cool, and clean/sanitize your system regularly.
Leggy, weak growth
Cause: Insufficient light intensity or duration. Fix: Increase light exposure or move plants closer to the light source (within safe distance to avoid heat stress).
Algae growth in the reservoir
Cause: Light exposure to the nutrient solution. Fix: Use opaque reservoirs and tubing, and keep the system covered from direct light.
Pruning and training hydroponic tomatoes
Proper pruning optimises airflow, light penetration, and energy allocation to fruit rather than extra foliage.
- Suckers (small shoots that grow between the main stem and branches) should be removed on a regular basis to maintain a single or double-leader growth structure.
- Reduce disease risk and increase airflow by pruning lower leaves as the plant matures.
- Use trellis clips or string to guide the main stem upwards as it grows.
- Top the plant once it has reached the appropriate height.
Harvesting hydroponic tomatoes
Hydroponic tomatoes are usually ready to harvest 60-85 days after transplanting, depending on the variety. Search for:
- Complete, even colour development (red, yellow, or the variety’s mature colour)
- A slight give when gently squeezed.
- Easily detached from the vine with a gentle twist.
Harvest the fruit in the morning when it is cool and firm for the optimum shelf life and flavour.
Hydroponic vs. soil-grown tomatoes: A quick comparison
| Factor | Hydroponic | Soil-Grown |
| Growth speed | Faster | Slower |
| Water usage | Very efficient | Higher usage |
| Pest/disease risk | Lower (especially indoors) | Higher |
| Setup cost | Higher initial investment | Lower initial cost |
| Control over nutrients | Precise | Limited |
| Space efficiency | High (vertical options) | Lower |
| Year-round growing | Yes, with proper setup | Seasonal (outdoors) |
Is growing hydroponic tomatoes worth It?
For most home growers and small-scale commercial enterprises, the answer is a resounding yes—as long as you’re ready to devote a little more time to monitoring pH, EC, and environmental conditions than traditional gardening. The benefits include faster growth, larger yields, cleaner produce, and the delight of harvesting fresh tomatoes no matter the season outside your window.
Start small, with a single Dutch bucket or DWC setup and one or two plants, before expanding to a larger system. Once you’ve figured out your nutrient schedule and ambient conditions, hydroponic tomatoes can be one of the most satisfying crops to cultivate.
Certainly! If you’d like to learn more, please consider following our WhatsApp Channel, Facebook, Instagram, YouTube, Twitter, and Pinterest.
Frequently asked questions about hydroponic tomatoes
Q1. How long do hydroponic tomatoes take to grow?
A1. Most hydroponic tomato varieties take 60–85 days from transplanting to first harvest, though this varies by variety and growing conditions. Cherry tomatoes tend to mature faster than large beefsteak types.
Q2. Can I grow hydroponic tomatoes indoors year-round?
A2. Yes. With adequate grow lights (14–18 hours daily), stable temperatures, humidity control, and manual pollination, hydroponic tomatoes can be grown indoors continuously, regardless of outdoor season.
Q3. What pH level is best for hydroponic tomatoes?
A3. Tomatoes thrive in a nutrient solution pH between 5.8 and 6.3. Straying outside this range can cause nutrient lockout, even if nutrients are technically present in the solution.