Imagine walking through your garden on a warm afternoon and catching a whiff of rich, warm cocoa drifting through the air — except there’s no candy bar in sight. That’s the magic of chocolate scented plants. These fragrant wonders release a genuine chocolate-like aroma from their flowers, leaves, or stems, turning an ordinary garden bed, patio, or windowsill into a sensory experience.
Chocolate scented plants aren’t a gimmick or a marketing trick. Many of them, like Chocolate Cosmos and Chocolate Mint, contain natural compounds that genuinely mimic the smell of cacao. Gardeners love them because they combine visual beauty with a nostalgic, comforting fragrance that few other plants can offer.
In this guide, you’ll learn about the best chocolate-scented plants to cultivate, how to care for them, where to place them for optimal aroma, and the most frequently asked questions before adding one to your collection.
Why grow chocolate scented plants?
Before delving into specific kinds, it’s helpful to understand why these plants have become so popular among home gardeners, aromatherapy aficionados, and sensory garden designers.
A multi-sensory garden experience
Colour, shape, and texture are fundamental to most landscape designs. Chocolate-scented plants provide an entirely other dimension: smell memory. Chocolate’s aroma is strongly associated with warmth and nostalgia, making these plants popular in relaxation gardens, patios, and other spaces designed for unwinding.
Natural mood boosters
Scent has a strong effect on mood. Warm, sweet, cocoa-like aromas are frequently connected with peace and enjoyment, which is why chocolate-scented plants are becoming more popular in therapeutic and sensory gardens.
Low maintenance, High reward
Many chocolate-scented plants, especially Chocolate Mint and Chocolate Cosmos, are surprisingly easy to grow, even for beginners. A little sunlight, well-drained soil, and regular watering are often all it takes.
Unique talking point
Few things surprise garden visitors more than being invited to “smell the chocolate flower.” It’s a memorable, conversation-starting feature for any outdoor space.
Top 15 chocolate-scented plants to grow
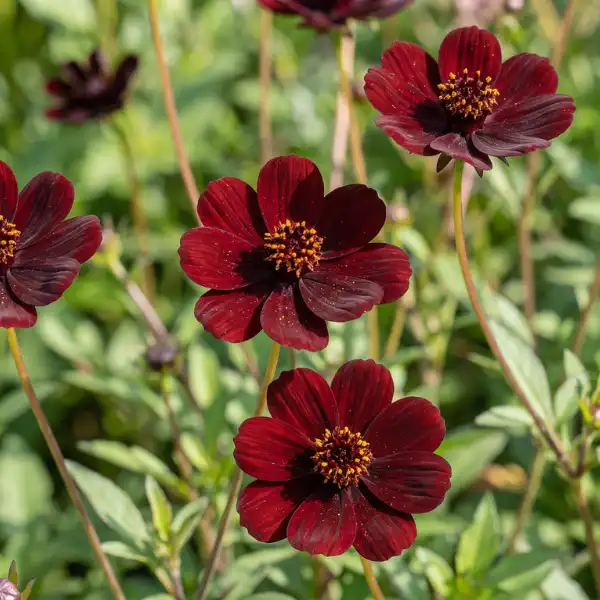
1. Chocolate cosmos (Cosmos atrosanguineus)
The undisputed star of chocolate scented plants. Chocolate Cosmos produces velvety, rich red petals with a pronounced cocoa aroma, particularly on warm afternoons.
Growing Tips:
- Needs full sun (6+ hours daily)
- Prefers well-drained, slightly acidic soil
- Overwinter tubers indoors in colder climates
- Blooms from midsummer through early fall
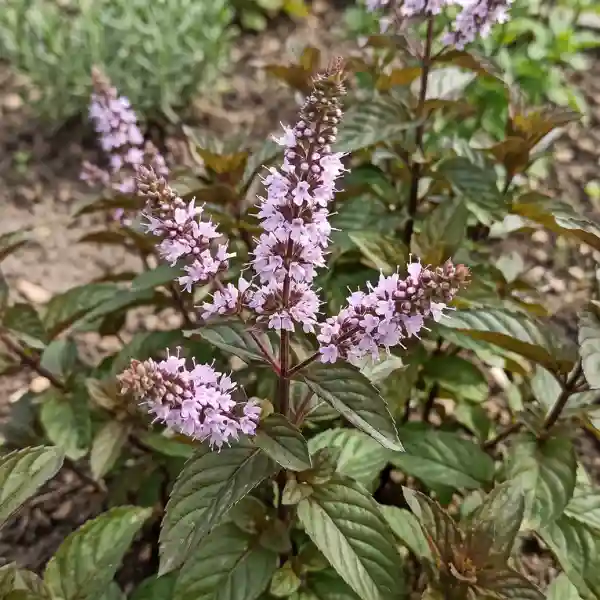
2. Chocolate mint (Mentha × piperita ‘Chocolate’)
A peppermint with dark-tinted leaves and a true chocolate-mint scent, akin to an after-dinner mint. It is a popular choice for teas, garnishes, and container gardening.
Growing Tips:
- Thrives in partial shade to full sun
- Spreads aggressively — grow in containers to control it
- Keep soil consistently moist
- Harvest leaves regularly to encourage bushy growth
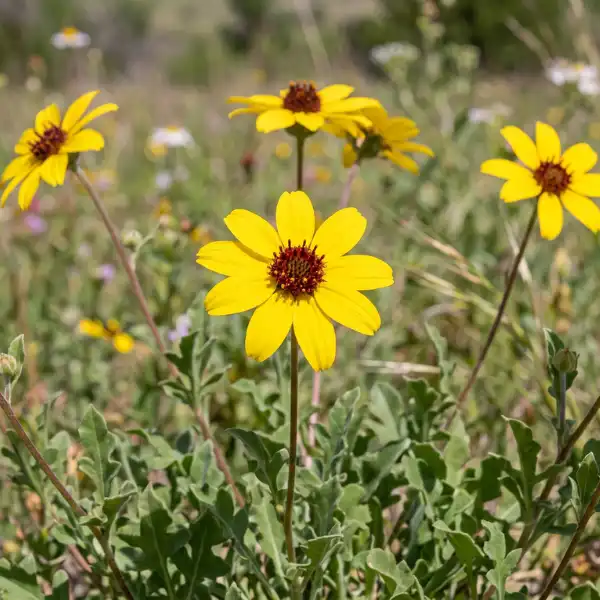
3. Chocolate daisy (Berlandiera lyrata)
Native to the southwestern United States, this cheerful yellow daisy releases a strong chocolate fragrance in the morning hours, fading as the day heats up.
Growing Tips:
- Extremely drought-tolerant once established
- Prefers full sun and sandy, well-drained soil
- Best planted near seating areas to catch the morning scent
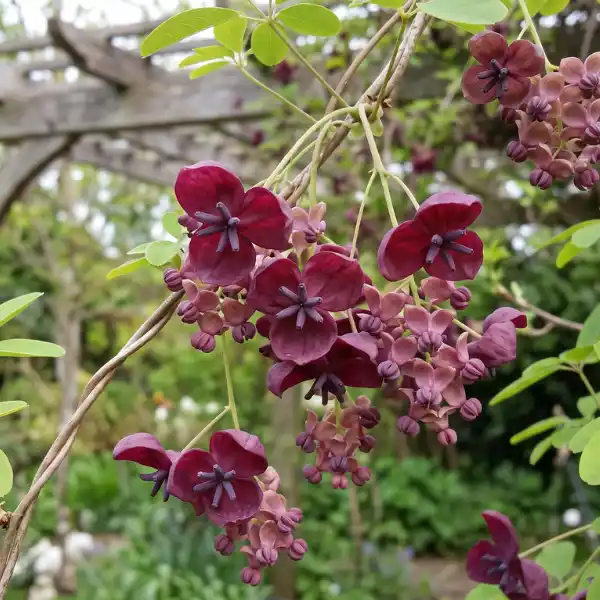
4. Chocolate vine (Akebia quinata)
A robust climbing vine that produces clusters of tiny, rich purple-brown blooms with a delicate chocolate-vanilla aroma in the spring.
Growing Tips:
- Needs a trellis or fence for support
- Tolerant of both sun and partial shade
- Prune regularly, as it can grow quickly
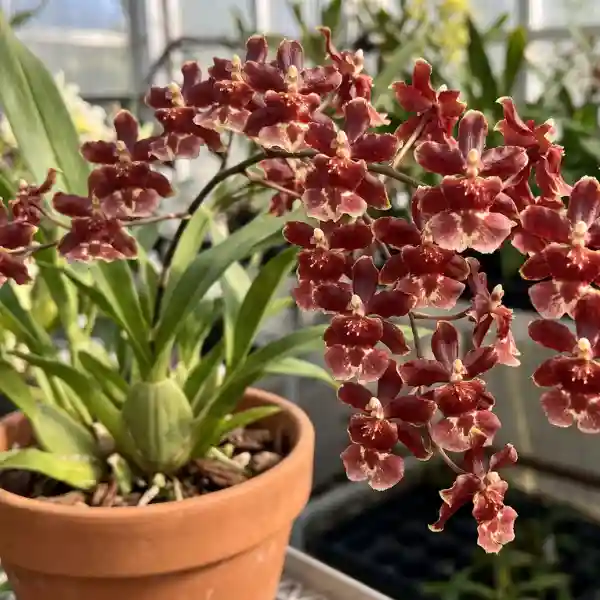
5. Chocolate orchid (Oncidium ‘Sharry Baby’)
Often called the “Chocolate Orchid,” this stunning orchid variety produces sprays of maroon-and-white flowers with a scent remarkably close to melted chocolate.
Growing Tips:
- Grow indoors with bright, indirect light
- Use orchid-specific bark mix, not regular potting soil
- Water when the roots turn silvery-green rather than on a fixed schedule
6. Chocolate flower (Berlandiera lyrata) — Desert variant
Closely related to the Chocolate Daisy, this desert-adapted variety is favoured in xeriscaping for its hardiness and fragrant yellow blossoms.
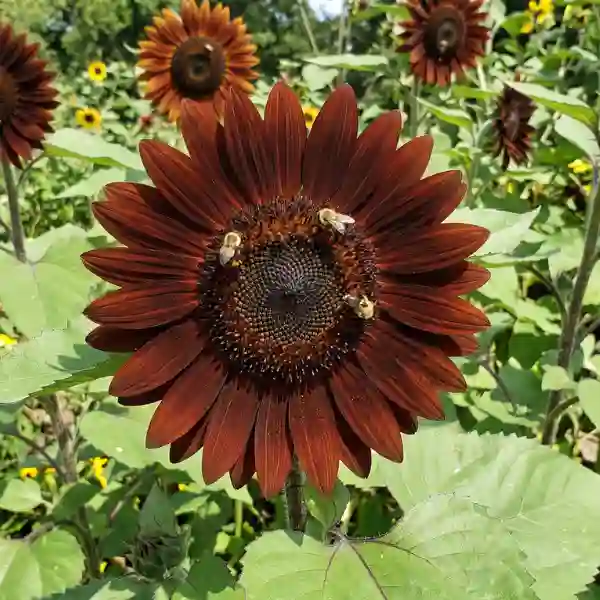
7. Chocolate sunflower (Helianthus ‘Chocolate’)
A striking sunflower cultivar with deep mahogany petals. While the scent is milder than other varieties on this list, it adds a rich, cocoa-toned visual complement to a fragrant garden bed.
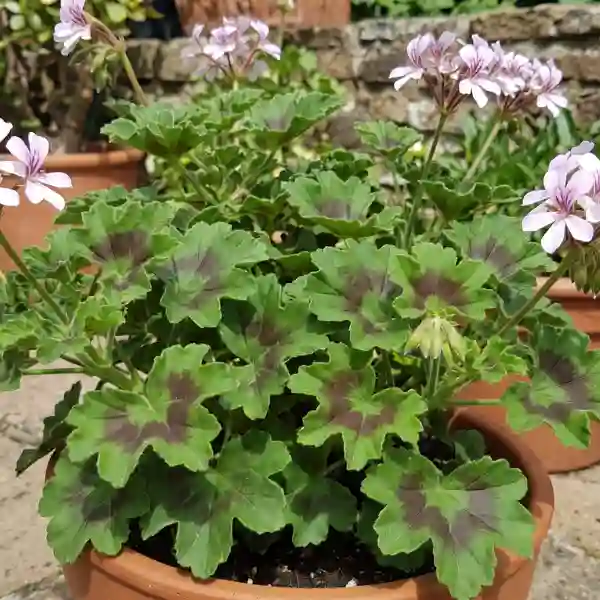
8. Chocolate geranium (Pelargonium ‘Chocolate Mint’)
A scented-leaf geranium with velvety, chocolate-brown-marked leaves that give off a minty-cocoa perfume when touched or crushed.
Growing Tips:
- Best grown in containers for easy overwintering
- Prefers full sun and well-drained soil
- Avoid overwatering, as it’s prone to root rot
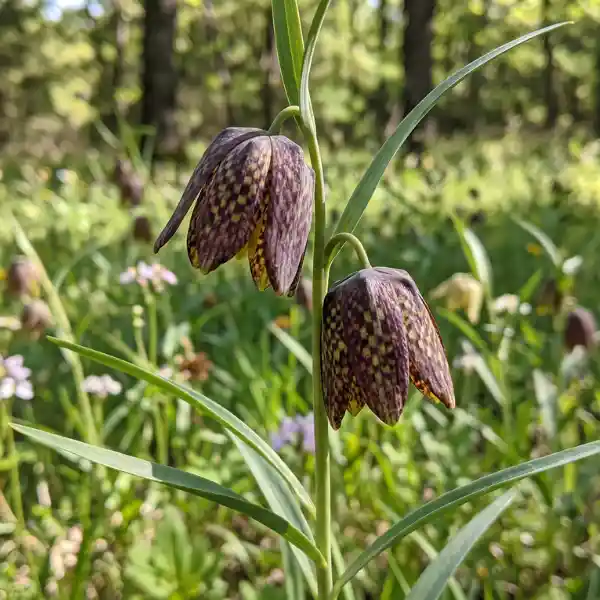
9. Chocolate lily (Fritillaria affinis)
Chocolate Lily, a wildflower native to the Pacific Northwest, has mottled brown-purple petals and a mild, earthy cocoa aroma that is best perceptible up close.
10. Chocolate chip ajuga (Ajuga reptans ‘Chocolate Chip’)
A compact ground cover with bronze-chocolate foliage. While the scent is subtle, it’s a wonderful textural and color companion to plant alongside stronger-smelling chocolate varieties.
11. Chocolate soldier plant (Kalanchoe tomentosa)
Also known as “Panda Plant,” this succulent has fuzzy, chocolate-tipped leaves. It’s grown more for its texture and appearance than fragrance, but it pairs beautifully in a themed succulent display.
12. Chocolate snakeroot (Ageratina altissima)
A native woodland plant with clusters of white flowers and a faint cocoa-like scent, especially appreciated by pollinators.
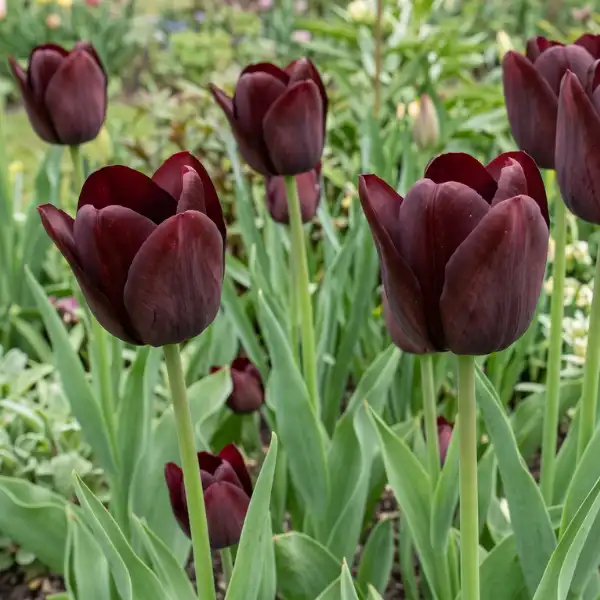
13. Chocolate tulip (Tulipa ‘Chocolate Beauty’)
A rich, deep-maroon tulip with a gentle sweet aroma evocative of dark chocolate, perfect for spring bulb displays.
14. Chocolate habanero pepper plant
An unexpected entry: while this pepper type is produced mostly for its fruit, when brushed, the leaf has a mild cocoa-spice scent.
15. Chocolate queen anne’s lace (Daucus carota ‘Dara’)
A dramatic, dark maroon relative of the classic wildflower, offering delicate texture and a mild sweet scent that blends beautifully into cutting gardens.
How to design a chocolate scented garden
Creating a dedicated sensory space around chocolate-scented plants takes a bit of planning. Here’s how to do it right.
Choose a sheltered, Sunny spot
Fragrance carries best in still air, so choose a spot protected from strong winds — near a patio wall, fence, or courtyard works well.
Layer scents by bloom time
Combine early bloomers like Chocolate Lily with summer stars like Chocolate Cosmos and Chocolate Daisy so your garden releases fragrance across multiple seasons.
Plant near seating areas
Place strongly scented varieties like Chocolate Mint and Chocolate Cosmos within arm’s reach of benches, patios, or walkways so the fragrance is easy to enjoy.
Mix containers and ground beds
Many chocolate scented plants, such as Chocolate Geranium and Chocolate Mint, do exceptionally well in containers — perfect for renters or small-space gardeners.
General care tips for chocolate scented plants
| Care Factor | Recommendation |
| Sunlight | Most varieties need 4–6+ hours of direct sun |
| Soil | Well-drained soil is essential; avoid waterlogging |
| Watering | Moderate and consistent; avoid letting soil dry out completely for mint varieties |
| Fertilizing | Light monthly feeding during active growth season |
| Pruning | Regular trimming encourages fuller growth and stronger fragrance |
| Winter Care | Tubers (like Chocolate Cosmos) should be lifted and stored in colder zones |
Common mistakes to avoid
- Overwatering fragrant varieties, which can dilute essential oils responsible for scent.
- Planting in deep shade, since most chocolate scented plants need good sunlight to produce their strongest fragrance.
- Ignoring soil drainage, which leads to root rot in varieties like Chocolate Cosmos and Chocolate Geranium.
- Crowding plants too closely, which restricts airflow and reduces the noticeable scent outdoors.
Conclusion
Chocolate scented plants provide something absolutely unique: a garden that not only looks lovely but smells like your favourite comfort meal. Whether you like the rich, velvety flowers of Chocolate Cosmos, the crisp perfume of Chocolate Mint, or the golden appeal of Chocolate Daisy, these plants provide a distinct sensory dimension to any outdoor or interior area.
Start small — pick one or two varieties suited to your climate and sunlight conditions — and build your fragrant collection from there. Before long, you’ll have a garden that’s as delightful to smell as it is to see.
Certainly! If you’d like to learn more, please consider following our WhatsApp Channel, Facebook, Instagram, YouTube, Twitter, and Pinterest.
Frequently asked questions about chocolate scented plants
Q1. What plant smells the most like real chocolate?
A1: Chocolate Cosmos is widely considered the plant that smells closest to real chocolate, thanks to natural compounds in its flowers that closely resemble cocoa’s aroma.
Q2: Are chocolate scented plants safe to touch?
A2: Yes, most chocolate scented plants are safe to touch. However, some, like Chocolate Mint, may cause mild skin irritation in sensitive individuals, so it’s best to do a small patch test first.
Q3: Can I grow chocolate scented plants indoors?
A3: Many varieties, such as Chocolate Orchid and Chocolate Geranium, thrive indoors near a bright, sunny window. Chocolate Mint also grows well indoors in containers.
Q4. Do chocolate scented plants attract pollinators?
A4: Yes. Several varieties, including Chocolate Cosmos and Chocolate Daisy, attract bees, butterflies, and other beneficial insects.
Q5: Are chocolate scented plants edible?
A5: Some are, like Chocolate Mint, which is safe for teas and garnishes. However, not all chocolate scented plants are edible, so always confirm before consuming any part of a plant.
")