You don’t have to use harsh chemicals or spend a fortune cleaning your house. A common pantry item, vinegar may be an efficient and reasonably priced DIY cleaner for a variety of surfaces and household chores. Here’s how to use it to keep your house immaculately clean.
Why use vinegar?
A natural deodorizer and disinfectant is vinegar. Because of its acidity, it works well to dissolve mineral deposits and filth. It’s also environmentally friendly and suitable for the majority of surfaces.
A basic vinegar-based DIY cleaner for all purposes
Ingredients:
one part vinegar made of white
one part aqueous
A few drops of essential oil, such as lavender or lemon, are optional but add a nice aroma.
Guidelines:
Using a spray bottle, mix equal parts water and white vinegar.
Should you want to, add a few drops of your preferred essential oil.
Thoroughly shake before using.
Using vinegar as a DIY cleaner
Countertops: Apply a mist and use a fresh cloth to clean the surface. Because vinegar stains natural stone surfaces like granite and marble, it should not be used on them.
Windows and Mirrors: For a streak-free shine, spray on glass surfaces and wipe with a lint-free cloth or newspaper.
Floors: To mop tile or vinyl floors, mix half a cup of vinegar with one gallon of warm water. Again, do not use on floors made of genuine stone.
Conclusion:
As an eco-friendly and cost-effective DIY cleaner, vinegar works great. You don’t need to use expensive solutions to keep your home clean and glossy because you can accomplish a lot of household cleaning jobs with only a few items. Try these easy recipes and reap the rewards of a budget-friendly, spotlessly clean house!
A1: Combine one cup vinegar, one cup baking soda, and a few drops essential tea tree oil. This concoction is effective at cleaning tiles, sinks, and bathtubs.
Q2: Can vinegar be used to clean windows and mirrors?
A2: Indeed, vinegar works wonders for sanitizing glass surfaces. In a spray bottle, combine one part vinegar to one part water. For a streak-free finish, spray the solution over the glass and wipe with a paper towel or lint-free cloth.
Q3: Can I use a steam mop with my DIY cleaner?
A3: Using a steam mop on laminate floors is generally not advised because of the high heat and moisture content that can cause the laminate to bulge or distort. For cleaning, use a microfiber mop and slightly moistened rags.
Q4: How should I apply the DIY cleaner to my hardwood floors?
A4: Use a microfiber mop or cloth to wipe the floor after lightly spraying it with the homemade cleanser. To avoid causing water damage to the floor, try not to saturate it too much.
Did you know that spending only 30 minutes in your garden might help to decrease stress and boost mood? Gardening is more than simply a pastime; it’s an effective approach to improving your physical and emotional health. In today’s fast-paced world, gardening provides a welcome respite and a sense of accomplishment.
The benefits of gardening go far beyond growing plants.. Gardening has the potential to significantly improve your health and happiness. Everyone, whether they have a vast garden or a little balcony, may reap the benefits of plant care.
Overview of gardening:
Gardening is the practice of producing and tending plants, including vegetables, fruits, herbs, and flowers. It may be done in the garden, on balconies, roofs, or even inside.
Key elements of gardening
Good soil is the foundation of successful gardening.
Selecting the appropriate plants for your climate and area.
Watering and sunlight are critical for plant development and production.
Pruning, weeding, and fertilizing are all part of regular maintenance.
Beginners should start with easy-to-grow plants like tomatoes, mint, or spinach to ensure a successful garden. Using compost instead of artificial fertilizers produces better soil, which improves plant growth and sustainability. Additionally, watering plants early in the morning is suggested to reduce evaporation losses and provide proper hydration.
11 benefits of gardening:
1. Gardening reduces stress and anxiety
One of the major benefits of gardening is its capacity to decrease stress. Spending time in nature reduces cortisol (the stress hormone) levels and promotes relaxation.
Digging dirt and putting seeds produces a relaxing effect.
Exposure to flora enhances mood
Gardening serves as a form of meditation.
2. Boosts physical health
Gardening is an effective exercise that increases physical activity by increasing flexibility and strength while burning calories at a rate comparable to mild exercises. Digging, watering, and weeding exercise different muscle areas, delivering a full-body workout. Furthermore, gardening promotes outside activity, which improves general health and fitness.
3. Improves mental well-being
Gardening has been shown to boost mental health and emotional well-being. It is an excellent approach for combating depression, increasing feelings of enjoyment, and promoting awareness among those participating in this exercise.
4. Provides fresh and organic food
Growing your own fruits and vegetables has several advantages, including access to fresh, chemical-free products. It promotes healthy eating habits, lowers shopping bills, and improves the flavor and nutritional content of food. Harvesting your own tomatoes, herbs, or spinach is a pleasant experience that much outweighs purchasing pre-packaged alternatives.
5. Increases vitamin D intake
Gardening outside has various health advantages owing to the natural sunshine exposure. It increases vitamin D levels, strengthens bones, and helps the immune system. Morning planting is very beneficial for increasing sunshine absorption.
6. Enhances mood and happiness
Gardening has been related to the release of “happy hormones” including serotonin and dopamine, which help to promote emotional equilibrium. Gardening promotes a sense of accomplishment and reduces negative thinking. The excitement and satisfaction gained from seeing plants develop is a distinguishing feature of this hobby, bringing a level of contentment that is difficult to obtain in other hobbies.
7. Encourages mindfulness and patience
Gardening is an activity that promotes patience and concentration. It encourages people to wait for plants to grow, which promotes present-moment awareness and reduces overthinking. This mindful technique increases mental clarity and promotes relaxation.
8. Supports biodiversity
Your garden may function as a little ecosystem, attracting pollinators like bees and butterflies, sustaining local fauna, and improving environmental health. Planting native plants is critical to preserving biological equilibrium in this habitat.
9. Improves sleep quality
Gardening improves sleep patterns by offering physical activity that naturally exhausts the body, lowers tension and anxiety, and promotes deeper sleep. Gardeners frequently report more peaceful evenings.
10. Builds social connections
Gardening promotes communal relationships through a variety of activities. Community gardens serve an important role in bringing people together and fostering the development of ties between members. The common experience of swapping plants and gardening knowledge not only strengthens friendships but also fosters family togetherness. Overall, gardening is a great way for people to interact with their neighbors and loved ones.
11. Boosts creativity and productivity
Gardening is a unique combination of art and science that allows people to express themselves creatively via garden design. Planning layouts not only encourages creative expression but also enhances problem-solving abilities. Furthermore, gardening activities improve productivity and attention. Gardening, from choosing the correct plants to arranging them in an aesthetically beautiful manner, stimulates one’s creativity greatly.
Tips to start gardening for beginners:
If you’re new to gardening, here are some basic suggestions:
Begin with simple plants such as herbs or succulents.
Utilize excellent soil and compost.
Water plants frequently, but don’t overwater.
Ensure proper sunshine.
Have patience and enjoy the process.
Conclusion:
The 11 benefits of gardening clearly demonstrate how this simple hobby may improve your life. Gardening has several benefits, including improved mental health and physical fitness, as well as increased enjoyment and creativity.
Whether you’re growing herbs on your balcony or creating a large backyard garden, each step takes you closer to a healthier and happier life.
A1: Yes, gardening may boost mood by triggering the production of feel-good chemicals in the brain and creating a sense of delight and contentment.
Q2: What are the benefits of gardening for children?
A2: Children who garden develop better relationships with food, stronger science literacy, improved fine motor skills, and greater responsibility and patience. School garden programmes are consistently linked to healthier eating habits and increased outdoor activity.
Q3: Can gardening improve children’s learning and development?
A3: Yes, gardening teaches children key ideas such as responsibility, patience, and fundamental science, which improves their cognitive and problem-solving abilities.
Q4: Can gardening boost the immune system?
A4: Yes, spending time outside and interacting with the earth can boost immune function by exposing the body to beneficial bacteria and fresh air.
Throughout history, chickweed has been valued for its numerous health advantages despite its modest appearance. This little, delicate plant may not look like much, but it has many nutritional and therapeutic qualities that make it an important tool in traditional herbal therapy. Its versatility has made it a mainstay in cosmetic products, culinary applications, and herbal medicines. We explore the many benefits of chickweed in this investigation, including its nutritional value, medicinal use, and ability to improve general health.
Health benefits of Chickweed:
Anti-inflammatory properties: It’s thought that chickweed has anti-inflammatory properties that could help reduce inflammation in the body. This property may be helpful for inflammatory disorders like arthritis.
Weight control: It has diuretic qualities that may assist in lower water retention, some herbalists believe it can help with weight management.
Skin problems: Its lotions and ointments are sometimes used to relieve inflamed skin.
Rich in nutrients: Calcium, magnesium, potassium, vitamin C, and vitamin A are among the vitamins and minerals found in chickweed. Including it in your diet can increase the amount of nutrients you consume overall.
Support for digestion: It has been used in traditional herbal therapy to ease digestive problems and promote digestion. It’s thought to have a slight laxative effect.
Wound healing: Chickweed has traditionally been used for wound healing due to its calming and anti-inflammatory qualities. It might aid in lowering inflammation and accelerating the healing of small cuts and wounds.
The health of the respiratory system: It has long been used to treat respiratory issues like bronchitis and coughing. Its tinctures or tea are used by some as respiratory assistance.
Detoxing: Some people believe it to be a mildly detoxifying herb. It is believed to assist the body’s natural detoxification processes, especially those that pertain to the liver and kidneys.
Conclusion:
Chickweed is a natural jewel that is sometimes disregarded, providing a range of advantages for overall well-being. It can be included in a healthy diet, used topically for skin care, or combined with other herbs to create a variety of herbal medicines. It is a herb that is highly adaptable and can improve many aspects of health.
A1: A common herbaceous plant that is sometimes considered a weed is chickweed (Stellaria media). Despite its extensive distribution worldwide, Europe is its native habitat of. Europe is where it is natively found.
Q2: How do I make chickweed tea?
A2: For tea, soak 1 to 2 tablespoons of dried chickweed in 5 to 10 minutes of hot water. After straining the tea, add sugar if preferred.Use fresh chickweed as well.
Q3: What are the potential health benefits of chickweed tea?
A3: Weight loss, skin issues, and improved digestion are just a few of the potential health benefits of chickweed tea. A healthcare provider should be consulted since there isn’t much scientific research on these claims.
Q4: How is chickweed uses for hair care?
A4: Either topically as a poultice or steeped in oil are options. You can use this oil to hydrate and nurture your hair and scalp. Additionally, supplements or teas may be consumed to support hair health from within.
The peppermint plant is a veritable powerhouse of health and happiness when it comes to natural cures and overall well-being. Beyond its culinary applications, peppermint, known for its refreshing scent and unique taste, has many advantages that promote a happier and healthier lifestyle.
Benefits of the peppermint plant:
Peppermint plant benefits, for digestion:
One well-known use of peppermint is to ease stomach problems. It aids in gastrointestinal tract muscular relaxation, which lessens symptoms like gas, bloating, and indigestion. Improved digestion may be facilitated by consuming peppermint tea or adding fresh peppermint leaves to meals.
This plant also helps with pain relief for headaches:
Headaches and migraines may be relieved by the cooling impact of peppermint menthol. So, tension and headaches brought on by stress may be relieved by rubbing peppermint oil on the temples or breathing in its fragrance.
Enhanced intelligence:
Peppermint oil, infused into products or diffused, has been shown to enhance concentration and mental alertness, providing a stimulating environment for cognitive performance.
peppermint plant lessen stress:
Peppermint scents inhaled through teas or essential oils, are known to promote relaxation and reduce tension, reducing stress and anxiety.
Breathing health:
The decongestant qualities ofpeppermint oil can help ease breathing issues. Also, clearing nasal passages and alleviating cold and allergy symptoms can be achieved by inhaling peppermint oil-infused steam or consuming peppermint tea.
Relaxation of muscles:
Peppermint oil, with its analgesic properties, can be applied topically or mixed with bathwater to alleviate tension and promote muscle relaxation.
Peppermint plant help with weight management:
Reduced hunger and desires have been linked to the scent of peppermint. After that, by reducing food cravings, the aroma of peppermint oil or peppermint tea may be beneficial for people who are attempting to control their weight.
Conclusion:
In conclusion, the benefits ofpeppermint plant for happiness and health demonstrate a wide range of favorable effects on mental and physical health. So, peppermint is a multifaceted herb that has amazing benefits to general health, ranging from strong medical qualities that help with headaches and digestion to its capacity to improve mood and lower stress levels.
Q1: What is the scientific name of the peppermint plant?
A1: The scientific name of the peppermint plant is Mentha × piperita.
Q2: How is the peppermint plant different from spearmint?
A2: The menthol taste of peppermint (Mentha × Piperita) is more potent than that of spearmint. Mentha spicata is a species that includes spearmint.
Q3: Can I grow peppermint plants indoors?
A3: It is possible to grow peppermint indoors. Make sure the soil drains properly, it gets enough sunlight, and it gets watered frequently.
Q4: Is the peppermint plant safe for dogs?
A4: Peppermint plants are generally safe for dogs in moderation, but excessive consumption may cause digestive issues, so consult your vet before introducing new plants to your dog’s environment.
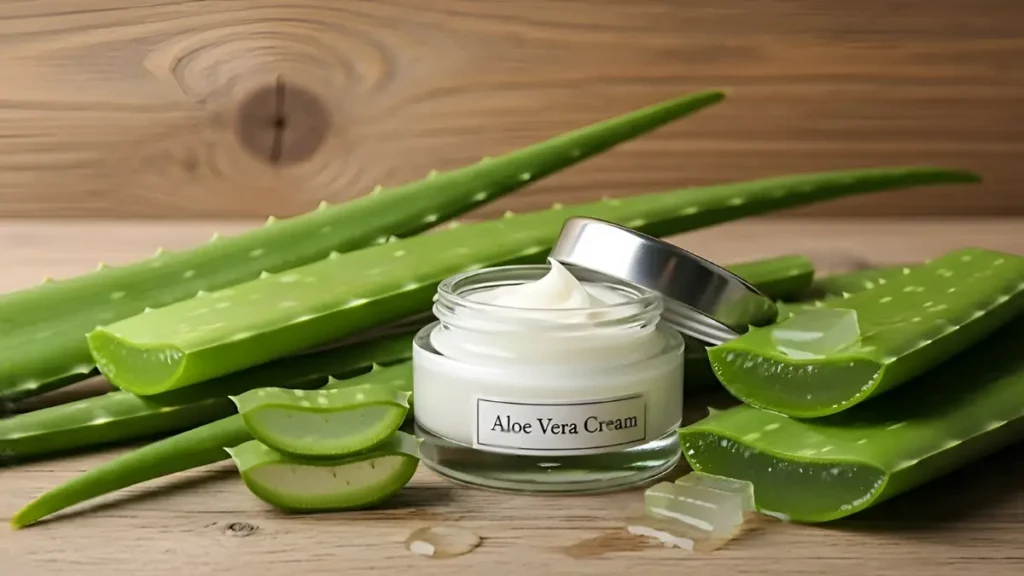
When it comes to natural healing and beauty, aloe vera is a true wonder plant. Aloe vera, known for its soothing gel and remarkable medical capabilities, has been used for generations in both traditional and modern treatments.
Aloe vera, which is high in vitamins, antioxidants, and enzymes, has several advantages, including improved skin health and digestion. Whether you cultivate it yourself or purchase ready-made gel, adding aloe vera into your daily routine will naturally improve your health and appearance.
In this detailed tutorial, we will look at the top 10 benefits of aloe vera and how to utilize it successfully.
What is Aloe vera?
Aloe vera is a succulent plant with thick, fleshy leaves that produce a transparent gel rich in vitamins A, C, E, and B12, antioxidants, amino acids, and enzymes. This plant has a long history of usage in traditional medicinal traditions, including Ayurveda, and is known for its soothing and cooling effects.
10 benefits of aloe vera:
1. Promotes glowing skin
Aloe vera is known for its deep hydration and nourishing characteristics, which help to make skin smoother and more luminous. Its advantages include reduced dryness, improved skin suppleness, and a natural shine. Regular use of aloe vera may brighten dull skin and enhance complexion, making it an excellent complement to skincare regimes.
2. Heals acne & pimples
Aloe vera has antibacterial and anti-inflammatory qualities, making it a useful therapy for acne-prone skin. The plant works by inhibiting the growth of acne-causing bacteria, lowering related redness and swelling, and avoiding future outbreaks. This makes it a mild yet effective natural remedy for acne.
3. Soothes sunburn & skin irritation
Aloe vera, sometimes known as the “burn plant,” is well-known for its cooling characteristics, making it an effective treatment for sunburn. It gives instant comfort by calming the skin, reducing inflammation, and hastening the healing process for burns and other skin irritations.
4. Deeply moisturizes skin
Unlike heavier lotions, aloe vera gel absorbs quickly into the skin, allowing it to penetrate without blocking pores. This characteristic makes it appropriate for both oily and sensitive skin types. Furthermore, aloe vera gel delivers great daily hydration, making it a versatile option for keeping skin moisturized without the heaviness associated with standard creams.
5. Reduces signs of aging
Aloe vera is well-known for its ability to boost collagen formation and promote skin suppleness, which results in a number of essential advantages such as less fine lines, wrinkle prevention, and the preservation of young. Furthermore, aloe vera’s antioxidants play an important role in countering free radicals, which are responsible for premature skin aging.
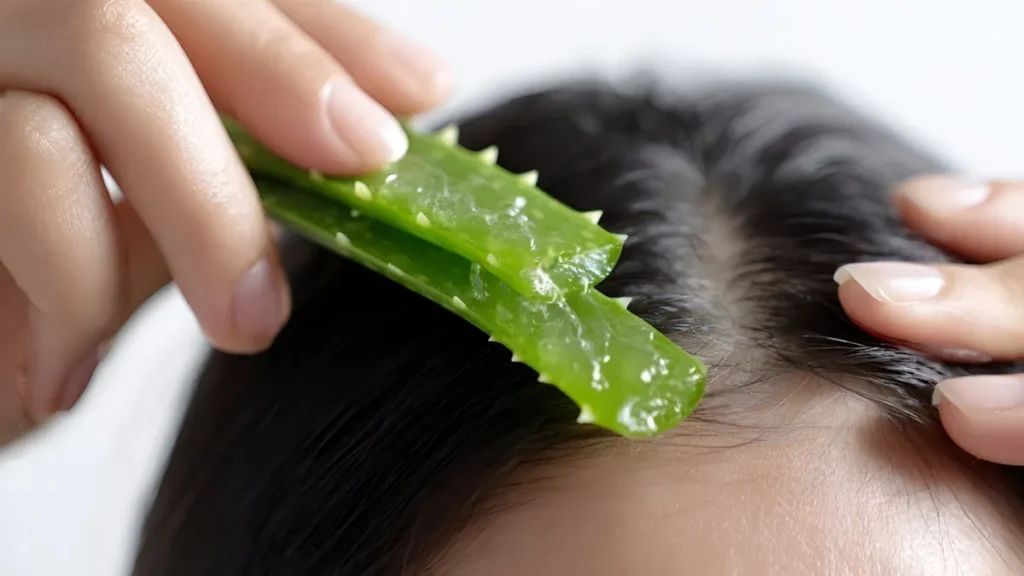
6. Strengthens hair & promotes growth
Aloe vera is highly beneficial for hair care, as it nourishes the scalp, reduces dandruff, and promotes hair growth. The enzymes present in aloe vera repair dead skin cells on the scalp, fostering a healthy environment conducive to hair growth.
7. Improves digestion
Consuming aloe vera juice in moderation has several digestive advantages. It can help lower stomach acid, enhance intestinal health, and relieve constipation. These actions make it a potentially useful adjunct to digestive health regimes.
8. Boosts immunity
Aloe vera provides antioxidants that boost the immune system. It defends the body against infections and promotes general health.
9. Helps heal wounds faster
Aloe vera has been shown to expedite wound healing through a variety of processes, including increased collagen formation, improved blood circulation, and reduced inflammation. This makes it a popular treatment for small wounds and skin injuries.
10. Supports detoxification
Aloe vera aids in the elimination of toxins from the body, hence increasing general health and energy levels. When ingested appropriately, it works as a natural detoxifier.
How aloe vera solves common problems:
Dry skin
Hydrates instantly without oiliness
Acne
Reduces inflammation and bacteria
Hair fall
Strengthens roots and improves scalp health
Digestive issues
Soothes stomach lining
Sun damage
Repairs and cools skin
Conclusion:
Aloe vera really lives up to its reputation as a natural healer and beauty enhancer. The benefits of aloe vera are numerous and potent, ranging from helping digestion and immunity to calming skin and strengthening hair health.
Incorporating aloe vera into your everyday routine can lead to significant changes in your overall health. It’s a simple yet efficient natural cure that may be used topically or ingested in moderation.
A growing trend in today’s manufactured goods world is embracing natural alternatives. Making soap is one such undertaking. Making your soap allows you to choose the ingredients, alter the fragrances, and produce something that is exclusively yours.Crafting homemade soap is an exploration of chemistry and self-care, not merely a creative endeavor. This tutorial will take you through the fundamentals of creating soap, giving you the know-how and self-assurance to start your sudsy journey.
A basic guide on how to make homemade soap:
Homemade soap ingredients
Shea butter, coconut oil, olive oil, and palm oil are typical choices. Every oil gives the soap a unique set of qualities (such as lather, hardness, or moisturizing).
Sodium hydroxide, or lye, is an essential component in the creation of soap. It undergoes a reaction with the oils known as saponification to produce soap. Lye can burn people if handled carelessly because it is a corrosive substance. Put on safety gear, like gloves and goggles.
Water for lye dissolution.
Optional additives include natural pigments or micas suitable for cosmetic use as colorants, herbs or botanicals for texture or exfoliation, and essential oils for smell.
Tools
Safety Equipment: To handle lye safely, wear protective clothes, gloves, and goggles.
Heat-Resistant Containers: Combine oils and lye solution.
Stick blender: To fully combine the oils and lye.
Molds: Silicon molds or even cardboard boxes covered with parchment paper can be used, as can any non-reactive container.
Thermometer: To keep an eye on temps while combining oils and lye.
Scale: To measure ingredients precisely.
Homemade soap recipes
Ensure that all of your components and tools are prepared. Check that there is enough ventilation in your workspace.
If needed, use parchment paper to line your mold.
Taking safety precautions, measure out the lye and water exactly as needed. Stir until the lye dissolves after adding it to the water—never the other way around. Let the mixture cool to around 38°C, or 100°F.
If needed, melt any solid oils, then put all of your oils in a container that can withstand heat. After bringing them all to a gentle boil, let them cool to about 100°F (38°C).
Pour the lye solution into the oils gradually once they have reached about 100°F (38°C). Blend them with a stick blender until you achieve trace, which is the consistency at which a thin layer of the mixture remains visible when it is poured over the surface.
Add fragrance, colorants, or any other additions at trace and mix well afterward.
Fill the mold you’ve created with the soap mixture.
Give the soap between 24 and 48 hours to cure the mold. At this point, if needed, you can unmold the soap and cut it into bars. After that, let the bars cure for four to six weeks on a rack in a well-ventilated environment. This makes it possible for extra water to evaporate, producing a softer and tougher bar of soap.
Your soap is now ready to use or give as a present!
Conclusion:
To summarize, making homemade soap may be a fun and rewarding task that allows you to tailor the ingredients and scents to your preferences. You may make opulent, chemical-free, and skin-friendly bars of soap by taking the necessary safety procedures. The joy of creating something special and useful is unequaled, whether you’re making soap for your use or as kind presents for friends and family. So grab your tools, pull up your sleeves, and get ready to start the thrilling journey that is producing soap!
A1: Proper storage allows homemade soap to last for a very long period. To assist the soap harden and last longer, it is ideal to let it cure for a few weeks after producing it. Homemade soap that has been properly preserved can last for several months or even years after it has been cured.
Q2: Can I use homemade soap for sensitive skin?
A2: Shea butter and olive oil are two examples of components that can be especially used for homemade soap formulations intended for sensitive skin. Reducing potential discomfort can also be accomplished by avoiding synthetic scents and colorants.
Q3: Why use homemade soap scum removers?
A3: Compared to commercial treatments, homemade removers are frequently more economical and ecologically friendly. Additionally, you have control over the ingredients, which makes delicate skin and surfaces safer.
Did you know that a single plant from your garden might naturally improve your health? Tulsi, commonly known as Holy Basil, is one of the most revered and powerful medicinal plants in traditional Indian homes.
The benefits of Tulsi go far beyond just boosting immunity—it supports mental clarity, heart health, and even skin wellness. In today’s fast-paced world, including Tulsi in your daily routine can be a natural and effective strategy to boost general well-being.
1. Boosts immunity naturally
Tulsi, which is high in antioxidants and essential oils, helps to strengthen the immune system. Regular use of Tulsi leaves or tea helps to battle infections, viruses, and germs. Its main advantages include improving immunological response, protecting against seasonal diseases, and preventing colds and flu.
2. Reduces stress and anxiety
Tulsi, known as an adaptogen, helps the body adapt to stress by regulating cortisol levels and promoting mental serenity. Its numerous advantages include reduced anxiety, improved mood, and increased mental clarity, making it an important herb for supporting general mental health.
3. Supports respiratory health
Tulsi (Holy Basil) is recognized for its efficacy in managing various respiratory conditions, including cough, asthma, and bronchitis. Its benefits include clearing mucus from the airways, relieving cough and cold symptoms, and improving overall breathing function.
4. Promotes heart health
Tulsi improves cardiovascular health by maintaining healthy cholesterol levels and managing blood pressure, lowering the risk of heart disease. Its primary benefits include decreasing LDL cholesterol, increasing blood circulation, and promoting overall cardiovascular health.
5. Improves digestion
Tulsi promotes digestive health by increasing the activity of digestive enzymes, which aids in food breakdown and relieves digestive pain. It aids digestion by decreasing bloating, reducing gas production, and lowering stomach acidity levels. Furthermore, Tulsi promotes general gut health, aiding in digestion and enhancing the body’s capacity to absorb nutrients efficiently.
6. Helps control blood sugar
Tulsi benefits diabetics by helping to regulate blood sugar levels naturally. Its primary advantages include increased insulin sensitivity, reduced blood sugar spikes, and improved metabolic health.
7. Acts as a natural detoxifier
Tulsi is known for its detoxification properties, aiding in the cleansing of the body by flushing out toxins and enhancing liver function. Its detox benefits include purifying the blood, supporting liver health, and removing harmful toxins.
8. Improves skin health
Tulsi is well-known for its detoxifying abilities, which help to cleanse the body by draining out toxins and improving liver function. It detoxifies the blood, promotes liver function, and eliminates dangerous pollutants.
9. Enhances oral health
Tulsi is frequently used in herbal toothpaste and oral care products due to its numerous oral health advantages. It specifically combats bad breath, prevents cavities, and decreases gum inflammation, making it an important element for good dental hygiene.
How to use Tulsi daily
Adding Tulsi to your routine is simple and beneficial.
Tulsi Tea: Boil fresh leaves in water and consume every day.
Raw Leaves: Eat 4-5 leaves every morning.
Tulsi Powder: Combine with warm water or honey.
Tulsi Juice: Take 1-2 tablespoons every day.
Conclusion:
The benefits of Tulsi make it one of the most potent natural treatments accessible today. This basic plant has several health benefits, ranging from increased immunity to improved mental health.
Incorporating Tulsi into your daily routine can promote long-term wellbeing and a better lifestyle. Tulsi, whether consumed as tea or used in natural medicines, is a true gift from nature.
A1: Yes, everyday usage is safe and good for your health.
Q2: What is the best time to take Tulsi?
A2: Morning on an empty stomach is excellent.
Q3: Does Tulsi help with weight loss?
A3: Yes, it increases metabolism and improves digestion.
Q4: Can children consume Tulsi?
A4: Yes, in tiny doses and with supervision.
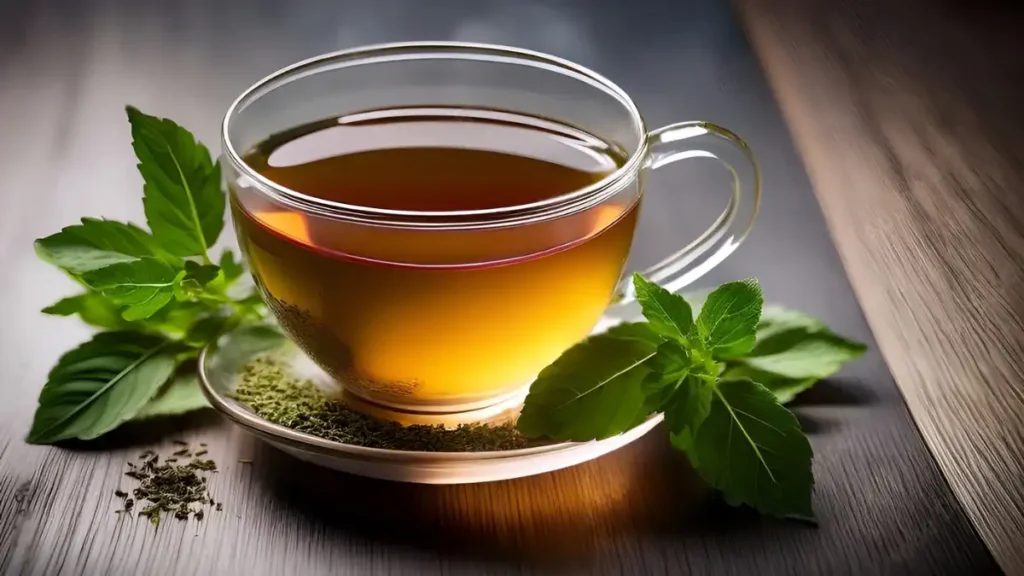
Q5: What are the main health benefits of tulsi tea?
A5: Tulsi tea is recognized for its natural antioxidant and adaptogenic characteristics, which help to boost immunity, decrease stress, and enhance general well-being.
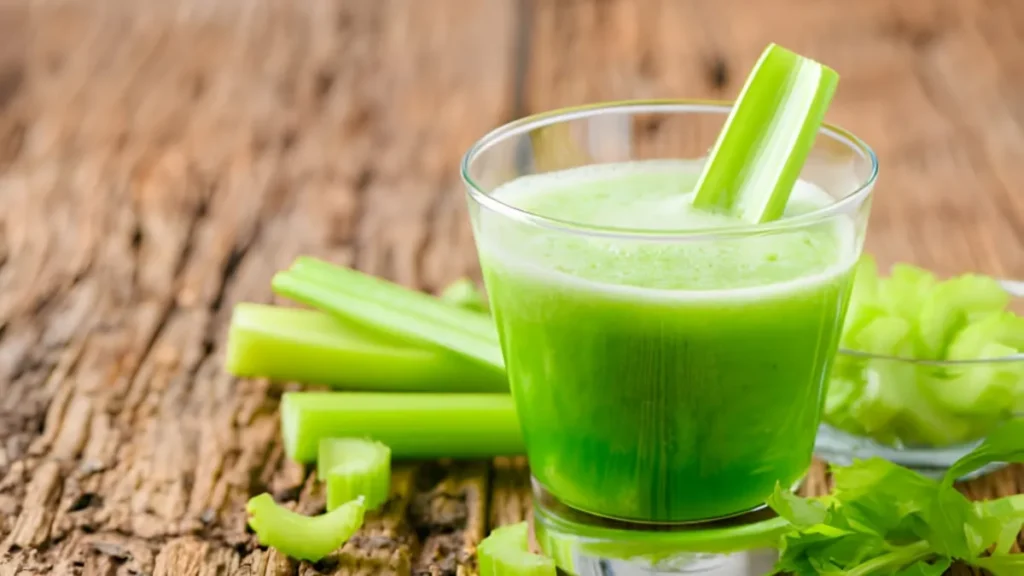
Celery juice has grown in popularity as a health elixir, lauded by both wellness enthusiasts and medical professionals for its multiple advantages. This bright green juice, made from celery stalks, is loaded with minerals and chemicals that have a favorable effect on general health. We’ll examine many of the benefits of celery juice as well as how to make celery juice.
Celery juice benefits:
Since this juice is primarily made of water, it is a highly hydrating beverage that can support the body’s fluid balance.
Vitamins K, C, potassium, and folate are among the vitamins, minerals, and antioxidants that are found in celery. these juices can help you achieve your daily vitamin requirements.
Celery juice is said by some to improve gut health and stimulate the production of stomach acid, which helps with digestion. Additionally, it might have a slight diuretic effect, which would lessen bloating.
Flavonoids and polyphenols, two substances found in celery, have anti-inflammatory properties. This juice may help treat illnesses like arthritis by reducing inflammation in the body when consumed regularly.
Celery juice’s high potassium content may improve heart health and aid control of blood pressure. Additionally, by reducing oxidative damage to blood vessels, its antioxidant capabilities may help lower the risk of cardiovascular disease.
According to some supporters, this juice can assist the body rid itself of waste materials and toxins by acting as a natural detoxifier.
Celery juice recipe:
To get rid of any dirt or debris, thoroughly rinse the celery stalks under cold water.
Cut off the ends of the stalks of celery.
To make the celery stalks fit in your juicer cut them into smaller pieces.
As directed by your juicer, feed the celery chunks through it.
Make sure the juice is well combined by giving it a good swirl once all the celery has been juiced.
To get rid of any pulp, you can optionally filter the juice using cheesecloth or a fine mesh screen.
For the greatest flavor and nutritional value, pour the juice into a glass and serve right away.
Conclusion:
In conclusion, even if celery juice is becoming more and more well-liked due to its supposedhealth advantages—such as its possible anti-inflammatory and antioxidant qualities—it’s crucial to approach its use sensibly. Although some people might have favorable benefits, there isn’t any scientific data to back up these assertions. The foundation of good health continues to be regular exercise along with a varied and balanced diet.
A1: There isn’t any scientific data that explicitly links this juice to weight loss, even though it can be a part of a balanced diet. But it can help with hydration and might improve general health.
Q2: Are there any side effects of drinking celery juice?
A2: While most people can safely consume significant amounts of these juices, some people may experience digestive problems such as upset stomachs or diarrhea. It’s best to start slowly and pay attention to how your body reacts.
Q3: How much celery juice should I drink daily?
A3: Generally speaking, you should begin each morning on an empty stomach with about 16 ounces of fresh juice. You can then modify the amount according to how your body reacts.
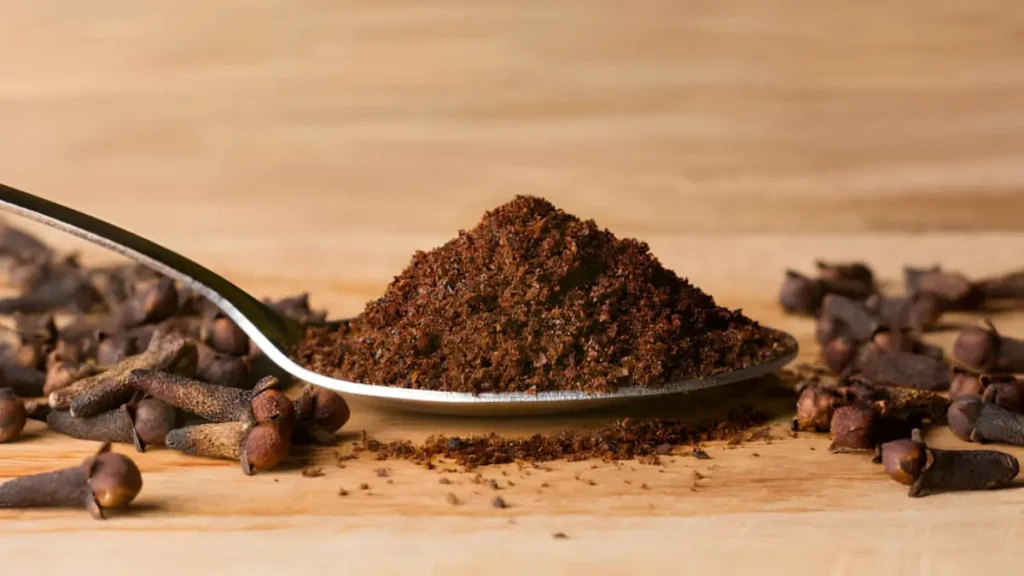
Since ancient times, people have treasured cloves—an aromatic spice made from the dried flower buds of the clove tree—for their many health advantages and delicious flavor. Cloves are a powerful combination of potent chemicals and necessary nutrients that benefit your health. To open the door to improved health, we explore cloves benefits in this guide and show you how to include them in your routine.
Cloves benefits for health:
Supercharger of antioxidants
Antioxidants in cloves, including eugenol, eugenol acetate, and flavonoids, help the body fight oxidative stress.Cloves shield cells from harm and lower the risk of chronic illnesses including diabetes, heart disease, and cancer by scavenging free radicals.
Blood sugar control
Cloves may help control blood sugar levels and enhance insulin sensitivity, which makes them advantageous for people with diabetes or at risk of getting the disease. Adding cloves to your diet could help you achieve better glycemic management.
Cloves benefits for dental health
Because of its analgesic and antibacterial qualities, cloves have long been utilized in traditional medicine for dental treatment. Clove oil is frequently used to treat mouth infections and ease toothaches. Furthermore, cloves’ antimicrobial qualities can aid in preventing gum disease and cavities.
Boost your immune system
Cloves have strong antibacterial qualities that can boost immunity and aid in the body’s defense against illnesses. Frequent clove use may keep you healthy and robust by lowering your risk of common illnesses like the flu and colds.
Cloves benefits for hair
Vitamins, minerals, and antioxidants found in cloves’ abundance can stimulate hair follicles and encourage the creation of new hair. By warding off infections and enhancing scalp health, cloves’ anti-inflammatory and antifungal qualities can help stop hair loss. Your hair will look healthier and more vivid when using cloves-enriched hair treatments.
Reproductive support
Including cloves in your diet might improve gastrointestinal health and aid with digestion. Cloves help improve nutrient absorption and lessen gas, bloating, and indigestion symptoms by inducing the synthesis of digestive enzymes.
Reduce inflammation
Cloves’ active ingredients have strong anti-inflammatory qualities that enable them to effectively reduce inflammation all over the body. It may be possible to reduce the symptoms of inflammatory diseases such as arthritis, asthma, and inflammatory bowel disease by consuming cloves or clove oil.
Cloves benefits for skin
The antibacterial qualities aid in combating microorganisms that cause acne. Packed with antioxidants, they fend against free radicals and lessen aging symptoms. Anti-inflammatory properties lessen redness and calm inflamed skin. The numbing effects of eugenol content reduce the pain associated with bug stings and bites. Dead skin cells are removed by exfoliating qualities, which results in a smoother complexion.
Conclusion:
Cloves provide a range of health benefits that can improve your overall well-being, from immune system support and dental health to anti-inflammatory and antioxidant properties. Through the use of cloves in baking, cooking, or topical application, you can take advantage of their medicinal qualities and start your path to better health. Discover the possibilities of cloves and witness the life-changing impact they can have.
A1: Cloves are beneficial to women in many ways, including easing menstruation pain, aiding digestion, enhancing immunity, and improving general health.
Q2: What are the health benefits of using whole cloves?
A2: Due to their antibacterial qualities, whole cloves also improve immune system function, aid in digestion, reduce inflammation, and promote dental health.
Q3: What are the cloves benefits for males?
A3: Because of its aphrodisiac qualities, cloves can improve sexual health, which is beneficial to male health. They might also help to promote general reproductive health and increase testosterone levels.
While rosemary uses in many different contexts, are you looking for a fresh and natural way to nourish your hair? This recipe for homemade rosemary shampoo is exactly what you need. In addition to its wonderful perfume, rosemary is well-known for its many health advantages for hair. You can give your hair the attention it needs without harsh chemicals by preparing your shampoo at home. Make your revitalizing shampoo with rosemary by following these easy instructions.
How to make rosemary shampoo at home:
Ingredients list:
Two tablespoons of dehydrated rosemary leaves
one cup of water
Half a cup of mild or unscented liquid castile soap
One teaspoon of optional coconut or olive oil
Ten drops of essential rosemary oil (optional; for added scent)
Instructions for making DIY rosemary shampoo:
In a small saucepan, bring the water to a boil first.
When the water reaches a boiling point, mix in the dried rosemary leaves.
After lowering the heat to a low, soak the rosemary in the water for ten to fifteen minutes.
Strain the rosemary leaves from the water and let it cool to room temperature after the steeping process.
After the rosemary water cools, transfer it to a jar or bottle that has been cleaned.
To the jar containing the rosemary water, add the liquid castile soap.
For more moisture, feel free to add some olive or coconut oil to the recipe.
Lastly, add the rosemary essential oil to the mixture and stir thoroughly if you want a deeper aroma of rosemary.
You can now use your own rosemary shampoo!
Conclusion:
To sum up, making your DIY rosemary shampoo presents a healthy and natural substitute for store-bought hair care items. Rosemary is well known for its ability to support healthy scalp function, encourage hair growth, and add a light fragrance. In the end, adding a homemade shampoo to your hair care regimen can be an enjoyable and fulfilling way to experiment with natural substitutes and possibly enjoy the advantages of this fragrant plant.
Q1: What are the benefits of using rosemary shampoo?
A1: Because of its antimicrobial qualities, rosemary offers many advantages for hair, including promoting hair growth, reducing dandruff, and enhancing scalp health.
Q2: Is rosemary shampoo suitable for all hair types?
A2: In general, all hair types can use this shampoo. Before using it frequently, people with sensitive skin or allergies should do a patch test.
Q3: How do I use rosemary shampoo on my hair?
A3: To use this shampoo, thoroughly wet your hair, work a tiny amount of shampoo into your scalp and hair, and then give it a thorough rinse with water. If required, repeat. হলে, পুনরাবৃত্তি করুন।
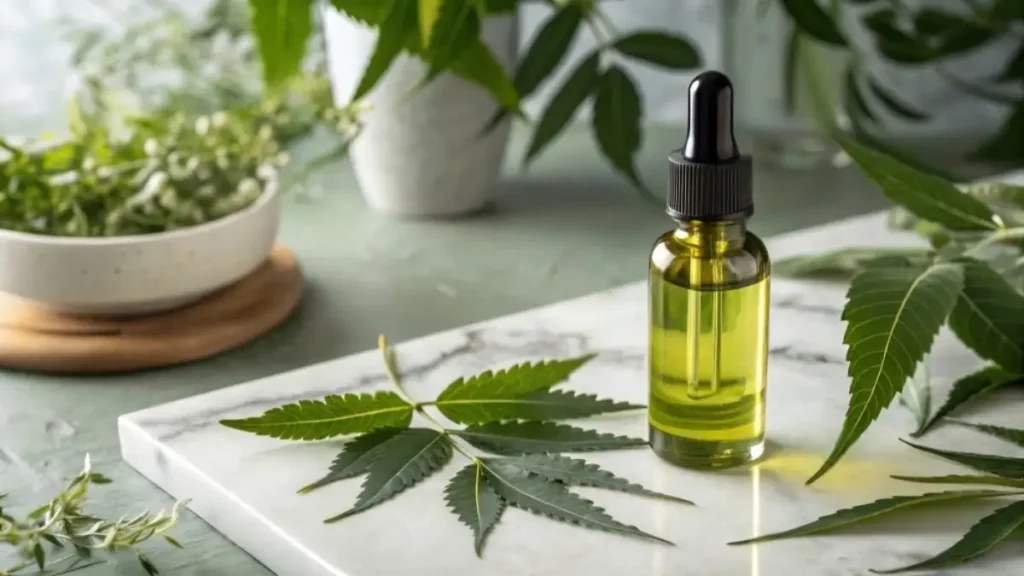
Nature’s treatments have a quiet power all their own, and neem is no exception. The phrase 9 Benefits of Neem: Powerful Healing Secrets Revealed is more than simply a catchy title; it represents centuries of wisdom passed down through generations.
Neem, often known as the “village pharmacy,” has been utilized in traditional medicine for thousands of years. From treating skin issues to boosting immunity, this simple tree provides remedies that contemporary science is only beginning to grasp. Ironically, in a world obsessed with manufactured solutions, we frequently overlook natural marvels that flourish just in our own backyard.
Neem’s adaptability is what makes it so interesting. Leaves, bark, oil, and even flowers—all elements of the tree have therapeutic properties. Whether you have acne, a weakened immune system, or digestive problems, neem quietly helps.
But here’s the twist: despite its bitter taste, neem has delicious health benefits. It’s almost as though nature is saying, “Good things don’t always come easy.”
Let’s dig deeper and discover the 9 Benefits of Neem: Powerful Healing Secrets Revealed, step by step.
Benefit Area
Key Advantage
Skin Health
Clears acne and infections
Hair Care
Strengthens roots and reduces dandruff
Immunity
Boosts natural defense system
Blood Purification
Detoxifies harmful toxins
Oral Health
Prevents gum disease
Digestion
Improves gut health
Anti-inflammatory
Reduces swelling and pain
Antibacterial
Fights harmful microbes
Blood Sugar
Helps regulate glucose levels
1. Boosts immunity naturally
One of the most major benefits of neem is its capacity to boost the immune system. Neem contains potent antioxidants that combat free radicals and protect the body from illness.
How it helps:
Improves immunological response.
fights bacteria and viruses.
Reduces inflammation.
2. Promotes clear and healthy skin
Neem is known for its helpful skin-healing qualities, which are especially efficient against acne, pimples, and other skin disorders. It can help cure acne and scars, reduce pigmentation, and soothe inflammation and redness.
3. Supports oral health
Neem has a long history of use in dentistry, with methods such as chewing neem sticks or using neem-based toothpaste proven to improve oral health. Neem has several benefits, including the potential to prevent gum disease, decrease plaque formation, and counteract foul breath.
4. Detoxifies the body
Neem is recognized for its blood-purifying capabilities, which help to remove toxins from the body, resulting in better overall health and energy levels. Neem has several beneficial effects, including blood purification, better liver function, and increased metabolism.
5. Improves hair health
Neem is well known as a helpful treatment for a variety of hair problems, notably dandruff, hair loss, and scalp infections. Its advantages include strengthening hair roots, decreasing dandruff, and supporting healthy hair development, making it an excellent natural treatment choice for keeping hair healthy.
6. Controls blood sugar levels
Neem has been found as a potentially useful herbal therapy for people with diabetes, especially when used carefully. Its therapeutic effects can be ascribed to a variety of methods. For starters, it has been shown to increase insulin sensitivity, which is essential for the body’s optimal glucose use. Furthermore, neem has been demonstrated to lower blood glucose levels, contributing in the management of hyperglycemia. Furthermore, it promotes pancreatic health, which is essential for insulin synthesis and control. Together, these qualities indicate that neem can be an effective addition in the diabetic control regimen when taken correctly.
7. Acts as a natural antibacterial agent
Neem has shown high potency against a variety of pathogens, including bacteria, fungus, and viruses, making it a popular ingredient in natural medicines. Its principal applications include treating wounds, avoiding infections, and repairing skin disorders, demonstrating its diverse therapeutic promise in infection control and dermatological health.
8. Aids in digestion
Neem improves digestive health by attacking dangerous germs and promoting overall digestive wellbeing. Its digestive advantages include lowering acidity, preventing ulcers, and improving gut health, all of which contribute to a healthy and efficient digestive tract.
9. Natural insect repellent
Neem oil is a popular natural insect repellent that is used in agriculture as well as in the home. Its significant advantages include the capacity to efficiently repel mosquitoes, creating a barrier against these prevalent pests. Additionally, neem oil provides strong protection for plants, sheltering them from a variety of hazardous insect pests that might endanger their health and growth. Furthermore, it distinguishes itself as an environmentally benign alternative to standard chemical pesticides, appealing to customers and farmers seeking sustainable pest management solutions. These characteristics make neem oil an important resource for ensuring human comfort and agricultural output while reducing environmental damage.
Conclusion:
The trip through 9 Benefits of Neem: Powerful Healing Secrets Revealed demonstrates that neem is more than a tree; it is a natural healer.
Despite its bitter taste, neem has several health and cosmetic advantages. In a world full with artificial solutions, neem serves as a reminder that sometimes the simplest remedies are the most effective.
In addition to being a lovely addition to your skincare regimen, homemade soaps let you alter the ingredients to suit your tastes. With the help of natural oils and the freshness of lemons, this homemade lemon soap recipe creates a zesty and energizing cleansing experience. You can make your batch of delicious lemon soap by following these easy instructions.
How to make lemon soap at home:
Use a cheese grater to shred the lemon zest finely. Make sure only to grate the lemon’s outer yellow layer; do not grate the bitter white pith.
To make melting easier, cut the glycerin soap base into small cubes.
The cubed glycerin soap foundation should be placed in a microwave-safe container and microwaved for 30 seconds at a time until it melts completely. To guarantee consistent melting, stir in between batches.
Add the grated lemon zest, lemon essential oil, and vitamin E oil when the soap base has melted. To uniformly include all of the components, give the mixture a gentle stir.
Pour the mixture into the soap mold very carefully. To remove any air bubbles, lightly tap the mold against the counter.
Let the soap cool to room temperature so that it can solidify entirely. Depending on the size of your soap mold and the ambient temperature, this often takes one to two hours.
After the soap has hardened, carefully take it out of the mold. If it’s obstinate, you can try putting the mold in the fridge for a short while to assist the soap coming out.
You can now use your soap! To extend its shelf life, keep it out of direct sunlight and in a cool, dry place.
Lemon soap benefits:
The natural exfoliating properties of lemon zest aid in revealing clearer, brighter skin by assisting in the removal of dead skin cells.
Lemon essential oil is useful in treating acne and other skin imperfections since it has antibacterial and antifungal qualities.
As a moisturizer, vitamin E oil nourishes and preserves the skin’s suppleness.
Conclusion:
In conclusion, the natural components and zesty aroma of handmade lemon soap provide a revitalizing and delightful cleansing experience. Its exfoliating qualities combined with moisturizing oils can leave the skin feeling smooth, soft, and renewed. Using homemade lemon soap also fosters a sustainable and environmentally friendly approach to personal care in addition to healthier skin.
A1: Most skin types can benefit from this soap, but those with dry or sensitive skin might want to test it on a tiny area of skin first because lemon can be slightly astringent and irritate certain people.
Q2: Can homemade lemon soap help with acne?
A2: Lemon soap’s inherent antibacterial qualities and ability to absorb excess oil from the skin may assist with acne. On the other hand, people who are prone to acne should exercise caution because lemons can occasionally cause sensitivity or discomfort.
Q3: Can lemon soap bar help with oily skin?
A2: Certainly, the natural astringent qualities of lemon assist in reducing excess oil production and unclogging pores, leaving the skin feeling rejuvenated and less greasy. This is why this soap bars are good for oily skin.