Author

Avery Smith

Browsing

Trench composting is a proven method for improving garden soil health and vitality. Integrating organic matter directly into the soil, reducing waste, and making composting easier for gardeners of all skill levels. We will examine the fundamentals of trench composting and its advantages and useful applications in this extensive tutorial.

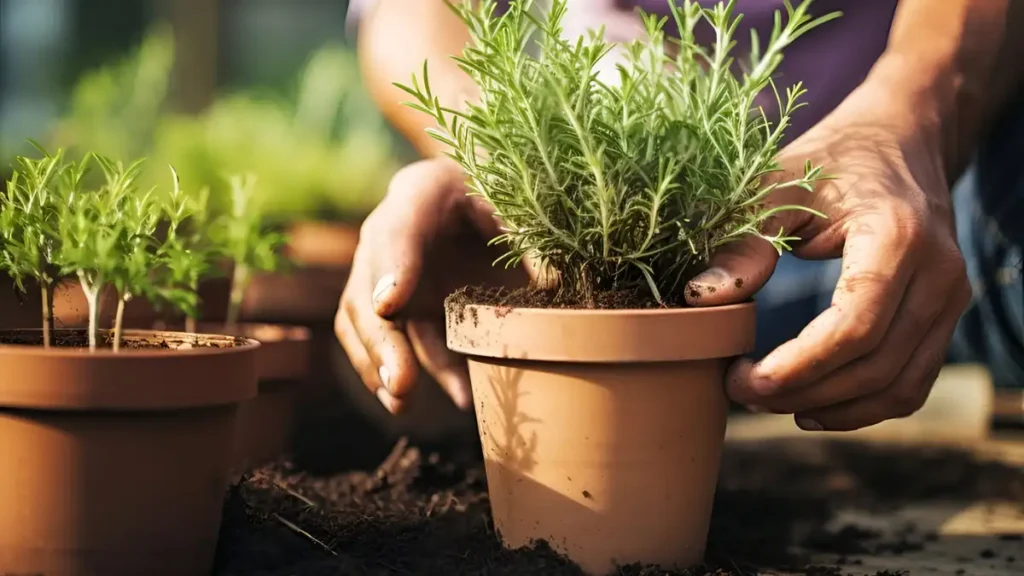
  • Select a Location: For trench composting, choose a location in your yard or garden that works well. It should be in a location where you can readily add organic waste and where there is enough sunshine.
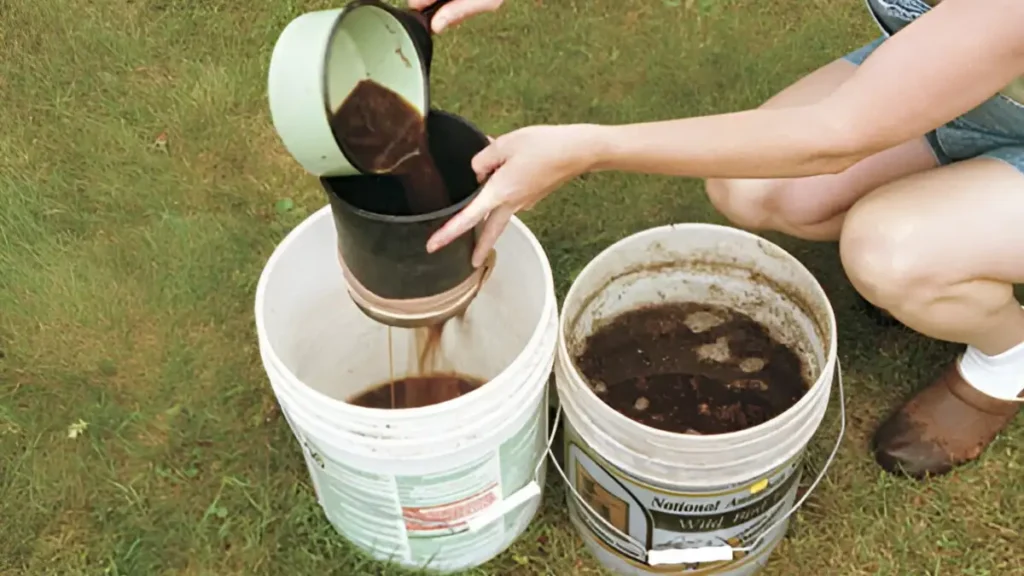
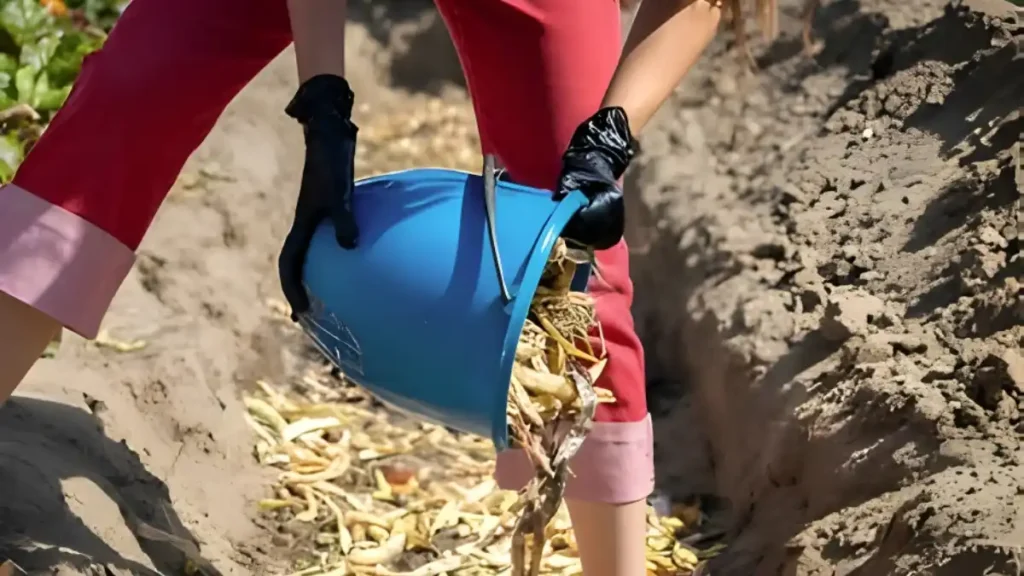
  • Excavate a trench: Cut a trench that is between one and two feet deep using a shovel or spade. Depending on the amount of organic waste you have and the space you have available, the trench’s breadth and length may change.
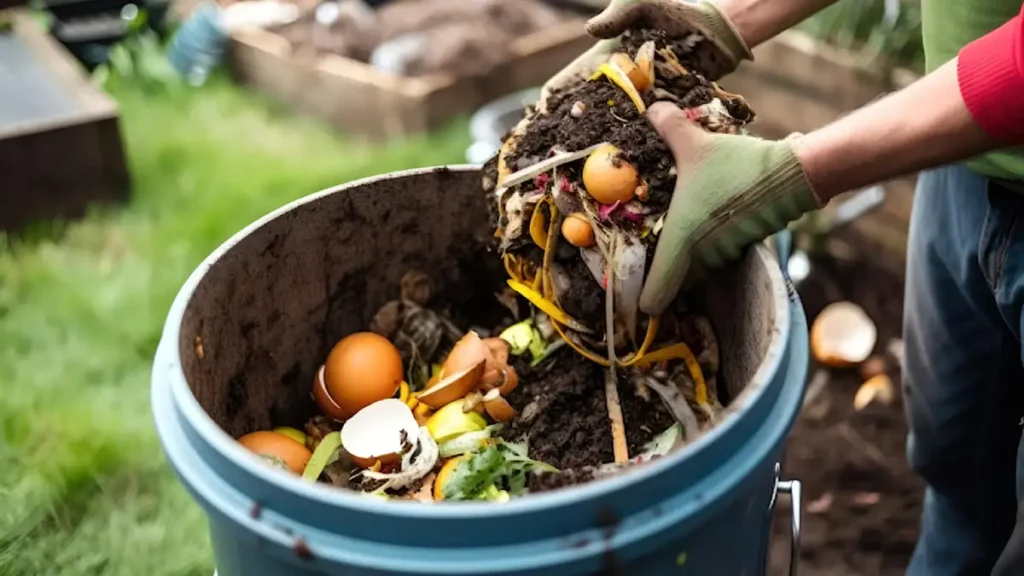
  • Layering: Begin filling the trench with layers of organic materials. To produce a balanced compost mix, alternate layers of green (nitrogen-rich) and brown (carbon-rich) materials. Kitchen leftovers, grass clippings, and plant trimmings are examples of green materials; dried leaves, straw, and newspaper are examples of brown materials.
  • Wrapping: Once you’ve filled the trench with organic trash, add a layer of dirt. This keeps pests away and aids in controlling the composting process.
  • Maintenance: As organic waste breaks down in the trench, add more of it regularly. The process of stacking green and brown materials remains unchanged. Watering the trench on occasion will also assist in keeping it moist, which is important for the composting process.
  • Await Decomposition: The organic materials in the trench will eventually break down and transform into compost that is rich in nutrients. Depending on variables including moisture content, temperature, and the kind of materials utilized, this process may take several months to a year.
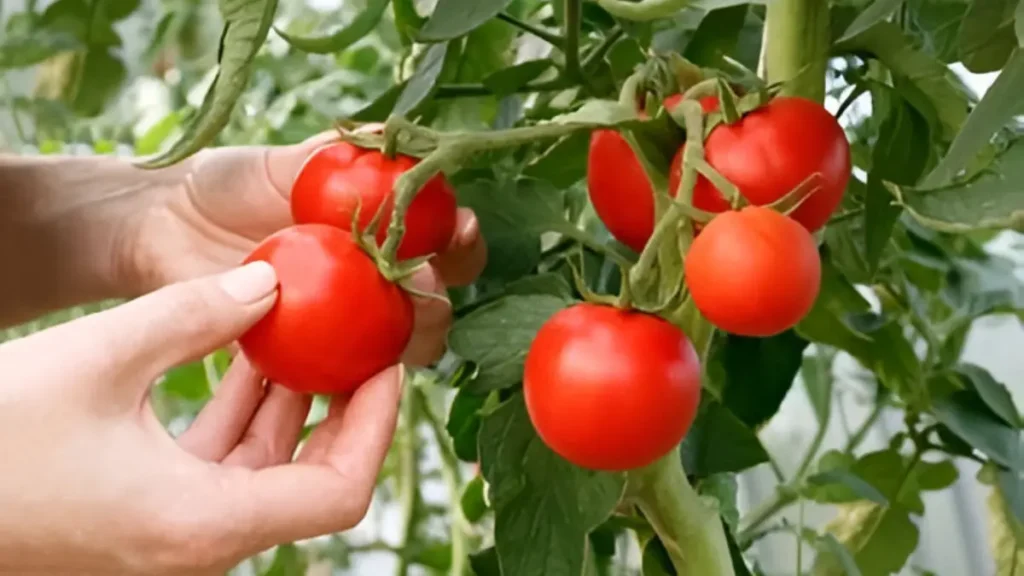
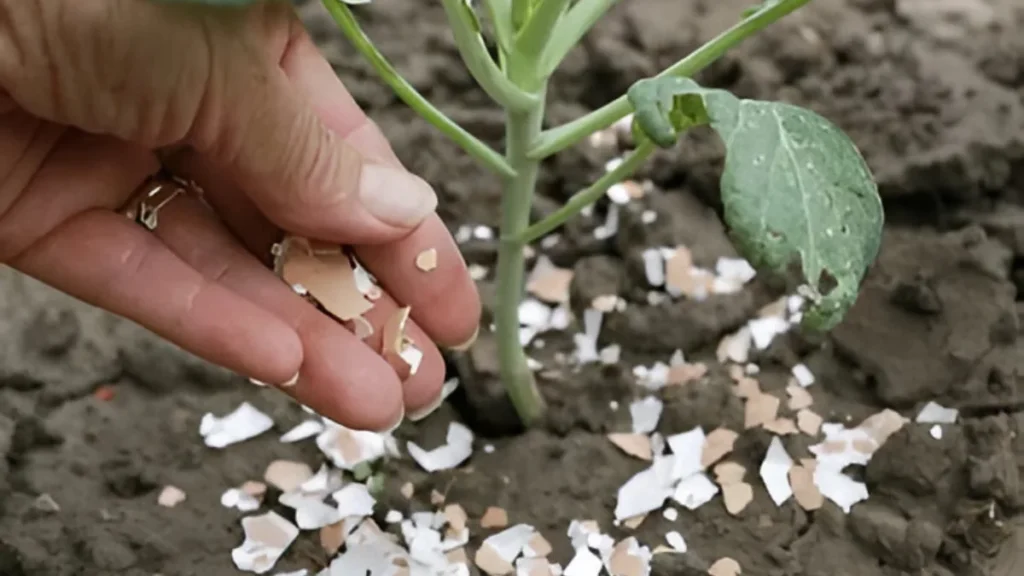
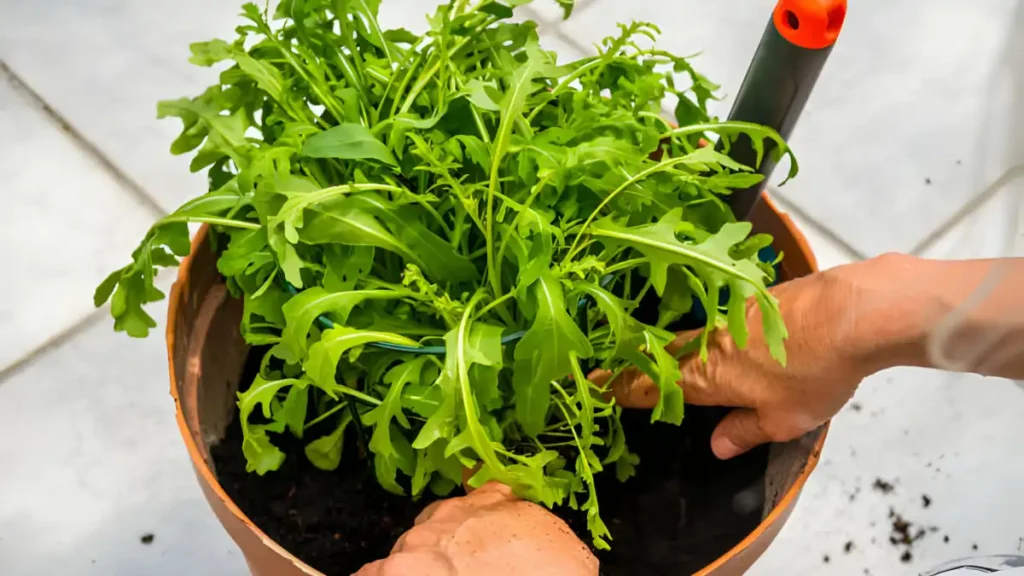
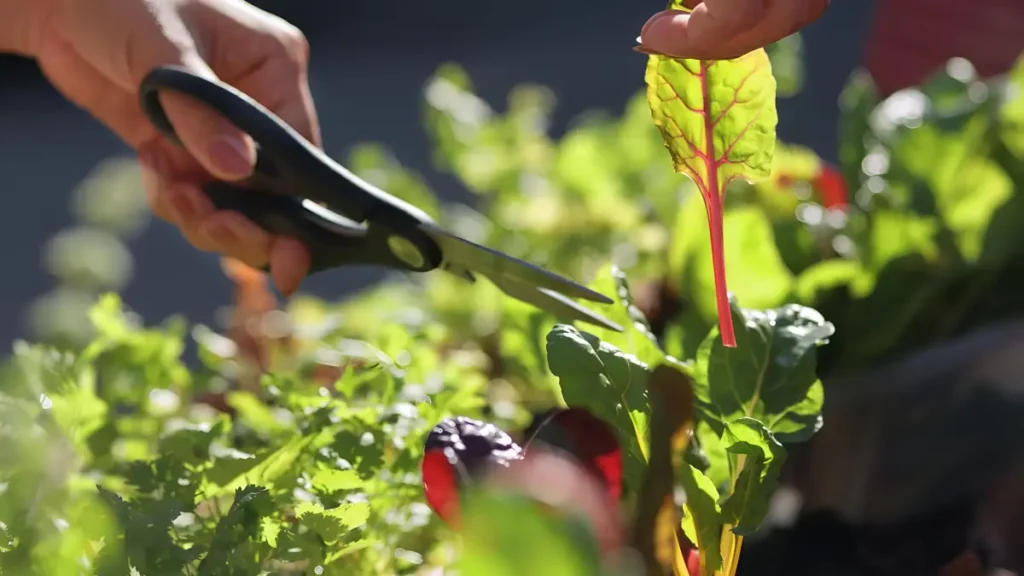
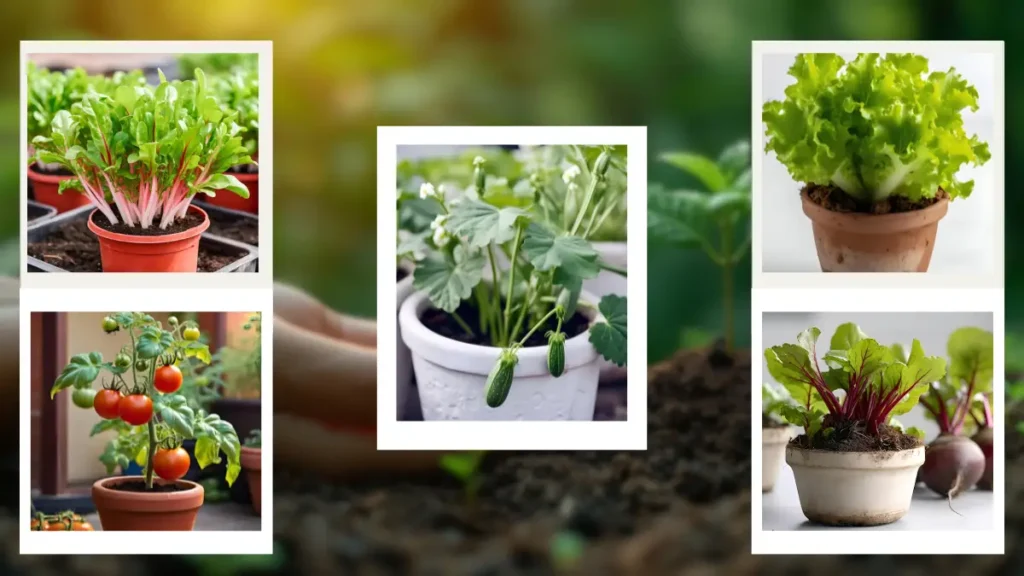
  • Applying organic matter directly to the soil by trench composting improves its quality. The fertility and structure of the soil are enhanced as a result of the organic material’s decomposition, which releases nutrients.
  • Trench composting minimizes nutrient loss and maximizes plant uptake by allowing nutrients to be directly taken by plant roots, in contrast to standard composting procedures where nutrients may seep away.
  • This composting is an efficient approach to recycling organic waste, such as kitchen leftovers and garden detritus, minimizing garbage sent to landfills.
  • This composting can help reduce weed development by covering the rotting organic material with dirt. This stops weed seeds from germinating by reducing their exposure to light.
  • The addition of organic matter via trench composting enhances the soil’s ability to hold water. This can lessen the need for frequent irrigation, which can be especially helpful in drought-prone areas.

Finally, trench composting provides an easy and efficient way to increase the fertility of plant soil. Organic waste can be directly buried in the garden bed to release nutrients over time, enriching the soil and encouraging healthy plant development. This method contributes to a more productive and sustainable garden environment by decreasing waste while also improving soil structure and microbial activity.

Certainly! If you’d like to learn more, please consider following our WhatsApp Channel: Harvest Gardening

Q1: Can I trench compost in winter?

A1: Yes, you can compost in a trench over the winter. Even though the breakdown process happens more slowly in colder climates, it still happens.

Q2: Will trench composting attract pests in winter?

A2: In winter, properly maintained trench composting shouldn’t draw pests. Meat, dairy, and fatty meals should not be composted since they attract rodents and other pests.

Q3: Will trench composting cause unpleasant odors?

A3: There’s a chance that this composting site will smell, especially in the early phases of decomposition. This can be problematic, especially in crowded or metropolitan location

Loved in many gardens, tomatoes flourish with the right attention and sustenance. How to increase tomato yield by using natural materials, innovative top dressing techniques are meant to strengthen tomato plants, encouraging strong development and abundant yields.

Mixture Rich in Nutrients

Making use of milk or whey yields a powerful mixture full of nutrients essential to plant growth:

  • Nitrogen, potassium, calcium, magnesium, iron, and phosphorus are examples of essential elements.
  • These dairy derivatives contain lactic acid bacteria that control plant diseases and release nutrients.

Methology and use of how to increase tomato yield

  • A diluted solution to the soil promotes healthy root development and general plant growth.
  • Applying foliar spraying creates a barrier that protects plants from diseases such as downy mildew on cucumbers and late blight on tomatoes.

Fusion That Is Biologically Active

Beneficial components can be added to the soil by mixing tomato paste, yeast, or spoilt jam:

  • Yeast supports strong root growth since it is high in active ingredients, vitamins, and amino acids.
  • Tomato paste enhances the mixture much more.

Getting Ready and Using

  • A powerful infusion is created when warm water, yeast, and tomato paste are combined and allowed to ferment.
  • Early-stage seedlings benefit from application as a root drench, which promotes rapid root establishment and robust growth.

When and How Often

  • Dressing made of milk or whey: Apply two to three times during the growing season, beginning 10 to 14 days after planting and continuing through fruiting.
  • Foliar spraying regularly (7–10 days) serves as a disease-prevention barrier.

Ideal Utilization of how to increase tomato yield

  • It is best to apply the east and tomato paste fusion in the initial days following seedling planting in warm water.
  • The use of warm water during application and proper dilution is essential for the best outcomes.

Natural top dressings gradually replenish critical nutrients, increasing soil fertility and plant health. Unlike chemical fertilizers, organic additions promote microbial activity, retain moisture, and reduce nutrient loss. This leads in stronger plants, more flowers, and increase tomato yield.

1. Compost – The ultimate organic nutrient booster

Organic top dressings enhance soil fertility and plant health by replenishing nutrients, promoting microbial activity, retaining moisture, and reducing nutrient loss, resulting in stronger plants and larger tomato harvests.

Spread compost around tomato plants’ bases, avoid direct contact with stems, and reapply every 3-4 weeks for ongoing nutrition delivery.

2. Aged manure – A powerhouse of nutrients

Well-rotted excrement from cows, horses, or chickens can be used as a top dressing, enhancing soil texture and slowly releasing nutrients. Apply a one-inch coating around tomato plants, gently working it into the soil.

3. Mulched grass clippings – Nitrogen-rich boost

Fresh grass clippings, rich in nitrogen, promote healthy tomato leaf and stem development. Apply a thin coating around plants, let them dry 1-2 days, and reapply as needed to maintain soil moisture and nutrient richness.

4. Banana peels – A potassium powerhouse

Banana peels are a natural source of potassium essential for fruit growth, which can be applied by chopping them into small pieces, spreading them around the tomato plant’s base, and covering with dirt or mulch.

5. Eggshells – Calcium for stronger plants

Calcium insufficiency often causes blossom-end rot in tomatoes. Crushed eggshells can help release calcium gradually into the soil, promoting breakdown and absorption. Apply eggshells to the base of plants and mix gently.

6. Epsom salt – Magnesium for enhanced growth

Magnesium is crucial for chlorophyll synthesis and plant health. Epsom salt enhances tomato fruit production and enhances flavor. Apply a spoonful of Epsom salt in water every two weeks, using a foliar spray or pouring at plant base.

7. Coffee grounds – Acidic soil amendment

Used coffee grounds, high in nitrogen, slightly acidify soil, benefiting tomato plants. To apply, dry the grinds and sprinkle a light coating around plants, but avoid excessive soil acidity.

8. Wood Ash – A potassium-rich alternative

Wood ash, rich in potassium and calcium, aids fruit growth and prevents illness. Apply in small amounts, sprinkle gently, and water to prevent soil pH elevation.

Using these organic top dressings promotes stronger plants and a bountiful crop by greatly increasing tomato growth. Hands-on experience with these techniques demonstrates their amazing advantages.

Certainly! If you’d like to learn more, please consider following our WhatsApp Channel, Facebook, Instagram, YouTube, Twitter, and Pinterest.

Q1: Can I use the organic fertilizer for tomatoes on other types of vegetables?

A1: Generally speaking, a wide range of veggies can be fertilized with the organic fertilizer meant for tomatoes. Observe the application rates that are suggested on the product label.

Q2: Should I prune my tomato plants, and how does tomato yield?

A2: Pruning tomato plants does indeed increase air circulation, lower the danger of illness, and focus energy on fruit production. To preserve the health of your plant, concentrate on getting rid of suckers and lower leaves, but don’t prune too much.

Q3: How can I make homemade tomato fertilizer?

A3: Combine equal portions of crushed eggshells, well-aged compost, and Epsom salt Apply this blend as a final dressing to your tomato plants to create a nutrient-rich, all-natural fertilizer.

Meta: Take your tomato cultivation to the next level! Learn the step-by-step process of how to increase tomato yield dramatically.

Leaf propagation is an intriguing and satisfying way to create new plants from existing ones. It’s an easy and economical way to add more plants to your collection; you can utilize houseplants, herbs, and succulents among other plant varieties. We’ll go over the fundamentals of leaf propagation in this beginner’s tutorial, along with step-by-step directions to help you effectively develop new plants from leaves.

Select well-being leaves

Choose leaves from mature, healthy plants. Seek for leaves devoid of bugs, diseases, or damage. The best probability of creating viable offspring is with healthy leaves.

Choose appropriate plants for leaf propagation

Not every plant can be multiplied via leaf-grafting. Succulents like snake plants and jade plants, as well as some houseplants like pothos and begonias, are popular options for leaf propagation. To guarantee success, learn about the particular needs of the plant you want to propagate.

Make clean cuts

Make sure to use sharp, clean scissors or pruning shears to make clean cuts while removing leaves for propagation. Steer clear of tearing or injuring the leaf as this may hinder its ability to root well.

Give leaves time to callus

Once the leaves are removed, let them air dry for a few days in a warm, dry place, until the cut ends get callused. When the leaves are planted in soil or water for proliferation, this helps keep them from decaying.

Select the appropriate media

Depending on the type of plant, leaves can be multiplied either in water or soil. Soil propagation is preferable for many houseplants, including succulents. Make use of a well-draining soil mixture, like potting soil plus sand or perlite. Place the leaf cuttings in a container designed for water growth, making sure that only the cut end is submerged in the water.

Leaf propagation requires sufficient light and moisture

Plant the propagated leaves in an area with indirect, bright light. Keep them out of direct sunlight to prevent the leaves from drying out or scorching. To add humidity, sometimes shower the leaves and keep the soil slightly damp but not soggy.

Carefully transplant

Plant the newly sprouted plants gently into individual pots filled with soil that drains properly once roots have grown and new growth has become apparent. Take extra care not to injure the fragile roots.

Monitor and care for new plants

As the new plants grow, keep a watch on them. To promote healthy growth, give proper care, such as routine watering, fertilizing (if needed), and sporadic pruning.

Leaf propagation is a simple and gratifying method for increasing your plant collection and creating new plants from existing ones. Through adherence to these fundamental guidelines and appropriate maintenance, leaf propagation can prove to be successful even for novices. Try out various plants and methods to see what suits you the best, and take pleasure in seeing your new plants flourish.

Certainly! If you’d like to learn more, please consider following our WhatsApp Channel: Harvest Gardening

Q1: What materials do I need for leaf propagation?

A1: A good potting mix or growing media, pots for planting, a clean, sharp knife or pair of scissors for taking cuttings, and healthy leaves from a parent plant are all you’ll need.

Q2: What is leaf propagation?

A2: One method of plant multiplication called “leaf propagation” involves starting a new plant from a leaf or a piece of a leaf. Certain plant species, such as succulents and some houseplants kept indoors, are commonly treated in this way.

Q3: Can you propagate succulent leaves in any way?

A3: Even though leaves are a viable means of propagating many succulent species, not all leaves will bear fruitful offspring. Certain leaves may not be able to take root or generate viable progeny because of environmental or genetic causes.

In gardening, lovers frequently look into natural and alternative ways to care for their plants to achieve the best possible health and vitality. A tried-and-true, environmentally beneficial method is making your compost tea. However, It is a superfood for plants, full of organic matter, microbes, and vital minerals that support strong, resilient growth.

Making your compost tea brewer

To begin, what you’ll need is as follows:

  • Compost: Make use of well-aged compost that has a blend of brown and green components. This will guarantee a wide variety of microbes and nutrients.
  • Water: Make sure it’s chlorine-free. Before using your tap water, let it sit for a full day if it includes chlorine.
  • Molasses: Rich in beneficial microbes, can be used without sulfur, as sulfur inhibits microbial activity.
  • Aeration Equipment: To guarantee proper aeration, you’ll need an aquarium pump, airstones, or a compost tea maker. So, this encourages the growth of aerobic microorganisms that are useful.
  • Strainer or Cloth Bag: To remove bigger particles from this.

Instructions:

  • Gather water, molasses, compost, and aeration supplies.
  • To maintain a healthy water supply, mix 1 cup of well-aged compost with one or two tablespoons of molasses for every gallon of water.
  • The compost can be steeped like a tea bag by placing it in a cloth bag or directly into water, ensuring it is securely tied.
  • Mix molasses with water and compost mixture, as molasses serves as a food source for microbes.
  • Set the airstones in its mixture and turn on the aquarium pump. If using a compost tea brewer, aerate the tea according to the manufacturer’s directions.
  • Give the compost tea a full day or two to brew. To promote microbial development, occasionally stir the liquid.
  • So, After fermentation, remove the compost bag and strain it using cheesecloth or a fine mesh sieve to remove any remaining solids.
  • To use concentrated compost on plants, dilute it with water using a 1:10 ratio.
  • It can be used as a water source for plants, and applied to the soil and leaves using a sprayer or watering can.
  • For optimal results, use it immediately and store it in a shaded area for a day or two.

Making your compost tea is an innovative way to farm that not only feeds plants but also revitalizes the soil, supporting organic gardening that is sustainable and reduces the need for synthetic fertilizers.

Certainly! If you’d like to learn more, please consider following our WhatsApp Channel: Harvest Gardening

Q1: What is compost tea?

A1: It is a liquid fertilizer made by soaking compost in water, containing nutrients and organic materials, which also promotes soil health and plant development.

Q2: Can compost tea be used on all types of plants?

A2: A multipurpose plant fertilizer. So, it provides organic nutrients to a wide range of plant species, including flowers, vegetables, fruits, and trees.

Q3: What is a compost tea brewer?

A3: It is a device used to create this tea, a liquid fertilizer rich in beneficial microorganisms. After that, it involves steeping compost in water, aerating it, and extracting the microbial essence for plant health.

Natural fertilizer is a sustainable way to enhance soil health and boost plant growth. Growing awareness of the value of environmental conservation and sustainability in many facets of our lives—including gardening—has occurred in recent years. Conventional gardening methods frequently include pesticides and synthetic fertilizers, which are bad for the soil, water, and other ecosystems. But you can make a healthier, more sustainable garden that grows in balance with nature by using organic gardening techniques and natural fertilizer. Made from organic materials like compost, manure, or seaweed, it provides essential nutrients while improving soil structure and encouraging beneficial microorganisms.

  • Organic matter found in natural fertilizers enhances the soil, encouraging microbial activity and enhancing its structure. Better water retention, aeration, and nutrient availability for plants are the outcomes of this.
  • Made from organic sources like compost, manure, and leftover plant material, these fertilizers provide plants with a steady supply of nutrients without depleting the soil.
  • Natural fertilizers, unlike synthetic fertilizers, are made from renewable resources and have a low environmental impact. When utilized properly, they don’t cause soil erosion or waterway contamination.
  • These fertilizers encourage the development of advantageous microbes in the soil, which improve nutrient cycling, fix nitrogen, and aid in the breakdown of organic materials. The creation of an abundant ecology below the earth promotes plant development.
  • These fertilizers have a balanced nutrient profile that encourages robust plant development, higher yields, and better disease and insect resistance. Natural fertilizers frequently result in plants that are more robust and healthy overall.
  • Compost: Produced from degraded organic materials, such as kitchen scraps, yard waste, and manure. It strengthens the soil’s structure and enriches it with vital nutrients.
  • Worm Castings: The nutrient-rich vermicompost that worms generate enhances the structure of the soil. It has helpful microbes that facilitate the uptake of nutrients by plants.
  • Manure: Rich in nitrogen, phosphorous, and potassium, animal manure from cows, horses, chickens, or rabbits is a great source of these elements. To prevent burning plants, make sure it’s well-aged or composted before using.
  • Eggshells: Crushed eggshells give the soil calcium, which helps shield tomatoes and peppers against blossom end rot. Additionally, they discourage some pests like snails and slugs.
  • Bone Meal: A phosphorus-rich, slow-release fertilizer that encourages robust root growth and blooming. Animal bones are finely ground to make it.
  • Coffee Grounds: Packed full of nitrogen, coffee grounds can be applied straight to the compost pile or soil to enhance its texture and fertility.

To sum up, using natural fertilizer to improve your garden is a holistic approach to gardening that is good for the environment and your plants’ health. Furthermore, natural fertilizers promote healthier, more vivid plant growth and are frequently more economical over time. To ensure a successful garden for years to come, switching to natural fertilizers is a straightforward yet significant step towards better gardening methods.

Certainly! If you’d like to learn more, please consider following our WhatsApp Channel: Harvest Gardening

Q1: What is the best natural fertilizer for vegetable garden?

A1: Compost created from kitchen scraps, yard waste, and organic materials is regarded as one of the most effective natural fertilizers for vegetable gardens. 

Q2: Is seaweed a good natural fertilizer for vegetable gardens?

A2: Yes, seaweed is a great natural fertilizer for vegetable plants since it contains nutrients including potassium, magnesium, and trace minerals.

Q3: Can I use natural fertilizer for all types of plants?

A3: Yes, a variety of plants, including ornamentals, fruits, vegetables, and flowers, can benefit fro

Culinary connoisseurs and home gardeners love arugula for its spicy flavor and nutritional value. The good news is that although it’s usually grown outside, you can grow this adaptable leafy green indoors, in the comfort of your own home. We’ll take you step-by-step through the process of how to grow arugula indoors in this simple guide.

Arugula varieties can enhance indoor gardening experiences. Popular ones include Rocket, Wild, Italian Cress, and Astro. Rocket has a peppery taste and quick growth, Wild has a stronger flavor, Italian Cress has delicate leaves, and Astro has a milder flavor and softer leaves. Astro arugula is ideal for indoor gardening due to fast germination and container-friendly growth.
  • Choose a shallow dish with holes for drainage. Since arugula has a shallow root system, a larger container is preferable to a deeper one.
  • Make use of an organic matter-rich potting mix that drains properly. Arugula grows best in soil that is between 6.0 and 7.0 in pH.
  • Distribute the arugula seeds uniformly over the soil’s surface. Apply a thin layer of dirt over them after gently pressing them into the ground. The seeds should be spaced 1-2 inches apart.
  • Place your container in a position with at least 6 hours of sunlight per day. Grow lights positioned a few inches above the plants can be used as a supplement if there is not enough natural light.
  • The ideal temperature range for arugula is 55°F to 70°F (13°C to 21°C). Keep it away from intense heat or cold.
  • ake care that the soil is constantly damp but not wet. Water the arugula when the top inch of soil appears dry to the touch. Avoid using irrigation from above to prevent fungal infections.
  • Every two to three weeks, feed your arugula plants a balanced liquid fertilizer that has been diluted to half-strength. This will promote healthy growth.
  • Pay attention to common pests such as flea beetles and aphids. Apply neem oil or insecticidal soap to treat infestations as soon as possible. Additionally, keep an eye out for disease indicators like damping-off or powdery mildew and take the necessary precautions to manage them.
  • Arugula ages rapidly; it usually becomes fully grown in 3–4 weeks. Harvest the outer leaves when they reach 2-3 inches in length, allowing the plant’s heart to continue developing. Harvesting can continue in this way.
Arugula, also known as rocket or roquette, is a fast-growing leafy green rich in vitamins and antioxidants. Growing it indoors ensures a steady supply, avoids pests and weather conditions, and allows convenient leaf harvest from the kitchen or living room.

Fresh arugula's peppery flavor is versatile and can be used in salads, sandwiches, wraps, cooked pasta or pizza, and smoothies. It pairs well with leafy greens and provides a tangy crunch.

Lastly, how to grow arugula indoors? is an easy and satisfying procedure. No matter the season, you can enjoy flavorful and fresh arugula straight from your kitchen by following this simple instruction. For the best growth, don’t forget to supply enough light, moisture, and nutrients. You can enjoy the satisfaction of homegrown fruit and boost your culinary masterpieces with exquisite arugula leaves that you harvest with time and care. Whether you’re planting it in a garden bed or a container, arugula thrives with minimal effort, making it an excellent addition to your homegrown vegetables. With just a little care, you can savor the fresh, tangy flavor of arugula all season long.

Certainly! If you’d like to learn more, please consider following our WhatsApp Channel, Facebook, Instagram, YouTube, Twitter, and Pinterest.

Q1: How long does it take for arugula to grow indoors?

A1: When cultivated indoors, arugula usually reaches maturity in 4-6 weeks from seed to harvest.

Q2: How to grow arugula in containers?

A2: If you want to cultivate arugula in a container, select a deep pot with soil that drains well, thinly spread the seeds, maintain the soil continuously moist, and give the plant lots of sunlight or moderate shade.

Q3: How to grow arugula from seed?

A3: To grow arugula from seed, place the seeds straight into sunny, well-drained soil and maintain the soil moist until the seedlings sprout and become mature.

Q4: Will arugula regrow after cutting?

A4: Yes, arugula will grow if you harvest the outside leaves while leaving the core intact. It can provide many harvests over several weeks before bolting.

Q5: What is the best climate to grow arugula?

A5: Arugula is a cool-season plant, with temperatures ranging from 45 to 65°F (7 to 18°C). Arugula thrives in Zones 9 and 10, but may be grown all year in temperate climates. Row cover and shade cloth can help to lengthen arugula’s growth season.

Best Indoor Plants are more than just aesthetic additions to your home; they contribute to a healthier living environment. In today’s fast-paced world, finding comfort and peace within our homes is increasingly crucial. Indoor plants are increasingly essential in home design to create environments that reflect individuality and provide a calming sensation. Indoor plants are not just aesthetically pleasing; they also improve air quality, lower stress levels, and promote overall well-being. Spruce Up Your Interiors: Best Indoor Plants Guide provides expert advice, stunning photos, and perceptive suggestions for designing warm, lively interior spaces that nourish the body and spirit. Together, let’s create a sanctuary that is greener and more peaceful.

  • Snake Plant (Sansevieria): The snake plant is known for its durability and air-purifying capabilities, and it can withstand low light and sporadic watering.
  • Pothos (Epipremnum aureum): Pothos is a trailing vine that thrives in low to moderate light and can tolerate occasional neglect. It works wonders for air purification indoors as well.
  • Chinese Money Plant (Pilea peperomioides): This unusual plant with round, pancake-like leaves has gained appeal in recent years. It likes regular watering and bright, indirect light.
  • Monstera Deliciosa: Known for its unusual leaves that resemble Swiss cheese, this plant grows well in bright, indirect light and can bring a bit of the tropics indoors.
  • Spider Plant (Chlorophytum comosum): Spider plants are flexible and easy to grow, producing tiny spider plants or “spiderettes” that dangle from the parent plant, adding visual appeal.
  • Aloe Vera: Aloe vera, with its succulent leaves, not only adds visual appeal but also serves as a home remedy for minor burns and skin irritations. It enjoys sparing irrigation and strong, indirect light.
  • Peace Lily (Spathiphyllum): Peace lilies grow well in low to moderate light levels and have graceful white blossoms and rich green leaves. They also aid with indoor air purification.
  • ZZ Plant (Zamioculcas zamiifolia): ZZ plants are ideal for busy or forgetful owners due to their glossy, dark green leaves and resistance to low light and dehydration.

In conclusion, adding the best indoor plants to your living areas can improve the atmosphere and air quality significantly. Incorporating the best indoor plants into your home is a simple way to create a healthier, more vibrant living space. With their ability to purify the air, reduce stress, and enhance overall well-being, these plants are essential for anyone looking to improve their quality of life. There are countless options for enhancing your decor with indoor plants, ranging from vivid succulents to thick ferns. Selecting the right plants for your interior design and lifestyle requires considering factors like lighting, space, and maintenance requirements. Make your home a sanctuary by choosing the best indoor plants for healthier living.

Certainly! If you’d like to learn more, please consider following our WhatsApp Channel: Harvest Gardening

Q1: What are some of the best indoor plants for beginners?

A1: Pothos, snake plants, spider plants, and peace lilies are a few indoor plants that require little maintenance.

Q2: What are the best indoor plants for low-light conditions?

A2: For low-light indoor settings, snake plants, pothos, peace lilies, spider plants, and ZZ plants are great options.

Q3: What are the best indoor plants for oxygen?

A3: The peace lily (Spathiphyllum), aloe vera (Aloe barbadensis miller), spider plant (Chlorophytum comosum), bamboo palm (Chamaedorea seifrizii), and snake plant (Sansevieria) are the greatest house plants for oxygen.

New to gardening? Learn how to grow Swiss chard with ease. Swiss chard is a great addition to any home garden because of its colorful stems and nutrient-dense leaves. Growing Swiss chard may be a wonderful experience, regardless of gardening expertise level. In this ultimate guide, we will explore all the tips and tricks to help you learn how to grow swiss chard.

Popular varieties include Bright Lights, Fordhook Giant, and Rhubarb Chard, each with unique colors, stems, and foliage.

Starting the process

  • Pick a sunny spot with soil that drains properly.
  • Add organic stuff, such as compost, to the soil to prepare it.
  • Directly sow seeds in the ground or, for a head start, plant seedlings inside.

How to grow swiss chard with proper watering and care

  • Maintain continuously damp but not soggy soil.
  • mulch the area surrounding the plants to keep them moist and discourage weed growth.
  • fertilize every few weeks using a balanced fertilizer.

Managing insects and illnesses

  • Maintain an eye out for common insects like caterpillars and aphids.
  • Make use of natural pest control techniques like beneficial insects or neem oil.
  • Rotate your crops every year to stop the spread of disease.
  • To prevent downy mildew, enhance air circulation and reduce overwatering. Treat leaf spot by removing damaged leaves and applying organic fungicides as needed.

Gathering and preserving

  • Harvest outer leaves first to promote ongoing development.
  • Trim leaves close to the stem so as not to harm the plant.
  • Swiss chard can be kept for up to a week in the refrigerator.
Bonus Success Tips
✅ Plant every 2-3 weeks for continual harvest.
✅ Combine with onions, carrots, or herbs to prevent pests.
✅ To maximize taste and nutrients, add Swiss chard to salads, stir-fries, and soups.

Finally, learning how to cultivate Swiss chard needs meticulous attention to detail, patience, and a dedication to good care. You can grow Swiss chard like an expert and quickly reap the rewards of your labor by using the advice provided in this tutorial.

Certainly! If you’d like to learn more, please consider following our WhatsApp Channel, Facebook, Instagram, YouTube, Twitter, and Pinterest.

Q1: Can I save Swiss chard seeds for planting next year?

A1: Indeed, the Swiss chard plant is biannual, meaning that it takes two years for it to complete its life cycle. It will produce blooming stalks with seeds next year. Before collecting the seeds to sow the following year, let them reach full maturity and dry on the plant.

Q2: How to grow swiss chard indoors?

A2: When cultivating Swiss chard indoors, select a window sill that receives enough sunlight, sow the seeds in soil that drains well, and maintain a constant moisture level while allowing enough airflow to promote good growth.

Q3: How to grow swiss chard from seed?

A3: When starting from seed, grow Swiss chard directly in full sun or partial shade. Make sure the soil stays constantly moist until the seedlings appear. Then, thin the seedlings to provide for the appropriate spacing between mature plants.

Q4: How long does it take for Swiss chard to grow?

A4: Swiss chard normally takes 7-14 days to germinate and matures in 50-60 days. However, you can begin picking young leaves as early as 30 days after planting.

If you’re curious about how to grow lavender from seed, you’re in for a delightful gardening adventure Lavender is a popular addition to any garden because of its gentle blossoms and calming aroma. Although cuttings are the usual method of propagation, cultivating lavender from seed can be a satisfying and economical way to add these lovely plants to your yard. This article will show you how to grow lavender from seed, whether you’re a novice wanting to develop your green thumb or an experienced gardener searching for a new challenge. Learn how to grow lavender from seed with our straightforward guide.

  • Choose a lavender seed variety that is appropriate for your climate and intended purpose. Lavender comes in a wide variety of forms, each with special qualities of its own.
  • Depending on your climate, you can sow lavender seeds indoors or outside. Plant seeds indoors 6–8 weeks before the final anticipated date of frost. Sow seeds outside once the risk of frost has passed in the early spring.
  • Lavender likes the soil to be slightly alkaline and to drain properly. If more drainage is required, incorporate more sand or perlite. Steer clear of clayey, thick soils that can hold onto too much moisture.
  • Lavender seeds should be thinly sown on top of damp soil, whether indoors or out. Lavender seeds need light to sprout, so gently press the seeds into the soil’s surface; do not cover them with more dirt.
  • Warm conditions are ideal for lavender seed germination. Try to keep the temperature in the range of 65–70°F (18–21°C) while the seeds are germinating. If you need to give constant warmth, you can use a heat mat.
  • Maintain an even but not soggy moisture content in the soil as you wait for germination. To prevent rot, let the soil’s surface dry out a little bit in between waterings.
  • It can take a few weeks for lavender seeds to sprout, so have patience and keep the right growing conditions in place.
  • The seedlings can be moved into individual pots or the garden once they have produced multiple sets of genuine leaves. To prevent breaking the fragile seedlings’ roots, handle them gently.
  • Before transferring seedlings into the garden, if starting indoors, let them gradually become accustomed to the outdoor environment. Hardening off is the process that helps avoid transplant shock.
  • For lavender planting, pick a sunny area of your yard with well-draining soil. Full daylight is ideal for lavender growth, as it struggles in shadowed areas.
  • Plant your lavender at least 12 to 18 inches apart to give them plenty of room to develop. Appropriate spacing promotes proper air circulation and helps shield against problems like powdery mildew.
  • Once planted, lavender likes slightly dry conditions and can withstand droughts. Water the soil well but sparingly, letting it dry out in between applications. Since fungi can cause problems in lavender plants, avoid watering them from above.

In conclusion, with the correct information and methods, learning how to grow lavender from seed can be a pleasant experience. You can enjoy the beauty and scent of lavender in your yard or home and improve your chances of success by heeding the advice provided. Don’t forget to select the appropriate lavender kind for your climate, as well as to give it regular hydration, enough sunlight, and soil that drains properly. Furthermore, you may successfully produce lavender from seed and make use of its many benefits for years to come with perseverance, care, and attention to detail. Follow our easy guide on how to grow lavender from seed and watch your garden flourish with aromatic, beautiful lavender plants.

Certainly! If you’d like to learn more, please consider following our WhatsApp Channel, Facebook, Instagram, YouTube, Twitter, and Pinterest.

Q1: How to grow lavender from seed at the best time?

A1: For best results, sow lavender seeds indoors 6-8 weeks before your area’s last frost date.

Q2: How to grow lavender from seed with appropriate fertilizer?

A2: To grow lavender from seed, put it in well-drained soil and use a balanced fertilizer with low nitrogen concentration to encourage good root development and flower production.

Q3: How do I protect lavender in winter?

A3: USDA zones 5–9 are suitable for lavender growth. For winter protection in colder climates, cover the base of the plant with pine needles or straw. Steer clear of rotting mulches that are thick and damp.

Q4: How long does lavender take to grow from seed?

Lavender seeds might take 2-3 weeks to germinate and usually take 2-3 months to mature into little seedlings. The plants may take 1-3 years to mature and yield an abundance of blooms.

Q5: Can you grow lavender from cuttings?

A5: It is possible to propagate lavender from cuttings, which is a quicker and more dependable way than starting from seeds. Softwood cuttings root in 2-4 weeks, but hardwood cuttings take somewhat longer but produce stronger plants.

Orchids are popular for indoor gardeners because of their beautiful beauty and sensitive charm. Orchids, despite their reputation for being picky, can flourish indoors with the right maintenance and care, rewarding growers with beautiful blooms and colorful foliage all year long. Whether you’re an experienced gardener or a beginner, learning how to grow orchids indoors can be a rewarding experience.

1. Select the correct orchid:

There are thousands of orchid types, each with unique maintenance needs. Make sure the orchid species you wish to grow is appropriate for indoor cultivation and that it fits your skill level before you begin by doing some research on it.

2. Give enough light:

For them to flourish, orchids need strong, indirect light. Put them close to a window that faces south or east so they may get lots of natural light without being in the direct sun. If there isn’t much natural light available, think about using artificial grow lights in addition.

3. How to grow orchids with appropriate temperature and humidity:

The ideal temperature range for orchids is 60–80°F (15–27°C) during the day and a little colder at night. Furthermore, they do well in humidity ranges of 50–70%. Using a humidifier, arranging orchids in groups, or setting pebble-filled water trays underneath the plants are some ways to raise the humidity in the space.

4. Select the proper potting mix:

A potting mix that drains properly and gives roots adequate air circulation is necessary for orchids. Make use of a particular orchid mix made up of charcoal, sphagnum moss, bark, and perlite. Conventional potting soil should not be used since it holds excessive moisture and can cause root rot.

5. Use water efficiently:

One of the most frequent errors made when caring for orchids is overwatering. Before adding any water, let the top inch of the potting mix dry off. After completely submerging the roots with water, let the extra runoff. Orchids should never be left in standing water as this might lead to root rot.

6. How to grow orchids, apply fertilizer often:

There are particular nutritional needs for orchids. During the growing season, apply a half-strength diluted balanced orchid fertilizer every 2-4 weeks. During the dormant season, fertilization frequency should be decreased.

7. Repot when needed:

Orchids may outgrow their pots as they become larger or the potting mix may degrade. Repotting is necessary when fresh growth appears or the potting mix begins to break down. Repotting should be done gently to protect the fragile roots.

8. How to grow orchids by monitoring for pests and diseases:

Keep a lookout for typical orchid pests including aphids, mealybugs, scale insects, and spider mites. Use a horticultural oil or insecticidal soap to treat infestations as soon as possible. Furthermore, keep an eye out for symptoms of illnesses like fungal infections or root rot and take the necessary action to treat them.

Learning how to grow orchids indoors can be a fulfilling and entertaining experience with the correct strategy. Orchid aficionados can establish ideal conditions for their plants to flourish by knowing the special requirements of orchids, which include light, humidity, temperature, watering, and air movement.

Certainly! If you’d like to learn more, please consider following our WhatsApp Channel, Facebook, Instagram, YouTube, Twitter, and Pinterest.

Q1: How to grow orchids in water?

A1: While certain orchid species can be grown in water by placing their cuttings in a vase filled with distilled water until roots emerge, most orchid species cannot grow exclusively in water due to the need for air surrounding their roots.

Q2: How to grow orchids from cuttings?

A2: Choose a healthy stem with three or more nodes if you are growing orchids from cuttings. After that, plant the cut end in a well-draining media, such as sphagnum moss or orchid bark, and immerse it in the rooting hormone. Until roots form, keep the cutting in a warm, damp place with indirect light.

Q3: How long do orchids live?

A3: Orchids can live for a very long time with the right care; some kinds can even outlast their owners. An orchid’s life duration varies based on its species, growth environment, and general level of care.

If you’re curious about how to grow roses indoors, you’re in for a delightful experience. Roses are frequently connected to outdoor gardens because of their classic beauty and alluring scent. They may, however, flourish just as well indoors with the correct circumstances and care. Although growing roses indoors call for some patience and attention to detail. The benefits of seeing these blossoms thrive in your house are worth the work. We’ll go into professional advice and methods in this article to show you how to grow roses indoors.

  • Select rose cultivars that are meant to be grown inside. Because of their diminutive size and susceptibility to container gardening, miniature roses, typically thrive inside.
  • To let extra water out, use a big container with drainage holes. Make sure the rose has enough room to grow and that the container is deep enough to support its root system.
  • Ensure they receive at least 6 to 8 hours of direct sunlight per day in an indoor location. Windows that face west or south are best for getting as much sunshine as possible.
  • Temperatures between 60–70°F (15–21°C) during the day and a little bit colder at night are ideal for roses. If possible, water the leaves frequently or keep a humidifier close by to maintain moderate humidity levels, particularly in the dry winter months.
  • Maintain a constant, but not soggy, moisture content in the soil. When the top inch of soil seems completely dry to the touch, give your indoor roses a thorough watering; just make sure any extra water can drain out of the container. Keep the foliage dry to avoid fungal problems.
  • Throughout the growing season (spring through fall), treat your indoor roses using a balanced liquid fertilizer designed for flowering plants. For optimum development and a profusion of blooms, adhere to the application rates and frequency recommended by the manufacturer.
  • Frequent deadheading and pruning aid in preserving the plant’s form and promote ongoing flowering. To enhance air circulation and general plant health, remove wasted flowers by cutting just above a set of healthy leaves and clipping any dead, broken, or overgrown stems.
  • Look out for typical indoor pests like spider mites, aphids, and whiteflies; also, be aware of fungal illnesses like black spots and powdery mildew. Regularly check your roses, and when necessary, take quick action to address any problems with organic or chemical remedies.
  • Indoor roses may require extra support, depending on the variety, to keep stems from bending or becoming lanky from the weight of blossoms. To support and train the plant to grow erect, use small trellises or supports.
  • Since indoor roses hibernate over the winter, cut back on fertilizer and watering. If the plant receives little natural light, move it to a colder spot away from drafts and think about adding more lighting.

In conclusion, how to grow roses indoors? can, with the appropriate information and attention, be a fulfilling and joyful experience. You can effectively develop lovely roses in your house by according to professional advice on choosing the best types, providing enough light, humidity, and temperature, as well as appropriate watering and fertilizing techniques.

Certainly! If you’d like to learn more, please consider following our WhatsApp Channel, Facebook, Instagram, YouTube, Twitter, and Pinterest.

Q1: How to grow roses indoors with appropriate fertilizer?

A1: Give roses a balanced fertilizer designed for flowering plants to promote healthy development and bloom output if you want to grow roses inside.

Q2: How to grow roses from cuttings in water?

A2: To grow roses from stem cuttings in water, pick a healthy one, remove leaves, place in water, wait for roots to form, and then plant in soil.

Q3: How to grow roses from seeds?

A3: Soak rose seeds for 24 hours, plant in moist soil, and keep in a warm, sunny spot. Germination can take weeks to months. Transplant seedlings when they have a few true leaves.

In recent years, there has been an increase in interest in growing vegetables indoors in pots. This creative gardening method has several advantages, from year-round fresh produce production to making the most of small spaces in urban settings. Vegetable gardening inside may be a gratifying and entertaining hobby, regardless of your level of gardening experience.

  • Select veggies that don’t take up a lot of room and are good for growing inside.
  • To avoid flooding, use pots or containers with drainage holes.
  • Select a potting mix that is high in organic matter and well-draining.
  • Plant your pots where they will get lots of sunlight, or use grow lights to add extra illumination.
  • Refrain from submerging or overextending. Ascertain that the soil is damp but not soggy.
  • For your plants to receive the vital nutrients they require, use a balanced fertilizer.
  • Maintain an indoor climate that is appropriate for the veggies you are cultivating.
  • Regularly check your plants for any indications of illness or pests, and take the necessary measures.
  • As they grow, some veggies might need to be pruned and given support.
  • When the vegetables are mature, harvest them to promote continual production.
  • Scallions: Similar to green onions, scallions are easily regrown from leftovers, making them a useful addition to indoor gardens.
  • Eggplant: Dwarf types of eggplant grow well in indoor pots, yielding fresh fruits for your preferred recipes.
  • Cucumbers: Tight bush cucumber types can be grown indoors in small spaces with trellis support, producing fresh cucumbers.
  • Herbs (parsley, mint, basil, etc.): A lot of herbs grow well indoors and add vibrant tastes to your food preparations.
  • Peas: Dwarf pea types, like dwarf beans, grow well in indoor pots and produce soft, delicious peas.
  • Beans: With the right support, dwarf bean types can be cultivated indoors and produce fresh pods for your meals.
  • Carrots: For container gardening, go for shorter carrot varieties, and savor the fresh produce straight from your indoor garden.
  • Green Onions: An easy choice for indoor gardening, green onions can be grown again by submerging their roots in soil or water.
  • Lettuce: You can always pick leafy lettuce varieties for salads and they work great in indoor containers.
  • Bell Peppers: To enjoy homegrown peppers all year round, choose dwarf kinds of bell peppers for indoor gardening.
  • Radishes: Ideal for indoor containers, radishes grow quickly and are compact.
  • Cherry Tomatoes: You may grow small-sized cherry tomatoes indoors in pots to have fresh fruit all year round.
  • Microgreens: These immature, highly nutritious greens can be harvested in a matter of weeks and are very easy to grow indoors.
  • Potato: To grow fresh, homegrown potatoes all year round, use big soil-filled containers or bags, put them in a well-lit spot, and be sure to water them regularly.
  • Beet: You can grow vegetables indoors, like beets, as long as you have adequate light, the correct soil, and consistent watering.

In conclusion, there are many benefits to growing vegetables indoors, such as having access to fresh produce all year round, having control over environmental elements like humidity and temperature, and being able to cultivate a wide range of crops regardless of the weather outside. However, good development demands careful attention to lighting, irrigation, and soil quality. Indoor vegetable gardening may be a fulfilling and sustainable method to add organic, nutrient-dense produce to your diet with the right preparation and upkeep.

Certainly! If you’d like to learn more, please consider following our WhatsApp Channel: Harvest Gardening

Q1: How much light do you need to growing vegetables indoors?

A1: For best growth, indoor vegetable plants usually need 6–8 hours of direct sunlight or 12–16 hours of artificial light per day.

Q2: What type of containers are suitable for growing vegetables indoors?

A2: Containers for growing vegetables indoors should include drainage holes at the bottom to prevent waterlogging. As long as they offer sufficient drainage, options include fabric grow bags, plastic or ceramic pots, and even reused buckets or crates.

Q3: What is the ideal temperature range for growing vegetables indoors?

A3: The ideal temperature range for most veggies is 60–75°F (15–24°C). Keep plants away from drafty windows and other heat sources that could alter the temperature.