Author

Avery Smith

Browsing

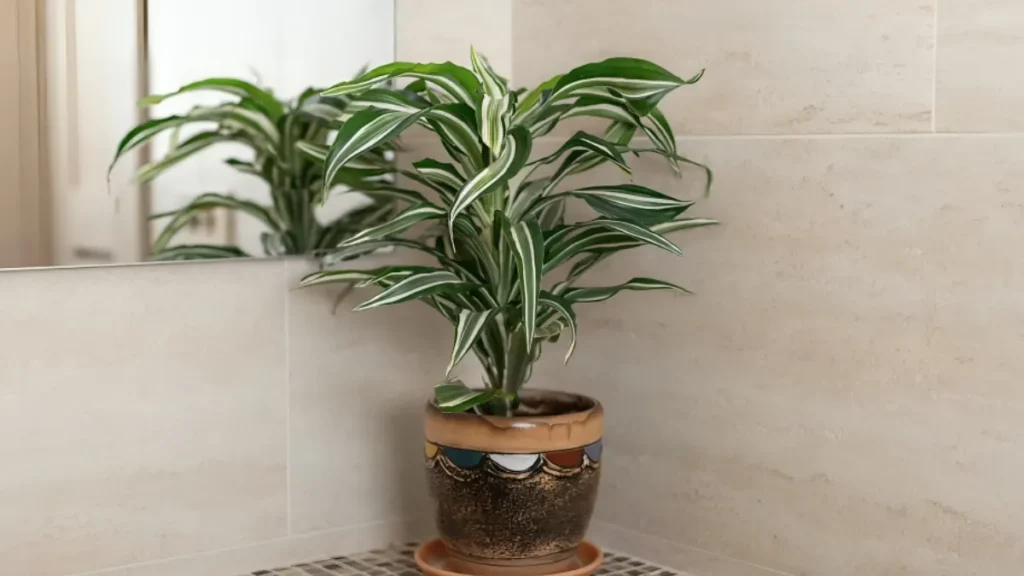
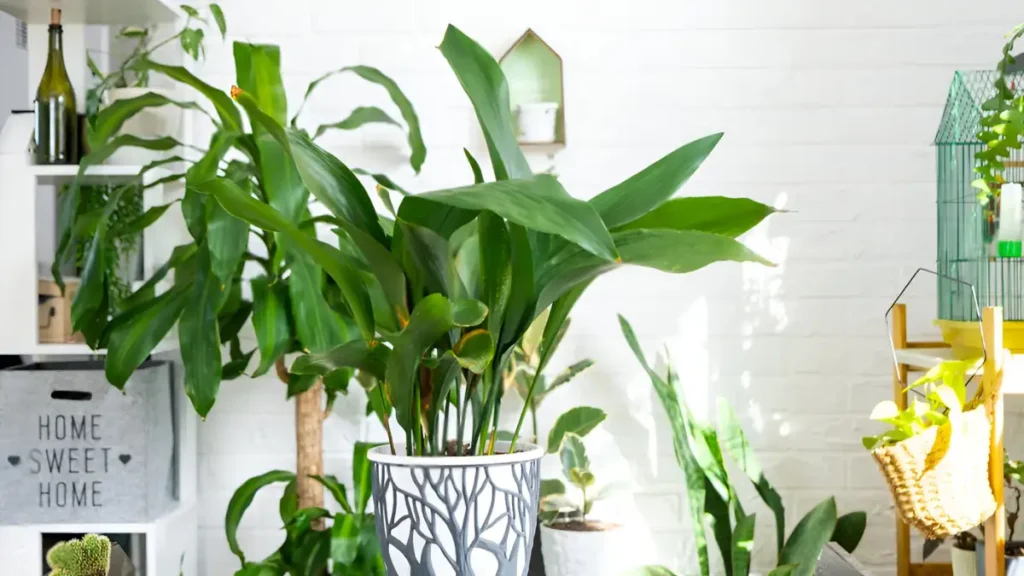
The Dieffenbachia plant, commonly known as the Dumb Cane, is popular due to its attractive leaf and ease of care. Generally green with patches or blotches of creamy white, these perennials can also have yellow accents thanks to cultivars. In Zones 10–11, this plant can reach considerable heights in the proper tropical environment—roughly 6 to 10 feet in its native Brazil, for example—but it also comes in smaller sizes. Lower leaves drop spontaneously with time, revealing the plant’s cane-like stems. Large, variegated leaves of this tropical plant, native to Central and South America, are loved for adding color to any indoor area. It’s crucial for novices wishing to take care of a Dieffenbachia to adhere to a few certain guidelines to maintain the plant’s health and growth. We offer a thorough guide to growing Dieffenbachia indoors below, including a list of the top six considerations for novices.

1. When to plant Dieffenbachia

  • Dieffenbachia is a tropical native, therefore it can be grown indoors year-round as long as the temperature is kept between 60°F and 75°F with moderate to high humidity. It also thrives in most interior climates. By planting in the spring, you may take advantage of Dieffenbachia’s natural growing season, which runs from March to October.

2. The appropriate site for your Dieffenbachia

The Dieffenbachia plant thrives in bright, indirect light, akin to its natural habitat in tropical forests. However, low light levels may hinder growth and color, while direct sun exposure may burn the fragile leaves.

  • Put it next to a window that faces east or north so that it will get filtered light all day long.
  • When dieffenbachia is growing new leaves in the spring and summer, it is especially crucial to provide filtered light to prevent sunburn on the foliage, which can happen if the light is too harsh and direct.
  • Consider utilizing grow lights to complement the natural light in your space if it is dark.
  • To guarantee uniform growth and stop the plant from tilting toward the light source, rotate it every few weeks.

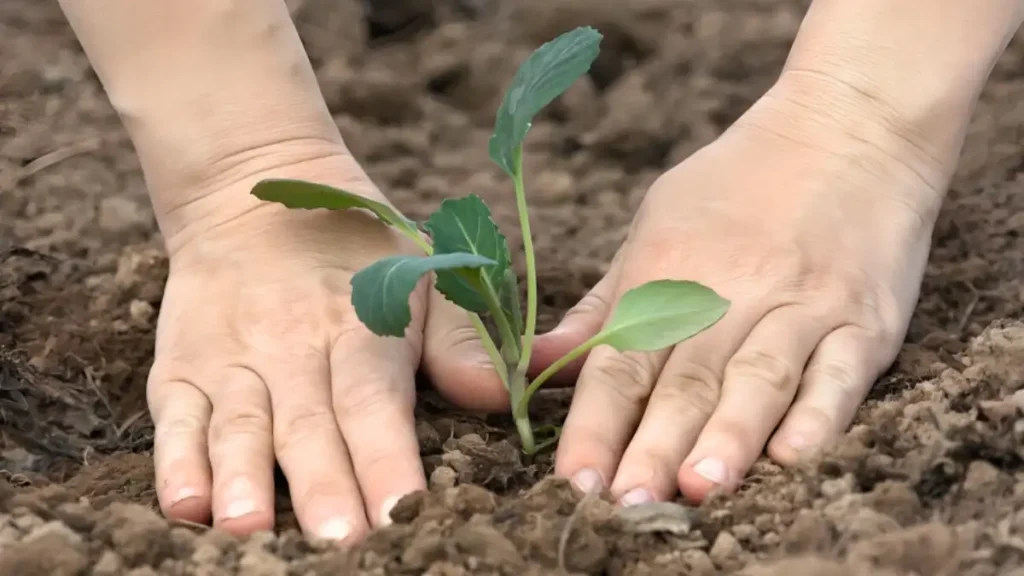
3. Use the right soil and learn how to plant Dieffenbachia

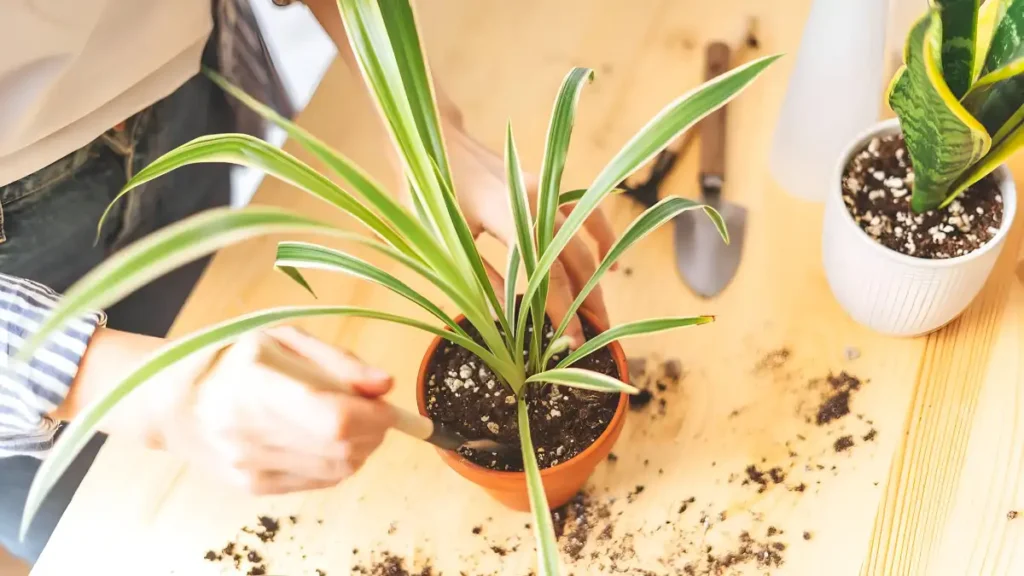
  • For good root growth, Dieffenbachia needs a lightweight soil mix that drains effectively. Aeration and moisture retention can be effectively achieved by mixing perlite or orchid bark with a premium indoor plant potting mix. When planting your dieffenbachia outside, choose a location with a pH between 6 and 7.5 that is rich, wet, well-drained, and well-ventilated soil.
  • Dieffenbachia should be planted indoors in a container with drainage holes and well-draining soil. Avoid direct sunlight, and water moderately, and keep it in a warm place between 65-75°F (18-24°C). Avoid overwatering and wipe leaves to maintain a dust-free surface.
  • Plant dieffenbachia outdoors in zones 10 and above by digging a large hole, adding bone and blood meal, backfilling, and compacting. Water and maintain a damp, not saturated soil, with an organic mulch for moisture retention.

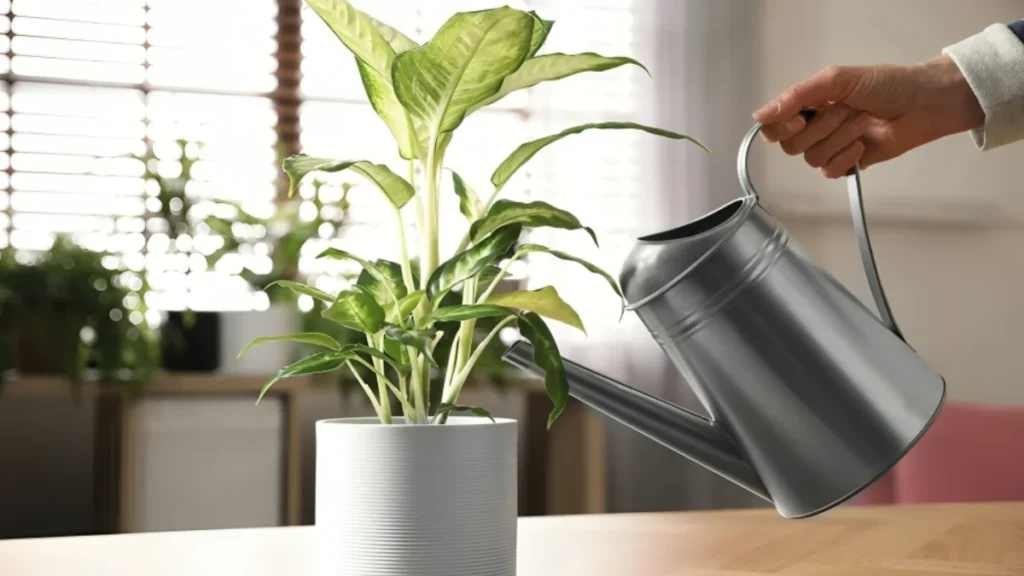
4. Watering schedule: Quantity and Frequency

Dieffenbachia thrives in slightly damp soil, but overwatering can cause root rot and leaves droop. Maintain a balance by following watering guidelines.

  • When the top one to two inches of soil feel dry to the touch, water your plant. Generally speaking, this implies watering once a week, though it can change based on your home’s humidity level.
  • Make sure the pot has adequate drainage so that any extra water can run off. To avoid water collecting at the bottom of the pot, use one with drainage holes.
  • As the plant’s development slows and its water requirements decrease, watering should be reduced throughout the winter.

Expert advice: To dissolve chlorine or fluoride in water, use room temperature filtered water or leave tap water outside for 24 hours, as these substances can discolor leaves.

5. Make appropriate use of fertilizer

Fertilize your Dieffenbachia during the growing season (spring and summer) for best growth. Adhere to these guidelines for fertilization:

  • Apply a balanced half-strength liquid fertilizer every four to six weeks.
  • Avoid overfeeding to prevent nutrient burn.
  • Cut back on fertilizer during dormancy in fall and winter.
  • Supplement with slow-releasing fertilizer if leaves fade or growth stunts.

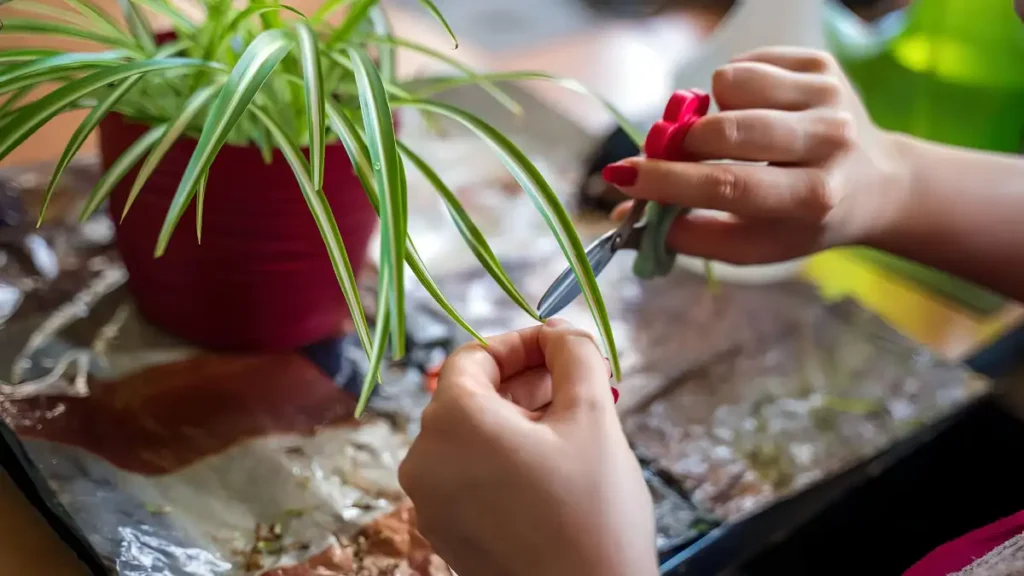
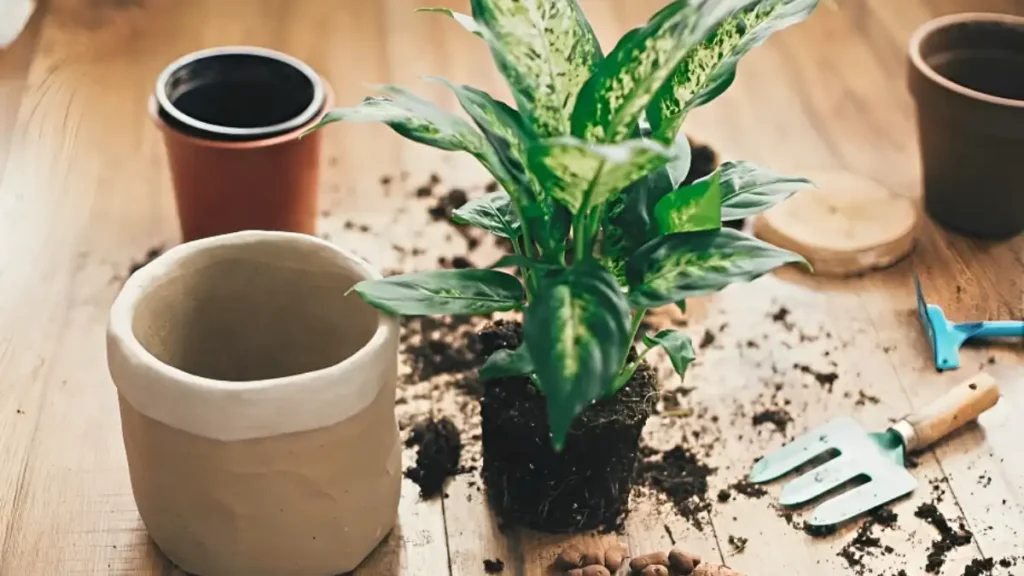
6. Repotting and pruning: Maintain the best possible condition for your plant

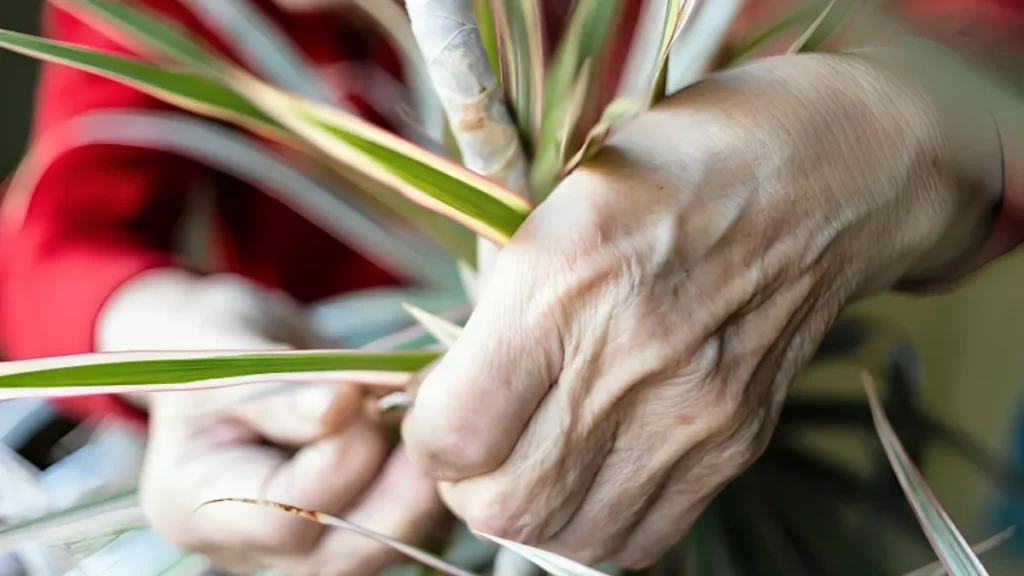
  • Use sharp scissors or pruning shears to clip off yellow or dead leaves at the base, and clip back top growth for fuller growth. Wear gloves when pruning Dieffenbachia, as sap is poisonous and can cause skin irritation.
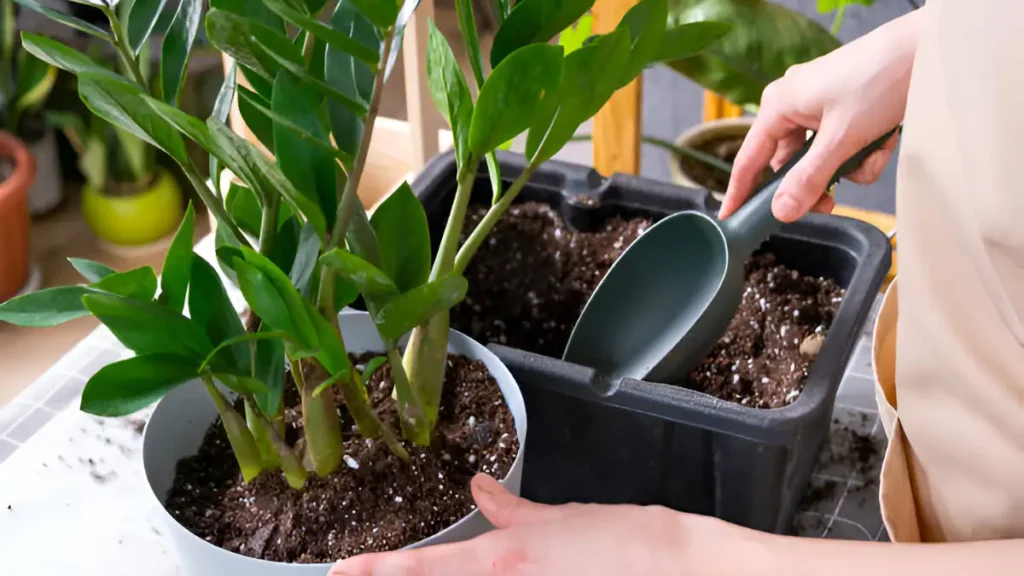
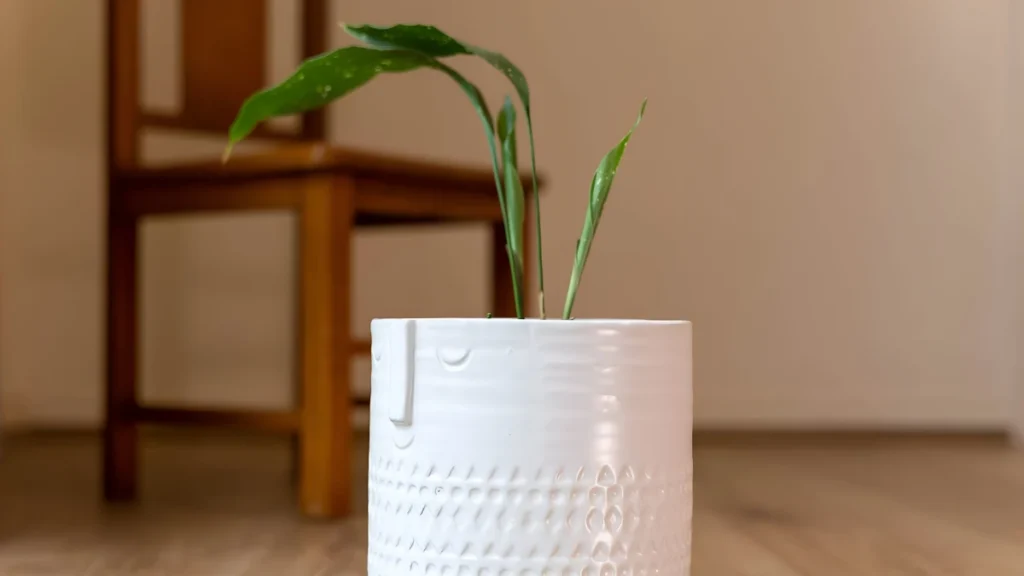
  • Repot Dieffenbachia in a larger pot in spring, using fresh potting mix and adequate drainage. Carefully repot the plant to avoid damaging its sensitive roots.

Growing a Dieffenbachia indoors can be a rewarding experience for both beginners and experienced plant enthusiasts. Key tips include selecting the right position, watering properly, managing temperature and humidity, using the right soil and fertilizer, trimming frequently, and monitoring pests.

Certainly! If you’d like to learn more, please consider following our WhatsApp Channel: Harvest Gardening

Q1: What are the common methods to propagate Dieffenbachia?

A1: The most popular techniques include air layering, division, and stem cuttings. Cuttings from stems are the simplest and most widely used approach.

Q2: What are the most common Dieffenbachia varieties?

A2: The Dieffenbachia cultivars “Camille,” “Tropic Snow,” “Exotica,” and “Compacta” are a few common ones. Every variety has different leaf colors and patterns, with green and white or yellow variegation being common.

One of the most well-liked houseplants is the Dracaena plant, which is appreciated for its vivid green foliage and ability to adapt to indoor settings. There are several types of dracaena houseplants, most of which have spear-shaped or grass-like leaves and branch out from one or more main stems resembling thick canes. Dracaena plants grow easily. Even though they do well in strong, indirect light, they even qualify as low-light houseplants. Young plants look great on mantels, tabletops, and desktops because of their compact, bushy appearance. When given the correct circumstances, houseplants may grow up to 6 feet tall, making them ideal for bringing color and vitality to a den, dining room, or living room corner. Whether you are a novice or an expert gardener, it is a great option for plant enthusiasts. We’ll look at the best ways to grow Dracaena indoors in this tutorial, so your plant can stay beautiful and healthy all year round.

The key to the success of Dracaena in your indoor environment is choosing the proper variety out of the many available. Among the most well-liked kinds are:

  • The slender, arching leaves of the Dracaena marginata, or dragon tree, have borders that are purplish or red.
  • The corn plant, Dracaena fragrans, has broad, glossy leaves and can reach considerable heights indoors.
  • The leaves of Dracaena reflexa, also known as Song of India, are glossy and have golden edges.
  • Janet Craig, dracaena deremensis”: A more manageable choice, ideal for smaller interior areas.

Although they are typically cultivated indoors, dracaenas can be taken outside in the summer and require a warm, brightly lit spot. In USDA Zones 10–11, which are semitropical and have a minimum temperature of 50°F, certain dracaena types may withstand the harsh winters. Compared to houseplants, these specimens grown outdoors grow far larger.

Dracaena is relatively simple to grow indoors with just basic maintenance.

1. The best lighting for dracaena plants

  • Dracaenas are adaptable, but finding the right balance is crucial for their development. Most thrive in bright, indirect light, while excessive direct sunlight can burn leaves and insufficient light can cause droopy stems and slow growth.
  • If natural light is scarce, place your Dracaena close to a window that lets in filtered sunlight or use an indoor grow lamp. Select Dracaena species, such as Dracaena fragrans, for rooms with low natural light levels as they are more suited to such conditions than other species.

2. Soil and water your dracaena correctly

  • To maximize natural light, grow Dracaena near filtered sunlight or indoor grow lamps, and choose species like Dracaena fragrans for rooms with low natural light levels, as they are more suitable.
  • One of the most frequent errors individuals make when taking care of Dracaena plants is to overwater them. These plants need to be kept dry, and if they are left in soggy soil, root rot can develop rapidly.

3. Keeping humidity levels for Dracaena

Dracaenas thrive in high to moderate humidity conditions, promoting quick growth and richer foliage. If your house’s air is extremely dry, especially in winter, consider increasing humidity with these suggestions.

  • Regularly mist the foliage.
  • To let the moisture around the plant evaporate, place a dish of water with stones close to it.
  • In the space where the plant is located, run a humidifier.

4. Fertilizing to promote healthy growth

  • Your Dracaena’s general health greatly depends on fertilization. Every four to six weeks during the spring and summer growing seasons, treat your plant using a balanced, water-soluble fertilizer. For the best results in encouraging healthy root and leaf development, use a 10-10-10 fertilizer. 
  • Overfertilizing can lead to fertilizer burn, and browning of leaf tips or edges, as plant development slows down in fall and winter.

5. Repotting and taking care of soil

  • Dracaenas grow slowly and don’t need frequent repotting. However, every two to three years, if the plant has outgrown its container, consider repotting. Use a well-draining potting mix and select a pot two inches wider. Dracaenas are sensitive to root disruption, so avoid harm. After repotting, provide water to help the plant adapt to its new environment.

6. Toxicity and safety precautions

  • Dracaenas are a great indoor garden plant, but pets cannot handle them. Keep them out of reach of dogs or cats to avoid accidental consumption, which can cause drooling, vomiting, or lethargic behavior. Place the plant in a separate room or on a high shelf.

If you give your Dracaena plant the proper amount of light, water, and attention, you may grow it successfully indoors. These easy-to-maintain plants will bring a touch of elegance and greenery to your house for many years to come. If you keep an eye on its requirements, your Dracaena will repay you with vivid, vigorous leaves.

Certainly! If you’d like to learn more, please consider following our WhatsApp Channel: Harvest Gardening

Q1: How to propagate Dracaena?

A1: Cut a healthy stem just below a node, then plant the cutting in water or moist soil. Keep the cutting warm and in indirect light until roots form. This is how Dracaena is propagated. Once it has taken root, move it to a pot with soil that drains properly.

Q2: What are the most common types of Dracaena plants?

A2: Dracaena marginata (Dragon Tree), Dracaena fragrans (Corn Plant), Dracaena reflexa (Song of India), and Dracaena sanderiana (Lucky Bamboo) are the most frequent varieties of Dracaena.

Q3: What are the benefits of dracaena plant?

A3: Because they require little upkeep and eliminate pollutants like formaldehyde and benzene from the air, dracaena plants are excellent for enhancing interior spaces. They give homes and workplaces a decorative, eco-friendly touch as well.

For those who are just starting, one of the most popular indoor plants is the ZZ plant (Zamioculcas zamiifolia). It is renowned for being adaptable and requiring little upkeep. Although the ZZ plant was found in the early 1800s, it wasn’t until the 1990s that it was readily accessible as a houseplant. It soon established a reputation for being unbreakable and the ideal houseplant for those who say they are unable to keep houseplants alive. The ZZ plant is native to warm, arid, shaded environments in East and South Africa. It thrives in desert interior environments. Easy to maintain: This houseplant does best in low light from windows facing east or north. Because it stores water in its plump, tuber-like rhizomes and thick, meaty leaves, it is also incredibly drought-tolerant. It expands sporadically and slowly. Everything you need to cultivate a healthy ZZ plant indoors will be covered in this extensive guide, including beginner-friendly care tips and methods.

Before we get into the details, it’s crucial to understand where the ZZ plant came from. Native to Eastern Africa, the ZZ plant thrives in arid conditions with little water availability. Its adaptability to indoor environments has made it a low-maintenance plant. It can withstand protracted dry spells thanks to the water-storing capacity of its thick, waxy leaves, and its subterranean storage units, or rhizomes, enable it to grow even in low light.

The ZZ plant is regarded as one of the easiest houseplants for novices to care for because it needs little maintenance.

1. ZZ plant light requirements

Because they can adapt so well to different lighting situations, ZZ plants are a common sight in homes and offices. But to promote the healthiest possible growth:

  • Ideal light is moderate, indirect light. Low light levels allow the plant to survive, but they will cause it to grow more slowly.
  • Don’t leave the plant in the sun for long periods. Its leaves may become scorched in direct sunlight, withering and developing brown patches.
  • Don’t worry if your room seems darker! ZZ plants can grow there, but if you want to see rapid development, try putting them in a place with indirect sunshine and bright lighting.

2. How often to water ZZ plant

  • After allowing the ZZ plant soil to completely dry out between waterings, deeply water. It should be enough to do this every few weeks, depending on the growing environment. Since a ZZ plant can store water in its rhizomes, it is preferable to submerge it rather than overwater it.

3. ZZ plant soil

  • When the soil of the ZZ plant dries up in between waterings, it thrives. Give the plant plenty of water, making sure that any extra runs out completely at the bottom of the pot. Next, before you water it once again, test the soil. Put your finger about an inch into the earth; water the plant well if the soil feels dry to the touch. In a few weeks, inspect the plant again if the soil is still wet. Make use of a potting mix that drains effectively, like one made for cacti or succulents. This lessens the risk of root rot, which is a major problem for ZZ plants in excessively wet environments.

4. The proper temperature and humidity for ZZ Plants

  • Room temperatures are kept between 60 and 75°F (16 and 24°C) on average. Zone Zero plants dislike being in extremely cold climates. They can get stressed out by drafts, air conditioners, and heaters, so keep them away from these areas.
  • Although they don’t care about humidity, sometimes spraying the leaves can help simulate their natural habitat if you reside in a very dry location. That being said, this is usually not required.

5. Apply fertilizer to your ZZ plant for best development

  • Twice a year, use a low-dose liquid fertilizer as directed on the label. Just fertilize it when you remember, and don’t fertilize it again for at least six months. The plant enters a dormant phase in the fall and winter, therefore fertilizer should be avoided during this time as it won’t need additional nutrients.

6. Repotting your ZZ plant

  • Every two to three years or when the roots get crowded, repot your ZZ plant. If the roots of the plant are beginning to press against the pot’s edges, you will know it’s getting root-bound. To allow the roots to spread out, choose a container that is 1-2 inches bigger in diameter than the one you are using now. Use clean, well-draining soil during repotting to give the plant the best possible growing environment.

7. How to propagate ZZ plant

Propagation is simple if you want to add more ZZ plants to your collection or give one to a friend:

  • Leaf cuttings: Take a healthy leaf off the plant and put it in the ground or water. It should start to generate new rhizomes after a few months.
  • Rhizome division: You can divide a plant when repotting by carefully cutting apart the rhizomes. After that, each newly formed segment can be potted independently to create a new ZZ plant.

The ZZ plant is a great addition to interior spaces for beginners looking to add greenery. It requires minimal maintenance, grows beautifully, and requires careful watering, strong indirect light, and avoidance of overwatering for long-term health.

Certainly! If you’d like to learn more, please consider following our WhatsApp Channel: Harvest Gardening

Q1: Is ZZ plant lucky at home?

A1: The ZZ plant is believed to bring wealth and good fortune, is popular for its low maintenance requirements and air-purifying capabilities.

Q2: Why is my ZZ plant losing leaves?

A2: It’s possible that overwatering, underwatering, or a lack of light is causing your ZZ plant to lose leaves. Ensure that the plant receives adequate indirect sunlight and that the soil dries out in between waterings.

The Spider Plant (Chlorophytum comosum) is one of the most popular houseplants for novice and seasoned plant lovers. For those wishing to add some color to their home, the spider plant is an excellent option because of its resilience, air-purifying properties, and distinctive appearance. Spider plants are low maintenance, tolerant of all light conditions, and unaffected by weekly watering misses. Spider plants, sometimes known as airplane plants, do great in hanging baskets or containers. One of the reasons this clump-forming perennial is so well-liked indoors is because it is only hardy in Zones 9–11 outside. This page is a detailed guide on growing spider plants indoors, including important tips on lighting, watering, soil, and overall care.

Spider plants are visually appealing and effective in eliminating pollutants like xylene, formaldehyde, and carbon monoxide from the air. They are low maintenance and can tolerate occasional neglect, making them an ideal choice for adding greenery to interior spaces.

There are numerous spider plant types, and each has special characteristics of its own. The most popular kinds of variegated spider plants are those with green leaves striped with white or cream. The leaves of certain types, like the solid green spider plant, are entirely green. Indoor circumstances are ideal for spider plants to grow in, regardless of the kind you select.

Spider plants require minimal care to thrive indoors, but they need certain essential factors to consider.

1. Where to grow spider plants

  • Spider plants are best grown indoors in most climates, while outdoors in the hottest regions, as they require a light environment with free-hanging leaves and avoid falling over on shelves, pedestals, or tabletops.
  • Spider plants like dampness and warm weather because they are native to tropical regions. They work wonderfully in bathrooms, absorbing steam from showers.

2. Soil and Potting

  • Spider plants thrive in acidic, easily draining soil. Use a high-quality potting mix with sand or perlite, and repot every year to provide fresh soil and root space. Choose a larger pot for growth and 1-2 inches larger than the existing one.

3. How to grow spider plants

  • Tropical spider plants can be brought indoors at any time of year, but choose a container with adequate drainage. Hanging plants require a lighter, heavier pot, while terra-cotta pots are ideal for surfaces, as they wick away moisture.
  • Remove the plant from its nursery pot, add potting mix, remove roots, transfer to a new container, surround it with soil, and provide ample water for the plant to settle.
  • Spider plants can be planted using seeds or plantlets, cut from their mother plant, and placed in a potting mix-filled pot. Wet the mixture, place it in a shadowed area, and observe roots take hold.

Spider plants are ideal for beginners due to their ability to withstand neglect. They thrive when watered, planted in well-drained soil, and placed near a light source.

1. Spider plant light requirements

  • Spider plants thrive in indirect sunlight, especially near north or east-facing windows. They can withstand low light but may burn in direct sunlight. They can adapt to artificial lighting, such as fluorescent grow lamps, by placing them 6-12 inches above the plant.

2. How often to water spider plant

  • Spider plants need moderate irrigation, watering when the soil appears dry. Avoid overwatering to prevent root rot. Ensure large drainage holes in the pot for proper water release.
  • Spider plants are sensitive to chlorine and fluoride in tap water, so it’s crucial to use distilled or filtered water instead or leave tap water out overnight.

3. Humidity and temperature

  • Spider plants thrive in warm, humid conditions, but should be kept away from cool drafts, air conditioners, and fans. Weekly water mists can help if the house is dry.

4. Fertilizing and pruning

  • Apply water-soluble fertilizer to spider plants once a month during spring and summer, following label guidelines. Excessive fertilization may result in brown leaf tips.
  • As soon as you notice dead leaves, remove them. Remove plant branches to direct the plant’s energy toward new development if it appears that it is growing slowly.

Spider plants are known for their easy propagation, producing offshoots called “pups” or plantlets that hang from the parent plant on long stems, allowing for easy planting in pots.

How to propagate spider plant step by step

  • Choose one where you can see a few tiny roots sticking out.
  • The plantlet can be planted directly into damp soil, or it can be rooted in water until the roots are around 1-2 inches long.
  • If planting directly in the soil, use a tiny container filled with well-drained potting mix. After planting, give the pot plenty of water and set it in an area with soft light.

It is simple and satisfying to grow a spider plant inside. These hardy plants will flourish with the right care, clean the air, and even create new plants for you to add to your house or share with friends. Spider plants are a great addition to any indoor plant collection, regardless of gardening experience level.

Certainly! If you’d like to learn more, please consider following our WhatsApp Channel: Harvest Gardening

Q1: What are the spider plant benefits?

A1: Because they are low maintenance and eliminate toxins like formaldehyde and carbon monoxide, spider plants are an excellent option for improving the ambiance and air quality in your house. They are also non-toxic to animals.

Q2: Is spider plant lucky for home?

A2: Yes, spider plants are lucky for homes since they are thought to provide good vibes and fortune, as well as clean the air and make the interior healthier.

Q3: Why does my spider plant look unhealthy?

A3: Spider plants may appear ill due to excessive moisture, dryness, or lack of light, and brown leaf tips may indicate low humidity or excessive fluoride in the water.

Among the hardy and low-maintenance houseplants you can add to your indoor plants is the cast iron plant (Aspidistra elatior). Being well-known for its capacity to flourish in low light conditions and tolerate neglect, it’s a great option for anyone wishing to include some greenery in their house without worrying about ongoing maintenance. Native to China and Japan, cast iron plants are resilient, low maintenance, and visually pleasing in the yard or as houseplants. Most types have glossy, green leaves that grow to a height of 20 to 30 inches. Other variations feature foliage that is speckled, cream-toned, or variegated. Low-maintenance cast iron plants, such as pothos, snake plants, and ZZ plants, are excellent houseplants for novice gardeners. They grow best outside in USDA Zones 6–11, mainly in southern states and northern California, as groundcovers or border plants. We will go over all you need to know in this in-depth guide to develop and take care of your indoor cast iron plant so that it stays happy and healthy for many years.

What is special about the cast iron plant?

The cast iron plant, originating from East Asia’s shadowed forests, is known for its resilience and longevity. Originating in low-light areas, it can withstand temperature swings, grow well in low light, and is highly drought-tolerant. Its dark green, leathery leaves evoke lushness and tropicalness.

1. Selecting the correct soil and pot

  • To cultivate a cast iron plant indoors, choose the right soil and vessel, combining sand or perlite with potting soil. A pot with drainage holes is essential for the plant’s dislike of “wet feet” or soggy roots.
  • For improved drainage, use a potting mix mixed with sand or perlite. If you want to prevent water retention, choose a pot with drainage holes. Avoid using too large pots, but make sure the size of the pot supports the plant’s root growth.

2. Cast iron plants light requirements

  • Cast iron plants are popular low-light houseplants due to their ability to thrive in medium to brilliant indirect light. They should not be exposed to direct sunlight, as it can bleach and burn their foliage. Position the plant close to a window that faces east or north for best growth.

3. Watering the cast iron plant

  • The cast iron plant is drought-tolerant and does not require regular watering. One of the few methods to destroy this tough plant is by root rot, which can be caused by overwatering. Allowing the soil to dry out in between waterings is preferable. Water the soil only when the top one to two inches have dried completely. Lower the frequency of watering during the winter. Don’t let the plant sit in too much water; instead, use room-temperature water.
  • Cast iron plants thrive between 60 and 75 degrees Fahrenheit, but they are not cold-resistant and should be brought indoors before frost. They can tolerate normal home humidity levels but may need extra if the house is dry. Bringing them indoors before frost is possible is crucial.
  • Even though cast iron plants don’t require much fertilizer, giving them a little boost during the spring and summer might encourage stronger, healthier leaves. Use a balanced liquid fertilizer as directed by the package if your cast iron plant is a houseplant. Granular fertilizer is usually a preferable option if it is grown outside. Don’t fertilize too much, though, as the leaves may become solid green instead of variegation.
  • The cast iron plant’s glossy leaves can collect dust, obstruct sunlight and hinder photosynthesis. Frequent wiping with a damp cloth is advised. Additionally, removing yellow or broken leaves can promote new growth without requiring severe trimming.

The division is a simple method for propagating cast iron plants, requiring them to be divided into smaller clumps with their root systems in early spring.

  • Remove the plant from its pot with care.
  • Make sure each area of the roots has a healthy amount of leaves and roots by gently separating the root clumps.
  • Replant each division with fresh soil that drains well in a container of its own.
  • Till they become established, give the young plants a little watering and put them in a shaded spot.

Cast iron plant is a great option for any indoor space because of their striking appearance, low maintenance requirements, and capacity to flourish in low light. You can make sure your plant stays vibrant and healthy for many years to come by adhering to the maintenance instructions provided in this guide.

Certainly! If you’d like to learn more, please consider following our WhatsApp Channel: Harvest Gardening

Q1: What is another name for cast iron plant?

A1: Aspidistra elatior, also known as the barroom plant, is a cast iron plant known for its adaptability to low light levels and tenacity.

Q2: Are there different types of cast iron plants?

A2: Cast iron plants, such as Aspidistra elatior ‘Variegata’ and Aspidistra elatior ‘Milky Way’, have varying colors and patterns of leaves.

Perennial herbs are plants that live longer than two years and frequently return season after season. Perennial herbs, like sage, thyme, and rosemary, have winter-lasting roots that reappear in spring, unlike annual herbs that end in one year. These herbs are common options for home gardens since they are often hardy and low-maintenance. As they become older, they also frequently acquire richer tastes, which makes them more useful in herbal medicines and cuisine. Fresh herbs just cannot be replaced. While dried herbs are convenient, they are flavorless and lack freshness. But growing herbs indoors or outdoors is rather simple.

Perennial herb gardening offers numerous benefits, including the annual return of herbs like sage, oregano, thyme, and rosemary, minimal care, and diverse textures, fragrances, and colors. These herbs enhance garden aesthetics, offer culinary and medicinal benefits, and attract beneficial insects.

The best perennial herbs for each season, indoor and outdoor growing tips, and the advantages of adding these hardy plants to your yard are all covered in this extensive book.

1. Thyme (Thymus vulgaris)

Thyme, a popular perennial herb in cooking and medicine, is durable, suitable for all seasons, and can be grown indoors or outdoors with adequate sunlight.

  • Outdoor Growing Tips: Full sun and well-draining soil are ideal for thyme. Once established, little watering is needed.
  • Indoor Growing Tips: Make sure thyme receives six hours of sunlight per day. If you have an indoor thyme plant, it will thrive with grow lights or a south-facing window.
  • Seasonal Perks: Thyme is a great herb to use all year round because it can withstand frost and stays evergreen in moderate areas.

2. Rosemary (Salvia rosmarinus)

Rosemary, a popular perennial herb in Mediterranean cooking, is known for its aromatic scent and needle-like leaves, making it ideal for year-round growth.

  • Outdoor Growing Tips: Rosemary likes warm, sunny locations with soil that drains properly. It is susceptible to overwatering but can withstand periods of drought.
  • Indoor Growing Tips: Grow rosemary in window boxes with natural light. Regularly rotate the plant to give it equal exposure to light.
  • Seasonal Perks: Rosemary is an evergreen in mild regions; it keeps its flavor and smell all year long even when cultivated indoors.

3. Sage (Salvia officinalis)

Sage, a perennial herb with velvety leaves and a savory scent, is a traditional herb used in healing and cookery due to its resilience in winter.

  • Outdoor Growing Tips: Sage needs full sun and soil that drains properly for it to grow. Once planted, it can tolerate drought and cold winters.
  • Indoor Growing Tips: Sage should be kept in a bright area, preferably facing south. It needs very little irrigation, particularly in the winter.
  • Seasonal Perks: In most regions, sage can last the winter outside and will come back stronger in the spring.

4. Oregano (Origanum vulgare)

Oregano, a hardy perennial herb native to warm, temperate regions, is a popular ingredient in Mexican and Mediterranean cuisine due to its robust flavor.

  • Outdoor Growing Tips: Full sun and well-draining soil are ideal for oregano. It’s a summertime heat-loving low-maintenance plant.
  • Indoor Growing Tips: Indoors, oregano requires bright, direct light. Grow lights can be used to augment natural sunlight if needed.
  • Seasonal Perks: While it usually dies back in the winter, oregano makes a strong regrowth in the spring.

5. Mint (Mentha spp)

Mint is a vigorously growing, adaptable perennial herb that’s a terrific choice for gardeners looking for quick results. Growing mint in containers is a great way to keep it from spreading too much.

  • Outdoor Growing Tips: Mint likes damp, well-drained soil, and partially to completely shaded. Because it grows quickly, you might want to plant it in containers to keep it from taking over your entire garden.
  • Indoor Growing Tips: Indoors, mint grows best in a bright area that receives frequent watering.
  • Seasonal Perks: Mint may be picked all year round and is hardy in most climes, while colder climates may cause it to fall dormant.

Perennial plants require 6-8 hours of sunlight daily, with full-spectrum grow lights for optimal light intensity. Indoor plants can dry out faster, so water them frequently but avoid overwatering. Herbs like mint and parsley thrive in damp areas, while rosemary and thyme prefer drier conditions. Use potting soil with perlite or organic compost, and ensure drainage holes in containers. Plant indoor herb gardens in pots with quick water drainage to avoid soggy roots.

Perennial herbs require full sun, at least six hours per day, and well-draining soil. Increase drainage by adding sand or compost as needed. Plant herbs in separate spaces, as too close can increase pest and disease vulnerability. Outdoor herbs require less watering than interior plants, but freshly planted herbs need frequent watering until roots take hold. Proper spacing and drainage are essential for herb growth.

For gardeners of all skill levels, growing perennial herbs both indoors and outdoors may be a fulfilling experience. Perennial herbs, including sage, mint, thyme, and rosemary, are versatile, low-maintenance, and delicious, making them ideal for culinary use or garden aesthetics.

Certainly! If you’d like to learn more, please consider following our WhatsApp Channel: Harvest Gardening

Q1: What are perennial herbs?

A1: Perennial herbs are plants that live for over two years and regenerate each season using the same root system. There are other examples, including lavender, rosemary, and thyme.

Q2: Which herbs are perennials in the UK?

A2: UK-wide perennial herbs like oregano, sage, mint, rosemary, and thyme are resilient and often sprout again in the spring.

Q3: How should perennial herbs in Zone 5 be cared for during winter?

A3: Perennial herbs in Zone 5 should be mulched in late fall for freezing protection, with some like rosemary requiring additional safeguards or indoor storage.

Flowers to plant in October will make your landscape look beautiful in the coming months. Many hardy kinds flourish as the weather cools, enlivening the environment with brilliant hues. Fall planting ensures a beautiful spring display by allowing bulbs such as tulips, daffodils, and crocuses to form sturdy roots before winter. Furthermore, even as the temperature drops, annuals for the cool season like pansies and snapdragons can still produce cheery blossoms. The following list of the top six flowers to plant in October will help you either add seasonal beauty or get ready for springtime blossoms.

1. Pansies

Because of their hardiness and bright flowers, pansies are one of the most widely used plant varieties for autumn planting. These resilient flowers are ideal for adding pops of color to your garden beds and containers because they come in a variety of hues. Pansies thrive in lower weather and can even survive frost, making them excellent for October planting. Select a location with partial sunlight and well-draining soil for the greatest results.

2. Chrysanthemums (Mums)

Mums, often known as chrysanthemums, are the traditional fall flower. Their blooms, which capture the warm tones of fall, come in a variety of tints of yellow, orange, red, and purple. Hardy perennials and mums may withstand multiple growing seasons when planted in well-draining soil with sufficient sunlight. Planting them in October guarantees a stunning display the following year by allowing them to grow roots before winter.

3. Asters

When looking to extend the flowering season into late fall, asters are an excellent alternative. The vivid blossoms of these perennial flowers come in pink, purple, blue, and white hues. Asters are a great addition to any garden because they grow best in full sun and well-drained soil. Planting them in October will allow them to put down deep roots and produce beautiful late-season color.

4. Violas

Like pansies, violas are tiny, vivid flowers with many blooms. They can withstand even the harshest winters because they are incredibly resilient. Since violas bring a wonderful pop of color to your garden throughout the fall and into the spring, they are ideal for planting in October. These flowers are adaptable to a variety of garden conditions since they like soil that drains well and partial shade.

5. Snapdragons

Snapdragons, annuals with tall spikes and unique flower shapes, are ideal for chilly climates and fall air. They can bloom earlier in spring when planted in October, offering various color and height options, and prefer full light and well-drained soil.

6. Ornamental cabbage and kale

Even though they are not flowers, ornamental kale and cabbage provide gardens a special beauty in the winter and fall. Their vivid purple, pink, and green foliage makes a striking show, particularly in the winter. These are great plants to plant in October since they can tolerate frost and grow well in lower climates. They thrive in full sun to light shade and well-drained soil.

  • Soil Preparation: To enhance soil structure and fertility, make sure your plant bed is adequately prepared by adding organic matter.
  • Watering: Newly planted flowers still need regular watering to form strong roots, even in the cooler temperatures.
  • Mulching: A layer of mulch applied to the soil can help keep it moist and shield plant roots from sharp temperature changes.
  • Location: Considering each species of flower’s requirements for moisture and sunlight, choose the best position for them.

Flowers to plant in October may not be the first thing on a gardener’s mind, but they can produce stunning results. These six flowers, which range from cheery pansies to resilient chrysanthemums, can not only make your garden seem lovely but also produce a colorful scene that will continue well into the fall and winter. So gather your gardening supplies and plant these pretty flowers to make the most of this autumnal season!

Certainly! If you’d like to learn more, please consider following our WhatsApp Channel: Harvest Gardening

Q1: What flowers to plant in october in southern california?

A1: October is a perfect time to plant cool-season flowers in Southern California, such as snapdragons, violas, and pansies. These flowers will bloom all winter and spring since they love the moderate fall weather.

Q2: What flowers to plant in october UK?

A2: October is a great month to plant hardy perennials like hellebores and crocuses, as well as spring-flowering bulbs like tulips and daffodils in the UK. These will have gorgeous springtime blooms.

Q3: What flowers to plant in october in arizona?

A3: Cool-season flowers like pansies, snapdragons, and calendulas grow well in Arizona’s mild fall weather, so October is a terrific time to plant them. The cooler months will bring color with these flowers.

Q4: What flowers to plant in october zone 9?

A4: Plant cool-season flowers (calendulas, snapdragons, and pansies) in October in Zone 9. The region’s mild fall and winter weather is ideal for these flowers.

It’s time to get ready for the fall harvest as the summer comes to an end. For many gardeners, October is a transitional month—a time when the warmth of summer gives way to the crispness of fall. Now is the ideal time to sow a variety of crops that can tolerate early winter frosts and thrive in lower climates. Many veggies can be planted in October for long-term success, for those who are determined to increase their crop and guarantee a plentiful garden. To guarantee that your garden is colorful and fruitful, we’ve included the best vegetables to plant in October below, along with some important tips.

1. Spinach – The Cool-weather powerhouse

One of the hardiest leafy greens, spinach grows best in colder climates. Because of this, it’s the perfect produce to plant in October when the weather is still cool but the soil is still warm. Spinach sprouts quickly and keeps growing deep into the winter. If you plant spinach in October, you can pick leaves deep into the winter and enjoy fresh produce all fall long.

  • Crucial growing advice for spinach: Spinach thrives in rich, well-drained soil with organic content, consistent moisture, and mulch for temperature control, ensuring healthy growth on chilly days.

2. Garlic –  The perfect winter crop

Garlic can be planted in October for a plentiful yield the following summer. Since garlic needs the winter cold to grow well, fall is the ideal season to plant. It grows slowly during the winter and then quickly picks up speed in the spring, providing you plenty of time to be ready for a bountiful summer crop.

  • Crucial advice for growing garlic: Hardneck garlic is cold-adapted, while softneck thrives in warmer climates. Plant garlic six inches apart and two inches deep, using balanced fertilizer for robust root development.

3. Kale – Fall’s superfood

The flavor of cold-hardy kale gets better after a mild frost. Given that it can tolerate low temperatures and even some snowfall, it’s among the greatest veggies to plant in October. Any garden should grow kale because of its excellent nutritional value and versatility in cooking.

  • Crucial advice for kale growing: Kale should be planted 12 to 18 inches apart to enable for vigorous development. The flavor can be enhanced and the leaves made sweeter by a light frost. As soon as the leaves get big enough to be useful, you can begin gathering individual leaves. Harvesting continuously promotes new growth.

4. Carrots – Root crops for cold success

Another fantastic vegetable to grow in October is carrots. While it takes a few weeks for carrot seeds to sprout, once they do, they can develop more slowly throughout the fall and winter. When you plant carrots in October, they will be ready to harvest in the early spring, providing you with delicious produce even before most other gardens wake up.

  • Crucial advice for growing carrots: Carrots need loose, well-draining soil to grow tall and straight. Maintain constant moisture in the soil to encourage uniform germination. To prevent overpopulation, thin out the seedlings once they are around two inches tall.

5. Swiss Chard – A nutrient-dense addition

Since Swiss chard grows extremely cold-hardy and produces leaves well into the winter in many locations, it’s a great vegetable to sow in October. In addition to being a nutritious powerhouse with endless culinary applications, its vivid leaves and stems bring color to the garden.

  • Crucial advice for Swiss chard growing: Give each chard plant ample space to grow by spacing them out by about 12 inches. Because it can tolerate cold temperatures, Swiss chard is a great option for fall and winter gardening. To promote new development, harvest the outer leaves regularly

6. Radishes – Quick and easy fall harvest

You may plant radishes throughout the fall as they are a root vegetable that grows quickly. They mature quickly—typically in three to four weeks—which makes them ideal for planting in October. With their crisp texture and spicy flavor, radishes are a great addition to any garden and flourish in chilly temperatures.

  • Crucial advice for growing radishes: Loose soil that drains easily is ideal for radishes. Clear away any pebbles or other debris that can impede the growth of roots. Water regularly, but don’t soak the roots too deeply—this can fracture the roots. It is advisable to pick radishes when they are still sensitive and immature, as prolonged rooting might cause them to turn woody.

October is a great time to plant hardy veggies that do well in cool weather, extending your gardening season. You can make sure that your garden flourishes all fall and even into winter by choosing the right veggies and using the right planting strategies. For committed gardeners, all six of these vegetables to plant in October will enrich your garden and provide success every year.

Certainly! If you’d like to learn more, please consider following our WhatsApp Channel: Harvest Gardening

Q1: What vegetables to plant in October in northern California?

A1: October is a fantastic time to plant cool-season veggies like broccoli, kale, spinach, and garlic in Northern California. These crops can withstand a mild frost and do well in cooler fall conditions.

Q2: What root vegetables are suitable for planting in Zone 7 during October?

A2: Carrots, radishes, and turnips are examples of root crops that grow well in Zone 7 in October.

Q3: Can you plant vegetables in October UK?

A3: In the UK, you can indeed sow veggies in October. Garlic, onions, broad beans, and winter lettuce are good choices because they can grow in chilly fall conditions.

How to start a vegetable garden? is a fruitful adventure that encourages a closer bond with nature and provides fresh products. Getting started in gardening may seem difficult to novices, but anyone can grow a healthy vegetable garden if they have the correct information and techniques. Here, we’ll provide six crucial tips on how to start a vegetable garden that will help you create a fruitful and lovely space.

1. Selecting the proper site: Matter of light, soil, and space

  • The first step towards a successful vegetable garden is choosing the right spot. Vegetables require six to eight hours a day of direct sunlight at the very least. Before selecting a location, note how much sun your yard receives in different parts of the day.
  • Soil quality is crucial for vegetable growth. Organic, well-draining soil is ideal for vegetables. A quick soil test can determine the ideal pH range of 6.0-7.0. To increase nutrient content, amend with compost, manure, or organic fertilizers.
  • Finally, ensure sufficient space for plants to grow, as crowded plants may need more competition for resources like light, water, and nutrients. Provide plants with space according to their specific requirements, as listed on seed packs or plant tags.

2. Provide your vegetable garden with careful thought

  • A flourishing garden requires a carefully thought-out arrangement. First, determine if you have enough area for raised beds, direct-to-ground planting, or container gardening. While container gardens are perfect for patios and balconies, raised beds provide greater drainage and soil control.
  • To increase yields and keep pests away from your crops, think about utilizing companion planting strategies when designing your layout. For example, growing basil close to tomatoes enhances their flavor and keeps harmful insects away. In a similar vein, marigolds planted next to crops like beans and carrots can help keep worms away.
  • Implementing a crop rotation strategy can maintain soil health by preventing pests and illnesses specific to a vegetable from accumulating. This can be achieved by rotating crops from different plant families annually.

3. Choosing the proper vegetables: Season and climate matter

  • To ensure success, determine your hardiness zone, which is based on average yearly temperatures, to select the right vegetables for your growing region, as not every climate is suitable for every vegetable.
  • Crops like lettuce, spinach, and peas thrive in cooler weather, while zucchini, tomatoes, and peppers thrive in warm climates. To prevent stunted growth or crop failure, follow the appropriate planting timetable for your area.
  • The heirloom variety offers a more flavorful, centuries-old product, and may be more resilient to disease and better suited to the environment compared to hybrids.

4. Effective, deep, and regular watering methods

  • Proper irrigation is crucial for a healthy vegetable garden, ensuring water is deeply and infrequently sourced to the roots, preventing issues like bitter cucumbers and tomato blossom-end rot.
  • To reduce evaporation and prevent powdery mildew, use a drip irrigation system or soaker hose to directly water the soil. Water plants early in the morning to allow them to absorb moisture before the heat sets in.
  • Mulch, like straw or leaf shreds, is essential for garden maintenance, controlling soil temperature, weed suppression, and moisture retention, making the garden healthier and increasing water efficiency.

5. Fertilizing for success: Understand what your plants need

  • All plants require nitrogen, phosphorus, and potassium for survival. Potassium improves plant health, phosphorus promotes root and flower growth, and nitrogen stimulates leaf growth.
  • Test soil nutrient levels to select appropriate fertilizers, such as compost, manure, and bone meal. For long-term soil health, side-dress plants with compost tea or a balanced organic fertilizer during the growing season.
  • Excessive fertilization can cause nutrient imbalances and burn plants. Use slow-release fertilizer and follow container directions for proper nutrient intake.

6. Handling insects and illnesses: Avoid, track, and manage

  • Preventing pests and illnesses in vegetable gardens requires careful management. Start by keeping the garden tidy and pest-free. Avoid growing vegetables too close together, as this encourages poor air circulation and promotes fungal infections.
  • Regularly inspect plants for pests like aphids, caterpillars, and beetles, which can cause severe damage. Use insecticidal soap, hand-pick, or introduce beneficial insects like lacewings and ladybugs for environmentally friendly pest management.
  • Crop rotation, companion planting, dry leaves, mulching, watering plants near bases, and promptly removing damaged plants are crucial preventive measures against diseases, reducing the risk of fungal infections.

Learning how to start a vegetable garden may be difficult, but by following these six vital principles, you’ll put yourself on track for success. With the appropriate site, careful planning, soil management, adequate watering, and good pest control, your garden will thrive and offer you fresh, home-grown produce.

Certainly! If you’d like to learn more, please consider following our WhatsApp Channel: Harvest Gardening

Q1: How to start a vegetable garden indoors?

A1: To begin an indoor vegetable garden, select a sunny location, use containers with adequate drainage, and plant vegetables such as herbs, lettuce, or tomatoes in well-drained soil. Ensure that they receive adequate light (supplement with grow lights if necessary) and water consistently.

Q2: What is the best vegetable garden for beginners?

A2: The greatest vegetable garden for beginners comprises plants that are simple to grow, such as lettuce, radishes, tomatoes, and herbs like basil or mint. These vegetables thrive with little effort and are ideal for both indoor and outdoor gardens.

Q3: How to start a vegetable garden in Australia?

A3: Plant veggies that are suited for the season, such as tomatoes, spinach, or carrots, in a sunny spot with well-draining soil if you’re starting a vegetable garden in Australia. Pay attention to the weather in your area and water frequently to ensure wholesome growth.

One of the most extensively farmed crops in the world, corn is valued for its adaptability, nutritional content, and place in the world’s food systems. Homegrown produce usually tastes the finest, especially if you know when and how to harvest corn at its prime. One of the most common vegetables planted in backyard gardens is sweet corn. A good corn harvest depends on planning, ability, and using the right tools. This article will walk you through the most important components of harvesting corn, allowing you to get the most yield and quality out of your crop.

The initial step in corn harvesting is determining if the corn is mature enough to be harvested, as late or early harvesting can result in starchy or flavorless kernels.

1. The appropriate stage of kernels: Denting and black layer development

  • Denting: In most corn varieties, kernels will begin to form a dent at the crown when they achieve physiological maturity. When the moisture level falls to between 30 and 35 percent, the kernel shrinks somewhat, and this “dent” forms.
  • Black Layer Formation: This happens when the moisture content is between 25 and 35 percent and the kernel has reached its maximum dry weight. The development of a black coating at the base of the kernel is an important indicator of full maturity and readiness for maize to be harvested.

2. Moisture content monitoring

Grain corn should be harvested with a moisture content between 20-25%, as extremely dry kernels may be difficult to prepare and higher moisture content may increase spoilage during storage. A moisture meter can be used to determine the precise moisture content, and regular checks should be conducted before harvest to prevent over-drying or under-wetness, affecting quality and production.

3. The look of the husk and ear

  • The corn is almost ready for harvest as the husks start to dry up and become brown. The husks should no longer be vivid green, but they also shouldn’t be excessively dry.
  • The kernels should be completely developed and closely packed, and the ears should feel firm to the touch.

Proper corn harvesting ensures optimal yield and quality, despite being labor-intensive. The best methods are outlined below.

1. Suitable tools and equipment

Selecting the right tools and equipment is crucial for successful harvesting. Hand harvesting requires a sharp knife or specialized instrument, while larger-scale operations use a combined harvester. Proper calibration and maintenance of equipment reduce crop damage and ensure kernels remain whole.

2. Cutting stalks

In small-scale corn harvesting, cut the stalks above the ground with a sharp knife or sickle, ensuring clean cuts and avoiding damaging the stalk to prevent nutrient storage before final maturation.

3. Picking the ears

Gently pluck corn ears after cutting stalks, twisting and drawing them down. Remove mature ears easily, but handle with care to avoid breaking kernels or harming the ear.

4. Using a combine for mechanical harvest

Adjust the harvester settings to your corn’s moisture content, ensure the combine’s height is suitable for maize type, and run it at the recommended speed to prevent kernel loss. Ensure moisture levels are checked and adjusted accordingly for efficient harvesting.

Freshly picked corn, like all veggies from the farm, has its greatest flavor. When the corn is at its sweetest, a week is the ideal time to consume it after harvest. Because the sugars have more time to turn into starches, the longer your corn rests, the more it will taste like store-bought corn. No matter the type of sweet corn, ears taste the finest straight from the plant because most of it loses 50% of its sugar content in 12 hours. Store shucked cobs in a gallon plastic bag in the refrigerator and cook within two days if you are not going to use the corn right away. Freezing corn in a plastic bag with paper towels can prevent moisture buildup, making it a tasty treat during winter months and a daydreaming summer treat.

Whether planting popcorn, sweet corn, or field corn, knowing when and how to harvest corn is essential to getting high-quality crops. You can guarantee a successful corn crop by keeping an eye on growth phases, moisture content, and adhering to recommended harvesting and post-harvest procedures. These pointers will direct you toward a plentiful and superior crop, whether it is for fresh eating, feed for cattle, or storage.

Certainly! If you’d like to learn more, please consider following our WhatsApp Channel: Harvest Gardening

Q1: In which month is corn harvested?

A1: Depending on the region and temperature, corn is normally harvested in late summer or early fall, usually between September and November. The corn variety and growing circumstances affect the timing.

Q2: What is the difference between corn and maize?

A2: Maize and corn are globally and scientifically synonymous, with maize used globally and corn more commonly in North America, referring to the same grain crop, Zea mays.

Q3: How to harvest corn seeds?

A3: Corn seeds are harvested by drying corn ears until husks turn brown and kernels firm, then shelling them off the cob, allowing them to dry completely before storage.

It’s a satisfying experience to grow sweet corn in your yard since you can eat the freshest, tastiest corn right from the stalk. Sweet corn grows quickly, forming towering stalks with vivid green leaves. One corn plant typically yields one or two ears in a home garden; you can select types with kernels that are yellow, white, bicolored (yellow and white), or even rainbow-colored. Although it is usually eaten raw on the cob, it can also be frozen, tinned, or used in other recipes. Sweet corn, a favorite summer crop, is high in fiber, vitamins, and antioxidants. It tastes great cooked, grilled, or added to soups and salads. Growing sweet corn properly needs careful planning and attention to detail, regardless of gardening experience level. We’ll cover everything in this tutorial, from planting to harvesting, so you’ll have all the information you need to grow impressive sweet corn.

1. Selecting the proper type of sweet corn

Choosing the correct variety of sweet corn is critical to success. Three main types of sweet corn exist: 

  • Standard (su): The standard variety with a more conventional taste. It is less delicious than newer varieties, but it matures faster and is more hardy in cooler areas.
  • Sugar-enhanced (se) – These varieties have a higher sugar content, resulting in a sweeter taste while maintaining the soft texture of regular corn.
  • Supersweet (sh2) – This kind contains the most sugar, producing a significantly sweeter and crunchier texture. However, it is more sensitive and needs warmer growing conditions.

2. When to grow sweet corn: Best season

Sweet corn thrives in warm conditions, so planting should occur in late spring or early summer after the last frost when soil temperatures are around 60°F (15.5°C). In regions with shorter summers, plant as soon as the soil warms up to ensure crop maturity before fall frosts.

3. Where to grow sweet corn: optimum place for planting

  • Corn, a sun-loving plant, requires a location with full light for six to eight hours daily. Properly position it in well-draining soil to prevent waterlogging, which can hinder root growth.
  • Since corn is a heavy feeder, it is important to have rich soil that is rich in nutrients, particularly nitrogen. To increase soil fertility before planting, incorporate well-rotted manure or compost into the soil.
  • Remember that the shorter crops are shaded by the tall stalks. Plant it next to crops like Asian greens or lettuce that benefit from shade from the summer sun. Steer clear of windy areas as high gusts may topple the long stalks.

4. The secret to a healthy crop is soil preparation

  • Sweet corn thrives in well-drained, loamy soil with a pH of 6.0 to 6.8, so it’s essential to prepare the soil before planting. Check pH and nutrient levels, make amendments, add organic matter, ensure adequate drainage, and use balanced or high-nitrogen fertilizer for corn development. Improve structure and nutrient availability.

5. Planting Advice: Proper timing and spacing are important

  • To plant sweet corn, space the seeds in rows 30 to 36 inches apart, 1-2 inches deep, and 8 to 10 inches apart. Plant in blocks of four rows side by side for best pollination. Plant one variety at intervals of 12 to 14 days, or plant other types that mature at different dates. To choose early, mid-, and late-season cultivars for a longer harvest season, compare days to maturity.
  • Sweet corn requires weekly watering, ideally, 1 to 1/2 inches, to thrive during germination and silking stages. Overhead watering can cause fungal diseases, while mulching helps control soil temperature, prevent weed growth, and preserve moisture.
  • Sweet corn requires a significant amount of nutrients for rapid growth, even in compost-treated soil. To ensure growth, mix balanced fertilizer with well-rotted manure or compost before planting. Side treat rows with high-nitrogen fertilizer when stalks reach 8 inches tall.
  • Growers of corn may face issues due to a few pests. Before or while the seeds germinate, crows and other birds may peck the ground and take them. Use a row cover to protect your plants from birds and attach it with pins, soil, or rocks for young seedlings. After three or four weeks, take off the cover to give the plants room to grow.
  • Harvesting sweet corn is crucial for achieving the best flavor and texture. It’s ready when silks turn brown but husks remain green. Press a kernel to determine ripeness, and when a creamy fluid emerges, the corn is ready for gathering.

Grow sweet corn in your yard yields fresh, tasty corn for your meal, making it a rewarding and fun activity. By following the advice in this article, from selecting the appropriate type to harvesting at the perfect time, you’ll be well on your way to a good sweet corn crop.

Certainly! If you’d like to learn more, please consider following our WhatsApp Channel: Harvest Gardening

Q1: How long does it take to grow sweet corn?

A1: Sweet corn typically takes 60-100 days from planting to harvest, with most varieties ready for harvest in 75 days.

Q2: Can you grow sweet corn in raised beds?

A2: Raised beds can grow sweet corn if they are deep enough, 12 inches deep, and spaced appropriately for pollination and air circulation.

Q3: How to grow sweet corn in containers?

A3: Use big pots (at least 12 inches deep and wide) to produce sweet corn in containers, and put multiple seeds in each to ensure adequate pollination. Make sure the soil drains well, give the pots regular waterings, and position them in direct sunlight.

A member of the brassica family, which also includes Brussels sprouts, broccoli, and cauliflower, cabbage is a versatile and nutrient-rich vegetable. Cabbage, which has thick, leafy heads, is available in different varieties, including red, green, and savoy, each with distinct tastes and textures. Learning how to grow cabbage is simple, and it is used in a variety of meals around the world, from salads and soups to fermented foods like sauerkraut and kimchi. Cabbage is tasty and a great source of vitamins, fiber, and antioxidants, making it a nutritious complement to any dish. Thus, growing cabbage from seed is a satisfying endeavor that enables you to produce healthy, fresh heads in your garden. Cabbage grows well in cool climates and is easy to cultivate with the right care, whether you plan to harvest it in the spring or fall. 

The environment and variety will determine the best time to sow cabbage. Cabbage planting season is fairly long. Since cabbage is a cool-season crop, early spring or late summer are the ideal times to sow it. You can plant it in the fall for a winter harvest in areas with mild winters. When planting in the spring, sow seeds indoors six to eight weeks before the last anticipated frost date, then move them outside once the ground is suitable for planting. Planting cabbage in late summer helps minimize bolting in milder climates by allowing the vegetable to mature in cooler fall temperatures. Transplanting early cabbage will enable it to mature before summer heat waves arrive.

With the correct method, growing cabbage from seed in the garden can be easy and productive. Here are some proven strategies for growing cabbage from seed outdoors:

1. See how to grow cabbage from seed

  • Cabbage seedlings can be grown from seed in early spring. Sow seeds 50-60 days before frost, planting three or four seeds per cell. To thrive, plants need bright, full sunlight. Use grow lights to start many plants. After seedlings emerge, divide larger plants by thinning them. To ensure proper growth, divide larger plants into smaller ones. To prepare for autumn crop planting, direct-sow seeds in mid-late summer or sow seeds under lights for early July planting.

2. How to sow seeds in the garden for growing cabbage

  • Cabbage, a cool-season crop, can be planted earlier than tomatoes due to its frost-free date. Seed packaging helps count frost-free dates, but hardening is still recommended before planting.
  • To start growing cabbage from seed in the garden, pick a sunny location with friable, well-draining soil. A week or so before planting, amend the soil with a large quantity of compost. When digging time comes, plant your cabbage seedlings in rows separated by 24 to 36 inches (60 to 90 cm), or around 15 to 23 inches (38 to 60 cm). Even though the plants might appear tiny right now, you want to give them enough space to grow into that dense cluster of leaves during the season!
  • After planting and throughout the growing season, give cabbage plants some water. As they age, cabbages need nitrogen and organic fertilizer. Don’t let the soil get too wet. Weed the area and thin the seedlings for appropriate spacing to keep weeds from competing for nutrients. Lightly cover the planting space with straw or crushed leaves for extra nutrients.

3. Watching for harm caused by pests

  • Pests like cabbage worms, flea beetles, cabbage root maggots, cabbage loopers, and cutworms can harm cabbage plants. A small white butterfly circling them may be a cabbage moth, but they lay cabbage worm eggs in brassicas and can quickly consume your vegetables.

4. How to know when to harvest cabbage

  • After 70–100 days of transplanting, harvest cabbage, making sure the heads are firm and suitable for the variety. Using a sharp knife, cut at the base, leaving the outer leaves whole. Eliminate any yellowing or damaged leaves. To maintain freshness, store in a cold, humid location. Depending on the type and conditions, freshness can endure for weeks to months.

Growing cabbage from seed in your yard can be a fun and productive experience if done right. These are some recommendations to help you choose healthy and bountiful cabbage varieties, prepare the soil, transplant seedlings, and control pests. For many months to come, your garden will produce robust, tasty cabbage heads if you pay close attention to this cool-season vegetable’s requirements.

Certainly! If you’d like to learn more, please consider following our WhatsApp Channel: Harvest Gardening

Q1: What is the best fertilizer for cabbage?

A1: A balanced fertilizer (10-10-10) that has equal amounts of nitrogen, phosphorus, and potassium is the best for cabbage. But for leafy development, cabbage also needs extra nitrogen, so 15-10-10) is a slightly greater nitrogen fertilizer that can yield better results.

Q2: What is the trick to growing cabbage?

A2: Providing ample light, well-drained soil, and steady moisture is essential for successful cabbage growth. Mulch and appropriate plant spacing are other ways to help conserve moisture and keep the roots cool.