Dahlias are brilliant and adaptable flowers that bring color and charm to any garden or outdoor environment. Dahlias are often cultivated in the ground, but they also grow well in pots, which makes them a great option for people who enjoy container gardening or have a small garden. You may have a gorgeous dahlia display on your patio, balcony, or porch with the correct upkeep.
When to plant dahlias
Usually in the spring, these are best planted once the last frost has passed and the soil has warmed up. In most places, this occurs in late April or early May. Planting dahlias too early, while the soil is still cold, might result in poor growth or tuber rotting since dahlias need warm soil temperatures. Planting them earlier might be possible if you live in a warmer region, but you should always wait until there is no longer a chance of frost.
We’ll look at the technique of growing dahlias in pots:
- Select a pot with a minimum diameter and depth of 12 inches (30 cm). Ensure the bottom has drainage holes to avoid waterlogging, which can cause root rot.
- It come in a variety of forms, including dwarf cultivars that are good for container planting. Seek a patio or compact kids so they don’t get too big or tall for your container.
- Pick an organic-rich, well-draining potting mix. To enhance drainage, add some perlite or coarse sand. Garden soil should not be used in pots since it can compress and impede root development.
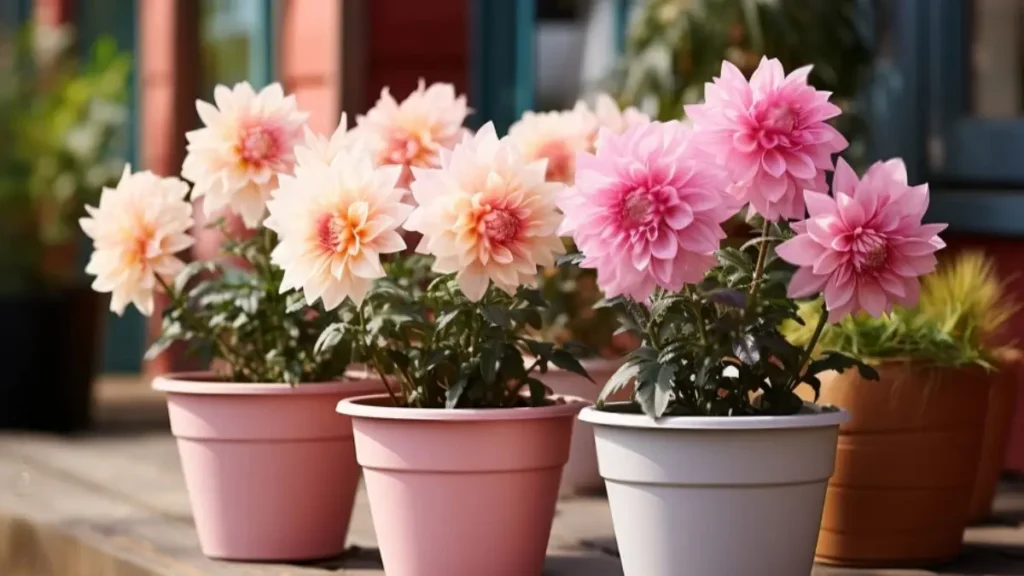
- When the chance of frost has passed in the spring, plant your dahlia tubers in the pot. Plant the tubers approximately 4-6 inches (10-15 cm) deep, with the “eye” or growth tip facing upward. Multiple tubers should be spaced under the variety you’re growing’s recommended spacing.
- Keep the soil wet but not saturated. When the top inch (2.5 cm) of soil feels completely dry to the touch, water deeply. Steer clear of overhead irrigation to avert fungal infections. When you water in the morning, extra moisture can escape over the day.
- Dahlias thrive in full sun, so ensure they receive six to eight hours of direct sunlight daily, and provide afternoon shade in hot regions.
- Throughout the growing season, give your potted dahlias a balanced fertilizer that is soluble in water every two to three weeks.
Conclusion:
For gardeners of all skill levels, growing dahlias in pots can be a fulfilling and joyful experience. This adaptable flowering plant adds a beautiful variety of colors, shapes, and sizes to any outdoor space or garden. Gardeners can successfully develop gorgeous dahlias in containers by following the necessary planting and care instructions, which include choosing the ideal pot size, using well-draining soil, and providing adequate sunlight and water.
Certainly! If you’d like to learn more, please consider following our WhatsApp Channel: Harvest Gardening
A frequently asked questions:
Q1: How do I propagate dahlias?
A1: Dahlias can be multiplied by taking stem cuttings during the growing season or by splitting tubers in the spring before planting. Plant divisions and cuttings in well-draining soil, ensuring they have viable growth points in each.
Q2: How do I prevent diseases and pests in dahlias?
A2: Dahlia illnesses and pests can be avoided by following excellent garden hygiene practices, such as clearing away trash, avoiding overhead watering to minimize fungal problems, and routinely checking plants for pest or disease symptoms. If necessary, you can also apply chemical or organic therapies; just be sure to properly follow the label’s directions.
Q3: What is the best time to plant dahlias?
A3: Dahlias grow best in the spring when the ground has warmed and the risk of frost has passed.