Tag

Guide

Browsing

As a significant wellness resource in natural health therapies, papaya leaves benefits are very important. While papayas are well-known for their exquisite flavor and nutritious content, the leaves of this tropical fruit have recently received notice for their exceptional therapeutic potential. Papaya leaves, rich in nutrients and bioactive chemicals, offer a versatile treatment for maintaining health.

High in nutrients:

  • Papaya leaves are a rich source of essential minerals like calcium, phosphorus, iron, and vitamins A, C, and E, which promote body processes and overall health.

Papaya leaves benefits, for a healthy digestive system:

  • Papaya leaves contain enzymes called amylase and protease that help break down proteins, carbs, and minerals to improve digestion and nutritional absorption. This home cure works well for clearing the gut and avoiding constipation. Additionally, there is evidence that papain may help prevent stomach ulcers.

Controlling diabetes:

  • Those who have type 2 diabetes may benefit most from papaya leaves. So, studies suggest that these substances can lower blood sugar levels, enhance glucose sensitivity, aid in insulin sensitivity, and potentially alleviate diabetes-related complications.

Support for the Immune System:

  • Papaya leaves are known to have a high vitamin C content, which strengthens the immune system. Sufficient consumption of vitamin C is essential for the body’s defense against infections and diseases.

Papaya leaves benefits, for women’s health:

  • However, papaya leaf juice or tea can help ladies who are having periods of pain. This substance provides a natural alternative to menstrual discomfort by regulating hormones, easing the menstrual cycle, and treating PMS symptoms.

Cancer-fighting Possible:

  • Papaya leaves have been shown to have anti-cancer capabilities in certain studies, which have been linked to the presence of certain chemicals. To determine the full scope of these advantages, more investigation is required.

Papaya leaves benefits, for skin health:

  • Papaya leaves include vitamins and antioxidants that can protect against free radical damage and encourage the formation of collagen, which could lead to healthier skin.

In conclusion, The benefits of papaya leaves, make a valuable addition to your overall well-being. After that, These leaves, rich in vitamins A, C, and E, and enzymes like papain, promote digestive health, immune system function, and antioxidant defense. Papaya leaves are becoming more and more popular as a natural health supplement due to their possible anti-inflammatory and anti-cancer qualities.

Certainly! If you’d like to learn more, please consider following our WhatsApp Channel, Facebook, Instagram, YouTube, Twitter, and Pinterest.

Q1: Are there any side effects of consuming papaya leaves?

A1: Although papaya leaves are generally regarded as harmless when eaten in moderation, allergic reactions or unsettled stomachs are possible for certain individuals. 

Q2: Can papaya leaves be used for pest control?

A2: Papaya leaf extracts may contain insecticidal qualities, which would make them helpful for managing pests in agricultural settings, according to certain research.

Q3: Is it safe for children to consume papaya leaves juice?

A3: Papaya leaf juice is generally not recommended for children, especially in concentrated versions, as their digestive systems may be more delicate. Before adding it to a child’s diet, speak with a pediatrician.

Q4: How to use papaya leaves to make a face mask?

A4: Due to its alleged skin benefits, several people use papaya leaves in face masks. Blend papaya leaves with yogurt or honey to create a paste. Apply the mask to your face and rinse it off after 15-20 minutes.

In the modern world, where vibrant, healthy hair is a must, many people look for all-natural hair growth enhancing products. Homemade shampoos provide an effective way to achieve this goal, which care for the scalp and increase the vitality of the follicles. Homemade onion hair oil is also effective in this regard. In this article, we will look at various methods and recipes for making DIY shampoos that promote hair growth organically.

Components:

  • One cup of liquid castile soap (you can use it unscented or with your favorite smell)
  • one cup of water
  • One tsp of coconut oil
  • A single tsp of jojoba oil
  • 10-15 drops of essential oil (such as lavender, tea tree, peppermint, or a mixture)
  • Combine the water and liquid castile soap in a bowl.
  • To the mixture, add the jojoba and coconut oils. Mix thoroughly to blend.
  • For extra benefits and scent, apply a few drops of essential oil. Stir once more.
  • Transfer the blend into a shampoo bottle or any other unoccupied receptacle of your preference.
  • Before using, give the bottle a good shake to make sure the components are fully combined.
  • Apply this shampoo just like you would a conventional shampoo. After applying the shampoo to wet hair, thoroughly rinse.

The majority of hair types can be used with this mild homemade shampoo recipe. However, you might want to alter the recipe or seek advice from a dermatologist before using it if you have particular hair issues or sensitivities. It’s also advisable to use this shampoo within a few weeks and store it in a cool, dry location because it doesn’t include any preservatives. The components may separate over time, so thoroughly shake before using each time.

Certainly! If you’d like to learn more, please consider following our WhatsApp Channel, Facebook, Instagram, YouTube, Twitter, and Pinterest.

Q1. What are the benefits of using homemade shampoo?

A1: This shampoo offers numerous benefits such as avoiding harsh chemicals, reducing plastic waste from commercial packaging, customizing it to your hair type, and being more cost-effective.

Q2: Can homemade shampoo be stored for a long time?

A2: This shampoo is recommended for use within a reasonable timeframe, as it doesn’t contain preservatives like commercial shampoos, and smaller quantities should be manufactured.

Q3:  How often should I use homemade shampoo for dandruff?

A3: For optimal effects, it is advised to use homemade dandruff shampoo two or three times a week. However, the frequency may change based on the particular characteristics of each person’s scalp and the substances in the shampoo.

Q4: Are there any natural ingredients I can add to my homemade shampoo for dandruff?

A4: Yes, you can add natural components to your DIY dandruff shampoo, like tea tree oil, coconut oil, neem oil, apple cider vinegar, and aloe vera.

Q5: How should I store homemade shampoo and conditioner?

A5: Keep DIY shampoo and conditioner out of direct sunlight and moisture by storing them in clean, airtight containers.

Healthy, glowing skin is more than simply pricey creams and cosmetic treatments. True radiance begins from inside, and one of the most natural ways to attain it is by eating the best fruits for glowing skin. These fruits are high in vitamins, antioxidants, water, and important elements, which nourish your skin from the inside out.

What is the best part? Many of these skin-loving fruits may be cultivated in your own yard, balcony, or patio. If you enjoy gardening, planting your own beauty-enhancing fruits is both satisfying and calming. Fresh, chemical-free produce provides higher nutrition and outcomes. Let’s look at how nature helps you shine easily.

Fruits for glowing skin are effective since they:

  • Contains antioxidants that combat free radicals.
  • Provide Vitamin C to promote collagen formation.
  • Improve hydration.
  • Reduce pigmentation.
  • Support natural detoxification.

According to the American Academy of Dermatology, a well-balanced diet high in fruits and vegetables promotes skin health. Now, let’s look at the best fruits for glowing skin and how to grow them.

Papaya offers several skin benefits due to its rich content of Vitamin C, Vitamin A, and the enzyme papain. It provides mild exfoliation, efficiently decreases pigmentation, stimulates collagen synthesis, and improves the look of dull skin.

Papaya is ideal for warm areas like India. For maximum development, it requires well-drained, organic-rich soil and should be put in full sunshine, receiving 6 to 8 hours of light every day. Plants must be spaced at least 6 feet apart and watered on a regular, moderate basis. Harvesting is typically available 6 to 9 months after planting. Furthermore, papaya plants grow fast and thrive in big pots, making them suitable for a variety of gardening situations.

Papaya fruit for glowing skin

Oranges are really good for obtaining beautiful skin because of their many characteristics. They stimulate collagen formation, which is necessary for preserving skin structure and firmness. Furthermore, oranges increase skin suppleness, making it more robust and young. They also assist to eliminate fine wrinkles, resulting in a softer face. Furthermore, they combat oxidative stress, which may harm skin cells and accelerate aging, therefore improving overall skin health.

Oranges may be grown in either containers or in garden soil. The best growth conditions are slightly acidic, well-drained soil, and full sun exposure. To ensure optimal development, water the plants deeply once a week and apply citrus-specific fertilizer. Oranges are normally harvested between eight and twelve months. For individuals with limited space, dwarf citrus cultivars are ideal for balcony gardening.

Oranges rich in vitamin C for glowing skin

Strawberries are high in antioxidants and vitamin C, which provide several skin advantages. They aid in regulating excess oil, eliminating acne, lightening the face, and enhancing uneven skin tone.

Strawberries are ideal for container gardening, as they require slightly acidic, rich soil and 5 to 6 hours of sunshine every day. Keep the soil wet but not saturated. The ideal container size is 8 to 10-inch pots, with a harvest duration of three to four months. Strawberries may also improve the visual appeal of areas when grown in hanging baskets.

Strawberries for glowing and healthy skin

Pomegranate is recognized as a potent anti-aging fruit, offering several benefits, including boosted blood circulation, improved skin texture, reduced wrinkles, and support for cell regeneration.

Pomegranate plants are hardy and drought-tolerant, making them suited for cultivation in a variety of situations. They flourish in sandy loam soil that is well-drained and need full sunshine for the best results. Watering should be kept moderate, and yearly trimming is suggested to increase fruit output. The harvesting phase normally lasts 5 to 7 months after blossoming. These plants are also suitable for growing in terrace gardens.

Pomegranate seeds for natural skin glow

Watermelon, which contains 92% water, is high in lycopene and provides several skin advantages. It profoundly hydrates, minimizes puffiness, prevents dryness, and naturally refreshes the face, making it a great choice for improving skin health.

Watermelon thrives in the summer and requires plenty of space to develop. It favors sandy, well-drained soil and requires full sun. Regular watering is required during the fruiting stage. Watermelons should be spaced 3 to 4 feet apart for best development, and harvested after 70 to 90 days. This fruit makes a great addition to summer kitchen gardens.

Best fruits for glowing skin in summer

Bananas are high in potassium and Vitamin B6, which provide a variety of skin health advantages. They assist to prevent dryness, increase skin elasticity, promote soft skin, and decrease irritation.

Banana plants thrive in tropical settings and require special growing conditions. They require rich, organic soil and plenty of sunshine to thrive. Frequent watering and periodic fertilization are required to guarantee sufficient nutrition availability. The interval between planting and harvesting varies from 8 to 12 months. Bananas may be grown effectively in home gardens if given enough room.

Bananas for healthy glowing skin

Dragon fruit has high levels of Vitamin C, antioxidants, and betalains, which benefit skin health in a variety of ways. It prevents premature aging, lowers inflammation, brightens skin, and promotes collagen formation. Because of its high antioxidant content, dragon fruit is becoming known as one of the best fruits for glowing skin.

Dragon fruit, derived from a cactus plant, flourishes in warm areas like India. To effectively cultivate it, follow these guidelines: use sandy, well-drained soil; ensure the plant receives 6-8 hours of sunshine every day; offer support with a vertical pole or trellis; and water lightly but regularly. The harvest is normally expected between 8-12 months. Additionally, dragon fruit may thrive in huge pots on terraces.

Best fruits for glowing skin

Kiwi is a fruit that has more Vitamin C than oranges. It promotes collagen formation, improves skin suppleness, reduces dark spots, and protects against UV damage.

Kiwi grows as a climbing vine, thriving in moderate winters and warm summers. It thrives in slightly acidic, rich soil and should be placed in direct sunshine. A sturdy trellis structure is required to support the vine. Pollination is necessary for both male and female plants. The plants will normally be ready to harvest in 3 to 4 years. Kiwis are ideally suited to colder climates, although they may also be grown in controlled patio arrangements.

Best fruits for women’s skin

Blueberries are high in anthocyanins and antioxidants, which provide a variety of skin advantages such as free radical protection, decreasing aging, enhancing skin texture, and reducing redness. Blueberries are among the best fruits for glowing skin due to their high antioxidant content.

Growing Blueberries in pots under certain conditions. They flourish in very acidic soil with a pH of 4.5 to 5.5 and require full sun exposure. It is critical to keep the soil continually wet and to choose a big container with enough drainage. It is advised to use organic compost and pine bark for best results. Blueberries usually take 2 to 3 years to reach harvest time.

List of fruits for glowing skin

If you want, you can try these homemade face masks:

Papaya Face Mask:
Mash papaya and apply for 15 minutes.

Orange Peel Powder Scrub:
Mix with yogurt and scrub gently.

Strawberry & Honey Pack:

 Reduces acne naturally.

Nature has already given us the greatest skincare ingredients: fruits. By including the best fruits for glowing skin into your regular diet and cultivating them at home, you nurture both your body and spirit.

Gardening is more than simply producing plants; it is also about developing health, confidence, and natural beauty. Start modestly, plant wisely, and enjoy the natural radiance.

Certainly! If you’d like to learn more, please consider following our WhatsApp Channel, Facebook, Instagram, YouTube, Twitter, and Pinterest.

Q1: How long does it take to see results from fruits for glowing skin?

A1: Usually 4–6 weeks with regular consumption.

Q2: Can I use fruits for glowing skin daily?

A2: Yes, but in moderation. Balance is key.

Q3: Which fruit works fastest for dull skin?

A3: Papaya and orange show quicker visible results.

Q4: Are fruits better than skincare products?

A4: Fruits support internal health. They complement skincare routines.

The simplicity and purity of a homemade face mask stand out in a world where skincare products packed with chemicals and preservatives are all the rage. These DIY treatments, combining natural components with customized mixtures, promise to nourish, revive, and renew your face to a new level. This guide will help you start your skincare journey by exploring the transformational potential of homemade face masks and offering you recipes, advice, and perspectives. Prepare to discover the key to beautiful, glowing skin, one DIY face mask at a time.

  • One mature avocado
  • One tsp honey
  • One scoop of yogurt without added ingredients
  • Not required: a few drops of essential oil (such as tea tree or lavender) for extra benefits and smell
  • First, remove the ripe avocado’s flesh with a spoon and transfer it to a mixing dish.
  • Using a fork, mash the avocado until a homogeneous paste develops.
  • In the mixing bowl, combine the avocado paste with the yogurt and honey.
  • Combine all the ingredients and stir until thoroughly mixed. Your consistency ought to be rich and creamy.
  • If desired, swirl the mixture so the essential oil is uniformly dispersed after adding a few drops.
  • Use warm water to completely cleanse your face, then pat dry with a fresh towel.
  • Apply the DIY face mask to your face, being careful not to get any near the sensitive eye area, using clean fingers or a brush.
  • To enable the components to seep into your skin, let the mask on for ten to fifteen minutes.
  • After the allotted time has passed, remove the mask with lukewarm water and use a fresh towel to gently dry your face.
  • To seal in moisture, use your preferred moisturizer afterward.

A homemade face mask is a powerful, economical, and all-natural way to take care of your skin. These all-natural mixtures have many advantages, such as moisturizing, exfoliating, and revitalizing. You may tailor your masks to the unique demands of your skin without using dangerous chemicals by using basic ingredients.

Certainly! If you’d like to learn more, please consider following our WhatsApp Channel, Facebook, Instagram, YouTube, Twitter, and Pinterest.

Q1: How often should I use a homemade face mask?

A1: The ingredients and type of skin you have will determine how often you use a DIY face mask. For most skin types, applying a face mask once or twice a week is plenty. To avoid irritation, it’s best to use it no more than once a week if you have dry or sensitive skin.

Q2: Can I customize a homemade face mask for my specific skin type?

A2: It is possible to tailor a handmade face mask to your unique skin type and issues. For instance, you might want to use components like clay or tea tree oil to help regulate excess oil production if you have oily skin. In a similar vein, foods like avocado or honey help nourish and hydrate dry skin.

Q3: Which ingredients are commonly used in homemade face mask for blackheads?

A3: Activated charcoal, clay (like bentonite or kaolin), honey, yogurt, lemon juice, and natural exfoliants like sugar or oats are frequently used ingredients in homemade face masks for blackheads.

This natural remedy has become well-known for its capacity to treat typical hair issues like thinning hair, hair loss, and dull hair. Rich in vital nutrients and powerful ingredients, onion hair oil has emerged as a preferred choice for individuals looking for a comprehensive approach to nourishing their hair.

  • This oil contains sulfur, which feeds the hair follicles and encourages thicker, healthier hair growth. Fortifying the roots also aids in decreasing hair loss.
  • Applying this oil regularly may help postpone the beginning of premature graying. Onions’ antioxidants shield hair from oxidative stress, which is frequently a cause of premature graying.
  • This product enhances hair texture, provides nourishment, minimizes frizz, and adds natural shine, resulting in a shinier, smoother finish.
  • This hair oil effectively treats scalp infections and dandruff due to its antibacterial characteristics. It supports the upkeep of a hygienic and healthy scalp environment.
  • This oil reduces breakage and split ends by strengthening the hair shaft with its rich blend of nutrients. As a result, hair becomes more robust and controllable.

Ingredients list:

  • Two onions of medium size.
  • Half a cup of coconut oil, or any other type of carrier oil.
  • A few drops of essential oil (like lavender or rosemary) for scent is optional.

Instructions for the onion hair oil recipe:

  • Cut the onions into little pieces after peeling them.
  • Heat the coconut oil in a pan over low to medium heat. Sliced onions should be added to the oil.
  • Allow the onions to get golden brown while they are cooking in the oil. This procedure aids in transferring the health benefits of the onions into the oil.
  • After the onions turn golden brown, remove the pan from the heat, allow the oil to cool, and strain the onion pieces to extract the infused oil.
  • Add essential oil for extra benefits and scent, and store this oil in a sterile, airtight container for added benefits.

The natural qualities of onion hair oil, which support the health and vibrancy of hair, are what give it its charm. The advantages it provides make it a valuable addition to your hair care schedule, even though the strong scent may take some getting accustomed to. For stronger, glossier, and healthier hair, unleash the power of nature and discover the wonders of this oil.

Certainly! If you’d like to learn more, please consider following our WhatsApp Channel, Facebook, Instagram, YouTube, Twitter, and Pinterest.

Q1: How to Use Onion Hair Oil?

A1: Apply this oil to the scalp, massage gently, leave on for at least an hour or overnight, then wash with mild shampoo for best results.

Q2: Can onion hair oil be used on all hair types?

A2: You can use this oil on any type of hair. Those seeking to address problems such as hair thinning, breakage, and dullness will find it extremely helpful.

Q3: Are there any side effects of using onion hair oil?

A3: This oil is generally safe, but slight irritation may occur. Perform a patch test before regular use and discontinue use if negative reactions occur.

Living in a small home does not mean you have to give up gardening. With the appropriate creative balcony garden ideas for tiny houses, even the smallest balcony can become a lush, calming green oasis. Whether you live in an apartment or a small house, your balcony has enormous potential for beauty, fresh air, and even produced produce.

Balcony gardens are more than just a trend in metropolitan areas with limited space; they are a lifestyle change. There are several methods to create a gorgeous green hideaway, ranging from vertical gardens and hanging planters to multi-functional furniture and intelligent plant selection.

Let’s look at the most practical, beautiful, and space-saving ways to turn your balcony into a thriving garden oasis.

Before delving into creative balcony garden ideas for tiny houses, consider why balcony gardening is great for small living areas.

  • Optimizes unnecessary space.
  • improves air quality.
  • Reduces stress and improves mood.
  • Offers fresh herbs and veggies.
  • Improves house attractiveness.

According to the NASA Clean Air Study, certain indoor plants can aid in the removal of pollutants from the air. Incorporating flora onto your balcony not only beautifies your property but also helps to create a healthier atmosphere.

For more information on plant health benefits, visit the Royal Horticultural Society: https://www.rhs.org.uk

When floor space is limited, consider vertical. There are many vertical gardening ideas, including:

Install wall planters

Vertical wall planters allow you to grow several plants without sacrificing valuable floor space. You may use:

  • Pocket Planters
  • Wooden pallet planters
  • Mounted Pots
  • Hanging baskets

Vertical gardens provide a great visual impact and are perfect for herbs, succulents, and tiny flowering plants.

Climbing plants for railings

Grow climbing plants on balcony railings or trellises. This provides seclusion while enhancing flora.

  • Money plant
  • Jasmine
  • Bougainvillea
  • Morning Glory

These plants give appeal to the balcony while keeping it airy and spacious.

Creative balcony garden ideas for small homes with vertical planters

One of the most successful creative balcony garden ideas for small homes is to use multi-level designs.

Use plant stands and shelves

Tiered plant stands make it easier to exhibit several plants in a small area. They:

  • Enhance sunshine exposure.
  • Create visual depth.
  • Make upkeep easy.

To make the most of wasted space, consider using corner shelves.

Hanging planters for an airy look

Hanging pots are ideal for trailing plants such as

  • Spider plant
  • Pothos
  • Petunia

They create more floor space while also adding elegance.

Hanging plants as creative balcony garden ideas for small homes

Smart furniture makes a significant impact in tiny balconies.

Foldable furniture

  • Foldable chairs.
  • Wall-mounted tables
  • Storage benches

This provides versatility while preserving space.

Planter benches

Benches with built-in planters provide both sitting and foliage in a single, compact solution. This is one of the most innovative balcony garden ideas for tiny homes.

Even a modest balcony may maintain a thriving vegetable garden.

Vegetables suitable for small balcony gardens include tomatoes, chilies, spinach, lettuce, radish, and cilantro.

To optimize the growth space, use fence planters or rectangular grow bags.

Herb garden ideas

Herbs are ideal for tiny balconies since they occupy less space.

Grow ingredients include basil, mint, thyme, rosemary, and parsley.

Small balcony vegetable garden idea for compact homes

Container gardening is an excellent way to create inventive balcony gardens in tiny dwellings. It promotes the use of unorthodox containers such as old buckets, wooden crates, metal cans, repurposed bottles, and ceramic bowls. This not only encourages creativity but also adds individuality and character to your balcony space.

To create an aesthetically pleasing garden or indoor space with color-coordinated pots, choose a consistent color theme. Options include an all-white color scheme for a modern look, earthy tones to evoke a natural vibe, or bright colors for a cheerful energy. Each choice contributes distinct visual effects that can enhance the overall ambiance.

Small balcony garden ideas

Lighting is essential for elevating the mood of your balcony and changing it into a lovely nighttime getaway. Wrapping fairy lights over the railings is an efficient approach for creating a charming ambiance. Furthermore, adding solar lanterns may give both aesthetic appeal and environmentally sustainable lighting. Consider adding LED candles, which provide a comforting glow without the risk of a flame. Together, these lighting solutions have the potential to greatly improve your outdoor environment.

Solar garden lights are an environmentally responsible and cost-effective solution that not only improves safety but also adds to the atmosphere of outdoor settings. They use solar energy, which is ecologically friendly and provides illumination without the need for power.

Apartment balcony garden ideas

Recommended low-maintenance plants for those with minimal care include the snake plant, aloe vera, succulents, ZZ plant, and peace lily. These varieties thrive with minimal care, requiring less frequent watering, and are well-suited for balcony environments.

Adding a theme to your tiny balcony offers a consistent aesthetic, which improves its overall appeal. A Zen Balcony Garden is one possible concept, which may be created by using bamboo plants for a peaceful mood, pebbles for textural contrast, minimum décor to keep things simple, and a small water feature to provide calm and movement to the area.

Boho Green Corner is distinguished by a variety of decorative elements, including macramé hangers that add a textured aesthetic to the space, patterned cushions that provide both comfort and style, trailing vines that add a natural and organic feel, and colorful ceramic pots that add vibrant pops of color to the overall design. These features combine to create a bohemian-inspired setting that highlights a variety of textures, colors, and natural elements.

Tropical micro oasis are distinguished by a variety of palm species, which add to the lush, green atmosphere. These areas frequently have huge leafy plants that add to the tropical motif and provide a relaxing atmosphere. Wooden furniture is frequently incorporated to complement this natural beauty, adding a rustic touch that blends in with the vivid flora.

Maintenance is required to preserve unique balcony garden ideas in tiny dwellings. Install drip irrigation, use self-watering containers, check drainage holes, and rotate plants to ensure they receive equal sunshine. It is critical to consider the direction of sunshine; south-facing balconies receive the most sunlight, while north-facing balconies may require shade-tolerant plants.

Privacy is a major worry for apartment residents. To overcome this problem, numerous natural methods may be adopted. Bamboo screens, tall potted plants, and climbing vines on trellises are good solutions for providing solitude while also improving the overall beauty of the living space.

Sustainability is critical to maximizing the long-term value of balcony gardens. Composting kitchen waste to enrich soil, collecting rainwater for irrigation, recycling containers to reduce waste, and refraining from using chemical fertilizers to safeguard the environment are all important activities. Additionally, organic agriculture promotes biodiversity and reduces environmental impact.

Even with inventive balcony garden ideas for tiny houses, accidents might occur. Overcrowding plants, disregarding weight limitations, installing inadequate drainage, picking plants that are incorrect for sunlight conditions, and overwatering are all common mistakes to avoid. Maintaining equilibrium is critical; simplicity and enough room for mobility should be addressed.

Small areas may have a tremendous effect. With these innovative balcony garden ideas for tiny houses, you can transform your balcony into a refreshing oasis full of flora, design, and practicality.

From vertical gardens and small furnishings to edible plants and mood lighting, there are several ways to personalize your balcony. Whether you desire a quiet reading corner, a little kitchen garden, or a colorful flower display, your small balcony may become your favorite area at home.

Start modestly, prepare carefully, and let nature to alter your place.

Certainly! If you’d like to learn more, please consider following our WhatsApp Channel, Facebook, Instagram, YouTube, Twitter, and Pinterest.

Q1: How do I protect my balcony garden from strong winds?

A1: Use windbreaks, fasten pots correctly, and select strong plants.

Q2: Is balcony gardening suitable for beginners?

A2: Absolutely. Begin with low-maintenance plants and eventually expand into additional types.

Q3: How often should I fertilize balcony plants?

A3: Feed plants with organic fertilizer every 2-4 weeks during the growth season.

Menstrual pain affects millions of women worldwide, frequently affecting daily routines, productivity, and general well-being. As we look for natural, effective, and compassionate alternatives to traditional pain management, herbal therapies have emerged as valuable friends. The finest herbal plants for period pain treatment have anti-inflammatory, antispasmodic, and hormone-balancing characteristics that treat cramps, bloating, mood swings, and exhaustion at their source.

In this thorough guide, we look at the most effective herbal plants for menstrual cramps, as well as their mechanisms of action, preparation techniques, and safe use to guarantee the best possible relief.

Primary dysmenorrhea is the most common type. It is not caused by an underlying medical condition. Instead, it’s associated with typical hormonal cycles.

Secondary dysmenorrhea results from medical disorders such as endometriosis or fibroids. This sort of discomfort may intensify over time, necessitating medical attention.

Although herbal plants can assist with period discomfort, you should visit a doctor if:

  • Pain suddenly gets acute.
  • Bleeding is really heavy.
  • Periods last longer than seven days.
  • Fever accompanies cramping.

Herbal medication complements the body’s natural functions. Instead of concealing symptoms, many herbs can help control uterine contractions, decrease inflammation, relax muscles, and balance hormones. These natural remedies are especially useful for people seeking:

  • Non-Synthetic Pain Relief
  • Long-term Menstrual Cycle Balance
  • Reduced inflammation.
  • Hormonal regulation.
  • Increased digestive comfort during menstruation

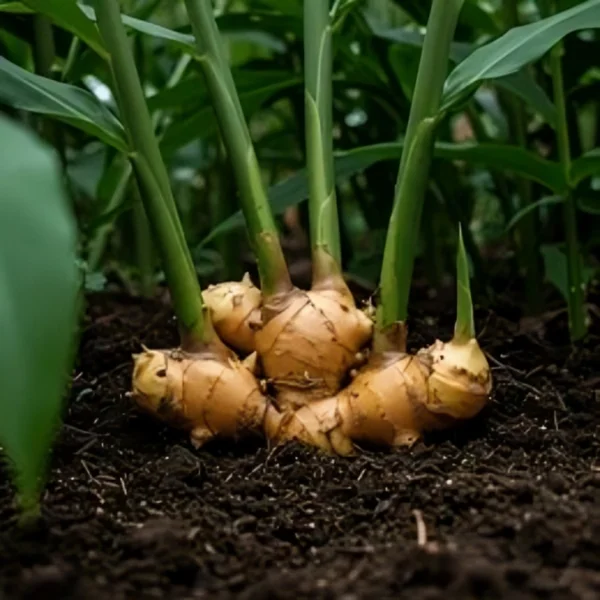
1. Ginger – The powerful anti-inflammatory root

Ginger is one of the most extensively investigated medicines for menstrual pain treatment. Its main chemicals, gingerols and shogaols, are potent anti-inflammatory and analgesic agents. Ginger decreases the formation of prostaglandins, which are responsible for uterine contractions and cramps.

In conclusion, the paper emphasizes a number of advantages associated with improved menstrual health. It mentions a reduction in the severity of menstrual cramps, less nausea during periods, improved circulation, and relief from bloating.

Fresh ginger tea, made by steeping 1-2 inches of sliced ginger root in hot water for 10 minutes, as well as ginger powder capsules and adding ginger to warm soups or herbal decoctions, have been shown to significantly reduce pain severity when consumed regularly during the first three days of menstruation.

Ginger

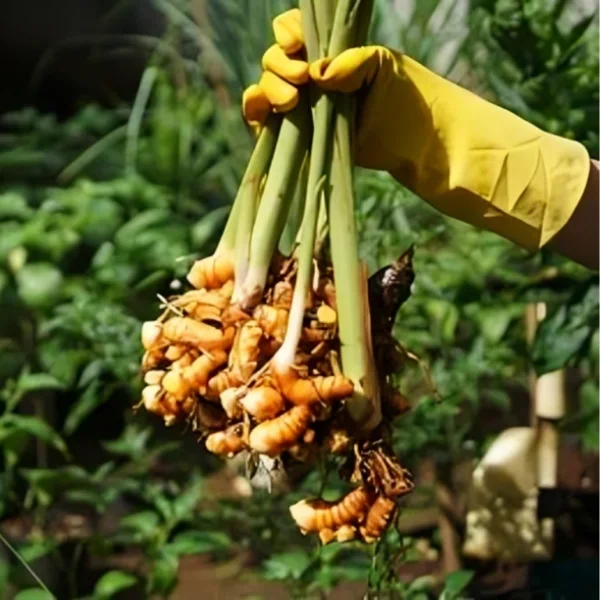
2. Turmeric – Natural pain and inflammation control

Turmeric includes curcumin, a potent anti-inflammatory that relieves menstrual cramps by reducing uterine inflammation and oxidative stress. This natural medication efficiently relieves pelvic discomfort, lowers excessive bleeding, promotes hormonal balance, and boosts immunity.

Golden milk, made with turmeric, warmed milk, and black pepper, is a popular beverage noted for its health benefits. Turmeric tea can also be brewed for therapeutic purposes. Furthermore, standardized curcumin pills are available for people looking for high dosages of this active ingredient. Notably, the combination of turmeric and black pepper enhances curcumin absorption, boosting its potential health benefits.

Turmeric

3. Chamomile – The gentle uterine relaxant

Chamomile is well-known for its soothing and muscle-relaxing properties, notably in treating uterine spasms and lowering anxiety during premenstrual syndrome (PMS). Its effects include relaxing uterine muscles, reducing inflammation, improving sleep quality, and calming mood swings.

Chamomile tea, when drunk at a rate of 2-3 cups per day during menstruation, is useful to women, particularly in offering comfort during this time. Additionally, regular consumption of chamomile tea can help regulate menstrual periods over time. This herbal infusion is known for its relaxing characteristics and possible hormonal balancing effects.

Chamomile

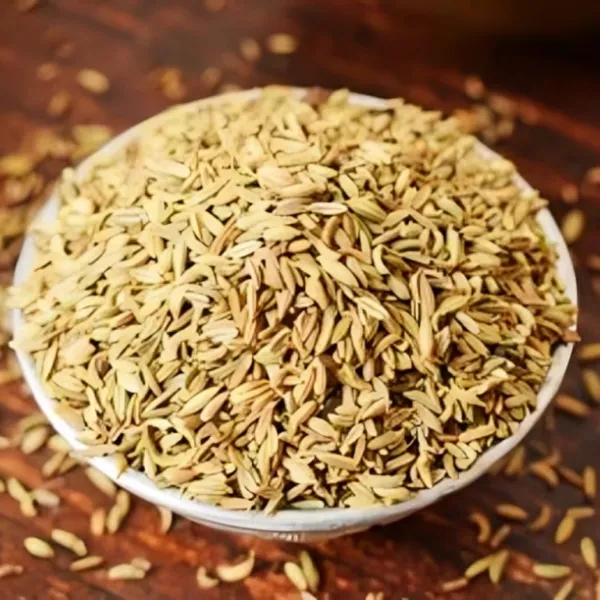
4. Fennel – Traditional remedy for menstrual cramps

Fennel seeds have antispasmodic characteristics that successfully reduce uterine contractions, making them a viable alternative to several over-the-counter pain treatments. Clinically recognized advantages include cramp alleviation, bloating reduction, improved digestion, and hormone balance assistance.

Fennel tea may be made by steeping 1 teaspoon crushed fennel seeds in boiling water. Another way to consume fennel seeds is to chew them after being soaked. Fennel works best when given at the commencement of cramping.

Fennel

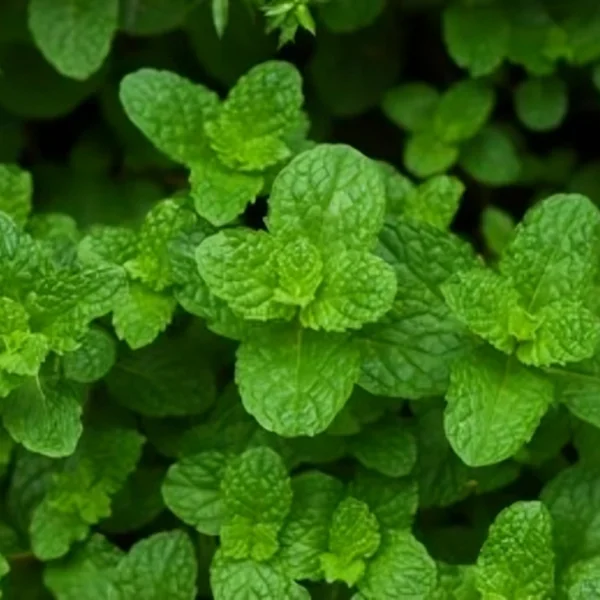
5. Peppermint – Cooling relief for abdominal pain

Peppermint’s menthol component offers a variety of medicinal properties. It relaxes smooth muscles and improves blood circulation, making it ideal for relieving lower abdominal stress. Additionally, peppermint helps to relieve muscular spasms, headaches, and stomach pain. Furthermore, it is invigorating and energetic.

Peppermint tea, noted for its refreshing flavor and scent, is frequently used for its digestive benefits, which assist to relieve symptoms like bloating and gas. Diluted peppermint oil may also be used for abdominal massage, which provides pleasant relief from intestinal problems. This procedure can assist to relax the muscles while also potentially increasing the advantages of peppermint’s natural characteristics.

Peppermint

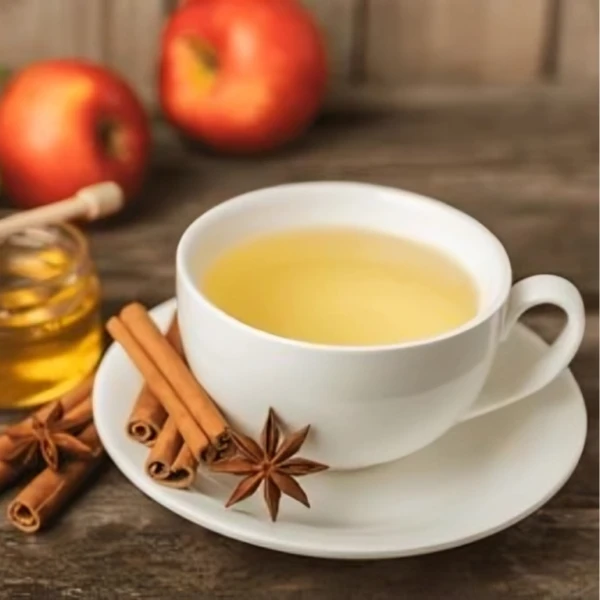
6. Cinnamon – Warming spice for cramp reduction

Cinnamon is a spice known for its high concentration of anti-inflammatory and antispasmodic chemicals, which provide several health advantages. It has been shown to lessen menstrual bleeding, nausea, irritation, and enhance blood flow.

Cinnamon tea is often used in warm drinks and can also be taken in capsule form, although it should only be eaten under expert supervision.

Cinnamon

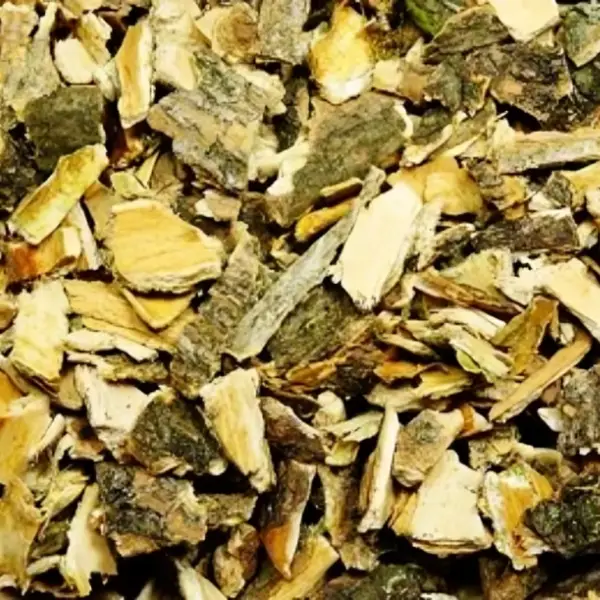
7. Cramp Bark – The traditional antispasmodic herb

Cramp bark is well-known for its ability to relieve muscular spasms in the uterus and has a long history of usage in herbal medicine, notably in the treatment of painful menstruation. Its advantages include the relaxation of uterine muscles, the decrease of severe cramping discomfort, and the soothing of nerve tension.

Herbal treatments can be prepared in two ways: tincture form or herbal decoction. To guarantee safety and efficacy, these forms should be used under the supervision of a skilled herbalist.

Cramp Bark

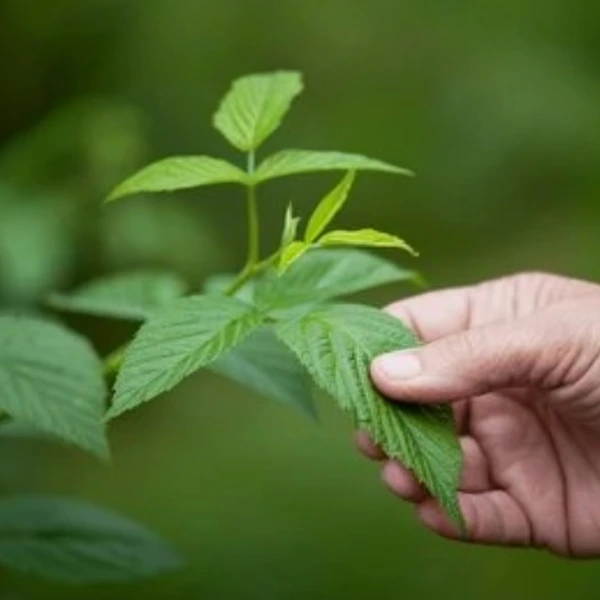
8. Raspberry Leaf – Uterine tonic for cycle support

Red raspberry leaf is renowned as a uterine tonic due to its potential to strengthen uterine muscles and reduce unpleasant contractions over time. It has several advantages, including toning uterine tissue, decreasing excessive bleeding, improving reproductive health, and naturally regulating hormones.

Regular drinking of raspberry leaf tea and herbal pills during the menstrual cycle offers the best results.

Raspberry Leaf

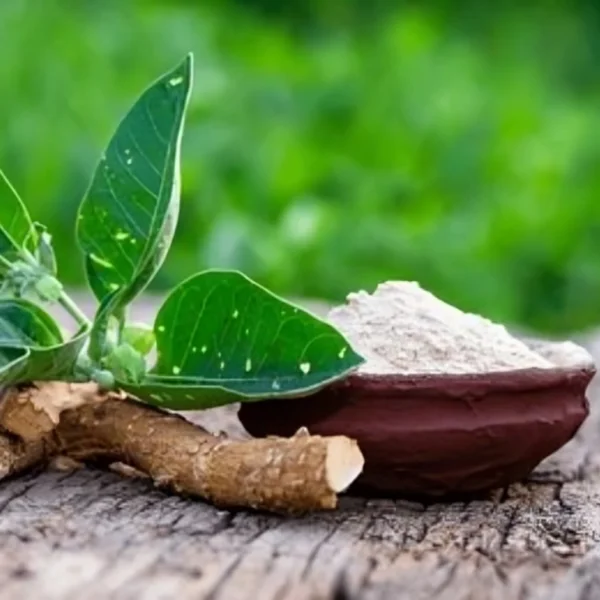
9. Ashwagandha – Hormone and stress regulator

Ashwagandha is an adaptogenic plant that promotes endocrine balance and reduces stress-related menstrual abnormalities. Ashwagandha’s key effects include cortisol management, hormonal balance, tiredness reduction, and mood stabilization.

To use the product, combine the powder with warm milk or use standardized extract capsules for easy intake.

Ashwagandha

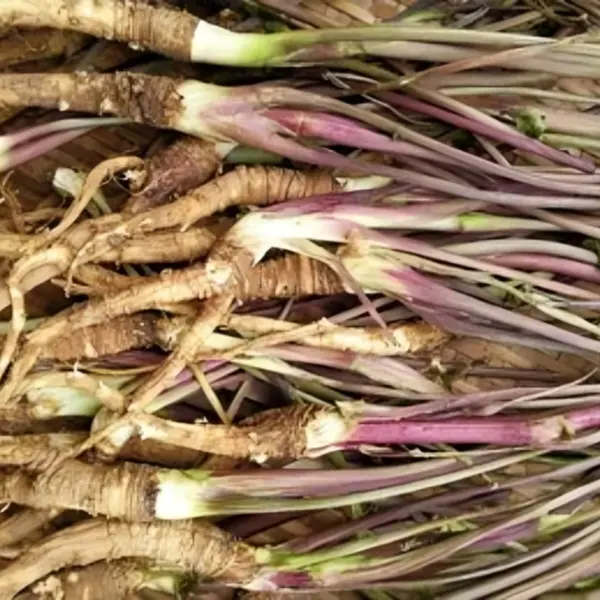
10. Dong Quai – The female ginseng

Dong Quai, a traditional medicine mainstay, is well-known for its ability to improve female reproductive health. It promotes blood circulation and regulates menstrual periods. Dong Quai’s main benefits include its capacity to lessen period cramps, improve healthy blood flow, relieve PMS symptoms, and promote hormonal balance, making it an important herb for women.

Tinctures are herbal formula mixtures that should be utilized with the supervision of a specialist. It is recommended that you seek guidance before using this product.

Dong Quai

Herbal plants for period pain alleviation are natural, but they are not without danger.

  • Always follow the suggested doses.
  • Avoid combining many plants without assistance.
  • Check for allergies.
  • Consult a healthcare practitioner if you are pregnant or using medication.

Natural does not always equal harmless. So it’s best to proceed cautiously.

The best herbal plants for menstrual pain reduction are potent, safe, and effective alternatives to pharmaceutical pain medications. Incorporating ginger, turmeric, chamomile, fennel, peppermint, cinnamon, cramp bark, raspberry leaf, ashwagandha, and dong quai into our health regimen provides us with long-term menstrual support.

Natural relief does more than just relieve cramps; it also promotes hormonal equilibrium, emotional balance, and long-term reproductive health. These medicines, when used consistently and mindfully, turn menstrual pain into tolerable, balanced cycles.

Certainly! If you’d like to learn more, please consider following our WhatsApp Channel, Facebook, Instagram, YouTube, Twitter, and Pinterest.

Q1: Are herbal plants for period pain relief safe for teenagers?

A1: Most mild herbs, such as chamomile and ginger, are rather harmless. However, before using it on a regular basis, speak with a healthcare expert.

Q2: Can I combine different herbal plants?

A2: Yes, but don’t combine too many at once. Begin with one or two and observe your body’s reaction.

Q3: Can herbal plants replace painkillers completely?

A3: They may provide great relief for minor discomfort. Serious discomfort may still necessitate medical attention.

The Lily of the Valley Flower is one of the most beautiful and fragrant blossoms in the garden. For generations, this plant has charmed hearts with its exquisite white bell-shaped flowers and delicious smell. Gardeners value it not only for its beauty, but also for its strength and significance.

The Lily of the Valley Flower is native to Europe and parts of Asia, and it thrives in cold weather and shady wooded regions. It has gradually gained popularity as an ornamental plant across North America and beyond. What genuinely distinguishes this flower is its blend of gentleness and power. It appears delicate at first, but once established, it spreads quickly.

In this tutorial, we’ll go over all you need to know about the Lily of the Valley Flower, including how to cultivate it, what it represents, its intriguing history, and how to utilize it safely and efficiently.

Scientific NameConvallaria majalis
FamilyAsparagaceae
Plant TypeHerbaceous perennial
Height6–12 inches
Bloom TimeMid to late spring
Flower ColorWhite (occasionally pink varieties)
Hardiness Zones3–9

This plant spreads by underground rhizomes called “pips.” These pips reproduce quickly, making Lily of the Valley an ideal ground cover for shady regions.

The Lily of the Valley meaning has deep roots in history, religion, and folklore. Across cultures, it represents:

  • Purity and innocence.
  • Renewal and Rebirth
  • Humility
  • Happiness returns.

In Christian tradition, the flower is linked with the Virgin Mary and is sometimes known as “Mary’s Tears.” In France, it is given on May 1st as a symbol of good fortune and riches.

Notably, the flower earned royal prominence when it was included in Catherine, Princess of Wales’ bridal bouquet at her wedding to Prince William, Prince of Wales, as a symbol of purity and eternal love.

1. Ideal location and light requirements

The Lily of the Valley flower grows in moderate to full shade. We recommend growing it behind trees, along shady paths, or in forest gardens. While it can withstand some morning sun, direct afternoon sunshine can burn its fragile leaves.

2. Soil conditions

For best plant development, well-drained, organic-rich soil is required. The soil’s pH should vary from slightly acidic to neutral, 6.0 to 7.0. Composting the soil also helps to promote robust root growth and powerful flowers.

3. Planting instructions

To plant pips effectively, do it in early spring or fall. Place them roughly 1 inch deep and 3-4 inches apart. After planting, be sure to properly water the pips. Within one season, these plants will establish themselves and begin to expand spontaneously.

4. Watering needs

Throughout the growth season, we maintain a steady moisture level. Although the plant is drought-tolerant once established, prolonged dryness diminishes flower output.

5. Fertilization

There is no need for extensive feeding. A small dose of balanced organic fertilizer in early spring promotes robust foliage and many blossoms.

  • Applying a small layer of mulch helps to retain moisture and reduce weeds, especially in warmer regions.
  • To keep everything looking neat, remove fading flowers and decaying foliage. Green foliage nourishes next year’s blossoms, so avoid removing it early.
  • Lily of the Valley is popular as a ground cover plant, yet it has the potential to become invasive. To properly regulate its development, root barriers should be installed, clumps divided every 2 to 3 years, and any undesired rhizomes removed as soon as possible.
ProblemCauseSolution
Leaf yellowingPoor drainageImprove soil aeration
Fungal spotsExcess moistureReduce watering
SlugsDamp conditionsUse natural repellents
  • The shrub produces vivid red berries after flowering.
  • All components, including leaves, flowers, and berries, are very hazardous if consumed.
  • It was employed in traditional European herbal medicine.
  • Its aroma is commonly utilized in premium fragrances.

The alluring aroma influenced renowned perfume firms, notably Dior, who included Lily of the Valley components into legendary fragrance creations.

The flower’s original aroma cannot be extracted directly using traditional distillation techniques. Perfumers instead use synthetic chemicals to imitate the aroma. The end product is a fresh, green, flowery perfume that exudes springtime elegance.

Its fragrance profile contains:

  • Sweet floral notes.
  • Green leafy undertones.
  • Soft, powdery finish.

This makes Lily of the Valley an essential component in both traditional and contemporary scent formulas.

Lily of the Valley has traditionally been employed in regulated pharmaceutical compositions due to its cardiac glycosides, which affect heart function. However, we highlight that the plant is dangerous and not suitable for self-medication.

In ancient herbal systems, extracts were carefully calibrated to support:

  • Heart rhythm regulation
  • mild diuretic effect.
  • Heart health

Modern medicine knows its strong chemicals, but they must be used under proper medical supervision.

Yes. Lily of the Valley is extremely harmful to both people and dogs.

Symptoms of poisoning might include:

  • Nausea
  • Vomiting
  • An irregular heartbeat
  • Dizziness

We recommend keeping the plant away from youngsters and animals. When working with big volumes, always wear gloves.

The Lily of the Valley Flower is a gardener’s perennial favorite. With its fragrant smell, exquisite white bells, and profound symbolism, it provides both beauty and significance. Although it appears fragile, it is remarkably robust and versatile.

This amazing plant may be successfully grown if you learn correct care practices, safety considerations, and its cultural heritage. Whether used in landscaping, as a symbolic gift, or just enjoyed in a forest garden, Lily of the Valley Flower lives up to its reputation as a strong and beautiful flower.

Certainly! If you’d like to learn more, please consider following our WhatsApp Channel, Facebook, Instagram, YouTube, Twitter, and Pinterest.

Q1: Can Lily of the Valley Flower grow in pots?

A1:Yes, but containers must have enough drainage and some shade.

Q2: Why is Lily of the Valley Flower popular in weddings?

A2: Because it represents purity, contentment, and eternal love.

Wild parsnip, technically known as Pastinaca sativa, is a tall, yellow-flowered plant that grows along roadsides, fields, and open spaces. Although it appears innocuous at first appearance, this plant may inflict severe skin burns if handled in direct sunlight. That’s why knowing our Wild Parsnip Guide is critical for homeowners, gardeners, and land managers.

Wild parsnip, which was originally grown as a root crop in Europe, escaped domestication and spread over North America. Over time, it adapted well to disturbed soils and open terrain. Today, it is regarded as invasive in many areas.

Wild parsnip, a member of the Apiaceae family that includes carrots, parsley, and celery, distinguishes itself from its edible cousins by producing deadly sap. Wild parsnip has a biannual growth cycle, hollow and grooved stems, yellow umbrella-shaped flower clusters, and a strong taproot.

Wild parsnips were introduced to North America in the 1600s as a food crop. Unfortunately, it has expanded beyond gardens and farms. It now flourishes in sunny settings like roads, meadows, and open lots.

Wild parsnip must be correctly identified because to its similarity to benign plants, with misidentification providing the danger of severe skin damage. Wild parsnip has flat-topped clusters of little yellow flowers that bloom from late spring to midsummer and are distinguished by an umbrella-like structure known as umbels. Unlike its white-flowered siblings, wild parsnip blossoms are a striking yellow.

The stem grows to a height of 2-5 feet, has vertical grooves across its surface, is hollow in nature, and may have sparse hairs.

The plant in issue has a thick root that resembles a carrot, a pale yellow interior, and a pungent stench when sliced. Its full form, which is distinguished by its height and colorful blossoms, is plainly seen during the flowering season.

FeatureWild ParsnipQueen Anne’s LaceGiant Hogweed
Flower ColorYellowWhiteWhite
Height2–5 ft1–3 ft10–15 ft
Toxic SapYesNoYes (Severe)
StemGroovedHairyPurple blotches

Wild parsnip contains furanocoumarins, which interact with sunlight and human skin, causing phytophotodermatitis. This response, which occurs when plant sap comes into contact with the skin and is then exposed to UV rays, causes symptoms including redness, burning, and blistering within 24 to 48 hours, as well as long-lasting dark spots on the skin. The delayed onset of these symptoms frequently causes people to be unaware of their exposure until hours later. Children, gardeners, and roadside workers are particularly vulnerable to this illness.

signs vary depending on the degree of exposure, but early signs include moderate redness, tingling, and small swelling.

Advanced symptoms include painful blisters, skin discolouration, peeling skin, and potential scarring. These symptoms usually appear within two days and might worsen with prolonged sun exposure.

If you suspect contact, wash the afflicted skin promptly with soap and cold water. It is best to avoid sunlight exposure for 48 hours. Cool compresses can be used to relieve moderate discomfort, and hydrocortisone cream is advised.

Managing wild parsnip requires a continuous approach. Mechanical management methods include digging first-year rosettes, clipping flower heads before they generate seeds, and ensuring that the root system is completely removed.

Chemical control through the use of selective herbicides is most successful when applied early in the target plant’s growth cycle. Adherence to label directions is critical for proper application.

Natural techniques for promoting healthy landscapes include fostering the growth of native plants, keeping dense turf grass, and mowing before flowering to encourage vigorous plant development and avoid unpleasant flowering. These practices contribute to ecosystem health and biodiversity.

Safe removal techniques stress the use of protective equipment to reduce dangers during operations. It is usually advisable to wear long sleeves, gloves, eye protection, and closed shoes to guarantee proper protection from any threats.

This thorough Wild Parsnip Guide has offered full information on identification, hazards, and control methods. While wild parsnip may appear appealing with its beautiful yellow blossoms, it also offers serious concerns. Fortunately, with correct education, precautions, and prompt action, you may effectively control and prevent its spread.

Maintain alertness, wear safety gear, and educate others. When handled correctly, even invasive issues such as wild parsnip may be managed safely and ethically.

Certainly! If you’d like to learn more, please consider following our WhatsApp Channel, Facebook, Instagram, YouTube, Twitter, and Pinterest.

Q1: Can wild parsnip kill you?

A1: No, it is not generally lethal. However, it can cause severe skin damage.

Q2: What time of year is wild parsnip most dangerous?

A2: Late spring to midsummer, when sap levels are highest and flowers bloom.

Q3: Can animals eat wild parsnip?

A3: Some animals may graze on immature plants, while adult plants might be irritating.

Q4: Is wild parsnip the same as garden parsnip?

A4: They are the same plant, Pastinaca sativa, but wild versions have greater chemical responses.

Cow Parsnip Explained begins with a fundamental understanding of this fascinating plant. Cow parsnip (Heracleum maximum) is a big, perennial plant endemic to North America. It belongs to the Apiaceae family, which includes carrots. At first view, it may appear dramatic and even threatening. However, this plant has a significant ecological significance in woods, meadows, and riverbanks.

Cow parsnip grows large, reaching 4 to 10 feet in height. Its broad leaves and big white flower clusters make it easily identifiable. While it offers many advantages, it also poses certain concerns. Gardeners, hikers, and environmental enthusiasts must all grasp cow parsnip.

In this tutorial, we’ll go over everything from identification advice to conventional applications and safety considerations. In conclusion, you will have a comprehensive and balanced perspective.

KingdomPlantae
OrderApiales
FamilyApiaceae
GenusHeracleum
SpeciesHeracleum maximum
HeightUsually 5–10 feet tall.
LeavesLarge, palmate, deeply lobed leaves with coarse texture.
StemsGreen, ridged, hollow stems covered with fine hairs.
FlowersFlat-topped white umbels, 8–12 inches across.
HabitatMoist meadows, forest edges, riverbanks, and roadside ditches.

Cow parsnip has long been utilized by indigenous tribes. While it is not commonly used in current medicine, it has had major historical applications.

Young stems and leaf stalks from certain plants are occasionally peeled and cooked, but they must be collected before becoming fibrous. Roots can also be cooked for culinary reasons, however incorrect handling may cause discomfort. Thus, preparing these substances requires meticulous knowledge and skill.

Cow parsnip has traditionally been used in medicine, particularly as a poultice to treat injuries, respiratory discomfort, and joint pain. However, it is vital to note that many applications are based on ancient knowledge, and there is a paucity of current scientific proof for their usefulness.

Cow parsnip contains furanocoumarins, which can cause phytophotodermatitis if its sap comes into touch with the skin and subsequently exposed to sunlight. Exposure symptoms include redness, blistering, burning, and long-lasting skin discolouration.

The intensity of cow parsnip responses is determined by the amount of sap exposed, the duration of sunlight exposure, and individual skin sensitivity. Although cow parsnip is less dangerous than gigantic hogweed, it is still vital to use caution.

To safely handle cow parsnip, it is advised to wear long sleeves and gloves, avoid crushing stems or leaves, and wash any exposed skin immediately with soap and water. It is also critical to keep afflicted regions away from sunlight for 48 hours. Mechanical removal while wearing protective clothes is suitable for garden or landscape clearance, and herbicides can be used selectively in situations of significant infestations.

One of the most critical safety considerations with Cow Parsnip Explained is identifying it from  giant hogweed (Heracleum mantegazzianum).

FeatureCow ParsnipGiant Hogweed
Height4–10 ftUp to 15–20 ft
StemGreen, lightly spottedThick, heavily purple-blotched
ToxicityMild to moderateSevere burns possible
Leaf SizeUp to 2 feetUp to 5 feet
Native StatusNative to North AmericaInvasive species
FeatureWater HemlockCow Parsnip
Plant Height3–6 feet (0.9–1.8 m)4–10 feet (1.2–3 m)
StemSmooth, hollow, often purple streaked or spottedThick, hairy, green stem
LeavesFinely divided, toothed leafletsVery large, broad, deeply lobed leaves
Flower TypeSmall white flowers in umbrella-shaped clustersLarge white flower clusters (umbrella-shaped)
Root SystemTubers with chambers (very toxic)Thick taproot, not chambered
Toxicity LevelExtremely poisonous (one of North America’s most toxic plants)Mildly toxic (sap can cause skin irritation)
SmellUnpleasant, carrot-like odorMild, celery-like smell
Geographic RangeNorth AmericaNorth America

Cow parsnip is a powerful native plant that is ecologically vital, visually appealing, and controllable with proper care. We can cohabit with this magnificent species with confidence if we grasp its identifying characteristics, ecological advantages, and safety measures.

Certainly! If you’d like to learn more, please consider following our WhatsApp Channel, Facebook, Instagram, YouTube, Twitter, and Pinterest.

Q1: What should I wear when handling cow parsnip?

A1: Wear gloves, long sleeves, and safety glasses.

Q2: Where does cow parsnip typically grow?

A2: Cow parsnip thrives in damp areas such as riverbanks, meadows, woodland borders, and roadsides.

Q3: How is cow parsnip different from poison hemlock? 

A3: Cow parsnip, unlike poison hemlock, has no purple-spotted stems and is less poisonous, yet its sap can still cause skin irritation.

Poison Hemlock (Conium maculatum) is one of the most poisonous plants found in North America and many other temperate locations worldwide. This invasive biennial plant is notorious for its high toxicity to people, animals, pets, and wildlife. Even minor exposure can endanger lives, thus homeowners, gardeners, hikers, and agricultural workers must exercise proper identification and educated safety precautions.

Poison Hemlock (Conium maculatum) belongs to the Apiaceae family, which includes carrots. This family contains numerous edible plants, which explains why Poison Hemlock is sometimes mistaken.

Scientific classification:

KingdomApiaceae
FamilyApiaceae
GenusConium
SpeciesC. maculatum
Growth6–10 feet in height
LeavesFinely split, fern-like green leaves.
FlowersSmall white blooms create umbrella-shaped clusters (umbels).

Historical background:

Poison Hemlock has long been associated with the execution of captives in ancient Greece. Most famously, philosopher Socrates was sentenced to death after swallowing a hemlock-based poison. Even now, Poison Hemlock is just as hazardous.

Correct identification is crucial. Poison Hemlock frequently fits into its surroundings, making it simple to ignore.

The leaves are characterized as brilliant green and fern-like in appearance. The stems are smooth and hollow, with pronounced purple or reddish streaks. The absence of hair on the stem is a crucial distinguishing feature.

Flowers in this setting are tiny and white, placed in umbrella-like clusters. They normally bloom between late spring and early summer. The seeds produced are tiny, ridged, and very poisonous.

Thick, white taproots are an important part of the root system, sometimes confused with wild parsnip or carrot roots due to their similar look. This can make identification difficult for individuals who are familiar with these plants.

Symptoms appear immediately, usually within 30 minutes to 2 hours after contact. The initial symptoms include a burning feeling in the mouth and throat, increased salivation, nausea, vomiting, and abdominal pain.

Advanced symptoms include muscular tremors and weakness, dilated pupils, a reduced heart rate, respiratory paralysis, convulsions, and loss of consciousness. In extreme situations, there is a danger of deadly respiratory collapse if medical attention is not sought immediately.

Poison Hemlock is extremely harmful to grazing animals such as cattle, horses, goats, sheep, and pigs, providing a significant risk during droughts when alternative food sources are scarce. The principal dangers of animal exposure to this plant are eating fresh or dried forms, consuming infected hay, and grazing on overgrown pastures. Domestic pets, like dogs and cats, are also at risk if they chew or mistakenly consume the plant while outside.

Preventing exposure to potentially dangerous plants demands close monitoring and appropriate management measures. Key personal safety guidelines include avoiding direct contact with the plant by not touching it with bare hands; wearing protective gear such as gloves, long sleeves, and eyewear; not burning any plant material, which may release hazardous substances; and thoroughly washing tools and clothing that have come into contact with the plant to reduce risk.

This text discusses critical strategies for controlling undesirable vegetation. It emphasizes the significance of early detection and removal of immature plants in order to avoid their establishment. Furthermore, it encourages mowing before blooming to reduce seed distribution and emphasizes the importance of disposing of cut plants in sealed bags to retain any possible seeds. Finally, it recommends avoiding regrowth by completely removing the roots throughout the eradication procedure.

Public awareness of contamination entails many critical steps, including teaching family members and workers about safety and prevention, clearly identifying polluted places to limit access, and reporting major infestations to local authorities to guarantee effective management and response.

Poison Hemlock may appear innocent, yet it is one of the most poisonous plants you will ever encounter. Understanding the hazards of Poison Hemlock, as well as its identification and safety measures, will help you avoid major consequences. Stay watchful, educate others, and don’t be afraid to seek help when necessary. Awareness saves lives.

Certainly! If you’d like to learn more, please consider following our WhatsApp Channel, Facebook, Instagram, YouTube, Twitter, and Pinterest.

Q1: Does Poison Hemlock smell like carrots?

A1: No. It smells musty and nasty, unlike eating carrots.

Q2: Is Poison Hemlock illegal to grow?

A2: In many areas, landowners are urged or forced to limit its spread.

Q3: Where is poison hemlock commonly found?

A3: Poison hemlock is typically found near roadsides, riverbanks, fields, and disturbed places with damp soil.

The Castor Bean Plant (Ricinus communis) is visually appealing with its huge tropical leaves and spiky seed pods, but it is also one of the most poisonous plants in America. This fast-growing plant, commonly planted for decorative purposes, has a terrible secret: ricin, one of the most dangerous natural compounds known to science.

The castor bean plant, which is commonly planted as an ornamental plant throughout the United States, contains one of the most deadly naturally occurring chemicals known to humans. Many gardeners grow it without considering the dangers it presents to children, pets, and even people.

Understanding this plant is critical for responsible gardening. Let’s look at why the castor bean plant is regarded America’s most dangerous garden plant and what you need know to remain safe.

The castor bean plant is a blooming perennial that is often cultivated as an annual in the United States.

Basic plant details

Botanical nameRicinus communis
FamilyEuphorbiaceae
Native toAfrica
Plant typePerennial shrub (often grown as annual)
Height6–15 feet
Common inSouthern & Central United States
UsesOrnamental gardening, industrial castor oil production

Common names in the United States

  • Castor Bean Plant
  • Castor Oil Plant
  • Palma Christi

The plant is dangerous because its seeds contain ricin, a potent poison. Ricin is a very poisonous protein found in castor bean seeds. Even a little quantity can be lethal if consumed, especially if the seeds are eaten or crushed.

Ricin is a powerful toxin that inhibits protein synthesis in human cells. As protein manufacturing ceases, cell functioning degrades, leading in tissue and organ failure. This disturbance can result in serious health implications, such as internal bleeding, organ failure, and even death.

Plant PartToxicity Level
Seeds (Beans)Extremely toxic
Seed PodsVery high
LeavesMild to moderate
StemsLow
RootsLow

Both children and adults can be subject to dangers, but children are in much greater danger. Children’s innate curiosity may lead them to consume items such as seeds, although adults may miss the hazards connected with such plants, especially since they are frequently accessible in garden centers. There is no known antidote for ricin poisoning, thus rapid medical intervention is required; treatment focuses on providing supportive care.

The castor bean plant is a serious menace to many animals, including dogs, cats, horses, and cows. Dogs may gnaw on seed pods, whilst cats may consume harmful chemicals when grooming. Horses and cattle may swallow falling seeds from the plant. Ingestion of these seeds or plant components can be lethal to these animals if treatment is not offered immediately.

While growing castor bean plants is permitted in most areas, this does not guarantee their safety. To maintain safe gardening techniques, adopt the following precautions: never grow castor beans near children’s play areas, remove seed pods before they develop, use gloves while handling the plant, and dispose of plant debris properly. If safety cannot be guaranteed, avoid growing castor bean plants totally.

Symptoms often appear 4 to 12 hours after exposure, with early indications including nausea, vomiting, stomach discomfort, and diarrhea.

Severe symptoms may include dehydration, low blood pressure, seizures, liver and kidney failure, and internal bleeding. Each of these signs suggests a serious health concern that needs quick medical treatment.

Non-toxic decorative plants include Canna Lily, Banana Plant, Hibiscus, non-toxic Elephant Ear, and Sunflower. These plants provide brilliant foliage while avoiding the dangers associated with poisonous plants.

FeatureCastor BeanOleander
Main toxinRicinCardiac glycosides
Most toxic partSeedsEntire plant
Risk to petsExtremely highExtremely high
Smoke toxicityNoYes
Fatal dose1–2 seeds1 leaf

The castor bean plant appears dramatic and tropical, yet it is one of the most deadly garden plants in America. Its presence in residential gardens offers significant, frequently overlooked hazards.

Certainly! If you’d like to learn more, please consider following our WhatsApp Channel, Facebook, Instagram, YouTube, Twitter, and Pinterest.

Q1. Can birds eat castor beans?

A1. Birds are typically resistant, but falling seeds represent a concern to pets.

Q2. Is castor oil poisonous?

A2. No, commercial castor oil is safe since the ricin is removed during processing.

Q3. Are castor bean plants safe for home gardens?

A3. Not advised for households with children or pets.