Tag

Tips

Browsing

Growing lavender in your yard is a pleasant way to use this tough and scented herb. There are various ways to grow lavender, such as seeds, cuttings, and division. Every technique has benefits of its own: division enables the duplication of established plants, cuttings offer a quicker path to mature plants, and seeds offer an economical approach to developing several plants. Lavender successfully propagates and adds beauty and scent to any garden or home with the right care. This post will explain how to propagate lavender.

Depending on the method, there is a best time to propagate lavender. New or solely semi-hardwood propagation procedures should be carried out in the spring. This also applies to softwood cuttings, which now have a significantly higher chance of rooting. This scheduling guarantees that the new plants have enough time to establish themselves before the colder temperatures of fall and winter, while also allowing for optimal root development. It is preferable to propagate lavender later in the season, when roots have time to form, and to allow the plant matter to become more mature.

Growing fresh plants is a fantastic way to propagate lavender from cuttings. Here’s a helpful step-by-step guide:

1. What you’ll require:

  • thriving lavender plant
  • Clean, sharp pruning shears or scissors
  • A little pot or container
  • Potting mix (ideally a blend of sand and peat or one intended for herbs)
  • Hormone for rooting (optional, but helpful)
  • A tiny greenhouse or a plastic bag (optional)

2. Procedure for propagating lavender from cuttings:

  • Look at your mature lavender plant’s stalks. Look for straight, healthy stems that are free of pests and have a nice color but no buds. Choose a long stem and mark the point at which the old growth gives way to the new growth. It needs to be between 4 and 6 inches long. Slice slightly below a leaf node, which is the junction of a leaf and stem.
  • Clear the lower two inches of the stem of all leaves to give the new cutting enough room to develop strong roots. Those leaves will no longer be able to photosynthesize since this portion of the stem will be buried in the ground.
  • Add potting mix to the pot until it reaches an inch below the rim. Wet the potting mix slightly. Using a pencil or stick, make a small hole in the mixture, and then place the cutting into it. To keep the cutting in place, compact the dirt surrounding it.
  • Dip the cut end in rooting hormone if you’re using it—this is an optional step. Lavender can root without it, however this can aid in promoting root growth.
  • Make sure the exposed stems of each cutting are buried beneath the earth as you plant it. To assist hold each cutting in place, carefully compact the dirt around it with your fingertips.
  • Place the pot in a warm area that receives plenty of indirect sunlight. Keep the soil moist but not too wet and soggy. Over the following two to four weeks, keep an eye on the cuttings.
  • The cuttings should begin to establish roots within 4-6 weeks. To check for root growth, you can gently tug on them to see if there is any resistance. The cuttings can be moved into bigger pots or straight into the garden once they have established a robust root system.

To sum up, growing new plants from old ones is a satisfying way for gardeners to propagate lavender, guaranteeing a steady supply of this aromatic and adaptable herb. By employing appropriate methods, including as harvesting cuttings in the appropriate season, utilizing soil that drains properly, and giving the plants enough light and moisture. Gardeners can easily learn how to propagate lavender plants by following these instructions. This technique supports the sustainability of lavender cultivation for future enjoyment and use, in addition to adding to the beauty and fragrance of gardens.

Certainly! If you’d like to learn more, please consider following our WhatsApp Channel: Harvest Gardening

Q1: How to propagate lavender in water?

A1: Cut a healthy 4-6 inch stem just below a leaf node, remove the lower leaves, and lay the stem in a glass of water with the node submerged to propagate lavender in water. In a few weeks, roots should start to form if the water is changed frequently.

Q2: What is rooting hormone?

A2: A chemical known as “rooting hormone” encourages the formation of roots in plant cuttings, facilitating the quicker and more successful establishment of roots. Auxins and other plant hormones are usually present.

Q3: What is the easiest way to propagate lavender?

A3: Lavender is most easily propagated by taking softwood cuttings in the spring or early summer and rooting them in wet, well-drained soil.

A quick and easy method for creating new plants from old ones is to propagate basil. Basil cuttings are typically taken below a leaf node, concentrating growth hormones. Soaked or inserted into the soil, they grow roots and establish themselves for transplantation. This technique increases basil production and ensures consistent harvests throughout the growing season. This is a step-by-step tutorial on how to propagate basil.

When the basil plant is actively growing, late spring or early summer, is the ideal time to propagate it. Basil has enough energy right now to grow new roots, which facilitates the establishment of cuttings. You may reproduce basil plants by seed or cuttings at any time of year if you cultivate them indoors or in a greenhouse. Start basil seeds 6–8 weeks before your area’s last frost if you wish to start from seed indoors and transplant them outside later. Wait to spread the seed until all chance of frost has passed and the temperature is beyond 50 F (10 C) if you want to direct sow outside.

If you’ve ever stored freshly cut basil stems in water for cooking as needed, you’ve probably observed that after about a week, the stems start to sprout new roots. Basil grows easily in water and has to be regularly watered and refreshed. You’ll need a clear container, clean water, and a sharp, sterilized snipper.

  • Choose fresh, leafy basil stems that are green in abundance. Stems that are weak or blooming should not be clipped.
  • Using a clean, sharp knife or scissors, cut the stems slightly above a node, which is the point where a leaf meets the stem. Make a 45-degree cut.
  • The top two or three sets of leaves remain after removing the lower leaves from the cutting.
  • Wet the potting mix or add water to a clean glass or jar.
  • Make sure the node is completely submerged before inserting the stem’s cut end into the rooting liquid.
  • If using rooting hormone, apply it as directed on the product label to the cut end of the stem.
  • The glass or jar should be placed in a bright, warm area—not in the direct sun.
  • Cover the glass or jar with a clear plastic bag or a cloche to maintain humidity.

  • Roots should develop within 1-2 weeks. Once roots have developed, you can transplant the new basil plant into a pot or garden bed.

Growing basil cuttings in soil bears similarities to growing them in water. Both approaches are easy to use and typically work well. assemble a sterile, sharp snipper, fresh leaves on stalks of basil, Planting mix, tiny pots or cell trays (minimum 1-2 inches deep), water, and liquid or powdered rooting hormone (Optional).

  • Moistened potting mix should be added to the small pots or cell trays.
  • Bury the chopped end of the stem in the ground until it reaches the node (the place where the cut was made). Gently compact the earth.
  • Apply rooting hormone to the cut end of the stem as directed by the product’s instructions, if using it.
  • Thoroughly but gently water the soil.
  • The pots or cell trays should be placed in a bright, warm area away from direct sunlight.
  • To keep the humidity levels stable, place a cloche or a clear plastic bag over the pots or cell trays.
  • It should take 1-2 weeks for roots to appear. You can take off the cloche or plastic bag once the roots have grown.

To sum up, propagating basil is an easy and efficient method of creating new plants from older ones. You can quickly reproduce your basil plants and guarantee a steady supply of fresh herbs by employing techniques like stem cuttings or seed sowing. The young plants will flourish if the propagation procedure is handled properly, which includes giving them enough light, water, and warmth. Whether you’re a novice or an expert gardener, you understand how to propagate basil by following this guide.

Certainly! If you’d like to learn more, please consider following our WhatsApp Channel: Harvest Gardening

Q1: How to propagate basil from flowers?

A1: Gather the seeds from the dried flower heads of the basil plants after letting the blossoms dry on the plant. Sow the seeds in the ground and make sure they stay moist until they sprout.

Q2: Is it better to root basil in water or soil?

A2: Basil is best rooted in water because it’s easier to keep an eye on it and avoid overwatering; that being said, rooting in the soil can produce thicker, more durable roots that can be transplanted later.

Q3: Can basil propagate in water?

A3: Yes, basil can propagate in water. All you have to do is put a cutting of basil in a glass of water, and after a few weeks, it will start to grow roots.

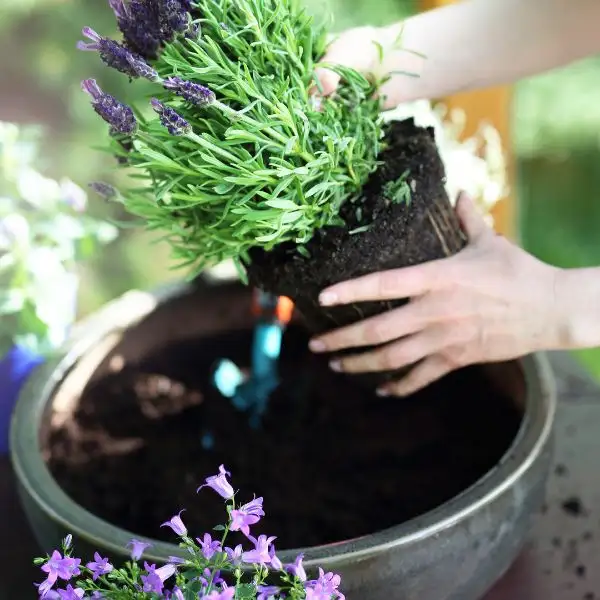
The proper timing of planting lavender is critical to its optimum growth. Springtime, when the risk of frost has passed and the ground has warmed up, is the best time to grow lavender. In this way, during the growing season, the young plants can establish their roots. Lavender can also be planted in the fall to give it a head start before the next spring in areas with moderate winters. When lavender is planted at the right time, it flourishes and produces fragrant foliage and lovely blooms. We’ll help you determine when to plant lavender with this guide.

Growing lavender from seeds is most effective in late winter to early spring, usually between February and April. Because of this timing, the seeds can sprout as the days become longer and the weather gets warmer. To give the seedlings a good start before moving them outside, start the seeds indoors approximately 10 to 12 weeks before the final anticipated date of frost. After the risk of frost has gone, the seedlings can be transplanted to a sunny, well-drained area in the garden.

1. Springtime (late April–early May)

  • Lavender is best planted in the spring, especially after the last frost. Lavender can form robust roots before the extreme summer heat since the soil is starting to warm.
  • Lavender has a full growth season to mature and adjust to its surroundings when planted in the spring. Because there is less chance of waterlogging the soil, this timing also lowers the risk of root rot.

2. Fall (late September – early October)

  • Early fall is another suitable time, particularly in warmer climates. The cooler weather helps the plant focus on root development rather than top growth.
  • Planting in fall gives lavender a head start for the next growing season. The roots can establish in the cooler months, leading to stronger growth in spring.

3. Avoid planting in summer and winter

  • Midsummer plantings may cause stress to the plant because of the dry, hot weather. If planting in the summer is necessary, make sure the lavender has enough water to establish itself.
  • Winter is not the best time to plant lavender because of the low temperatures and risk of frost, which can harm young plants without established roots.

The proper timing of planting lavender is critical to its optimum growth. Lavender is best planted in the spring, once the risk of frost has passed and the ground has warmed. In this way, during the growing season, the young plants can establish their roots. Lavender can also be planted in the fall to give it a head start before the next spring in areas with moderate winters. When lavender is planted at the right time, it flourishes and produces fragrant foliage and lovely blooms. You can discover why and when to plant lavender at its finest by adhering to these suggestions.

Certainly! If you’d like to learn more, please consider following our WhatsApp Channel: Harvest Gardening

Q1: How do I prepare the soil for planting lavender?

A1: Lavender grows well on slightly alkaline, well-drained soil. Healthy growth requires the incorporation of organic matter into the soil and the maintenance of adequate drainage.

Q2: When to plant lavender zone 7?

A2: The optimum time to plant lavender in Zone 7 is usually in the spring, following the last frost, which falls between April and May. This enables the plant to develop roots ahead of the summer’s heat.

Q3: Can lavender be grown in containers?

A3: It is possible to cultivate lavender well in pots. Use a potting mix that drains properly and select a pot with adequate drainage. Containers are an excellent choice for regions with colder winters and for managing soil conditions.

Q4: When to plant lavender in Texas?

A4: Lavender grows best in Texas in the early spring, following the last frost, or in the fall, when the roots have time to take hold before the summer heat. Make sure the soil has good drainage and an abundance of sunlight.

Pruning rosemary is vital for keeping the plant healthy and alive and fostering new development. Regular pruning of rosemary, a tough evergreen plant, prevents it from being too woody and encourages a bushier shape. These are some crucial guidelines on how to prune rosemary.

To keep rosemary healthy and encourage rapid development, pruning is necessary. Frequent pruning reduces disease risk, promotes bushier growth, and keeps the plant from getting too woody or lanky. It also enhances air circulation. Furthermore, pruning ensures that the plant produces more fragrant leaves that are ideal for culinary usage and help form the plant, making it more aesthetically beautiful.

When the rosemary plant has done flowering, prune it in late spring or early summer. This time promotes healthy new development and enables the plant to recuperate swiftly. As you shape the plant to the right size, concentrate on cutting off any dead or broken branches. Stems can be slow to regrow from woody, older sections of the plant, so try to avoid cutting into them. Pruning rosemary regularly keeps it bushy and keeps it from getting too woody or overgrown.

  • For precise cuts, use scissors or pruning shears with sharp edges. Illnesses are stopped from spreading by clean instruments.
  • To maintain the health of your rosemary, wipe the blades with rubbing alcohol both before and after pruning.
  • To keep the plant bushy or spherical, trim the outer branches. Try not to remove too much of the center.
  • Prune to increase the plant’s internal airflow, which helps ward off fungus-related illnesses. Eliminate any branches that are dead, broken, or crossing.
  • Never cut a leaf close to its node or where new growth is beginning. This promotes the growth of new branches.
  • Stems that are woody and aged should not be cut into since rosemary does not grow well from these locations. Concentrate on pruning flexible, green stems.
  • Plants should never have more than one-third removed at once. Pruning a plant too much might cause stress and impede its growth. Rejuvenate your overgrown or woody rosemary by pruning a little more each year instead of all at once.
  • After cutting, give the plant plenty of water to aid in its recovery and promote new growth. To encourage healthy regrowth, treat sparingly with a balanced organic fertilizer

Trimming rosemary is an easy yet necessary operation to maintain the plant’s health and productivity. By regularly pruning the plant, you may keep it from getting too woody, promote new growth, and preserve its shape. Pruning is best done in the spring or early summer when a third of the plant should be trimmed back. Dead or overgrown branches should be removed in particular. You may learn how to prune rosemary properly by following these tips.
Certainly! If you’d like to learn more, please consider following our WhatsApp Channel: Harvest Gardening

Q1: How to prune rosemary in a pot?

A1: Trim back the upper third of the rosemary plant in a pot, paying particular attention to removing any woody stems and cutting slightly above a leaf node. This keeps the plant from growing lanky and promotes bushier growth.

Q2: Can I prune rosemary in winter?

A2: Winter pruning should be avoided as much as possible, especially in colder regions where plants are more vulnerable to frost damage. If necessary, light pruning of damaged or dead branches is acceptable.

Q3: What should I do if my rosemary becomes too woody?

A3: If your rosemary becomes too woody, you can cut it back hard in early spring. However, be careful not to cut into the oldest wood, as this might not regenerate. Focus on cutting back to where you see some green growth.

Q4: Is it okay to prune rosemary flowers?

A4: You can trim the blossoms of rosemary, yes. This can promote increased leaf growth and keep the plant from expelling too much energy in the process of producing seeds.

A joyful and satisfying activity, gardening enhances our lives with fresh produce, beauty, and peace. But gardens are at the mercy of nature, and one of the hardest enemies gardeners have to contend with is persistent rain. Although rain is necessary for plants to develop, too much rain can cause a variety of issues such as nutrient loss, root rot, soil erosion, and plant damage. This article will provide useful information and practical advice on how to protect plants from heavy rain.

1. Enhance soil drainage:

To strengthen the soil’s structure and drainage, add compost or well-rotted manure. Cover your plants with a thick layer of organic mulch. Mulch lessens soil erosion by absorbing excess water. Raised beds help enhance drainage and keep water from collecting around the roots of your plants.

2. Coverage

To protect your plants from wind and rain damage, cover them with overturned pots, bowls, buckets, or other suitable-sized containers. To keep the coverings in place, be sure to weigh them down. Bricks, cement blocks, and pebbles will all function perfectly.

3. Pick resilient plant varieties

Choose plant cultivars that are reputed to tolerate prolonged periods of rainfall. Because they are adapted to the local environment, native plants are frequently a suitable choice. These plants are less sensitive to water stress because they are more sturdy and have access to deeper soil layers.

4. Row Covers

A thick row cover, sometimes known as a frost blanket, can help shield smaller plant beds and rows from storm damage. When using this strategy, it’s crucial to weigh the row cover down firmly and leave additional space on either side before a significant storm.

5. Use the right planting techniques

Plants should be arranged suitably to allow for enough air circulation, which speeds up their drying out after rain. Plant plants on small mounds to enhance runoff if the plants are especially susceptible to waterlogging.

Lastly, how to protect plants from heavy rain? To maintain the health and longevity of your plants, you must shield your garden from prolonged periods of precipitation. It is possible to shield your garden from the destructive effects of prolonged rain by using these precautionary steps. Proper planting methods, effective drainage systems, and temporary protection measures will all work together to keep your plants robust and healthy.

Certainly! If you’d like to learn more, please consider following our WhatsApp Channel: Harvest Gardening

Q1: Are there specific types of plants that are more resilient to heavy rain?

A1: Yes, some plants—like ferns, marsh milkweed, and marsh marigold—do better in damp environments. Garden resilience can be increased by choosing plants that can withstand severe rain in locations that are prone to it.

Q2: How to protect plants from frost?

A2: Plants should be covered with cloths or frost blankets for protection from frost, and the soil should be watered in the afternoon to retain heat. As an alternative, bring indoors or into a greenhouse potted plants.

Q3: How to protect plants from wind damage?

A3: To lessen the effects of severe winds and shield delicate plants from damage to stems and leaves, use windbreaks like fences or shrubs around them.

You may find everything you need to prepare homemade fertilizer in your kitchen and yard, which can help you achieve lush, colorful plants. These homemade mixtures save money, encourage sustainable gardening methods, and lessen the need for dangerous pesticides.

Homemade fertilizer made from banana peels:

  • Potassium is abundant in banana peels, encouraging plants to blossom and bear fruit.
  • To make a potassium-rich liquid fertilizer, just slice up banana peels and bury them around the base of your plants or soak them in water for a few days.

Using compost Tea:

  • For your plants, compost tea is like liquid gold because it offers a variety of nutrients in an easily absorbed form.
  • Fill a bucket with water, then top it off with compost. Stir it once in a while as you let it steep for several days. Use the nutrient-rich liquid that remains after straining out the sediments to water your plants.

Fish emulsion fertilizer:

  • A powerful fertilizer high in phosphorus, nitrogen, and trace minerals is fish emulsion.
  • Fish heads or leftovers should be blended with water until liquefied. To fertilize your plants, strain out any sediments and dilute the mixture with water.

Homemade Fertilizer with eggshells:

  • Calcium from eggshells is excellent for preventing blossom end rot in tomatoes and peppers.
  • Dried eggshells can be ground into a fine powder and added to the soil before planting, or they can be sprinkled around the base of your plants.

Fertilizer made of weed tea:

  • Make good use of those annoying weeds by converting them into fertilizer rather than throwing them out.
  • Add a good handful of weeds to a bucket of water. For a few weeks, let them break down, stirring now and then. Use the resulting “weed tea” as a plant food by diluting it with water.

You may lessen your need for chemical fertilizers and provide your garden with natural, nutrient-rich solutions by using these homemade fertilizer tips. Try out a variety of recipes and methods to see what suits your plants and soil the best.

Certainly! If you’d like to learn more, please consider following our WhatsApp Channel: Harvest Gardening

Q1: Can I fertilize any kind of plant with homemade fertilizer?

A1: A vast range of plants, including decorative plants, fruits, vegetables, and flowers, can be fertilized with homemade fertilizer. However because overfertilization can damage plants, it’s imperative to use it sparingly. It’s also a good idea to investigate your plants’ needs before applying homemade fertilizer, as some delicate plants could need particular kinds of fertilizer.

Q2: What are the benefits of using homemade fertilizer?

A2: A few advantages of homemade fertilizer are affordability, sustainability, and the capacity to adjust nutrient levels to meet the requirements of certain plants.

Q3: Can I use coffee grounds as homemade fertilizer for indoor plants?

A3: It is possible to use coffee grinds as indoor plant fertilizer. All you have to do is scatter the coffee grounds around the base of your plants, making sure they don’t bunch together. Nitrogen, potassium, magnesium, and other minerals that are good for plant growth can be found in coffee

Known for its creative use of raised beds separated into square foot parts, square foot gardening is a departure from conventional gardening methods. Even in small urban spaces, gardeners may maximize space, reduce waste, and produce an abundance of harvests by skillfully arranging plants inside these defined regions.

  • Raised Beds: The garden is constructed using raised beds, each 4 feet by 4 feet. After that, it filled with a nutrient-rich growing medium made of compost, peat moss, and vermiculite.
  • Grid System: Using a real or imaginary grid, each raised bed is divided into portions measuring square feet. This facilitates planting organization and facilitates varying crop spacing.
  • Intensive Planting: Depending on the size of the plant, a certain number of plants are planted in each square foot. Larger plants like tomatoes require a full square foot, while smaller plants such as lettuce can be planted four to a square foot.
  • Crop Rotation: In the square foot sectors, we rotate crops every season to prevent soil depletion and pest problems.
  • Companion planting: Plants grow together and help each other out by sharing nutrients and keeping pests away
  • Pick a location with good drainage and at least 6 to 8 hours of sunlight per day. Avoid places with inadequate drainage or lots of shade.
  • Construct or buy an elevated bed that has a minimum depth of 6 to 12 inches. Square foot gardening has no set size. This is a standard dimension of 4 feet by 4 feet ensuring easy access from all directions.
  • Fill the raised bed with premium, well-draining soil. For square foot gardening, a standard mixture is equal parts compost, peat moss, and perlite or vermiculite. To make loose, fertile soil, thoroughly mix these components.
  • Make a grid to divide the raised bed into portions that are each square foot. Mark off each square foot using wooden slats, twine, or any other material. This grid facilitates correct crop spacing and helps to coordinate the planting process.
  • Plant a different kind of vegetable or herb in each square foot, following the plant’s recommended spacing. Based on the size of the mature plant, the square foot approach usually enables 1, 4, 9, or 16 plants per square foot. To prevent crowding and guarantee appropriate growth, adhere to the spacing standards.
  • After planting, give the raised bed a thorough watering to help settle the soil and promote healthy root contact. Sustain a consistent watering schedule to keep the soil consistently moist but not drenched. To prevent wetting the leaves, which might cause disease, irrigate the plants from the base up.
  • Spread a layer of organic mulch on the soil’s surface, such as straw or shreds of leaves, to help hold in moisture, keep weeds at bay, and control temperature.
  • Regularly monitor your garden for pests, illnesses, and nutritional deficiencies, and take care of plants by pulling weeds, trimming blossoms, and supporting climbing plants as needed.
  • Crop rotation is planting various kinds of crops in each square foot from season to season to prevent soil depletion and insect accumulation.

In summary, this gardening strategy is perfect for tiny yards or urban settings since it emphasizes increasing output in a constrained amount of space. Through meticulous planning and application of square foot gardening methods, people can effectively grow a wide variety of foods with minimal wastage and needless labor.

Certainly! If you’d like to learn more, please consider following our WhatsApp Channel: Harvest Gardening

Q1: What is Square Foot Gardening?

A1: Mel Bartholomew created the gardening technique known as “square foot gardening” in the 1980s. It entails constructing square-foot-sized raised beds that are compact and heavily planted.

Q2: Can I use Square Foot Gardening for growing fruits?

A2: A person can use a Square Foot Garden to grow various fruits, including melons, cucumbers, dwarf fruit trees, raspberries, and strawberries. Just make sure larger plants have enough room and, if necessary, support structures.

Q3: Can I practice Square Foot Gardening indoors?

A3: Yes, you can use raised beds or containers in a sunny spot—like next to a window or on a balcony—to grow indoors following the concepts of Square Foot Gardening.

Knowing how to prune roses is essential for maintaining healthy and beautiful plants. Roses are adored floral plants, and pruning is a necessary activity to keep them healthy, shaped, and capable of blooming. Rose Bushes can be made to grow robustly, blossom profusely, and have general vitality by gardeners pruning off dead, damaged, or overgrown branches. To prevent harming the plants, it’s imperative to comprehend the unique requirements of each rose kind and to use the proper methods. We will discuss how to prune roses in this article, along with the necessary tools and when to prune.

When to prune roses:

Right before new growth appears, late winter or early spring is the ideal time to prune roses. This usually occurs in late February or early April in most places. But it’s important to take into account your unique climate and your roses’ habits. It could be necessary to wait until the risk of frost has passed if you have exceptionally cold winters.

Rose-pruning instruments:

To make precise cuts, use secateurs or pruning shears that are clean and sharp. Before and after pruning, thoroughly clean your instruments to stop the spread of illness.

Technique for how to prune roses:

  • First things first, take out any sick, damaged, or dead wood. Make neat, angled incisions to return to healthy tissue.
  • To enhance air circulation and lower the danger of disease, remove any branches that are crossing or rubbing against one another.
  • Try to make the plant’s center more open to let in light and air, as this promotes robust, healthy development.
  • Strong, robust canes should be trimmed back to a height of 18 to 24 inches, leaving three to five buds facing outward.
  • Cut down hybrid tea roses to just above an outward-facing bud, removing roughly one-third to one-half of the previous year’s growth.
  • Though they might not need as much pruning, climbing roses still need to have any overgrowth and dead or weak wood removed to keep their ideal shape.
  • Even though they don’t always need exact pruning, shrub roses can nevertheless benefit from shape and deadheading.

To sum up, having a vigorous and healthy garden depends on knowing how to prune roses properly. Gardeners may encourage the best possible growth, flowering, and general vitality in their rosebushes by using the right tactics. Important things to keep in mind are when and how to prune, the use of clean, sharp equipment, and knowledge of the particular requirements of various rose kinds. Anyone can create an amazing display of gorgeous roses in their yard with a little knowledge, patience, and effort.

Certainly! If you’d like to learn more, please consider following our WhatsApp Channel: Harvest Gardening

Q1: How do I care for my roses after pruning?

A1: Give your roses a thorough watering after trimming to aid in their recovery from the strain of the cut. To promote healthy development, use a balanced fertilizer, and think about covering the base of the plant with mulch to keep moisture in and keep weeds out.

Q2: How to prune roses in summer?

A2: Roses should be pruned in the summer to promote new growth, remove dead or diseased wood, and shape the plant to the desired shape and structure.

Q3: How to prune roses for winter?

A3: When pruning roses for the winter, remove any crossed or inward-facing stems to promote outward growth and airflow and clip back any dead or diseased branches, cutting just above healthy buds.

Trench composting is a proven method for improving garden soil health and vitality. Integrating organic matter directly into the soil, reducing waste, and making composting easier for gardeners of all skill levels. We will examine the fundamentals of trench composting and its advantages and useful applications in this extensive tutorial.

  • Select a Location: For trench composting, choose a location in your yard or garden that works well. It should be in a location where you can readily add organic waste and where there is enough sunshine.
  • Excavate a trench: Cut a trench that is between one and two feet deep using a shovel or spade. Depending on the amount of organic waste you have and the space you have available, the trench’s breadth and length may change.
  • Layering: Begin filling the trench with layers of organic materials. To produce a balanced compost mix, alternate layers of green (nitrogen-rich) and brown (carbon-rich) materials. Kitchen leftovers, grass clippings, and plant trimmings are examples of green materials; dried leaves, straw, and newspaper are examples of brown materials.
  • Wrapping: Once you’ve filled the trench with organic trash, add a layer of dirt. This keeps pests away and aids in controlling the composting process.
  • Maintenance: As organic waste breaks down in the trench, add more of it regularly. The process of stacking green and brown materials remains unchanged. Watering the trench on occasion will also assist in keeping it moist, which is important for the composting process.
  • Await Decomposition: The organic materials in the trench will eventually break down and transform into compost that is rich in nutrients. Depending on variables including moisture content, temperature, and the kind of materials utilized, this process may take several months to a year.
  • Applying organic matter directly to the soil by trench composting improves its quality. The fertility and structure of the soil are enhanced as a result of the organic material’s decomposition, which releases nutrients.
  • Trench composting minimizes nutrient loss and maximizes plant uptake by allowing nutrients to be directly taken by plant roots, in contrast to standard composting procedures where nutrients may seep away.
  • This composting is an efficient approach to recycling organic waste, such as kitchen leftovers and garden detritus, minimizing garbage sent to landfills.
  • This composting can help reduce weed development by covering the rotting organic material with dirt. This stops weed seeds from germinating by reducing their exposure to light.
  • The addition of organic matter via trench composting enhances the soil’s ability to hold water. This can lessen the need for frequent irrigation, which can be especially helpful in drought-prone areas.

Finally, trench composting provides an easy and efficient way to increase the fertility of plant soil. Organic waste can be directly buried in the garden bed to release nutrients over time, enriching the soil and encouraging healthy plant development. This method contributes to a more productive and sustainable garden environment by decreasing waste while also improving soil structure and microbial activity.

Certainly! If you’d like to learn more, please consider following our WhatsApp Channel: Harvest Gardening

Q1: Can I trench compost in winter?

A1: Yes, you can compost in a trench over the winter. Even though the breakdown process happens more slowly in colder climates, it still happens.

Q2: Will trench composting attract pests in winter?

A2: In winter, properly maintained trench composting shouldn’t draw pests. Meat, dairy, and fatty meals should not be composted since they attract rodents and other pests.

Q3: Will trench composting cause unpleasant odors?

A3: There’s a chance that this composting site will smell, especially in the early phases of decomposition. This can be problematic, especially in crowded or metropolitan location

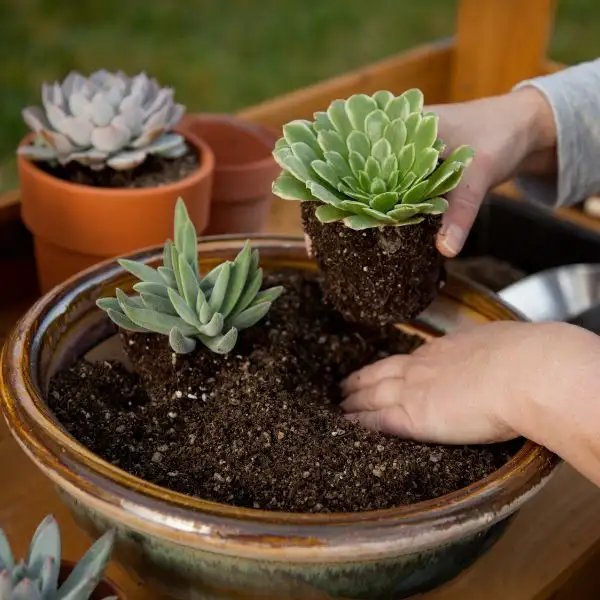
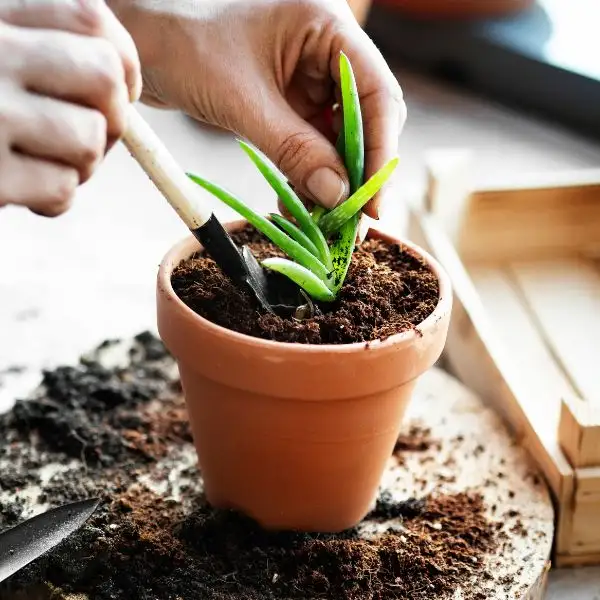
Leaf propagation is an intriguing and satisfying way to create new plants from existing ones. It’s an easy and economical way to add more plants to your collection; you can utilize houseplants, herbs, and succulents among other plant varieties. We’ll go over the fundamentals of leaf propagation in this beginner’s tutorial, along with step-by-step directions to help you effectively develop new plants from leaves.

Select well-being leaves

Choose leaves from mature, healthy plants. Seek for leaves devoid of bugs, diseases, or damage. The best probability of creating viable offspring is with healthy leaves.

Choose appropriate plants for leaf propagation

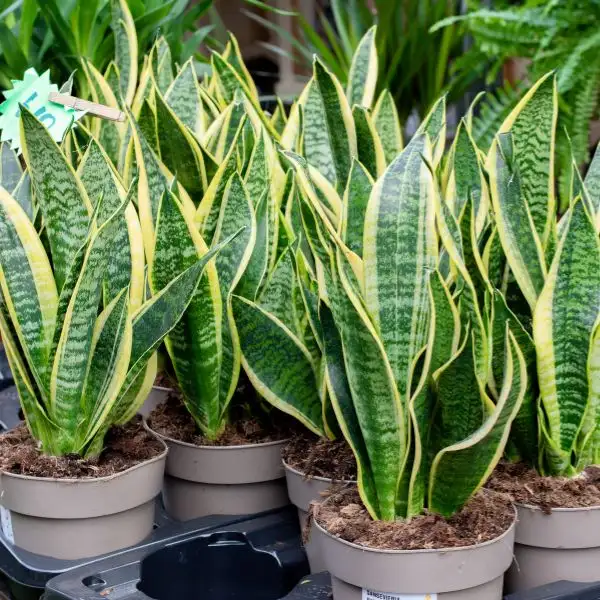
Not every plant can be multiplied via leaf-grafting. Succulents like snake plants and jade plants, as well as some houseplants like pothos and begonias, are popular options for leaf propagation. To guarantee success, learn about the particular needs of the plant you want to propagate.

Make clean cuts

Make sure to use sharp, clean scissors or pruning shears to make clean cuts while removing leaves for propagation. Steer clear of tearing or injuring the leaf as this may hinder its ability to root well.

Give leaves time to callus

Once the leaves are removed, let them air dry for a few days in a warm, dry place, until the cut ends get callused. When the leaves are planted in soil or water for proliferation, this helps keep them from decaying.

Select the appropriate media

Depending on the type of plant, leaves can be multiplied either in water or soil. Soil propagation is preferable for many houseplants, including succulents. Make use of a well-draining soil mixture, like potting soil plus sand or perlite. Place the leaf cuttings in a container designed for water growth, making sure that only the cut end is submerged in the water.

Leaf propagation requires sufficient light and moisture

Plant the propagated leaves in an area with indirect, bright light. Keep them out of direct sunlight to prevent the leaves from drying out or scorching. To add humidity, sometimes shower the leaves and keep the soil slightly damp but not soggy.

Carefully transplant

Plant the newly sprouted plants gently into individual pots filled with soil that drains properly once roots have grown and new growth has become apparent. Take extra care not to injure the fragile roots.

Monitor and care for new plants

As the new plants grow, keep a watch on them. To promote healthy growth, give proper care, such as routine watering, fertilizing (if needed), and sporadic pruning.

Leaf propagation is a simple and gratifying method for increasing your plant collection and creating new plants from existing ones. Through adherence to these fundamental guidelines and appropriate maintenance, leaf propagation can prove to be successful even for novices. Try out various plants and methods to see what suits you the best, and take pleasure in seeing your new plants flourish.

Certainly! If you’d like to learn more, please consider following our WhatsApp Channel: Harvest Gardening

Q1: What materials do I need for leaf propagation?

A1: A good potting mix or growing media, pots for planting, a clean, sharp knife or pair of scissors for taking cuttings, and healthy leaves from a parent plant are all you’ll need.

Q2: What is leaf propagation?

A2: One method of plant multiplication called “leaf propagation” involves starting a new plant from a leaf or a piece of a leaf. Certain plant species, such as succulents and some houseplants kept indoors, are commonly treated in this way.

Q3: Can you propagate succulent leaves in any way?

A3: Even though leaves are a viable means of propagating many succulent species, not all leaves will bear fruitful offspring. Certain leaves may not be able to take root or generate viable progeny because of environmental or genetic causes.

In gardening, lovers frequently look into natural and alternative ways to care for their plants to achieve the best possible health and vitality. A tried-and-true, environmentally beneficial method is making your compost tea. However, It is a superfood for plants, full of organic matter, microbes, and vital minerals that support strong, resilient growth.

Making your compost tea brewer

To begin, what you’ll need is as follows:

  • Compost: Make use of well-aged compost that has a blend of brown and green components. This will guarantee a wide variety of microbes and nutrients.
  • Water: Make sure it’s chlorine-free. Before using your tap water, let it sit for a full day if it includes chlorine.
  • Molasses: Rich in beneficial microbes, can be used without sulfur, as sulfur inhibits microbial activity.
  • Aeration Equipment: To guarantee proper aeration, you’ll need an aquarium pump, airstones, or a compost tea maker. So, this encourages the growth of aerobic microorganisms that are useful.
  • Strainer or Cloth Bag: To remove bigger particles from this.

Instructions:

  • Gather water, molasses, compost, and aeration supplies.
  • To maintain a healthy water supply, mix 1 cup of well-aged compost with one or two tablespoons of molasses for every gallon of water.
  • The compost can be steeped like a tea bag by placing it in a cloth bag or directly into water, ensuring it is securely tied.
  • Mix molasses with water and compost mixture, as molasses serves as a food source for microbes.
  • Set the airstones in its mixture and turn on the aquarium pump. If using a compost tea brewer, aerate the tea according to the manufacturer’s directions.
  • Give the compost tea a full day or two to brew. To promote microbial development, occasionally stir the liquid.
  • So, After fermentation, remove the compost bag and strain it using cheesecloth or a fine mesh sieve to remove any remaining solids.
  • To use concentrated compost on plants, dilute it with water using a 1:10 ratio.
  • It can be used as a water source for plants, and applied to the soil and leaves using a sprayer or watering can.
  • For optimal results, use it immediately and store it in a shaded area for a day or two.

Making your compost tea is an innovative way to farm that not only feeds plants but also revitalizes the soil, supporting organic gardening that is sustainable and reduces the need for synthetic fertilizers.

Certainly! If you’d like to learn more, please consider following our WhatsApp Channel: Harvest Gardening

Q1: What is compost tea?

A1: It is a liquid fertilizer made by soaking compost in water, containing nutrients and organic materials, which also promotes soil health and plant development.

Q2: Can compost tea be used on all types of plants?

A2: A multipurpose plant fertilizer. So, it provides organic nutrients to a wide range of plant species, including flowers, vegetables, fruits, and trees.

Q3: What is a compost tea brewer?

A3: It is a device used to create this tea, a liquid fertilizer rich in beneficial microorganisms. After that, it involves steeping compost in water, aerating it, and extracting the microbial essence for plant health.