Author

Avery Smith

Browsing

If you’re curious about how to grow wasabi, you’re in for a rewarding gardening adventure. A fulfilling and distinctive experience, growing wasabi at home lets you savor the unique flavor of this highly valued Japanese condiment straight from your garden. Wasabi is a versatile and tasty plant that grows well in pots, despite being generally linked with sushi. As such, it’s a great option for urban or small-space gardening. This tutorial will show you how to grow wasabi in containers, adding an elegant flavor to your home’s cuisine.

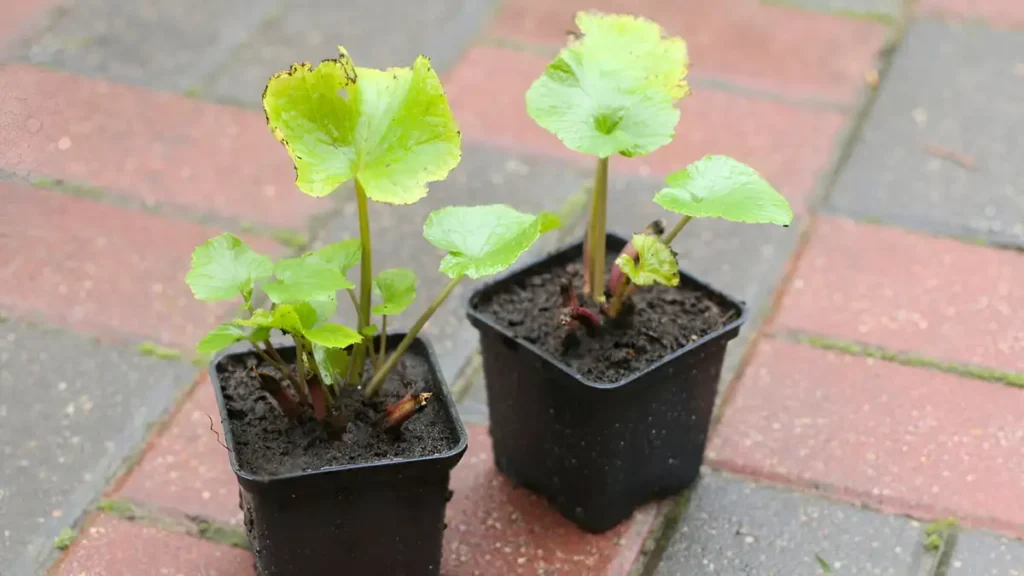
Selecting the ideal light, location, and container:

  • Choose a wide, shallow container with good drainage. Wasabi prefers a slightly acidic environment, so consider using a wood, plastic, or ceramic container.
  • Wasabi likes chilly, shaded environments. Put the container in a partially shaded or filtered sunlight area. Steer clear of direct sunlight, particularly in warmer regions.

Soil preparation for growing wasabi:

  • Rich, well-draining soil with a somewhat acidic pH is ideal for wasabi. To improve the nutrient level, incorporate compost or other organic materials into potting soil. Verify that the soil is still moist but not drenched. Drainage can be enhanced by adding vermiculite or perlite.
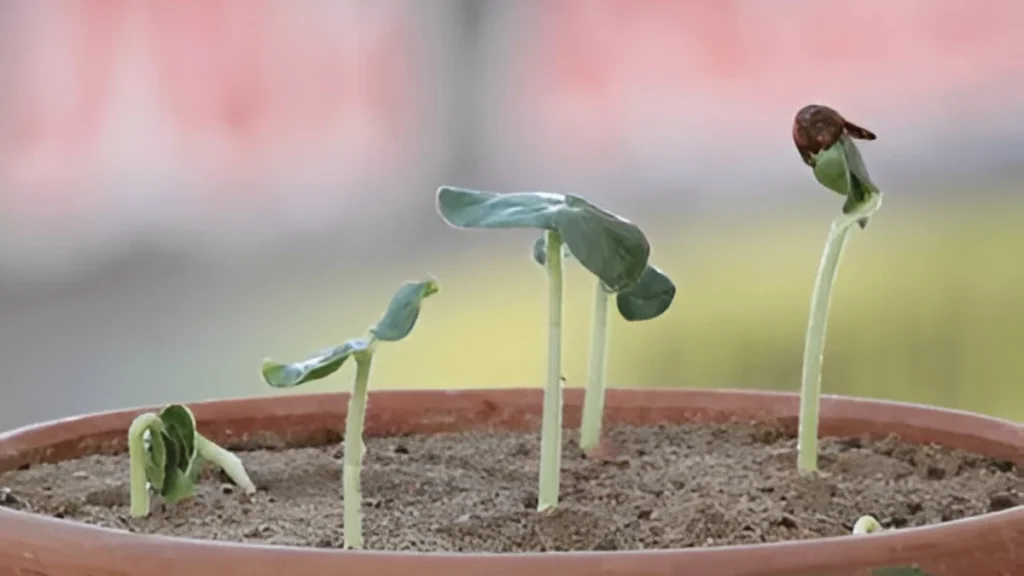
How to grow wasabi:

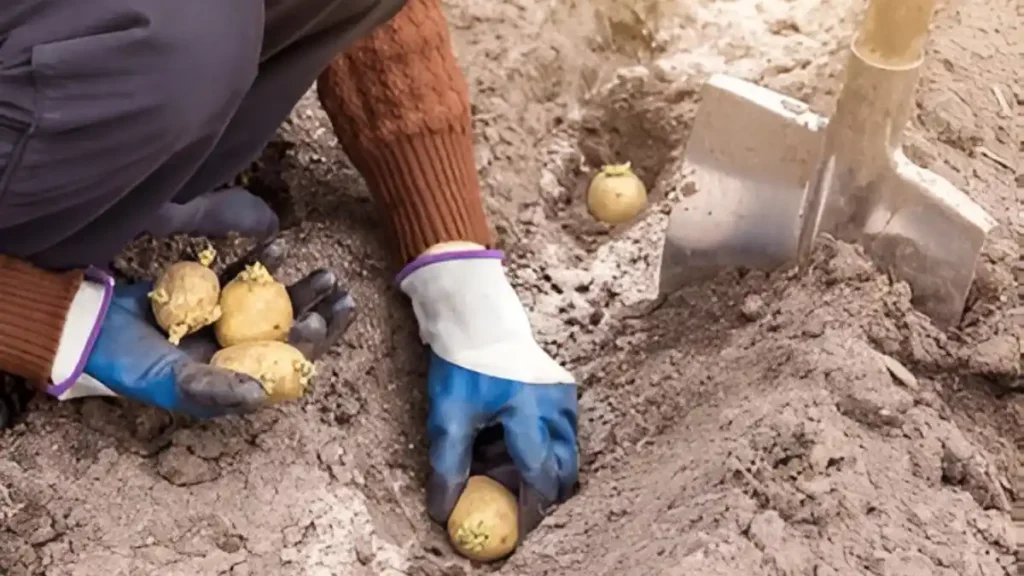
  • Wasabi can be grown from seeds or rhizomes, with rhizomes planted 2 inches deep and separated by at least 12 inches.

Watering and temperature management:

  • Wasabi plants require consistent, damp soil with adequate drainage to prevent root rot.
  • Wasabi grows best in cold climates. Keep the temperature in the range of 10°C to 21°C (10°F to 70°F). Keep the plant safe from the cold.

Feeding plants:

  • Fertilize plants every four to six weeks with a balanced, water-soluble fertilizer during the growing season, avoiding overfertilization to maintain flavor appeal.

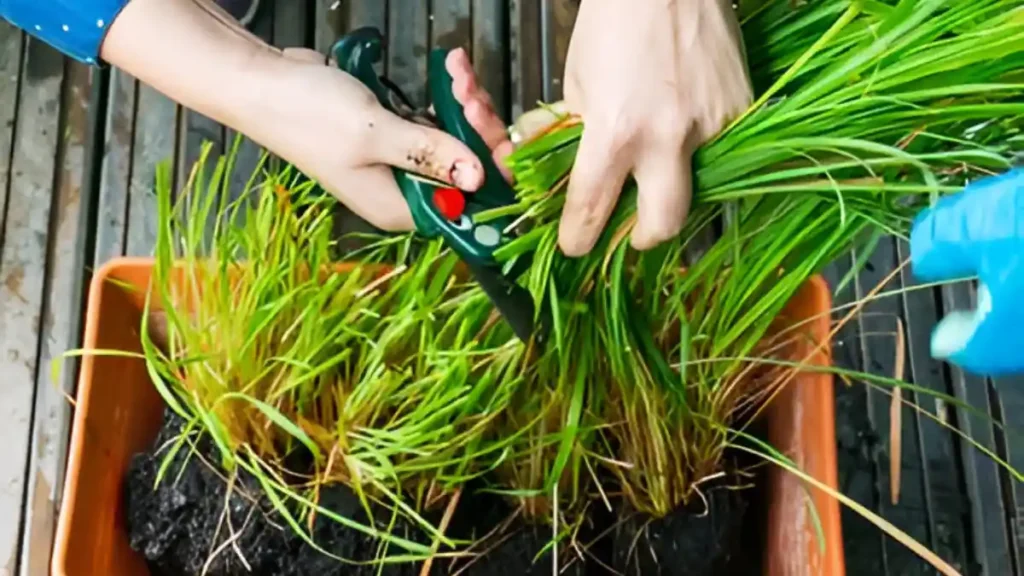
Mulching and pruning:

  • To retain moisture and keep the roots of the plant cool, cover the base of the plant with a layer of organic mulch, such as leaf mulch or straw.
  • Regularly remove any yellowed or damaged leaves. The plant can concentrate its energy on strong development as a result.

How to grow wasabi with Regular care and monitoring:

  • Watch out for pests like snails and aphids. For aphids, control methods include using insecticidal soap, and for slugs, handpicking. Maintain adequate air circulation to ward off illnesses.
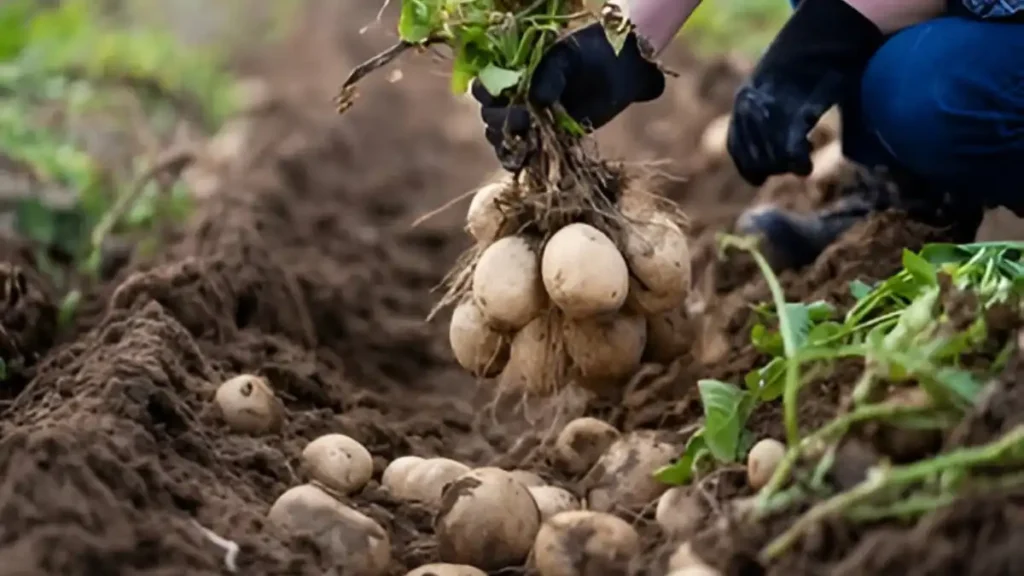
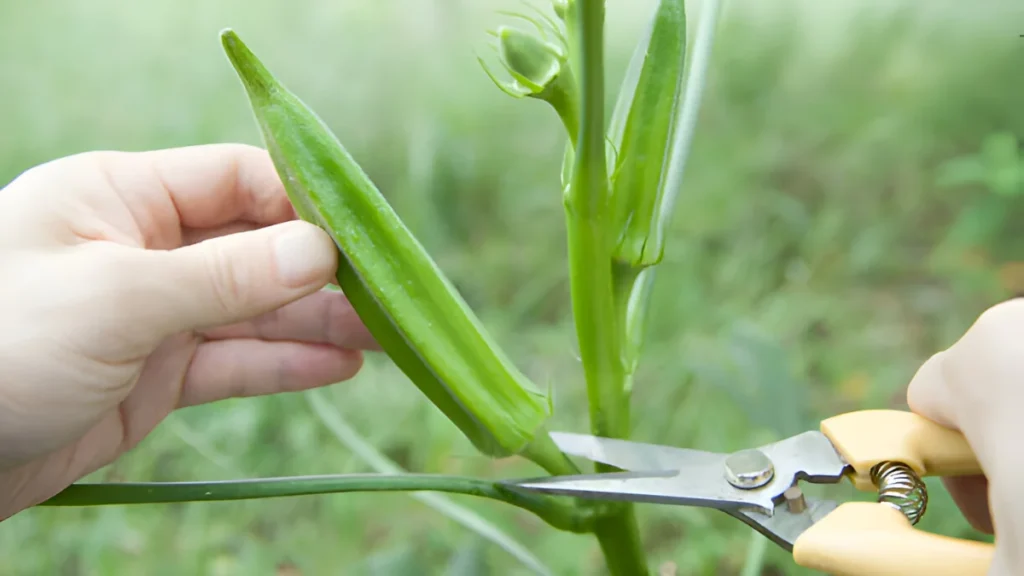
Collecting:

  • The plant’s leaves and stems can be harvested, while the sought-after wasabi roots, or rhizomes, are typically ready for harvest within a year or two.

In conclusion, how to grow wasabi at home is a rewarding and feasible endeavor. for those seeking to enjoy this unique and flavorful plant. By following a few key steps, you can successfully recreate the ideal conditions for wasabi growth, even if you don’t have access to traditional soil beds. By following these steps on how to grow wasabi, you’ll be well on your way to cultivating this flavorful and distinctive plant in your own garden.

Certainly! If you’d like to learn more, please consider following our WhatsApp Channel, Facebook, Instagram, YouTube, Twitter, and Pinterest.

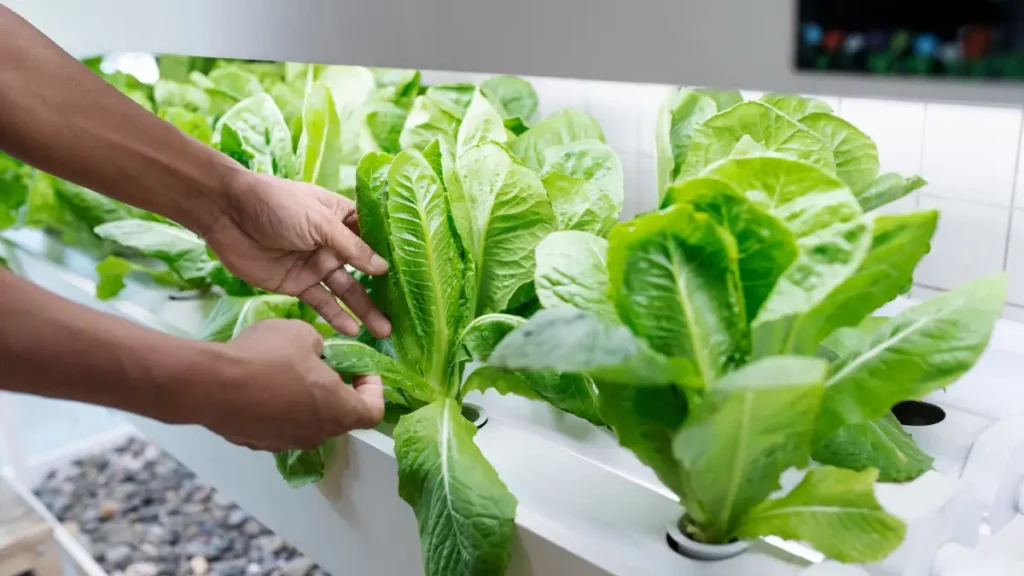
Q1: How to grow wasabi hydroponically?

A1: Maintaining a pH of 6.0–7.0, cold temperatures (around 54°F or 12°C), a well-aerated nutrient solution, and high humidity in a shaded area are all necessary for hydroponically growing wasabi.

Q2: How much light do I need for growing wasabi indoors?

A2: Wasabi likes shadows and soft light. For a minimum of twelve hours per day, provide filtered sunshine or artificial light with a color temperature of between 4000K and 5000K.

Q3: What is wasabi?

A3: Wasabi, a pungent Japanese condiment, is primarily consumed as a rhizome, used to create a spicy green paste often served with sushi.

It’s a pleasant and surprisingly easy project on how to grow potatoes at home. You don’t need a huge garden to do this; it can be grown effectively with just one potato and a container. Container gardening is a workable choice if you have limited outdoor space or want to try a handy and space-efficient technique. Potatoes are resilient and can thrive in containers, making them an ideal choice for beginners and seasoned gardeners alike. How to grow potatoes with this beginner-friendly guide. Get the right tools and tips to ensure a successful and bountiful harvest. you can learn how to grow potatoes at home and enjoy a bountiful harvest.

To begin with, you need these things:

  • One healthy potato with “eyes” (sprouts)
  • Big pot or container (at least five gallons)
  • Best potting soil
  • Either well-rotted manure or compost
  • Slow-release, balanced fertilizer
  • Hose or watering can
  • sunny area

Steps on how to grow potatoes in containers:

  • Select a disease-free, organic seed potato that is in good health. Make sure every chunk of potato has at least one “eye” (a little sprout), whether you use it whole or split it into bits.
  • Use a large pot with drainage holes, and a 10-15 gallon capacity, and add excellent potting mix, leaving 4-6 inches above the top for optimal growth.
  • Place the potato, whole if you’re using one, in the center of the container, about 4 inches deep. After chopping the potato into chunks, plant each chunk so that the sprouts (eyes) face upward and the cut side is down. Arrange the bits in the container in an even spacing.
  • Add soil to the planted potato and ensure it remains damp but not soggy throughout the growing season.
  • Pick a sunny spot for your container because potatoes require six to eight hours of sunlight each day. Use grow lights or position the container close to a sunny window if you’re growing them inside.
  • Maintain moist soil, water when dry, and cover growing tubers with more soil to protect them from sun damage.
  • Apply a balanced, slow-release fertilizer following the directions on the package as soon as the potato plants begin to grow. This will supply the nutrients required for the healthy development of potatoes.
  • Potatoes are typically harvested when the plants turn yellow and wither back, and it is important to gently dig around them to avoid damage.
To increase potato yield, rotate crops annually to prevent soil depletion. Use companion planting to repel pests, like potatoes growing alongside beans or basil. Mulch to retain moisture and control temperature, and regularly check plants for pest or illness symptoms to take appropriate action.

How to grow potatoes from a single potato in containers at home is a rewarding and straightforward gardening project. The step-by-step process describes how to grow potatoes from a single potato. planting to harvesting, emphasizing the simplicity of container gardening for potatoes. It is essential to ensure proper drainage, use nutrient-rich soil, and provide adequate sunlight to support the potato plants’ development. Regular watering and monitoring for signs of pests or diseases are crucial for a successful harvest.

Certainly! If you’d like to learn more, please consider following our WhatsApp Channel, Facebook, Instagram, YouTube, Twitter, and Pinterest.

Q1: When is the best time to grow potatoes in a container?

A1: To ensure optimal potato growth, plant potatoes in the container in early spring after the last frost has passed.

Q2: How do I grow potatoes in a bag?

A2: To grow potatoes in a bag, sow seed potatoes in a large, durable bag filled with a soil and compost mixture. Water the bag frequently and set it in a sunny spot.

Q3: What type of bucket should I use to grow potatoes in a bucket?

A3: To prevent waterlogging, use a sturdy, large bucket with drainage holes at the bottom, such as a 5-gallon bucket.

Q4: What common issues might arise when to grow potatoes in thin air?

A4: Keep an eye out for illnesses, pH imbalances, and vitamin deficits. To stop root rot, keep an eye out for obstructions in the misting nozzles and make sure the aeration is adequate.

How to grow lemongrass at home successfully? It’s effortless. You do not require a large garden or a green thumb. You can quickly see the growth of your lemongrass with just a few simple steps. Learn the magic of appropriate watering procedures, the ideal soil conditions, and the appropriate quantity of sunlight. Together, let’s demystify the craft of cultivating lemongrass. Learn how to grow lemongrass at home with this quick, easy guide. Perfect for those who want to add a refreshing herb to their home garden.

Step 1: Get stalks of lemongrass

  • To begin, purchase lemongrass stalks from a local market or grocery store. Make certain the stems are young, green, and have complete roots.

Step 2: How to grow lemongrass by choosing the right container

  • Lemongrass prefers well-drained soil, so use a container with sufficient drainage. For one or two lemongrass plants, a pot at least 12 inches in diameter is appropriate.

Step 3: Planting lemongrass

  • Make your own by mixing standard potting soil with sand or perlite, or use a well-draining mix that is already available.
  • Place the stalks of lemongrass in the ground one to two inches deep. At least 12 inches should separate each additional stalk.

Step 4: Applying water

  • Water the lemongrass well after planting. Until you start to notice new growth, keep the soil continuously moist.
  • Regularly moist soil is preferred by lemongrass. Water only until the top inch of soil seems dry; do not overwater.

Step 5: Sunlight

  • Put the container somewhere that gets lots of sunlight. Since lemongrass needs full sun to flourish, try to get at least 6 to 8 hours of direct sunshine each day.

Step 6: The process of fertilization

  • During the growing season, fertilize the lemongrass every four to six weeks using a balanced fertilizer. For application rate instructions, go to the product.

Step 7: How to grow lemongrass with proper maintenance

  • When the leaves reach about 12 inches in height, trim the outer ones to promote bushier growth. Eliminate any withered or broken leaves.
  • Over time, lemongrass can get congested. Every two to three years, divide the plant to encourage healthier development.

Step 8: Gathering

  • When the stalks are at least 12 inches tall, lemongrass should be harvested. Use pruning shears or sharp scissors to cut them at the root. Fresh stalks can be preserved for later use or used in recipes.

In summary, how to grow lemongrass at home? is an enjoyable and sustainable endeavor that adds a fragrant touch to your garden and culinary creations. So, roll up your sleeves, get your hands dirty, and embark on the journey of cultivating lemongrass for a continuous supply of this delightful herb right in your backyard.

Certainly! If you’d like to learn more, please consider following our WhatsApp Channel, Facebook, Instagram, YouTube, Twitter, and Pinterest.

Q1: What is the ideal temperature to grow lemongrass from seeds?

A1: The ideal temperature for growing lemongrass from seeds is between 70°F to 85°F (21°C to 29°C).

Q2:  How to grow lemongrass indoors by using regular kitchen scraps?

A2: To grow lemongrass indoors from kitchen scraps, place the root end in water until roots develop, then transplant it into a pot with well-draining soil and ample sunlight.

Q3: Are there any common pests or diseases that affect lemongrass plant?

A3: In general, lemongrass is resistant to illnesses and pests. However, look for aphids or mites. If necessary, apply insecticidal soap. Make sure there’s adequate airflow and refrain from overwatering to stop fungal problems.

Q4: What are the main uses of lemongrass oil?

A4: Lemongrass oil is widely utilized in aromatherapy, insect repellent, and skincare due to its antifungal and antibacterial properties.

One satisfying and space-efficient method to enjoy fresh, local vegetables is to grow broccoli in containers at home. Nutrient-rich and well-known for its health advantages, broccoli grows well in containers on patios, balconies, or even windowsills. Whether you’re a home gardener looking to diversify your crops or a food enthusiast eager to explore new flavors, understanding the different types of broccoli can enhance your culinary and gardening experiences. Whether you’re a seasoned gardener or a beginner, learning how to grow broccoli can be both enjoyable and productive.

Certain broccoli types, such as Calabrese broccoli, De Cicco, Waltham 29, Sprouting broccoli, and Purple Sprouting Broccoli, are ideal for container gardening due to their large green heads, cold-tolerant nature, and extended harvest season.

How to grow broccoli in appropriate containers:

  • Select a sizable container that is at least 12 inches deep. Because of its deep root system, broccoli requires a large container. To avoid waterlogging, make sure the container has drainage holes at the bottom.

The preparation of the soil:

  • Choose a good potting mix with sufficient drainage. Composting can improve the soil.
  • Soil with a pH of 6.0 to 7.0 is ideal for broccoli; neutral soil does not work well for them.

How to grow broccoli by spreading seeds:

  • You may grow broccoli from seeds or transplants. If you’re beginning from seeds, plant them inside 6 to 8 weeks before the last predicted frost date.
  • Plants can be started indoors or bought from a nursery.
  • In the container, space the seeds or transplants 18 inches apart.

Sufficient Sunlight:

  • For broccoli to grow, it needs direct sunlight. The container should be placed where it will receive at least 6 to 8 hours of sunlight each day.

Watering:

  • Ascertain that the soil is consistently moist but not drenched. As soon as the soil looks to be one inch dry, water it.
  • Keep an eye on the moisture level frequently because container plants might need to be watered more frequently than plants planted in the ground.

How to grow broccoli using fertilizer:

  • Apply a slow-releasing, balanced fertilizer or a high-nitrogen, water-soluble fertilizer.
  • A fertilizer’s specified dosage should be followed; do not overfertilize as this can cause problems with quality.

Management of Insects and Diseases:

  • Look out for typical insects such as caterpillars, cabbage worms, and aphids. To manage infestations, handpick them or apply organic insecticidal soap.
  •  Ensure adequate ventilation to reduce the likelihood of fungal infections.

Harvesting:

  • Broccoli heads should be harvested when their florets are tightly packed and firm. If you cut off the primary head first, tiny side shoots will frequently keep growing.
  •  To guarantee the finest flavor and texture, harvest just before the buds open.
Broccoli benefits from companion planting with pest-repelling herbs such as basil and dill, as well as flowers like marigolds, which attract beneficial insects. Vegetables like onions, garlic, and celery help discourage pests, while leafy greens like spinach and lettuce make good use of available garden space. However, broccoli should not be planted near tomatoes, strawberries, or pole beans because they might compete for nutrients or attract pests that damage broccoli.

Growing broccoli in containers is a feasible and profitable choice for those with limited garden space. You can successfully grow healthy broccoli plants on your balcony, patio, or any tiny outdoor space by following the necessary procedures, which include choosing a suitable container, using high-quality soil, providing enough water and sunlight, and taking care of any potential pests. By choosing the right variety, using well-draining soil, and providing adequate sunlight and water, you can successfully cultivate healthy broccoli plants in your own backyard or balcony. With patience and proper care, you’ll be harvesting crisp, nutritious broccoli heads in no time, adding a delicious and healthy addition to your meals.

Certainly! If you’d like to learn more, please consider following our WhatsApp Channel, Facebook, Instagram, YouTube, Twitter, and Pinterest.

1: What is the best method for growing broccoli sprouts at home?

A1: Using a sprouting jar or tray is the best way to cultivate broccoli sprouts at home. Rinse the seeds twice a day, store them in a dark spot at first, and when they begin to sprout, move them outside.

Q2: How do I grow broccoli microgreens?

A2:Soak broccoli seeds in water for eight to twelve hours to begin. Next, equally distribute them across a growing medium (such as soil or a hydroponic mat) and maintain their moisture content. The tray should be put in a well-lit place.

Q3: Can dogs eat broccoli?

A3: Broccoli is safe to feed dogs in moderation. Make sure it’s cooked, unseasoned, and devoid of any sauces or additional seasonings.

Q4: Does broccoli regrow after cutting?

A4: Yes, broccoli may sprout after being chopped if the main stem and several side shoots are intact. The plant will gradually grow smaller side florets.

Q5: How long does broccoli take to grow?

A5: Broccoli takes between 60 and 90 days to develop from seed to harvest, depending on the type. Transplants mature quicker, often in 50-70 days.

One satisfying and environmentally friendly method of growing this tasty herb in the comfort of your own home is to grow green onions without soil. So, learn how to grow green onions using hydroponics, an environmentally friendly technique that does away with the need for conventional soil. Whether you have a large garden, a small patio, or just a windowsill, green onions can be successfully grown in a variety of settings. This guide will help you understand the basic steps involved in growing green onions, from selecting the right variety to harvesting your crop. Learn how to grow green onions indoors or outdoors, yielding fresh results in no time.

The following supplies are needed to get started:

  • Five-liter plastic bottles, cleaned and emptied
  • A plastic tray that only fits on the bottle’s surface.
  • Onion bulbs, red or yellow, with the tops removed
  • A cable
  • Water and a plastic wrap

How to grow green onions with a hydroponic system:

  • How to grow green onions- keeping the top half intact, then cut the 5-liter plastic bottles in half horizontally. The top part will hold the growing green onions, and the bottom half will act as a reservoir for water.
  • Make sure the plastic tray fits tightly into the upper portion of the bottle. The bottle should flood only the top of the tray. To let water through, drill or cut a lot of big holes in the tray.
  • Thread the cable through the perforations after laying it across the tray. Verify that you insert the cable into the bottle’s water. The rope will supply water to the roots of the onions, acting as a wick.
  • So slice off the tops of red or yellow onions. To allow new roots to grow, clean the bottom of the bulb by removing any dead ones. We’ll arrange these cooked onions on the platter.
  • Arrange the prepared onions on the tray, ensuring that the cable comes in contact with each root section of the onion. Spread the onions equally so that they cover the whole surface of the tray.
  • Wrap plastic wrap around the bottle’s top. Because of the greenhouse effect that will result, the onions will grow more quickly in a regulated environment. Keep the plastic wrap on the onions until they sprout.
  • Make sure the water reservoir is at the lower part of the filled bottle. The water will be drawn up by the rope and fed to the roots of the onions. So, Maintain a constant water level to encourage strong growth.

Gathering and replanting:

  • You can pick the green onions once they are at the desired length. When necessary, trim the green tops with cutters so that the remaining parts can keep growing.
  • When harvesting, save a few inches of the white base with roots. If you put it back in the water, it will grow again.
To promote faster growth, use filtered water instead of tap water, add liquid plant food weekly, and after regrowth cycles, consider transplanting or replacing plants with new ones.

As a result, to successfully grow green onions without soil, it is essential to choose a suitable hydroponic or aquaponic system, monitor and maintain optimal nutrient concentrations, and ensure proper lighting for photosynthesis. Regularly observing plant health and adjusting parameters as needed will contribute to a thriving and productive green onion harvest.

Q1: How to store green onions in water like cut flowers?

A1: To keep the green onions fresh, just put them in a glass or jar with enough water to cover the roots. After that, change the water every several days.

Q2: What container or pot is best for growing green onions from scraps?

A2: Choose a pot or container that drains effectively and has a minimum depth of 6 inches.

Q3: How to cut green onions without making a mess?

A3: Using a solid cutting board and a sharp knife will help reduce mess. While maintaining a firm grip, carefully cut the green onion.

Q4: How long can green onions last in water?

A4: Green onions may stay in water for around 1 to 2 weeks if the water is changed every few days. They may keep growing, but the quality will deteriorate with time.

Q5: How do you regrow onions in water?

A5: Place the root end of a discarded onion in a glass of water, ensuring that the roots are immersed but the top remains above water. Change the water every several days, and fresh green shoots will emerge within a week.

Growing peas at home in containers is a delightful and accessible way to enjoy fresh, crisp peas right from your garden, even if you have limited space. Peas are versatile, cool-season vegetables that thrive in containers, making them an excellent choice for urban gardens, patios, balconies, or any small gardening space. Whether you’re a seasoned gardener or a novice, this comprehensive guide will walk you through the steps to cultivate peas in containers, ensuring a bountiful harvest and a rewarding gardening experience. Growing peas may be a wonderful experience, regardless of gardening expertise level.

Finding the Best Seeds for Growing Peas

Purchasing top-notch seeds is essential before you start your pea farm. Reputable neighborhood nurseries, gardening shops, or internet vendors are good places to find seeds. Select fresh, certified container-gardening pea seeds. Because they are petite, varieties like “Little Marvel” or “Tom Thumb” are perfect for small spaces and container cultivation.

Pea Seeds That Grow

Your adventure to raise peas begins with growing. Here’s a detailed how-to:

  • Soak the seeds in water for the entire night to start. This promotes faster germination by softening the seed coat.
  • Pre-sprout the seeds for quicker growth by keeping them in a sealed plastic bag with a damp paper towel for a few days, or until tiny roots start to show.
  • Use nutrient-rich potting soil to fill your containers (pots, grow bags, or crates). Plant the pre-sprouted or pre-soaked seeds two to three inches apart and an inch deep.
  • Ascertain that the soil is consistently moist but not drenched. The containers should be placed in an area that gets at least 6 to 8 hours of sunshine per day.

Establishing a Base of Support

Peas are climbing plants that need assistance to grow well. It is essential to construct a strong support structure to stop the vines from spreading. Take a look at these techniques:

  • Put in a trellis or cover your container with netting. Make sure it is tall enough to support the selected pea variety’s mature height.
  • As an alternative, place bamboo stakes within the container and carefully connect the growing pea vines to them.

Growing and Taking Care of

Use these care guidelines to guarantee a productive crop and healthy growth:

  • Keep the soil’s moisture content constant. Do not overwater peas since they can deteriorate in soggy conditions.
  • Regularly apply a balanced fertilizer to supply essential nutrients.
  • Spread some organic mulch on the ground to keep the moisture in and keep weeds at bay.

Gathering Your Peas

It’s about time to collect your pea plants as they get bigger:

  • Peas should be gathered when the pods are full but not too ripe or harsh.
  • Consistent collecting promotes ongoing output.
Containers are ideal for growing peas due to their space optimization, pest control, easy maintenance, extended growing season, and improved soil management. They are ideal for patios, balconies, and small gardens, reducing weeding and watering, allowing for maximum sunlight exposure, and allowing for better control over nutrient and soil quality.

Growing peas in containers is an easy and satisfying way to eat fresh, local produce. Even in little areas, you may grow a plentiful crop by following these procedures. Experience the delight of cultivating your own tasty peas by using this approach!

Q1: When is the ideal season for growing peas in containers?

A1: As soon as the soil is workable in the early spring, peas should be planted. They can withstand mild frosts and do well in chilly conditions.

Q2: What pests should I watch out for when growing peas from seed?

A2: Caterpillars, pea weevils, and aphids are common pests of peas. If necessary, monitor the plants and apply organic pest control techniques like neem oil or insecticidal soap.

Q3: Is it possible to growing peas on a trellis?

A3: Yes, it is entirely possible to grow peas on a trellis. Utilizing a trellis for peas is a popular and successful technique.


In addition to being a novel gardening experience, growing eggplants upside down is a quick, easy, and effective technique to make the most of available space. Without giving up valuable ground space, you can have an abundant crop by hanging your eggplants upside down. This article will walk you through the simple process of growing inverted eggplants and experiencing the delight of a bountiful crop. Eggplants grow very well in pots, which makes them a perfect complement to your balcony garden.

  • Inverted gardening is ideal for urban environments as it effectively utilizes vertical space. Those living in apartments or with limited ground space would benefit from this.
  • Increased air circulation around the leaves and fruit is made possible by hanging the plants. This can lower the chance of fungal infections, which are prevalent in moist, stagnant places.
  • Growing eggplants off the ground helps them stay healthier and more robust by limiting their exposure to pests and diseases carried by the soil.
  • By doing away with the need to stake or support plants, this technique eases care and lessens physical strain on the plants.
  • Weeding is almost nonexistent because the plants are not in the ground, and soil care is greatly decreased.
  • Watering from above guarantees that nutrients and water reach the roots directly, which is critical for eggplant growth.
  • When combined with their functionality and aesthetic appeal, upside-down eggplants provide an intriguing visual addition to any garden area.

This is thorough advice on how to put up an eggplant garden that is upside down:

Supplies Needed:

  1. adopted plastic bottles (2 liters or more; larger volumes are advised)
  2. Plantain seedlings
  3. Tape for masking
  4. Punch a hole
  5. The silverware
  6. healthy twine
  7. superior compost or soil

Methodical Guide:

  • Pick a location that gets at least 6 to 8 hours of sunlight per day. Eggplants prefer warm, sunny weather.
  • Take off the labels and clean the plastic bottles. Cleanly chop off the bottle’s bottom with a knife.
  • To prevent sharp edges, hide the cut edge using masking tape. Next, make four holes for the twine, spaced evenly around the bottle.
  • Take the baby eggplants out of their nursery pots and carefully transfer them to the container. Make sure the root ball is completely covered when you plant it in the center.
  • Leaving a little space at the top for watering, fill the bottle with soil or compost.
  • Use sturdy hooks or a dependable hanging method to safely suspend the container. Verify that it is sturdy and able to support the weight of the developing plants.
  • Make sure the soil around your hanging eggplant plants is continuously moist but not soggy by checking them frequently.
Growing eggplants upside down offers several benefits, including space efficiency, reduced pests and diseases, improved air circulation, less weeding and maintenance, and enhanced fruit production. It's ideal for small gardens, balconies, and patios, and helps prevent soil-borne pests and diseases. Additionally, it ensures optimal solar exposure for optimal fruit production.

Anyone can enjoy this fun and space-saving gardening method of growing eggplants upside down. Uniquely and enjoyably, you can soon be harvesting delicious eggplants with the necessary supplies and a little attention.

Q1. Can I use any type of container for growing eggplants upside down?

A1: In Minecraft, you can plant pumpkin seeds by tilling a portion of farmland and then placing the seeds on the tilled soil. Make sure the space is hydrated and well-lit.

Q2. What are the growing eggplant problems?

A2. Typical concerns include fungi, pests like flea beetles and aphids, poor fruit set from poor pollination, and yellowing leaves from overwatering or nutrient shortages.

Q3: What is the best time to start growing eggplants from seeds indoors?

A3: Six to eight weeks before the final anticipated date of frost in your area, start eggplant seeds indoors. This enables the healthy development of seedlings prior to their outside transplantation.

Q4: What type of soil should I use for growing eggplants in pots?

A4: Use well-drained, nutrient-rich soil mixed with loamy garden soil, compost, and perlite or sand to improve aeration. Healthy eggplant growth in pots requires a pH range of 5.5 to 6.5.

Q5: How many eggplants can you get from one plant?

A5: A robust eggplant plant may yield between 5 and 12 eggplants every season, depending on the type, growth circumstances, and maintenance. Regular picking promotes increased fruit output.

Pruning is crucial to keep grapevines healthy and guarantee a plentiful crop. Knowing when and how to prune grape vines is essential for maximizing their growth, fruit output, and general vitality, whether you’re an experienced grower or a novice enthusiast. Every year, grape plants require extensive pruning. Although extra light pruning may be required during the growing season, any major trimming should be completed when the plants are dormant. Pruning grapes is best done in the spring, in February or March, or even as late as early April, as pruning too early might cause harm to the canes and buds from a harsh frost in late winter.

The advantages of pruning:

  • By directing the plant’s energy into producing fruit-bearing shoots, pruning increases the number and quality of grape clusters.
  • Frequent pruning encourages the regrowth of healthy wood by removing old, useless canes and promoting new growth.
  • With pruning, you may easily manage and harvest grapevines by improving their form and managing their size.

Basic Pruning Instruments:

  • How to prune grape vines? First, pruning shears with sharp edges
  • For heavier branches, loppers
  • gloves to keep your hands safe
  • Tool cleaner

How to Prune Grape Vines in Steps:

  • How to prune grape vines? Includes choosing and training one or more canes to act as the vine’s primary structural components. Many grape types, such as Cabernet Sauvignon and Merlot, frequently employ this technique.
  • Pruning the branches of mature vines is common practice. Retrim the previous year’s canes so that spurs have two to three buds remaining. Make sure the spurs are placed approximately six inches apart.
  • Another pruning variation is in which two canes are chosen and trained. So this technique is frequently used in areas with severe winters.
  • It is usual in some areas and involves creating a bush-like structure with several short arms.

After-Pruning Care:

  • Use an antibiotic after trimming to guard against any possible diseases.
  •  Keep a constant eye out for growth and health problems with the vine.

Advice for Successful Pruning:

  • To get clean cuts, always use clean and sharp machines. To keep water from building up on the cut surface, after that make your cuts at a 45-degree angle. Avoid overpruning as this might cause stress to the vine and lower fruit yield.

How to Prune Grape Vines With Proper Hints:

  • Examine the vine thoroughly before beginning.
  • Select a few strategically positioned canes that are promising.
  • Remove any aging wood and canes that are clearly inappropriate, such as those that are too distant from the main trunk or small and weak. As you progress, this will help to clear up some of the misunderstanding.
  • In case you break one, always save at least one spare cane for last.
  • Before tying, gradually bend the canes into place. Gently cracking canes that grow in a different direction than you want them to can often get them to cooperate. When you want the cane to reverse direction, bend it with both hands and press down until you hear the fibers fracture.

However, learn how to prune grape vines with our comprehensive guide. A vital part of grape management, pruning grapevines has a direct effect on the longevity, health, and productivity of the plants. Grape producers can optimize fruit production, shape the structure of the vine, and reduce the danger of disease by using strategic pruning techniques. 

Q1: when to prune grape vines?

A1: The ideal time to prune grape vines is late winter or early spring.

Q2: What happens if grape vines are not pruned?

A2: Pruning is necessary for grape vines to become overgrown, leading to reduced air circulation, sunlight exposure, and grape quality.

Q3: What types of grape vines are for sale?

A2: There are many grapevine varieties available for purchase, such as Zinfandel, Cabernet Sauvignon, Chardonnay, Merlot, and Pinot Noir.

Learning how to grow blackberries can be a delightful and fruitful addition to your garden. A home garden would benefit greatly from the addition of blackberries. Growing blackberries in pots allows you to get the thrill of growing your berries even if you have limited space for a garden. With the help of this beginner’s guide, you will learn all you need to know about how to grow blackberries in containers effectively and have a plentiful crop delivered straight to your home. Get expert tips on how to grow blackberries.

Choosing Correct Varieties:

It is selecting the best blackberry kinds for container cultivation before you start growing your own. Seek for Blackberry kinds that are small or compact, as they are ideal for cramped areas. Several well-liked choices that fit into a container are “Baby Cakes,” “Bushel and BerryTM Baby Love,” and “Patio Pride.”

How to grow blackberries with Proper Containers:

The success of your blackberry bushes is greatly influenced by the containers you choose. Select large, solid pots with good drainage to avoid waterlogging, a prevalent problem in container gardening. To fit the plant’s root system and offer stability, use containers with a minimum diameter of 18 inches and a minimum depth of 12 inches.

How to Prepare Soil Mix:

Make sure your potting mix is well-balanced to encourage the growth of blackberries. For a slightly lower pH, use an acid-loving mix added to a regular potting mix high in organic matter. Blackberries prefer a bit of pH soil, so this mixture will help them grow.

Potting and Growing:

Make sure the container is big enough to fit the blackberries’ growth when you plant them. Make sure the soil level in the pot and the blackberry shrub are the same before planting. Instead of turning, gently tease the roots to promote outward development.

  • Blackberries grow best in broad light, however they may take little shade.
  • Make sure there is enough ventilation near the plant to avoid problems brought on by moisture.
  • Maintain a constant moisture content in the soil, especially when fruiting grows. Blackberries require slightly more steady moisture than raspberries.
  • Regularly apply organic fertilizers designed specifically for berries to meet their nutrient requirements.
  • Blackberries grown in containers could require less pruning because some types are created to grow in order.

Collecting and Enjoying:

Pick ripe blackberries as soon as possible to avoid insect damage. Savor the fruits raw or add them to various dishes to experience their rich flavor and potent antioxidants.

How to maintain potted blackberries in the winter?
To protect your blackberry plant in winter, wrap containers with burlap or relocate to a protected area, reduce watering, maintain soil moisture, and spread mulch around the base to prevent root damage.

Blackberry gardening in pots at home is a fun and easy hobby. The joy of growing these berries from small flowers to full, delicious fruit is unparalleled, regardless of gardening experience level. May your blackberry bushes flourish as you set out on your container gardening journey, and may you enjoy the sweet fruits of your labor with every mouthwatering harvest.

Certainly! If you’d like to learn more, please consider following our WhatsApp Channel, Facebook, Instagram, YouTube, Twitter, and Pinterest.

Q1: Can dogs eat blackberries?

A1: Blackberries are fine for dogs to eat in balance. To make sure your dog doesn’t react negatively, remove the stems and introduce them gradually.

Q2: Which pests commonly damage growing blackberry plants in Texas?

A2: Watch out for pests like spider mites, aphids, and Japanese beetles. Implement regular inspections and consider natural predators or approved insecticides.

Q3: When is the best time to take blackberry cuttings?

A3: When the blackberry plant is dead, late fall or early spring, is the best time to take cuttings. Higher success rates for root development are ensured by doing this.

Q4: What are the best blackberries for containers?

A4:  The finest blackberries for containers are ‘Baby Cakes’ and ‘Black Cascade’, which are compact, thornless, and yield delicious, juicy berries on short, controllable canes. These cultivars flourish in containers with proper drainage and frequent feeding.

Q5: What is the best fertilizer for blackberries?

A5: The finest blackberry fertilizer is a balanced 10-10-10 or 20-20-20 mix applied in early spring and after fruiting. Organic choices like compost, aged manure, and fish emulsion are also effective for consistent growth and fruit output.

The Crassula plant, sometimes referred to as the Money Tree or Jade Plant, is a valuable addition to any house because of its many health advantages in addition to its pleasing appearance.

  • This plants improve indoor air quality by eliminating pollutants such as formaldehyde, acetone, benzene, and toluene. Because these substances can aggravate health conditions including allergies, asthma, weakness, and insomnia, the it is a great addition to a healthy living space.
  • Keeping this plants nearby can help reduce stress and increase mental health. The presence of vegetation indoors is associated with creating a calmer and more tranquil atmosphere.
  • Traditionally, jade plant extracts were used to heal wounds, skin warts, and diabetes. Its leaves are sometimes included in teas to heal digestive problems and other illnesses.
  • These plants use crassulacean acid metabolism to absorb CO2 at night, making them especially useful for maintaining healthy air quality in bedrooms.
  • This plant can help maintain humidity levels in dry conditions, which can help lessen problems like colds, itchy throats, and dry skin.

Gardening Has Aesthetic Benefits:

  • These low-maintenance plants may grow in both sunny and shady settings and only need occasional watering. They are therefore perfect for beginning gardeners.
  • According to Feng Shui, Crassula plants are lucky and positive. They look good and are small enough to fit in with a variety of interior decor styles.

Growing and Care Guidelines:

  • This plants may withstand some shade, but they prefer full sun. they should shield against bitterly cold weather.
  • When the soil is dry, give the plants sporadic watering. Rotten roots might result from overwatering.
  • Prune the plants after they bloom or when they lose their desirable shape. This keeps them looking and feeling good.

Distribution:

  • You can cultivate crassula from seeds; usually do this in the spring or summer. Planting the seeds requires wet, well-drained soil.

Typical Problems:

  • Stress from submersion can cause a plant’s leaves to drop. Underwatering makes the leaves get shriveled or soft.

Pruning:

Whenever any type of crassula becomes straggly or leggy, its growth might be reduced by around one-third. Every clipped branch should have a minimum of a few leaves. If it blooms (which it seldom does when planted inside), you should cut it back soon.

Common Pests:

Most this plants deal with aphids, spider mites, mealybugs, and other common pests, primarily when cultivated indoors. However, specific pests and diseases may vary.3. The easiest way to address these problems is to use non-chemical remedies, such as neem oil or other horticultural oils.

In the realm of mental health, crassula plants become catalysts for positive emotions. Their presence reduces stress and enhances mood, fostering a sense of calm amidst the chaos of modern life. As we nurture these plants, we find ourselves nurturing our mental well-being.

Q1: What kind of light does Crassula Ovata require?

A1: Bright Indirect sunlight is ideal for Crassula ovata. It will benefit from plenty of filtered light if you place it close to a window.

Q2: What are the ideal growing conditions for Crassula arborescens?

A1: The ideal conditions for Crassula arborescens include well-draining soil, a mixture of perlite, bright indirect light, and temperatures between 65 and 75°F (18 and 24°C). Use minimal water, letting the soil dry up in between applications.

Q3: What type of soil is best for Crassula succulents?

A2: For your Crassula succulent, use a well-draining succulent or cactus mix with extra perlite to provide adequate aeration and avoid soggy roots.

Q4: Can I keep my crassula plant indoors?

A4: Yes, you can keep these plants indoors. Ensure they receive plenty of bright, indirect sunlight and provide adequate ventilation to prevent issues with humidity.

Dill, with its fluffy leaves and unique flavor, not only infuses your recipes with a dash of freshness but also grows well in container gardens. Explore our tutorial on how to grow dill in pots to add some spice to your cooking efforts. As an annual herb, dill will wither away after flowering or if it experiences a frost, but the seeds are reusable.

Types of dill:

  • Fernleaf: Compact, takes around 20 days to develop. Due to its small size, it is perfect for indoor growing and container planting.
  • Bouquet: Another choice that grows quickly, has a lot of leaves, and tastes good.

How to Grow Dill With Perfect Soil:

  • Add well-balanced organic fertilizer to the soil to supply the necessary nutrients for healthy growth.
  • How to grow dill? Make sure pots have holes for drainage to keep water out of the container and encourage strong root growth.
  • Choose a pot with bottom drainage holes that are at least 12 inches deep. Due to its deep taproot, dill requires a deep container.

Planting Seedlings or Seeds of Dill:

  • Plant them straight in the ground, about 1/4 inch deep. Divide the seeds into 18–24-inch sections.
  • If using seedlings, plant them with the same spacing between each seed and make sure the dirt surrounding the seedlings is packed down gently to remove any pockets of air.

Essential tips on how to grow dill:

  • Don’t overwater; instead, keep the soil consistently moist to avoid root rot. When it appears that the top inch of soil is dry, water it.
  • The pot should be placed in an area with full to partial sun exposure. Dill grows best in direct sunshine.
  • During the growing season, after the dill plants have established themselves, which normally takes a few weeks, add a balanced liquid fertilizer every four to six weeks.
  • Consider using stakes to provide support if you’re planting a taller variety of dill to keep the plants from bending or toppling over.
  • Larger growth is encouraged by regular harvesting. Trim fronds from the outer borders so that growth can proceed in the center. For the finest flavor, harvest before blossoming.
  • Regular harvesting decreases the need for pruning because the plant retains a compact and productive shape.

How to grow dill without Pests & Diseases:

Diseases and pests rarely attack dill. Use Defender Slug & Snail Pellets or beer traps (saucers loaded with beer) around your plants if slugs and snails start to cause problems for your young dill seedlings.

By following these steps on how to grow dill in pots successfully, start by selecting a suitable pot with good drainage to prevent waterlogged soil, ensuring the dill plants receive adequate moisture without the risk of root rot. Use a well-draining potting mix enriched with organic matter to provide the necessary nutrients for healthy growth. When dill is dried, dehydrated, frozen, or kept in salt, it keeps its flavor nicely. For year-round use, you can store the leaves or the seeds. You can freeze-dry your dill to make it last for twenty years. We choose dehydrated dill because we adore the flavor of dried dill seed or dill plant.

Certainly! If you’d like to learn more, please consider following our WhatsApp Channel, Facebook, Instagram, YouTube, Twitter, and Pinterest.

Q1: When is the best time to take dill cuttings?

A1: When the dill plant is actively developing, the spring or early summer is the ideal time to take cuttings. Select a mature, healthy plant to cut.

Q2: What are the basic requirements for growing dill leaves?

A2: Well-drained soil with a pH of 5.5 to 6.5 is ideal for dill growth. It needs six to eight hours of direct sunlight per day, along with a reasonable amount of water.

Q3: When is the best time to plant dill seeds?

A3: When the soil temperature hits about 60°F (15°C), in the spring or early summer, it is ideal to plant dill straight from seeds.

Q4: How to grow dill leaves at home?

A4: To grow dill leaves at home, sow the seeds in well-drained soil in a container at least 12 inches deep and place it in direct sunlight. Maintain a steady moisture level in the soil, prevent transplanting (dill has sensitive roots), and harvest the leaves on a regular basis to promote new development.

Q5: Does dill regrow after cutting it?

A5: Yes, dill regrows after being cut, as long as at least one-third of the plant remains. Regular picking promotes bushier growth, but once it blossoms and goes to seed, leaf output decreases.


To put it briefly, growing okra in pots is a simple and satisfying task. You may benefit from a plentiful harvest of this healthful vegetable with the correct soil, sunlight, and maintenance. In this guide, we will take you through easy steps on how to grow okra in pots, allowing you to enjoy the satisfaction of nurturing your homegrown produce.

Materials required:

  • Okra kernels
  • Pot or container with a minimum depth of 12 inches
  • Properly draining planting soil
  • Using compost or organic fertilizer
  • Pipe or water bottle
  • sunny area

How to grow okra in the Proper Container:

  • Choose a pot or container with drainage holes at the bottom and at least 12 inches in depth to avoid waterlogging.

Get the potting mix ready:

  • Use a potting mix that drains well, or create your own by adding compost or other organic materials to garden soil. A slightly acidic to neutral pH soil is preferred by okra.

sowing seeds:

  • Sow the okra seeds approximately an inch below the surface. When the weather warms up, you can start seeds indoors and take them outside.
  • To provide each plant adequate room to grow, keep a distance of roughly 12 inches between each seed when planting several in a big pot.

How to grow okra with watering:

  • After sowing, give the container a thorough watering to provide optimal soil-to-seed contact.
  • Make sure the soil is constantly damp but not soggy.
  • After the seeds sprout, water less frequently, but make sure the soil is kept continuously moist.

Sunlight:

  • The container should be placed where it will receive at least 6 to 8 hours of sunlight each day.

Getting fertilized:

  • Once the seedlings have taken root, mulch the base of the plants with compost or a balanced organic fertilizer. For application rate instructions, go to the product.
  • During the growing season, fertilize once more when the plants are about 6 inches tall, and then once a month after that.

Pruning and insect control:

  • For support, certain kinds might require staking. Remove any withered or yellowing leaves to promote fresh development.
  • Look out for insects like spider mites or aphids. If necessary, apply neem oil or insecticidal soap.

Collecting:

  • After planting, okra is usually ready to be collected 50–60 days later.
  • When the pods are between two and four inches long, harvest the okra. Frequent harvesting promotes increased pod yield.

Growing okra from seeds in pots is a rewarding and feasible endeavor for both novice and experienced gardeners. By following these steps, you can easily learn how to grow okra successfully. Start by selecting a well-draining potting mix and ensuring adequate sunlight for optimal growth. The germination process requires patience, but with consistent watering and proper care, the okra seeds will sprout, leading to healthy seedlings. Find out how to grow okra at home is easier than you think!

Q1: What time is the best to grow an okra plant from seeds?

A1: When the soil temperature reaches approximately 65°F (18°C) or above, late spring or early summer is the best time to plant okra seeds.

Q2: What type of soil is suitable for growing okra in Texas?

A2: Okra grows best on soil that drains properly and has a pH of 6.0 to 6.8. In Texas, loamy or sandy loam soils are ideal for productive farming.

Q3: What type of fertilizer should I use to grow okra plants?

A3: Apply a balanced fertilizer, including equal amounts of potassium, phosphorus, and nitrogen. When the plants are about 6 inches tall, fertilizer should be applied. This should also happen when the plants start to bloom.