Tag

Grow & care

Browsing

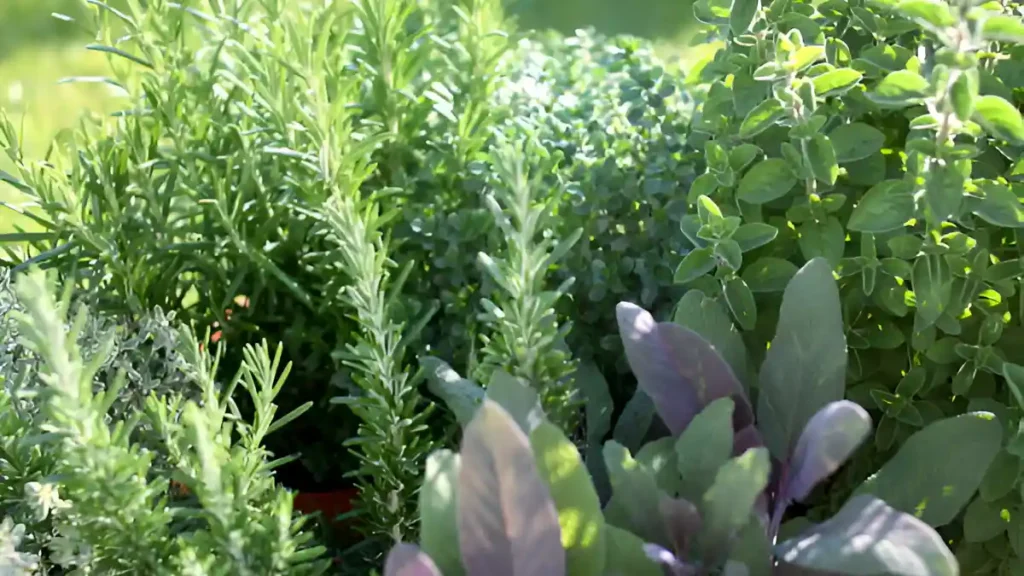
A climbing bean plant known as a pole bean grows vertically and is frequently supported by poles, trellises, or other structures. Because of their great production and ability to grow more beans in a smaller space than bush beans, they are popular in home gardens. But any summer vegetable garden must contain these sweet, starchy green beans (Phaseolus vulgaris). There are several types of pole beans, including runner, snap, and green beans. Although they usually take longer to mature, they provide a consistent harvest over a few weeks, which makes them a great option for prolonged fresh bean output. 

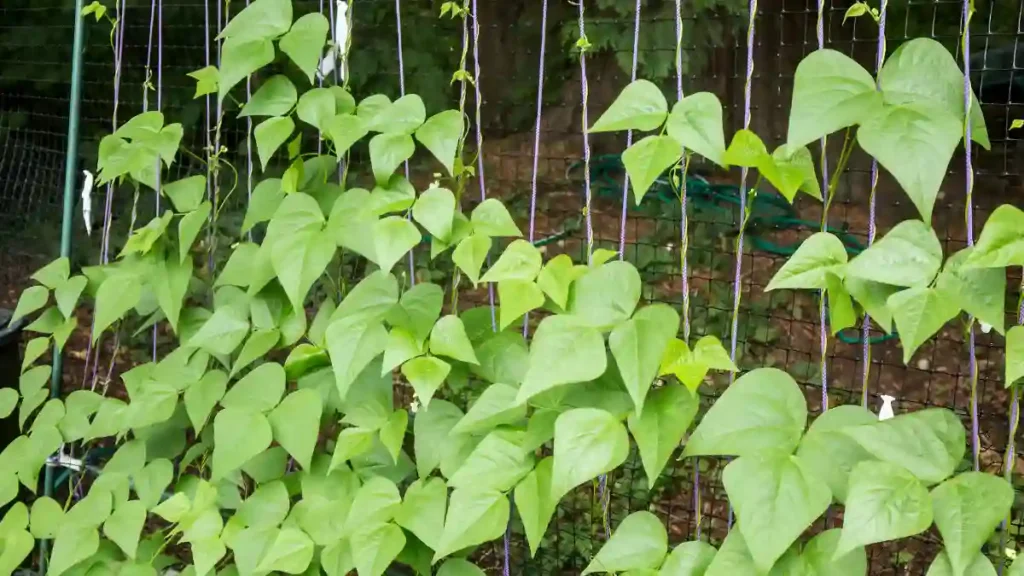
Pole beans are climbing plants that need help to flourish, in contrast to bush beans. They are renowned for their prolonged growing season and capacity for continuous bean production. The beans are perfect for vertical gardening since they grow on vines that may reach heights of six to ten feet. These beans can grow in a range of climates and produce large yields when given the right care.

  • These beans have various benefits, especially for people with small gardens, but bush beans also have their perks. Pole beans are a great choice for gardeners working in tiny spaces since they grow vertically and need trellises or other structures to climb.
  • These beans also yield beans continually during the growing season. In contrast to bush beans, which usually yield all at once, pole beans provide a consistent crop that allows you to enjoy fresh produce for several weeks.
  • One of the most popular types, Kentucky Wonder is renowned for its long, straight pods and delicious flavor.
  • Blue Lake: A delicate, highly prolific, stringless cultivar.
  • Scarlet Runner: A decorative bean that yields tasty pods and has vivid scarlet blooms.
  • Purple Podded: Known for its purple pods, which become green when cooked and have a delightful flavor, this variety is distinctive.

Regardless of your level of gardening experience, following this guide will enable you to produce many nutritious pole beans. Come with me as we investigate all the data you need.

1. The best time to plant pole beans

These beans thrive in warm, regularly temperature soil between 15°C and 29°C. They can be planted in India from October to March during the Rabi season or June to September during the Kharif season, ensuring frost risk is eliminated.

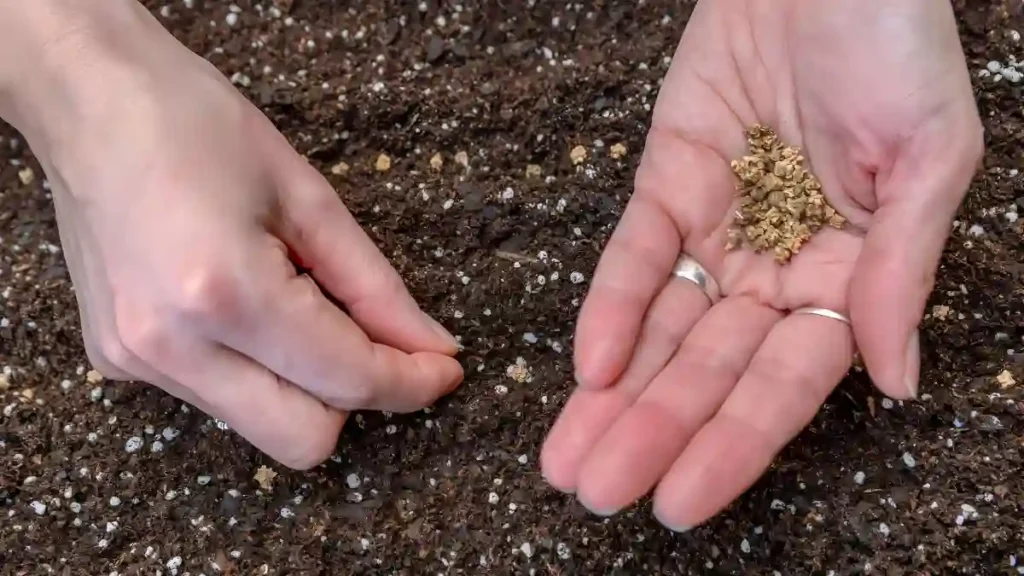
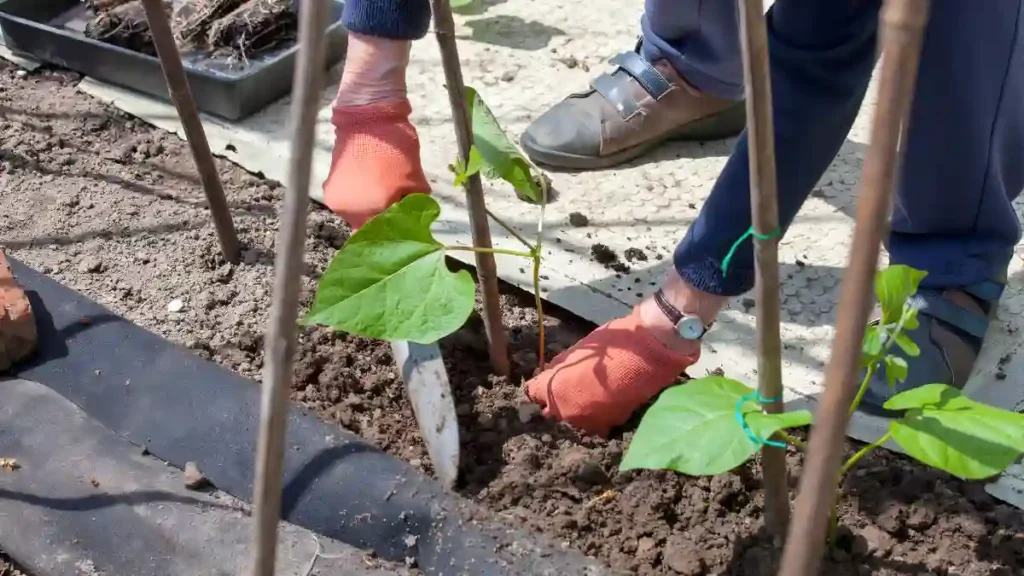
2. Learn how to plant pole beans

  • Pole beans thrive in warm, regularly drained soil between 15°C and 29°C, and can be planted in India between October-March or June-September, ensuring frost risk is eliminated.
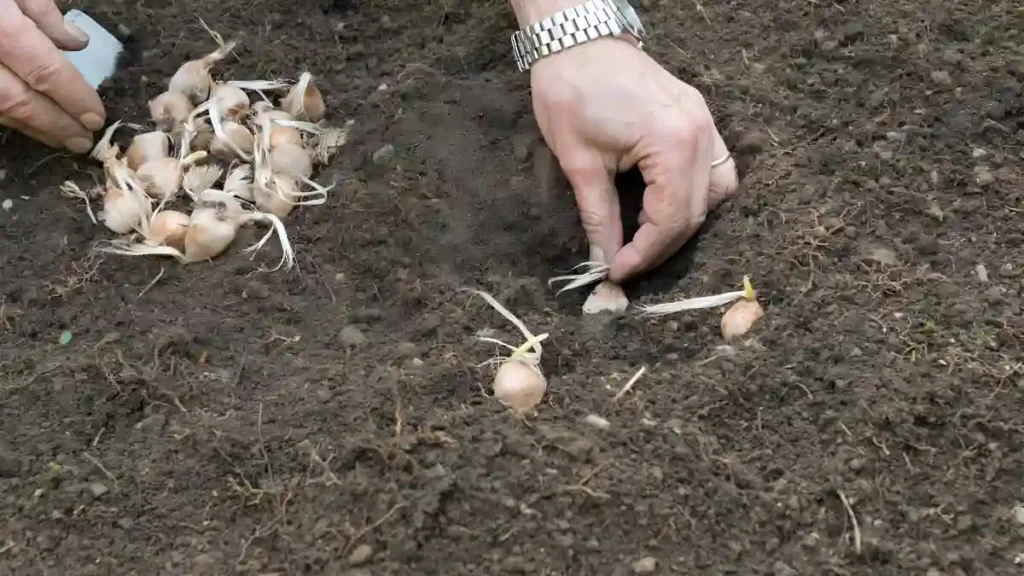
  • Plant seeds in rows, one inch deep and three inches apart, or create mounds or hills with five to six seeds, leaving three feet between each. Trim out seedlings when they reach 3 inches tall.
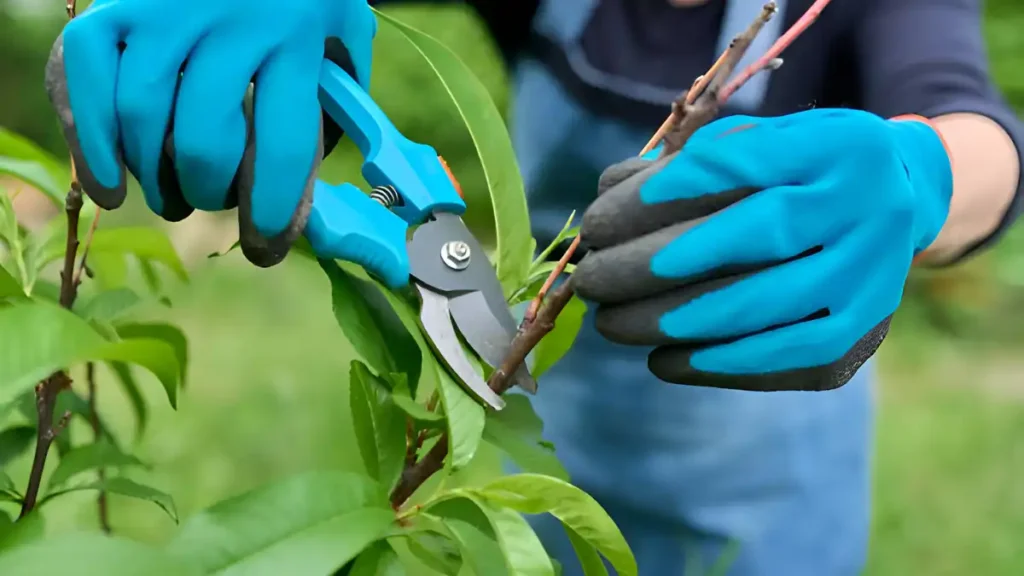
  • To support these beans, provide immediate assistance by constructing a fence, teepee, or trellis, and using poles or posts at least 6-8 feet high. Proper support prevents sprawl, making harvesting challenging and reducing production.

3. How to care for pole beans

  • A weekly inch of water is all that beans need, but they shouldn’t be watered overhead as this can encourage leaf diseases. To prevent problems like powdery mildew and to keep leaves dry, water the base of the plants.
  • Mulch around pole bean plants to maintain soil temperature, control weed growth, and preserve moisture. Use organic mulch like shredded leaves, straw, or grass clippings.
  • Pole beans, nitrogen-fixing plants, absorb nitrogen from the atmosphere and convert it into beneficial form. A balanced organic fertilizer at planting time is beneficial, but high-nitrogen fertilizers should be avoided to prevent excessive foliage growth and bean production.
  • Companion planting helps repel pests like aphids and Mexican bean beetles by eliminating them with water and hand-plucking larger insects. Maintaining healthy airflow between vines prevents mildew.

Growing pole beans in your backyard may be a fruitful and fulfilling experience. These climbing plants can provide you with abundant crops throughout the growing season if you give them the proper care. Pole beans may increase the yield and visual appeal of your garden, whether you use attractive kinds like Scarlet Runner or more classic varieties like Kentucky Wonder.

Certainly! If you’d like to learn more, please consider following our WhatsApp Channel: Harvest Gardening

Q1: How to grow pole beans in a raised bed?

A1: Plant the seeds 3 inches apart in full sun and well-draining soil to cultivate pole beans in an elevated bed. To keep the soil damp but not soggy, provide strong trellises or poles for support and water regularly.

Q2: When to harvest pole beans?

A2: Pole beans are ready to harvest when the pods are 4 to 6 inches long and firm, but the beans inside have not yet bulged. Depending on the type, this stage normally happens 60 to 70 days after planting.

Q3: How to harvest pole beans?

A3: Pole beans can be harvested by holding the vine in one hand and carefully snapping off the pods with the other to prevent harming the plant. It’s crucial to pick the beans frequently—at least once or twice a week—to stimulate the plant to continue producing.

Growing beets in your yard may be profitable and straightforward if you approach it correctly. These colorful root vegetables are not only highly nutritious, but they adapt well to a wide range of conditions. Grown for their roots and greens, beets are a versatile crop with a wide range of colors and shapes. Beets and their greens are regarded as a “superfood” by many and are a great source of fiber, antioxidants, folate, vitamins A and K, manganese, copper, and potassium. To give your garden produce more taste and nutritional value, learn how to grow beets. But you can also grow beets in containers. In this tutorial, we’ll look at 7 of the finest strategies for growing beets effectively, from soil preparation to harvesting procedures, so you can enjoy a plentiful harvest of this versatile vegetable.

1. Select the best beet variety for growing beets

Choosing the beet variety that best fits your climate, soil type, and tastes is one of the first steps in growing beets. There are numerous types of beets, and each has special qualities of its own.

  • Detroit Dark Red: This type is a favorite among home gardeners because of its typical beet flavor and deep red color.
  • Golden Beets: Perfect for salads, these beets have a sweeter, milder flavor than red beets and don’t stain as easily.
  • Chioggia: Known for its vivid candy-cane stripes, this heirloom variety’s delicate texture makes it a popular choice for fresh consumption.

2. Get the soil ready

Rich in organic content and loose, well-drained soil, beets grow nicely there. To guarantee the best development possible, make sure your garden bed is completely ready before planting.

  • PH of the soil: Beets like their soil to be somewhat acidic, ranging from 6.0 to 7.5. Use a pH test kit to check the pH of your soil, then adjust it as needed to get it within this range.
  • Open Up the Soil: Beets thrive in loose soil that permits easy root expansion. To promote root growth, till the soil to a depth of at least 12 inches and remove any rocks, debris, or compacted soil.
  • Add Organic Matter: Before planting, amend the soil with compost or well-rotted manure. This will raise nitrogen levels, improve soil texture, and promote strong root growth.

3. How to grow beets at the right time

  • Planting in Early Spring: Plant beets in early spring, two to four weeks before the last frost date, with optimal germination at a soil temperature of at least 50°F.
  • Succession Planting: Throughout the growing season, sow seeds every two to three weeks to provide a steady supply of beets. You’ll be able to harvest fresh beets well into the fall or late summer if you do this.
  • Fall Planting: Beets can also be planted in late summer for a fall or winter harvest in regions with moderate winters. Grown in colder climates, beets tend to taste sweeter.

4. How to properly space seeds

  • Seed Spacing: Plant beet seeds 12-18 inches apart, spacing 1 inch apart. Trim clusters of seeds as soon as they sprout to prevent overcrowding.
  • Thinning: Thin seedlings 2-3 inches tall to one plant per 3-4 inches for beet expansion and strong root formation. Trim for salads as tender greens.

5. Water consistently and correctly for growing beets

  • Watering Schedule: Make sure the soil is regularly damp but not soggy. Beets need one to one and a half inches of water each week, either from irrigation or rainfall.
  • Mulch: By covering your plants with an organic mulch layer, you may control soil temperature, keep moisture in the soil, and lessen weed competition.
  • Refrain from overwatering: Although beets require moisture, excessive watering can cause fungal infections or root rot. Make sure there is adequate drainage in the soil to avoid standing water around the roots.

6. How to grow beets with a moderate amount of fertilizer

  • Nitrogen: Beets need nitrogen for leaf growth, but excessive nitrogen can harm roots. Use a balanced fertilizer with slightly increased phosphorus and potassium for root growth.
  • Timing: Lightly fertilize seedlings between four and six inches tall, and ensure consistent nutrient supply throughout the growing season by applying compost or organic fertilizer side-dressing.

7. Harvest timely

  • Baby beets are sweeter and ideal for salads or roasting. Mature beets are ready for leaf harvest when roots reach 3-4 inches in diameter. Leaf harvest allows for nutrient-dense and tasty beet greens without impairing root growth. Baby beets are ideal for salads and roasting due to their smaller, fragile roots.

Following these seven strategies for growing beets in your garden will result in a successful harvest of delicious, healthy beets. Every stage is critical to growing superior beets, from selecting the best variety to harvesting when it’s best. These instructions will teach you how to grow beets, regardless of your level of gardening experience.

Certainly! If you’d like to learn more, please consider following our WhatsApp Channel: Harvest Gardening

Q1: How long do beets take to mature?

A1: Depending on the cultivar, beets can mature in 50 to 70 days on average. For the finest flavor, harvest them when the roots are between 1.5 and 3 inches in diameter.

Q2: What month is best to plant beets?

A2: Depending on your environment, early spring (March to May) or late summer (August to October) are the optimum times to plant beets. Plant beets during mild weather conditions, as they prefer lower temps.

Q3: How many beets grow from one seed?

A3: A single beet “seed” is usually a cluster of seeds, which allows numerous beet plants (usually 2 to 5) to grow from a single seed cluster.

Crocus sativus, the saffron crocus, is the plant used to grow saffron, a highly valued spice. This fragile plant does best in sunny spots with a dry, warm temperature and well-drained soil. It is customary to grow saffron bulbs, also known as corms, in late summer or early fall. Each of the autumn-blooming blossoms yields three bright crimson stigmas that must be meticulously picked by hand. It may take several years for saffron plants to attain maximum output, so patience is crucial. A good harvest of saffron depends on proper maintenance, which includes routine watering and insect prevention. Discovering how to grow saffron crocus corms in the late summer or early autumn, taking pleasure in the breathtaking fall foliage, and harvesting saffron in October is the most elegant method of cutting costs on your food expenses.

Saffron, a precious spice from the saffron crocus flower, is used in Mediterranean, Indian, and Middle Eastern cuisines. Its unique flavor, color, and perfume are produced by hand-harvested and dried reddish-orange stigmas. Three vivid red stigmas, which are hand-picked and dried to produce saffron threads, are present in every bloom. One kilogram of saffron requires about 150,000 blossoms, highlighting the labor-intensive nature of the crop’s harvesting procedure. Due to its labor-intensive harvesting and large number of blooms, saffron is one of the most expensive spices globally.

USDA Hardiness Zones 5-9 are ideal for saffron crocus growth. Plant in sandy or well-drained soil with full light. If not available, place crocus in bright areas with visible purple blooms. Give each corm its bed or low ground cover to keep squirrels and chipmunks away. Avoid planting in areas with heavy shade or rain.

  • Saffron harvest success relies on loamy, well-draining, organically rich soil with a slightly acidic to neutral pH range of 6.0 to 8.0.
  • Saffron corms are best planted in late summer or early fall, ensuring sufficient space for growth and reproduction, 4-5 inches deep and 4-5 inches apart.
  • Planting a corm requires placing the pointed end up. Planting depth is important because planting too deep can prevent a corm from sprouting while planting too shallow can result in inadequate shelter from the cold. For most places, a depth of 5 inches is often advised. Make sure the pot is at least 12 inches (30 cm) deep if you’re planting in pots so that there is enough room for root growth and drainage.
  • Saffron crocus thrives in the broad sun but can thrive in partially shaded areas with trees, as they bloom in the fall after many trees have shed their leaves.
  • Saffron plants can withstand drought, but corms need moderate moisture. After planting, water thoroughly for soil settling, but avoid overwatering to prevent root rot. Maintaining damp but not soggy soil is crucial.
  • Water plants weekly during the growing season, excluding rain, from fall to early spring. In areas with abundant rainfall, water may be unnecessary. Stop watering after the spring flowering season.
  • Saffron crocus thrives at 70°F but can withstand colder temperatures. USDA Zones 3-4 require transplanting after blooming. Excessive humidity can lower saffron quality, so a 40-50% humidity range is ideal for saffron crocus corms. Digging or transplanting them to a warmer spot is recommended after blooming.
  • Crocus blossoms can be produced by planting corms that store enough nutrients. However, yearly fertilization with organic fertilizer, like bone meal, can improve the plants’ growth. Apply granular fertilizer with a 5-10-5 NPK ratio in early spring, keeping it away from the corm.
  • Growing saffron crocus is challenging due to pests such as squirrels, chipmunks, mice, moles, voles, and rabbits. To avoid injury, plant corms over 5 inches deep. Thrips cause unsightly leaves but have minimal impact on harvest. To avoid root and corm rot, plant in well-drained soil and provide minimal water.

Although learning how to grow saffron may seem difficult, it can be a very rewarding experience if done with the proper planning. Even inexperienced growers can provide premium saffron at home or on a larger scale by learning about the particular climate and soil requirements of the plant, planting and caring for bulbs with care, and perfecting the harvesting and storing techniques. Your saffron garden will flourish if you start modestly and adhere to these professional guidelines.

Certainly! If you’d like to learn more, please consider following our WhatsApp Channel: Harvest Gardening

Q1: How to grow saffron indoors?

A1: When growing saffron indoors, put the corms 4 inches deep in well-draining potting soil, give them lots of sunshine, and water them sparingly, letting the soil dry out in between applications. For optimum growth, make sure the temperature stays between 60 and 70°F (15 and 21°C).

Q2: How to harvest saffron crocus?

A2: Saffron crocus, a delicate plant, can be harvested by carefully removing red stigmas from blooms before they open, preserving flavor and color by drying them in cold, dark conditions.

Q3: What is the use of saffron crocus?

A3: Saffron crocus, a highly valued spice with distinct flavor, perfume, and color, is used in traditional medicine for treating various illnesses due to its colorful, tasty stigmas.

Q4: When to harvest saffron crocus?

A4: In late fall, generally in October or November, saffron flowers blossom. Since the blooms only bloom for a few days, the harvest window is sometimes very short—just a few weeks. To preserve the fragile stigmas, it is imperative to harvest as soon as the flowers open, early in the morning.

Native to Central and South America, Persea americana, or avocado tree, is an evergreen tropical and subtropical tree. The tree, which may reach a height of 80 feet, is well-known for its rich, creamy fruit and does best in warm, non-frosty regions. It has huge, glossy green leaves and is a member of the Lauraceae family. Avocado trees are a delightful addition to any garden or interior setting. To produce your supply of this rich, adaptable fruit, you may learn how to grow an avocado tree indoors or outdoors in a sheltered spot. It is important to adhere to a set of well-thought-out procedures to guarantee success. We will walk you through the top 5 methods for growing and taking care of an avocado tree in this in-depth article.

1. How to choose the best variety of avocados

Avocado trees come in various types, with Hass, Fuerte, and Bacon being the most commonly cultivated. Choose a tree based on size and climate, considering your living environment.

  • Hass avocados: Known for their creamy texture and nutty flavor, Hass avocados are the most popular and accessible type of avocado. They are frequently grown by those who want to produce fruit from avocados since they do well in warm settings.
  • Fuerte Avocados: Distinguished by their velvety green exterior, they can withstand lower temperatures and are a great option for people living in mildly colder climates.
  • Bacon Avocados: Bacon avocados are a cold-tolerant type that grows well in areas where wintertime lows are possible.

2. How to plant an avocado tree

  • How to grow an avocado tree from a seed:

Although it takes time, planting an avocado tree from seed is an enjoyable and instructive experience. First, take the pit out of a ripe avocado, clean it well, and pat it dry. After that, suspend the pit over water using toothpicks, making sure the wide end is in the water. After six to eight weeks, a sprout will appear from the top as roots start to form.

When the sprout is 6 to 8 inches tall, it’s time to plant the seedlings in the soil. Pick a pot that drains well, add potting mix that drains well, and plant the seedling, leaving the top half of the plant above the earth.

  • Planting a tree from a nursery

For quick results, choose a nursery-grown tree. Choose a sunny outdoor planting spot with well-draining soil. Level the root ball with the soil surface by digging a hole twice as broad and deep as the root ball.

3. Providing your avocado tree with soil, water, and mulch

  • Avocado plants require well-draining soil, with sandy loam being the best type, but clay-based soil may require organic matter for drainage, and a pH of 6 to 6.5 is recommended.
  • Avocado trees require frequent, deep irrigation to encourage stronger root development. Watering occurs when soil starts to dry up, and young trees need more frequent watering in summer. A mature tree needs around two inches of water per week.
  • To protect the avocado tree’s shallow root system and improve soil moisture retention, add mulch at least 6 inches away from the trunk and add nutrients like wood chips or bark as the soil breaks down.

4. How to fertilize and prune an avocado tree

  • Apart from eliminating dead wood in the spring, there is no need to prune the avocado tree. If desired, you can prune an avocado to keep it the same size. The majority of trees bear fruit in a few years.
  • Fertilizing an avocado tree should begin in the late winter or early spring and continue until fall, based on the directions that come with the fertilizer you’ve chosen. Fertilizers made especially for citrus or avocado plants are effective.

5. Control of insects and diseases

  • Common pests causing problems for avocado trees include lace bugs, borers, mites, thrips, cankers, sun blotch, fruit rot, and root rot. Diseases like cankers, sun blotch, fruit rot, and root rot can also occur. It’s crucial to monitor these pests and early signs of illness to address any issues promptly.

Growing and caring for an avocado tree may be a highly rewarding experience, whether you start from seed or nurture a young tree. You may have a fruitful and healthy avocado tree for many years to come by choosing the correct kind, giving it the care it needs, and keeping an eye out for pests and illnesses.

Certainly! If you’d like to learn more, please consider following our WhatsApp Channel: Harvest Gardening

Q1: How long does it take to grow an avocado?

A1: An avocado tree developed from seed takes between 5 to 13 years to bear fruit; however, grafted plants can begin bearing fruit in as little as 3 to 4 years. Care and growing conditions also impact the period.

Q2: Can avocado trees tolerate cold temperatures?

A2: Although certain kinds can tolerate temperatures as low as 28°F (-2°C) for brief periods, avocado trees are susceptible to frost and normally thrive in temperatures above 60°F (16°C).

Q3: When is the best time to harvest avocados?

A3: When avocados are fully ripe yet still hard, they should be picked. The best season is usually between late fall and early spring, depending on the variety and environment.

The little deciduous apricot tree (Prunus armeniaca) is prized for its mouthwatering golden-orange fruit. Originating in China, it has been farmed for millennia and has extended to several regions around the globe, including the Mediterranean and Central Asia. The tree usually reaches a height of 8 to 12 meters. It has fragrant white or pink flowers that bloom in the early spring, along with wide, heart-shaped leaves. They bear fruit best when trained against a sunny wall and are cultivated similarly to peach trees and nectarines, which are near cousins of each other. The tree grows best on soil that drains properly and in an area with moderate summer and winter temperatures. To make sure an apricot tree will flourish in your location, carefully consider the USDA Hardiness Zones before making your purchase.

1. Selecting the proper variety of apricot tree

Selecting the right apricot tree variety for your climate and soil type is crucial for successful cultivation in temperate areas with cold winters and mild summers.

  • Moorpark: A well-known cultivar that yields big, delicious fruits.
  • Tilton: This cultivar is well-known for both its superb fruit quality and adaptability to a range of environmental conditions.
  • Royal: This cultivar is well-liked for its steady yield and is best suited for areas with warm, dry summers.

2. The best place to plant apricot tree

  • Apricots require at least 6 to 8 hours of sunshine every day to grow. Pick a spot that is protected from severe winds and has well-draining soil. Keep an eye out for any adjacent structures or trees that could shadow an apricot tree. Choose a planting location shielded from chilly winter winds if you live in Zone 6 or lower, where plant hardiness may be difficult to achieve. Apricot flowers are vulnerable to frost damage in the early spring, so stay away from low-lying regions where frost might accumulate.
  • Apricot trees should not be grown in irrigated lawns in dry areas like the Southwest desert, as they require more water for growth than turf.

3. When and how to plant an apricot tree

  • When the tree is still dormant, late winter or early spring, is the ideal time to grow apricot trees. As a result, the roots might take hold before the growth season starts.
  • Before planting apricot trees, ensure a well-drained, loamy soil with a pH of 6.0 to 7.5, and consider adding organic materials like compost or peat moss for increased drainage.
  • Create a deep, wide hole twice the tree’s root ball, ensuring the grafted tree’s bulge is 2-3 inches above the soil line. After watering, backfill the hole with a mix of dirt and organic compost.

1. Watering

  • Apricot trees require regular rainfall and watering to maintain soil moisture, but avoid overwatering to prevent root rot.
  • Spread an organic mulch layer of two to three inches around the base of the tree to help keep the soil wet and keep weeds at bay. To avoid fungal infections, keep the mulch a few inches away from the tree trunk.

2. How to fertilize an apricot tree

  • To ensure optimal growth and fruit output, fertilize your apricot tree in early spring and early summer using a balanced fertilizer like 10-10-10. Apply the fertilizer at the drip line, avoiding overfertilization to avoid excessive foliage development and fruit yield loss.

3. When and how to prune an apricot tree

  • Annually prune apricot trees in late winter, trimming unhealthy, damaged, suckers, and branches to form a V shape. Remove closely spaced growth on main branches, aiming to remove 25% of interior growth annually for fruit ripening.
  • Apricot trees require trimming and thinning to remove excess fruit, ensuring each young apricot is 4 to 6 inches apart. This practice preserves the tree’s health by allowing the remaining fruit to reach maturity.

4. Control of diseases and insects

  • Apricot trees face pests and issues like root infections, cankers, and weed eaters. To prevent cankers, shield lower limbs and trunk from weed eaters and lawnmowers, and if possible, cut away diseased timber 12 inches below symptoms.

You may effectively establish a fruitful and healthy apricot tree in your yard by using the advice in this article. To guarantee that your tree flourishes and yields plenty of fruit, every step—from choosing the appropriate species to trimming and insect control—is essential.

Certainly! If you’d like to learn more, please consider following our WhatsApp Channel: Harvest Gardening

Q1: How to propagate an apricot tree?

A1: You may utilize techniques like grafting, budding, or seeding an apricot tree to multiply it. The most dependable method is to graft onto rootstock; growing from seeds may take longer and provide inconsistent fruit quality.

Q2: What is the best fertilizer for apricot trees?

A2: Apricots prefer low nitrogen, high potassium, and phosphorus fertilizers like chicken manure, worm castings, worm juice, and seaweed solution during the growth season. Potash is also beneficial.

Q3: What is a dwarf apricot tree?

A3: Dwarf apricot trees, a smaller variation of the common apricot tree, grow 6-8 feet and are ideal for small gardens or container planting, yet still produce full-sized apricots.

Apples are one of the most well-liked and adaptable fruits, and the apple tree (Malus domestica) is a commonly grown fruit tree. Apple trees are native to Central Asia and have been cultivated for thousands of years in temperate regions worldwide. These trees are deciduous, reaching heights of up to 40 feet. Usually, they blossom in the spring and produce fragrant pink or white flowers, which are followed by fruit in the late summer or early fall. Apples are consumed raw, cooked, or in drinks, and apple trees are very important culturally and commercially worldwide. This in-depth tutorial provides a comprehensive guide to growing an apple tree, ensuring its health and fruit production, regardless of gardening knowledge, and provides expert guidance through every stage of the process.

1. Choosing the right apple variety

Selecting the appropriate variety is the first step in growing a vigorous apple tree. Apple tree varieties are as varied as the areas in which they are found. Among the crucial elements to take into account are:

  • Apple trees grow well in moderate climates. Varieties like Honeycrisp, Gala, and Granny Smith grow nicely if you live in an area with chilly winters and mild summers. You could like Anna, Dorsett Golden, or Fuji in warmer climates.
  • A large number of apple trees do not self-pollinate. This implies that many varieties are required for cross-pollination. Select cultivars that flower at around the same time to guarantee a good crop.

2. How to plant an apple tree

Apple tree planting is a process that calls for time and skill. To get you started, consider these recommended practices:

  • When the apple tree is dormant, early spring or late fall, is the ideal time to plant it. This enables the roots to take hold before the onset of the growing season.
  • Apple trees require well-draining soil with a pH of 6.0 to 7.0, and to promote root growth, compost or organic matter should be added to the soil.
  • Standard apple trees need 15-20 feet of space, while dwarf trees should be placed 8-10 feet apart for healthy air circulation and disease prevention.
  • Not deeper than the roots, but twice as broad, should be dug. Make sure the tree is 2-4 inches above the earth at the graft union, which is where the tree was grafted onto the rootstock.

Learning the technique of caring for apple trees can guarantee that your trees are healthy and provide plenty of fruit, regardless of your level of gardening knowledge.

1. Watering and mulching

For apple trees to develop healthily, mulching and watering them appropriately are crucial. Poor growth or illness can result from either overwatering or underwatering.

  • Newly planted apple trees require 10-15 liters of water weekly, while established trees require deep water every ten to fourteen days, depending on their environment.
  • Cover the tree’s base with a layer of mulch that is two to three inches thick, leaving a few inches of space around the trunk. This controls soil temperature, keeps weeds out, and preserves moisture.

2. How to prune an apple tree

For apple trees to remain healthy and produce as much fruit as possible, pruning is essential. When the tree is still dormant, in late winter or early spring, pruning is most effective.

  • Pruning enhances sunlight penetration, which is essential for fruit growth, helps maintain the form of the tree, and gets rid of dead or diseased wood.
  • Cut off branches extending downward, inward, or across, build an outward-growing scaffold, and use sharp, clean instruments for pruning to prevent disease spread.
  • Remove extra fruit in early summer for healthier growth and remove smaller, malformed, or crowded fruits to maintain one apple per 6-8 inches on a branch.

3. How to fertilize an apple tree

Providing the proper nutrients to your apple tree will guarantee healthy development and a bountiful crop. For best effects, fertilize apple plants as follows:

  • Apply fertilizer in early spring before the growth season begins, then apply a lighter treatment after the tree flowers.
  • Use a balanced fertilizer specifically designed for fruit trees, with an N-P-K ratio of 10-10-10, and organic solutions like compost and well-rotted manure.
  • Apply fertilizer evenly beneath the tree’s canopy, avoid closeness to the trunk, and thoroughly water the area after application to ensure root nutrient absorption.

4. Preventing apple tree diseases

Apple trees are vulnerable to many pests and illnesses, but damage may be minimized with the right maintenance. Typical problems include the following:

  • A fungus that causes dark spots on fruits and plants can be prevented by maintaining proper airflow, frequent trimming, and using appropriate fungicides.
  • Apple trees are damaged by bugs burrowing into them, and larvae can be prevented by covering the base with sticky bands and using pheromone traps.
  • Branches die back from this bacterial illness and seem burned. Reduce the size of the impacted regions and stay away from high-nitrogen fertilizers that promote rapid development.

Expert apple tree cultivation takes time, but with the correct techniques, you may have a strong tree and a bountiful crop for many years to come. All these little things—pruning, fertilizing, eliminating pests, choosing the appropriate species, and watering regularly—matter immensely to the success of your tree.

Certainly! If you’d like to learn more, please consider following our WhatsApp Channel: Harvest Gardening

Q1: How long does it take to fully grow an apple tree?

A1: Apple trees typically mature 6-10 years from seed, while grafting from older specimens takes 3-5 years, depending on the type and growth environment.

Q2: How to grow apples from apples?

A2: To grow apples from apples, clean, extract seeds, and plant them in soil. Store in a cool, dark spot for a few weeks, and provide ample water and sunlight.

Q3: In which season do apples grow?

A3: Apple harvest season is September-October, except Nilgiris (April-July), with fruits developing 130-150 days after the maximum bloom stage, depending on the type.

Prunus persica, the peach tree, originating in Northwest China, is a deciduous tree that grows best in mild summers and cold winters. It is tiny to medium-sized, reaching 4 to 10 meters, and produces velvety-skinned peaches after pink blooms in spring. Peach trees are valued for their decorative beauty and cultural importance. Growing a peach tree in your garden can yield an abundant crop of sweet peaches each summer. In this post, we provide the best peach tree care advice to help you maintain a strong, fruitful tree.

1. Selecting the proper variety of peach tree

Selecting the right peach variety is crucial for planting, as different cultivars suit different climates and soil types, with clingstone peaches ideal for canning and preservation.

  • Climate Compatibility: Peaches thrive in mild summers and cold winters, so choose a variety with chill hours below 45°F for optimal dormancy and fruit production. Low-chill varieties like Flordaprince or Tropic Snow are ideal for mild winter regions.
  • Soil Requirements: Peaches thrive in sandy loam, well-drained soil with a pH of 6.0 to 7.0. Test the soil and supplement it with organic matter if needed. Avoid thick clay soils, as they can cause root rot.
  • Space Considerations: To flourish, peach trees require lots of area. Trees of standard size should be planted 15 to 20 feet apart, while dwarf kinds can be planted 10 to 12 feet apart.

2. Planting the peach tree

Planting the right peach tree seedlings in early spring or late winter is crucial for its strong growth and healthy development.

  • Planting Location: Planting peach trees requires a spot with 6-8 hours of direct sunlight daily, as sunlight generates energy for fruiting. Avoid low-lying areas with late frost buildup.
  • Making the Hole: To ensure proper root growth and a solid base, create a hole twice as deep and wide as the tree’s root ball. To hydrate the roots, immerse them in water for a few hours before planting.
  • Planting Depth: Plant the tree in a hole with level soil around the root collar to prevent root infections and ensure proper drainage.
  • Backfilling and Watering: Backfill the hole with excavated dirt, compact it, and water the tree after planting. Allow the soil to settle around the roots, and add a 3-inch layer of mulch to prevent rot.

1. Watering and graining

Your peach tree needs regular watering to be healthy, especially in the early years while the tree is establishing its root system.

  • Watering Schedule: Watering a peach tree requires a specific schedule, varying based on climate and rainfall. Regular watering during dry spells is crucial to prevent root rot and maintain moist soil.
  • Techniques of Irrigation: Soaker hoses or drip irrigation are ideal for peach trees as they directly hydrate roots without soaking leaves, preventing brown rot and peach leaf curl.

2. How to prune a peach tree for optimal growth

Pruning is crucial for peach tree care, promoting healthy growth, air circulation, and fruit yield. Open-center pruning is optimal for allowing sunlight into the canopy.

  • Pruning Schedule: The optimal time for pruning a peach tree is late winter or early spring, with summer pruning being another option to reduce overgrowth and increase light penetration.
  • How to Prune a Peach Tree: Remove dead or damaged limbs, trim back branches to create an open vase shape, lower illness risk, and improve fruit quality. Reduce tree height to 10-12 feet for manual fruit harvesting.
  • Fruit Thinning: To ensure fruit size and prevent branch fracturing, thin peaches manually and space them 6-8 inches apart on branches. Pruning also prevents branches from fracturing due to excessive fruit.

3. How to fertilize a peach tree

Proper fertilization is crucial for fruit health and abundance, ensuring a balanced supply of micronutrients like iron, zinc, magnesium, nitrogen, phosphorus, and potassium.

  • When to Fertilize: Fertilize your tree in early spring, using a balanced 10-10-10 blend, according to the package’s rate, but avoid overfertilization, as excessive fertilization may result in too many leaves instead of more fruit.
  • Fertilizers: Organic fertilizers like fish emulsion, compost, or well-rotted manure can be used as natural alternatives to fertilize plants, gradually releasing nutrients into the soil for consistent growth and fruiting.

4. Control of peach tree diseases

Peach plants are prone to several pests and illnesses. Being proactive in handling any issues is essential to maintaining the health and productivity of your tree.

  • Common pests causing harm to peach plants include scale insects, aphids, and peach tree borers. Regularly check for infestation symptoms and treat with horticultural oil or insecticidal soap.
  • Fungal Diseases: Brown rot, powdery mildew, and peach leaf curl are common fungi damaging peach trees. Regular pruning, removing diseased branches, and using a fungicide spray in spring can help prevent these issues.

To grow and care for a peach tree, choose a sunny spot with well-drained soil, plant in early spring, water frequently, especially in dry spells, and cover the soil with mulch. Adherence to comprehensive maintenance guidelines can result in a healthy tree yielding an abundant crop.

Certainly! If you’d like to learn more, please consider following our WhatsApp Channel: Harvest Gardening

Q1: Will a peach tree grow in the UK?

A1: Peach trees in the UK, particularly in warmer southern regions, may thrive but may require protection against frost and chilly breezes during spring blooms.

Q2: When to harvest peaches?

A2: Peaches are typically harvested in mid to late summer when they have a rich, uniform color, slight give when pressed, and a sweet perfume.

Q3: Can peach trees grow in India?

A3: Peach trees thrive in milder climates in northern India, such as Himachal Pradesh, Jammu & Kashmir, and Uttarakhand, due to their cooling hours.

Q4: Can you grow a peach tree from a cutting?

A4: A peach tree can be grown from a softwood cutting, but requires close tending and is most effective in warm, humid conditions with a well-drained medium.

Although growing Geraniums outdoors, they can also be kept as houseplants. Growing geraniums indoors can be a rewarding way to add vibrant color and charm to your living space. These versatile plants thrive with ample light, consistent watering, and a bit of attention to their specific needs. Whether you’re a seasoned gardener or a beginner, indoor geraniums offer an opportunity to enjoy their beautiful blooms year-round, enhancing the atmosphere of your home with their cheerful presence. Discover how to grow geraniums indoors in any environment with this beginner’s guide.

There are numerous varieties of geranium houseplants, and each has special characteristics. The most well-liked geraniums are zonal varieties, which are distinguished by their vivid blooms and unique leaf designs. Because of their trailing tendrils, ivy geraniums are perfect for hanging baskets and containers. Large, vivid blossoms adorn the flowers of Regal, or Martha Washington, geraniums, which flourish in colder climates. Prized for their aromatic leaves, scented geraniums bring a sensory aspect to any area with their aromas of lemon, rose, and mint. Easy maintenance, vibrant blooms, and an eye-catching complement to indoor gardens are offered by each variety.

  • Light: Producing robust, blooming indoor plants requires Geraniums to have bright, direct sunshine to grow well. Put them up against a window that faces west or south. Six to eight hours in the sun straight. To keep the plants healthy if you don’t have windows that get enough sunlight, you can add artificial grow lights and use them for roughly 14 hours a day. 
  • Temperature: Temperatures of 60–75°F (15–24°C) during the day and roughly 55°F (13°C) at night are ideal for geraniums. They can get stressed out, so keep them out of temperatures below 50°F (10°C).
  • Soil and potting: To guarantee enough aeration, use a well-draining potting mix that preferably incorporates sand, peat, or perlite. To avoid water pooling in the soil, use containers with drainage holes.
  • Watering: Give your geraniums some water when the top one to two inches of soil appear dry. Maintain adequate drainage because overwatering can cause root rot. These plants are highly susceptible to diseases including rust, blossom blight, and gray mold if the soil is kept excessively moist.
  • Fertilizing: Treat geraniums every four to six weeks during the growing season (spring and summer) using a balanced, water-soluble fertilizer (such as 10-10-10 or 20-20-20). Once a month, use an all-purpose liquid fertilizer at half strength or time-release fertilizers. The plant’s development naturally slows down in the winter, so cut back on feeding.
  • Pruning: Removing any lanky canes and pinching back the growth tips can promote a bushier plant. To increase ventilation and stave off illness, remove any yellowing or dead leaves.

Geraniums are a satisfying indoor plant to grow since they bring bright colors and fresh greens to any area. Hardy plants can survive all year long with the right conditions, such as frequent watering, well-draining soil, and enough sunlight. Indoor geraniums will blossom wonderfully and add to the ambiance of your house if you keep the temperature moderate and prune when necessary. You may learn how to grow geraniums indoors and have healthy, vivid geraniums indoors all year long by following these instructions.

Q1: Do geraniums grow well indoors?

A1: Absolutely, geraniums may thrive indoors provided they have access to lots of sunlight—ideally, a bright window. To flourish indoors, they also need soil that drains well and moderate watering. Usually, they are accessible from March to June.

Q2: How do you keep geraniums alive inside?

A2: Geraniums in pots during the winter Take out all the plants you choose to save, being careful to save the majority of the root ball, and transfer them into a big pot. After giving the plants a thorough watering, put them in a window that faces the sun or artificial illumination. Every two weeks, plants need to be watered.

Q3: How to grow geraniums indoors winter?

A3: Geraniums can be grown indoors in the winter by placing them in a sunny area with at least six hours of light per day. Water them sparingly, letting the soil dry in between applications. It is best to store them between 60 and 70°F (15 and 21°C).

Q4: How long do indoor geraniums last?

A4: Indoor geraniums can survive for several years if given the right conditions, which include enough sunlight, frequent hydration, and periodic trimming. However, if not properly managed, they may begin to degrade after 2-3 years.

Famous for its calming effects and daisy-like blossoms, chamomile is a pleasant and adaptable herb. It grows well in sunny, well-drained soil and is perfect for novice and expert gardeners. Growing chamomile requires planting seeds directly in the ground or beginning them indoors before moving them outdoors. This hardy plant is ideal for garden beds, containers, or even as a companion plant to ward off pests because it needs very little maintenance. Chamomile is a lovely addition to any garden because of its pleasant scent and wide range of applications, which include natural skincare products and soothing drinks.

Chamomile is a well-known herb with various types, each with its benefits. The two most popular varieties are German chamomile (Matricaria chamomilla) and Roman chamomile (Chamaemelum nobile). German chamomile is frequently used in drinks and cosmetics products because of its relaxing and anti-inflammatory properties. Roman chamomile, with its slightly sweeter scent, is commonly used for stomach problems and aromatherapy. While they both have calming qualities, their functions and traits are different. You may cultivate chamomile indoors or outdoors. Here’s some excellent tips on how to grow chamomile depending on the environment:

1. Instructions for growing Chamomile indoors:

  • Pick a pot that is at least 6 to 8 inches deep and has sufficient drainage. A huge pot is not necessary for chamomile, but make sure it has adequate room to spread.
  • Use potting soil that drains properly, preferably with a pH of 5.6 to 7.5.
  • Your chamomile should be placed in an area that gets at least four to six hours of sunlight per day. The perfect window faces south. Use grow lights if there is not enough natural light.
  • Don’t overwater the soil; just a gentle misting is enough.
  • The ideal temperature range for chamomile is 60–68°F (15–20°C).

2. Guidelines for growing chamomile outdoors:

  • In your garden, pick a bright spot—though chamomile can also grow in some partial shade. It does best in moderate climates.
  • Sandal or loamy soils with good drainage are ideal for chamomile growth. If you have thick soil, you might want to add some compost or sand to help with drainage.
  • When there is no longer a chance of frost, sow seeds straight into the garden in the early spring. Gently press the seeds into the earth after scattering them there. Water sparingly so as not to remove the seeds.
  • When seedlings are big enough to handle, thin them to 6–8 inches apart. By allowing for adequate air circulation, this space lowers the chance of illness.
  • Once established, chamomile can withstand drought; but, to maintain its health during dry spells, give it regular watering.
  • Cover the plants with a light layer of mulch to keep moisture in and keep weeds out.

3. Basic maintenance advice for growing chamomile:

  • It doesn’t take much fertilizer to grow chamomile. A light springtime application of a balanced fertilizer can help improve poor soil conditions.
  • Regularly deadhead wasted flowers to promote ongoing blooming. After the first bloom, trim the plants back to encourage a second flush of flowers.
  • Although chamomile is often pest-free, watch out for spider mites and aphids. Use insecticidal soap to manage infestations as needed.

A straightforward and satisfying gardening project, chamomile has calming qualities, may be used in a variety of teas and cosmetics items, and is a natural treatment. It needs little care and grows well in a variety of temperatures. Growing chamomile is a rewarding way to experience nature’s calming qualities and establish a connection with it. Following these guidelines will help you learn how to grow chamomile inside or outdoors, allowing you to enjoy its beauty and advantages all year round.

Certainly! If you’d like to learn more, please consider following our WhatsApp Channel: Harvest Gardening

Q1: How to grow chamomile in Texas?

A1: In Texas, chamomile should be planted in full sun to partially shaded, well-drained soil. Water frequently, and think about sowing just after the last frost or beginning seeds indoors in the early spring.

Q2: When to harvest chamomile?

A2: When the chamomile blooms completely open, which is usually in the early morning after the dew has evaporated, harvest it. Just before the flowers begin to wilt is the ideal time.

Q3: How do I start growing chamomile from seeds indoors?

A3: First, add seed starting mix to tiny pots or seed trays. Lightly scatter the chamomile seeds on top, pressing them into the ground without packing them in. Place the pots in a warm, sunny spot and make sure the soil stays moist.

Because of its zesty and refreshing flavor, cilantro—also referred to as coriander in some regions of the world—is a popular herb used in various cuisines. Whether you aim to add color to your garden or enjoy fresh herbs in your home, growing cilantro can be rewarding. However, cilantro has a reputation for being a little finicky, especially when it comes to bolting or going to seed prematurely, in hot weather. This guide provides you with the best tips on how to grow cilantro successfully. 

Growing cilantro can be rewarding if you know how to create the right conditions. Here are some of the best tips for growing cilantro:

Now let’s see how to grow cilantro:

  • Sow cilantro in early spring or late autumn. Planting should be avoided during the hottest months since it struggles in the heat.
  • Full to partial sun is ideal for cilantro growth. A little afternoon shade helps keep plants from bolting, or going to seed too soon, in hotter climes.
  • Use organic matter-rich, well-draining soil. Soil with a pH of 6.2 to 6.8 is ideal for cilantro, as it is somewhat acidic. Plant seeds 6 to 8 inches apart at a depth of about 1/4 inch. After seedlings are well-established, thin them to 12 inches apart.
  • Cilantro needs water just like all other plants do. Throughout the growing season, the plants require steady, uniform hydration. Before you water it again, make sure to thoroughly wet the soil and let it dry out.
  • It is light to feed cilantro. Use a balanced fertilizer sparingly, or amend the soil before planting with compost. For improved development, think about utilizing organic fertilizers like fish emulsion or compost tea. A diet like 12-4-8, which has a high nitrogen ratio, is recommended. Another great choice is a time-release formula.
  • The ideal temperature range for cilantro is between 50°F and 85°F (10°C and 29°C). If the weather rises, give it some shade or think about planting somewhere colder.
  • The main issue with cilantro is bolting, which detracts from the quality of the leaves. Young plants are prone to damping off, and frequent visits by sap-sucking leafhoppers may result in the development of Aster’s yellow disease in the plant. In this instance, the plant turns infertile and its blooms and leaves turn yellow. Leaf spots can also affect cilantro.

You can have fresh herbs all year long by growing cilantro indoors. You can grow cilantro inside in containers. Verify the pot’s drainage system. It needs a bright area, preferably close to a window that receives four to six hours of sunlight each day. Make sure the soil drains adequately and maintain a constant moisture level, but don’t overwater it. Because cilantro can be a bit picky, keep the temperature cool—between 60 and 70°F (15 and 21°C)—to avoid it bolting too soon. You may have a consistent supply of aromatic cilantro leaves for your cooking with proper care.

Cultivating cilantro from cuttings is an easy and effective technique to spread this aromatic herb. Begin by taking healthy, 4-6 inch-long stems from an established cilantro plant. Make sure the cuttings are above the water line in a glass of water after trimming the bottom leaves. The emergence of roots will occur in a few days. The cuttings can be planted in soil and kept in a sunny area until the roots are one to two inches long. In a few weeks, your cilantro will be ready for harvest with regular watering and care.

For people who appreciate using fresh herbs in their cuisine, growing cilantro may be a fulfilling experience. All things considered, planting cilantro may be an easy and efficient method to add fresh, locally grown herbs to your food preparations with the right care and attention. You may enjoy fresh cilantro from your garden for a large portion of the year if you follow these recommendations.

Certainly! If you’d like to learn more, please consider following our WhatsApp Channel: Harvest Gardening

Q1: What type of soil is ideal for growing cilantro in Texas?

A1: Loamy, well-draining soil with a pH of 6.5 to 7.5 is ideal for cilantro growth. The fertility and structure of the soil can be enhanced by adding organic matter.

Q2: What is the best time to harvest cilantro?

A2: Harvest cilantro three to four weeks after planting, before the plant flowers and leaves are vibrant green.

Q3: What is the best nutrient solution for growing cilantro hydroponically?

A3: When growing cilantro hydroponically, the ideal fertilizer solution should have a balanced pH of 6.5 to 6.0 and be high in potassium, phosphorus, and nitrogen.

Q4: What is bolting in cilantro?

A4: Bolting in cilantro refers to the rapid flowering and seed production of the plant, often triggered by heat or stress, which can result in bitter leaves.

For thousands of years, people have cultivated and utilized herbs for their culinary and therapeutic properties. Any landscape is made aesthetically beautiful and fragrant by its fragrant and ornamental features. You won’t go back after you’ve experienced the flavor difference between fresh and dried herbs. Fresh herbs taste better and are more nutrient-dense than store-bought varieties. Growing and harvesting your herbs also costs less. Here are some pointers on how to grow herbs in your garden at home.

  • Basil: Known for its potent flavor and scent, basil is a widely used herb. It grows nicely indoors with lots of sunlight and soil that drains properly. Growing basil in your own house, be it on a sunny windowsill, garden, or balcony, may be a fulfilling experience.
  • Parsley: Growing parsley indoors is simple and flexible. It likes frequent watering and shaded spots.
  • Chives: Chives are hardy herbs that thrive in indoor environments. They need wet soil and mild sunlight.
  • Mint: Mint is a hardy herb that grows well indoors but may easily take over outdoor gardens. It likes soil that is regularly moist and partially shaded.
  • Rosemary: A fragrant herb, rosemary lends a savory flavor to a variety of meals. It needs well-drained soil and lots of sunshine.
  • Oregano: With enough sunlight and well-drained soil, oregano is a hardy herb that can grow indoors. Growing oregano indoors is an easy and rewarding process, regardless of your level of gardening experience.
  • Select an interior location that receives 6 to 8 hours of sunlight per day, such as a window facing south.
  • As long as they have adequate drainage, use containers with holes for drainage to avoid waterlogging and root rot. Some examples of such containers are repurposed jars, plastic containers, and terracotta pots.
  • Make sure the potting mix you use is well-drained.
  • Let the soil dry out a little bit in between waterings. It’s time to water if the soil is dry to a depth of one inch.
  • Every two weeks, use an all-purpose water-soluble fertilizer at half the suggested strength.
  • Arrange the herbs in a well-ventilated space with a temperature between 60 and 75 degrees Fahrenheit.
  • Select a location in your garden that gets at least 6 to 8 hours of sunlight per day as most herbs prefer full sun. Make sure the soil in the region drains properly to avoid waterlogging.
  • Add organic matter, like compost or manure, to the garden soil and make sure it has enough drainage. The pH needs of different types of herbs vary. For window boxes, hanging baskets, and containers, use premium, well-draining soil like Proven Winners Premium Potting Soil.
  • Herbs grown outdoors can need to be watered more frequently, particularly in hot, dry weather. Make sure to keep the soil uniformly moist but not soggy by giving it regular, deep watering.
  • The majority of herbs require little to no additional fertilizer. When planting, incorporate a slow-acting fertilizer into the soil, such as cottonseed meal, blood meal, or bone meal fertilizer spikes; add more water-soluble fish emulsion as needed.
  • For the best flavor, pluck outdoor herbs in the morning when their essential oils are concentrated, and trim them frequently to encourage bushy growth and prevent legginess.

To sum up, there are a few important aspects that need to be considered when learning how to grow herbs. These tips can help you maintain a healthy herb garden that will bring you fresh flavor and aromatic delights all year long, whether you want to grow it indoors or out. Growing herbs is a fun and satisfying project, whether you’re using them to make tea with freshly picked mint or as a garnish for foods made with basil.

Certainly! If you’d like to learn more, please consider following our WhatsApp Channel: Harvest Gardening

Q1: How do I prevent pests and diseases in my indoor herb garden?

A1: To prevent fungal illnesses, regularly check herbs for pests, keep the indoor garden area clean, apply neem oil or insecticidal soap, and refrain from overwatering.

Q2: How to grow herbs in winter?

A2: If you want to cultivate herbs in the winter, you can use grow lights or indoor pots placed near windowsills that receive plenty of sunlight to ensure good growth.

Q3: How often should I water my outdoor herb garden?

A3: Water when the top inch of soil feels dry to the touch since herbs enjoy slightly moist soil. Watering strongly and seldom is preferable to watering softly every day.

The Kentia palm, sometimes referred to as the thatch palm or Forster Sentry palm, is a laid-back houseplant that grows slowly and is a tropical native. The senator from New South Wales, William Forster, inspired the name Kentia Palms. Howea forsteriana is the scientific name for it. Under the right circumstances, this species can reach a height of 40 feet. In this article, we shall learn more about the development and maintenance of Kentia palms.

California and Hawaii are the two US states where it may be grown. A detailed guide is provided here.

How to plant Kentia palms:

  • Choose a spot outside with sandy to loamy, well-draining soil that receives some shade. Pick a pot with adequate drainage holes if you’re planting in one. Add more gravel or broken pottery to the bottom for more drainage, then fill in around the roots, leaving room at the top for watering.
  • When the top inch of soil dries out, prepare to water. However, take care to prevent the soil from getting too wet, as this may cause root rot. Kentia palms can withstand temperatures as high as 100 degrees Fahrenheit and, for small periods, as low as 25 degrees Fahrenheit.

A little extra attention to humidity, temperature, watering, and a little care will be needed for indoor Kentia palm plants.

Kentia palm fertilizer

  • Since it grow slowly, they don’t require a lot of fertilizer. Use a slow-release fertilizer in the spring and summer to support growth if you decide to fertilize these palms. Choose a fertilizer designed especially for palm trees and adhere to the directions on the label.

Pruning

  • It should require very little pruning. However, you may need to cut off affected fronds as soon as they develop to prevent the disease from spreading. Only trim fronds that are unhealthy or dead. Using sharp pruning shears, remove these. Once the fronds get brown and dry, trim them off. 

Propagating Kentia Palm

  • Though spring or summer are the ideal seasons, you can do this at any time. Release the root ball from the pot by gently pulling it loose. Next, decide which palm you wish to be excluded from the group. Replant your split palm in a good location for growth. The remaining palms can then be separated or replanted together as before. 

Potting and Repotting of these palms

  • This palm grows slowly, so you may only need to repot it every few years. Make sure the container has enough drainage holes before planting this palm in it. Plant the same depth in a pot that is a few inches wider around. Add more fresh potting soil that drains properly to fill in. 

Common illnesses and their therapy

  • Spider mites, mealybugs, and scale are common pests that can harm this palm. A light misting of a powerful stream of water can occasionally cure a mild infestation. If not, you can apply neem oil or insecticidal soap. A suitable fungicide may typically effectively treat diseases that affect these palms, such as leaf spots and other fungal problems. 

Kentia palms are popular indoor and outdoor plants, recognized for their delicate, fluffy fronds and ability to flourish in low-light environments. They can grow up to 10 feet inside and grow slowly. It makes these palms a popular option for bringing some greenery into different areas. You can properly care for this palm tree by adhering to the above-described directions.

Certainly! If you’d like to learn more, please consider following our WhatsApp Channel: Harvest Gardening

Q1. What is the best fertilizer for Kentia palms?

A1. For these palms, the best liquid fertilizer is one that is balanced and has equal amounts of potassium, phosphate, and nitrogen. During the growing season, fertilize it every four to six weeks.

Q2. Is Kentia palm toxic to cats?

A2. No, it is okay for your cat to gnaw on a this palm, therefore there’s no need to be concerned.

Q3. Why are the leaves of my Kentia palm turning yellow?

A3. On a Kentia palm, yellowing leaves are frequently an indication of overwatering. Make sure the soil drains well, and let it dry out a little bit in between waterings.

Q4. How to grow Kentia palm indoor?

A4. Due to their tolerance for poor light, container growth, and even occasional neglect, kentia palms can thrive inside. Use potting soil that drains properly. Water your Kentia palm every one to two weeks, or when the top inch of soil becomes dry. 

Q5. What are the main differences between a Kentia palm and a Majesty palm?

A5. The Kentia palm is easier to maintain indoors due to drought resistance and low light, while the Majesty palm requires more humidity, increased light, and regular watering for flourishing.