Lemon peels has many uses outside of cooking and is frequently disregarded as only a byproduct of juicing or cooking. It rich in vitamins, antioxidants, and essential oils, have many uses in the home, cosmetic, and health sectors.It have been used for ages in many cultures as cleaning agents and flavorings due to their many uses. The many applications of lemon peels are examined in this article.
To fully utilize lemon peels, follow these steps:
Grate the zest of thelemon peel to infuse your recipes with a zesty kick. It’s ideal for bringing out the flavor of marinades, salads, pasta dishes, and desserts.
To make a revitalizing tea with lemon flavor, steep lemon peels in hot water. They can also be added to your water pitcher to boost its flavor.
Create your citrus-infused cleanser to make use of lemons’ inherent cleaning properties. Just let it’s steep in white vinegar for a few weeks, then filter the resulting liquid to clean surfaces such as cutting boards and countertops.
To add a lovely, natural scent to your home, boil it in water with a splash of cloves or cinnamon. This easy mixture works well to dispel smells and make the space seem cozy.
To make a revitalizing exfoliating scrub, mix sugar, olive oil, and finely crushed lemon peel. The peel’s citrus qualities can help revitalize and brighten your skin, leaving it smooth and radiant.
To keep ants and other pests out of your house, scatter lemon peels around the locations they are currently present in. Without the use of dangerous chemicals, the potent citrus aroma serves as a natural repellant.
Conclusion:
In conclusion, there are a lot of advantages and applications for this besides cooking. So lemon peels are incredibly versatile, being used as everything from natural cleaners to fragrant accents in food and beauty products. They are useful for housekeeping, health, and hygiene reasons because of their high concentration of essential oils and nutrients. Including lemon peels in daily cooking can improve general well-being and lead to a lifestyle that is healthier, more sustainable, and greener.
A1: Antioxidants, vitamins, and minerals found in lemon peels help strengthen immunity, facilitate digestion, enhance skin health, and freshen your breath.
Q2: How do I store lemon peels for future use?
A2: Lemon peels can be kept for up to a week in the refrigerator in an airtight container, or they can be frozen for longer storage. As an alternative, they can be dried and kept for several months in a cool, dark spot.
Q3: What are the benefits of boiling lemon peels?
A3: It can be boiled for numerous advantages. Antioxidants, vitamins, and minerals found in abundance in these peels have been shown to support healthy skin, strengthen the immune system, and enhance digestion. Boiling also releases steam, which has the added benefit of clearing the air and easing lung congestion. Another healthy and pleasant technique to flavor drinks or improve the flavor of different foods is to infuse water with lemon peel.
If you’ve ever desired a low-maintenance herb that can flourish practically anywhere, growing thyme in pots is one of the simplest and most gratifying options. Whether you live in an apartment, have a limited garden area, or simply enjoy having fresh herbs on hand, thyme is the ideal plant to start with.
This hardy Mediterranean herb is prized for its fragrant leaves, culinary adaptability, and durability. With the appropriate procedures, you can cultivate thick, delicious thyme on your balcony, windowsill, or patio.
Let’s be honest—many novices struggle with herbs because they overwater or utilize the incorrect soil. That’s precisely why this guide exists. If you follow these foolproof steps, you’ll have a thriving thyme plant in no time.
Why choose thyme for container gardening?
Thrives under sunny conditions.
Requires minimal watering
Grows nicely in smaller pots.
Commonly used in cooking.
It attracts pollinators like bees.
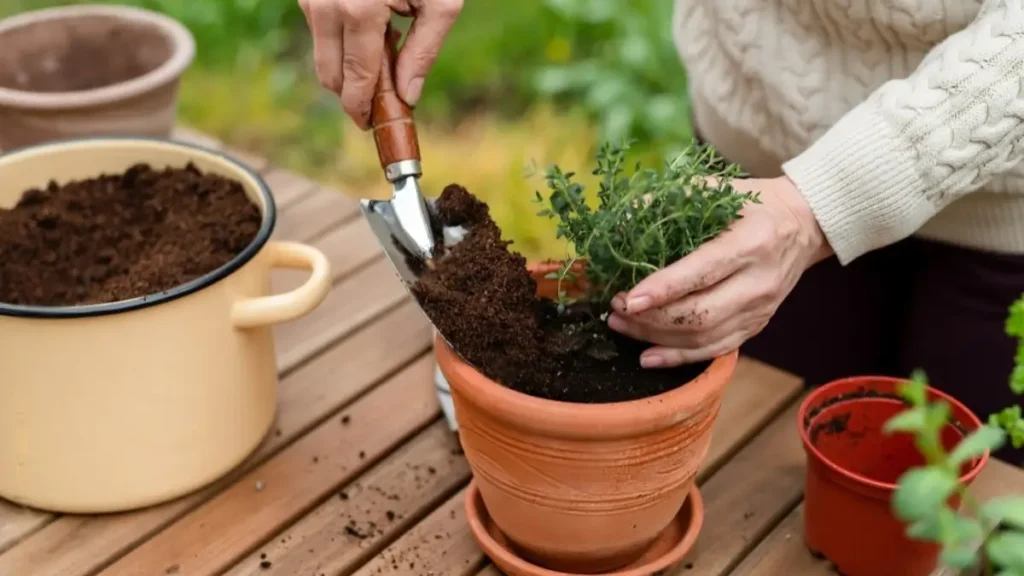
Choosing the right pot for thyme
Choosing the right container is critical for successful planting. The perfect pot should be at least 6-8 inches deep, composed of terracotta to avoid overwatering, and fitted with drainage holes. Avoid using plastic pots because they retain too much moisture, which is bad for thyme.
Best soil for growing thyme in pots
Thyme thrives in well-drained, somewhat sandy soil and requires a specific soil mix for maximum growth. The best mix is 40% garden soil, 30% sand or perlite, and 30% compost. Thyme roots decay easily in damp circumstances, proper drainage is essential.
Sunlight requirements
Thyme grows in direct sunshine, requiring at least 5 to 6 hours each day, with 6 to 8 hours being optimum. For best indoor development, place the pot near a south-facing window to guarantee adequate light exposure.
Watering thyme the right way
Overwatering is the most common mistake made while planting thyme in pots. Key watering guidelines include watering only when the topsoil is dry, avoiding everyday watering, and allowing excess water to drain. Thyme should be considered a “less is more” plant in terms of water requirements.
Growing thyme in pots
Method 1: From seeds
Fill the container with prepared dirt.
Sprinkle the seeds lightly.
Cover with a thin layer of dirt.
Keep moist (but not damp) until germination.
Method 2: From cuttings (Recommended)
Take a 4-5-inch cut.
Remove the lowest leaves.
Plant in wet soil.
Keep in moderate shade until the roots grow.
Fertilizing thyme plants
Thyme is a plant that grows well without a lot of fertilizer. Fertilization recommendations include using organic compost on a regular basis and avoiding nitrogen-rich fertilizers. It is vital to remember that excessive fertilizing might reduce the flavor of thyme, whilst less fertilizer improves the herb’s perfume and taste.
Pruning and maintenance
Regular pruning is required to keep a bushy and fruitful thyme plant. The pruning procedure entails clipping the top growth on a regular basis, cutting no more than one-third of the plant at a time, and eliminating any woody stems. This method encourages the production of fresh, delicate growth suitable for culinary applications.
Common problems and solutions
Even hardy plants might face a variety of challenges. Aphids and spider mites are among the pests that may harm them; one recommended treatment is to apply neem oil regularly. Regarding infections, root rot caused by overwatering is a major problem that may be addressed by improving drainage and lowering watering frequency.
Harvesting thyme
Harvesting is a satisfying process that should be completed after the plant has grown to a height of 5-6 inches. The best time to pick is in the morning since it boosts taste. To harvest, cut the stems just above the leaf node. The gathered material can be used fresh or dried for later use.
Conclusion
Growing thyme in pots is one of the most basic methods to begin your herb-growing experience. With minimum maintenance, the perfect sunshine, and regular watering practices, you may have a steady supply of fresh, scented thyme at home.
Whether you’re making wonderful meals or beautifying your landscape, thyme is a little plant with tremendous benefits.
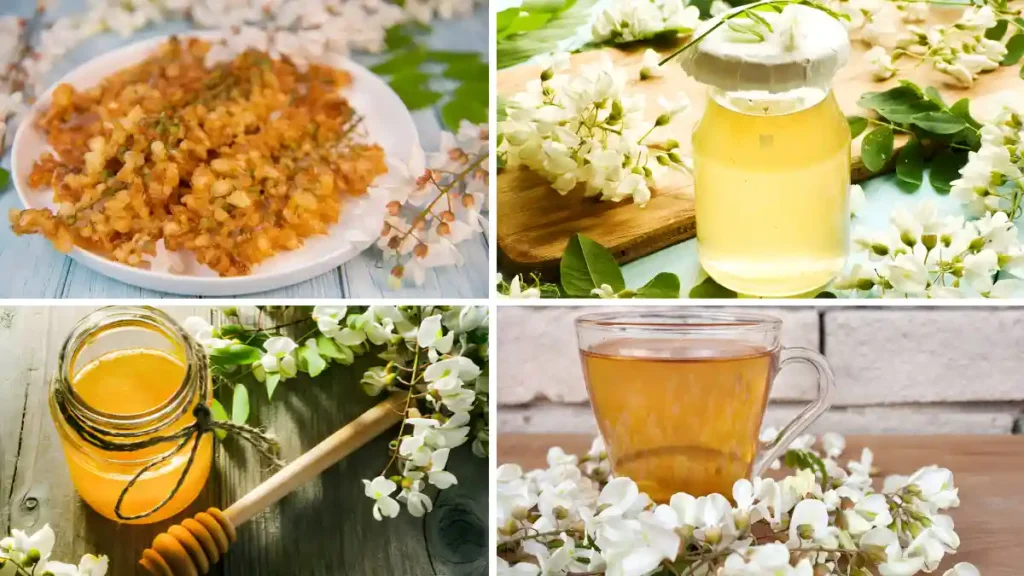
The North American native black locust tree, scientifically known asRobinia pseudoacacia, has long been valued for its beautiful ornamental foliage and hardy wood. Beyond its decorative qualities and practical applications, it also conceals a gastronomic gem that is just waiting to be unearthed. This post will go into the intriguing realm of black locust culinary magic, covering everything from its cultural significance and culinary applications to its health advantages.
Our expertly prepared dishes savor the spellbinding flavors meant to entice your senses and enhance your eating experience. At Black Locust, we take great satisfaction in finding the best ingredients and combining them with cutting-edge cooking methods to produce mouthwatering dishes that make an impression.
Crispy and delicious black locust fritters
Fry black locust flowers till golden brown after dipping them in a thin batter of flour, eggs, and milk. Dust with powdered sugar and serve as a delicious appetizer or dessert.
Syrup with black locust flower infusion
Simmer equal parts water and sugar to make a simple syrup. Add these blooms and steep until fragrant. After straining out the flowers, use the infusion syrup to sprinkle over ice cream or waffles, or to sweeten cocktails and lemonades.
Applying garnish
Add a beautiful garnish of these flowers to cakes, cupcakes, and other sweets. A delicate appearance makes any sweet treat more attractive.
Making salad
Sprinkle freshblack locust blossoms to add a subtle floral taste and a flash of color to a salad. Goat cheese, greens, and a mild vinaigrette dressing work nicely with them.
Honey is made from these flowers
Add these flowers to a jar of honey and let it sit for a few weeks to infuse the honey with the flowers. The honey will absorb the subtle floral tones of the blooms, making it ideal for drizzling over toast or incorporating into tea.
Making tea from black locusts
Tea made from these flowers steeped in hot water is a fragrant and calming plant. You can drink this delightful beverage hot or cold by adding honey or lemon to taste.
Conclusion:
To sum up, black locust flowers have a distinct yet subtle flavor that goes well with a range of dishes. They are adaptable components for both sweet and savory dishes because of their delicate sweetness and flowery scent. A touch of elegance and complexity may be added to any recipe with these flowers, whether it be for baked products, salads, or infused syrups and cocktails. Dishes can reach new heights of culinary perfection when these flowers are prepared carefully and creatively.
A1: Native to North America, the black locust (Robinia pseudoacacia) is a medium-sized deciduous tree. It is well-known for its fragrant white flowers and unusual compound leaves.
Q2: What are the uses of black locust wood?
A2: Because of its strength and capacity to withstand rot and decay, this wood is extremely valuable. It is frequently utilized in outdoor building projects like decking, landscaping, and fence posts.
Q3: What is the significance of black locust flower?
A3: These flowers are important because they draw pollinators like butterflies and bees, which increases the richness of the ecosystem.
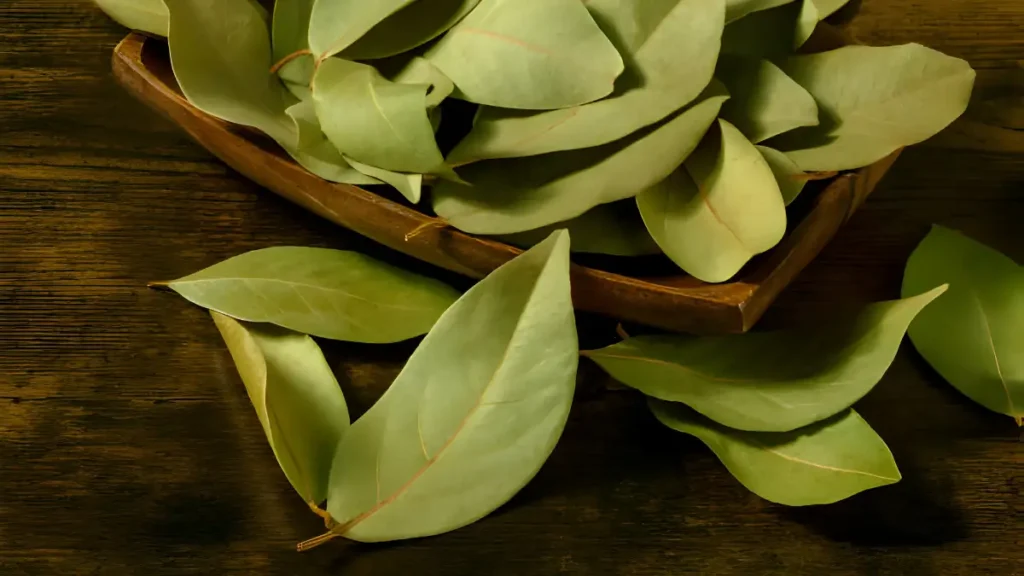
Bay leaves often remain disregarded in the kitchen as mere taste enhancers, but they provide a wealth of health benefits valued for millennia. These fragrant leaves have a variety of therapeutic benefits that enhance general well-being. People frequently use them in cooking to give meals a light flavor and scent. Let’s delve deeper into the bay leaves benefits.
Bay leaves benefits for health:
Gastrointestinal support
Digestive enzyme secretion is stimulated by chemicals found in bay leaves, which support a healthy digestive system. They can aid in the relief of typical digestive problems such as gas, indigestion, and bloating.
Bay leaves benefits for heart health
Compounds found inbay leaves help to control blood pressure and decrease cholesterol, which promotes cardiovascular health. Regular ingestion of bay leaves may help lower the incidence of stroke and heart disease.
Control of blood sugar
According to research, bay leaves may help control blood sugar levels, which means that people who already have diabetes or are at risk of getting it may benefit from using them. Bay leaf constituents have been shown to enhance insulin sensitivity, which helps with glucose metabolism.
Support for respiratory systems:
Bay leaves’ volatile oils have expectorant qualities that help to relieve respiratory conditions like congestion, bronchitis, and coughing. Breathing can be made easier and the respiratory passageways cleared by inhaling steam soaked with bay leaf extracts.
Antimicrobial activity
Antimicrobial qualities found in bay leaves can aid in the prevention of bacterial and fungal illnesses. Bay leaves can help strengthen the immune system and prevent common infections by adding them to soups, stews, or drinks.
Bay leaves benefits reducing stress
Researchers have demonstrated that the tranquil perfume of bay leaves has a calming impact on the mind, assisting in reducing tension and anxiety. You can encourage relaxation and mental health by adding bay leaves to your food or using bay leaf essential oil in aromatherapy.
Conclusion:
Finally,learn about the bay leaves benefits of, which make them an important complement to culinary and medical activities. In addition to improving food flavor, they also aid in digestion, lessen inflammation, and may even have antibacterial qualities. Antioxidants found in bay leaves may also improve general health and well-being. Incorporating bay leaves into your diet can be a tasty and potentially helpful choice, but more research is needed to properly grasp their therapeutic potential.
A1: The process of burning bay leaves releases chemicals and essential oils, including myrcene and eucalyptol, which can repel insects and aid with relaxation, stress relief, and respiratory health.
Q2: Can bay leaves benefits skin health?
A2: Indeed, bay leaves have antibacterial qualities that aid in the treatment of acne and other skin issues. Their antioxidants may also enhance the general health and brightness of the skin.
Q3: Can you eat bay leaves?
A3: Although bay leaves are rough and can taste nasty when eaten, they are frequently used to flavor food and taken out before serving.
The stately horse chestnut tree,Aesculus hippocastanum, is indigenous to the Balkan Peninsula. For generations, this has been a wealth of benefits, valued for its medical qualities and revered for its beauty. This amazing plant still enthralls scholars and fans despite its modern uses in herbal supplements and its historical use in folk medicine. Let’s explore the plethora of advantages that horse chestnuts provide for people.
Horse chestnut benefits:
Properties that Reduce Inflammation
Because it has a high flavonoid and saponin content, it has strong anti-inflammatory qualities. Together, these substances lessen inflammation, which makes horse chestnut extract an effective treatment for ailments like edema, arthritis, and joint discomfort.
The benefits of horse chestnuts for managing edema
Fluid retention, often known as edema, can be difficult to treat. The diuretic qualities of its extract encourage the body to rid itself of surplus fluid, which helps to lessen edema. This makes it a useful home cure for people who have bloating or swollen limbs.
Blood health
The beneficialeffects of horse chestnut on circulatory health are among its most well-known advantages. Aescin, a substance found in these tree seeds, has been shown to strengthen blood vessels and enhance circulation. Because of this, it is a well-liked option for treating ailments like hemorrhoids, varicose veins, and chronic venous insufficiency.
Horse chestnut benefits for skin care
This is a common ingredient in skincare treatments because of its astringent qualities. In addition to its anti-inflammatory and antioxidant qualities, this extract’s ability to tighten and tone the skin makes it a desirable ingredient in creams, lotions, and serums designed to reduce the visibility of fine lines and wrinkles and enhance the texture of the skin.
Antioxidant impacts
Horse chestnut, which is high in antioxidants, aids in the body’s defense against oxidative stress and free radical damage. Consistently taking its supplements or applying its extracts topically can improve general health by preventing chronic illness and premature aging of cells.
Conclusion:
Horse chestnut is a very adaptable plant with numerous health advantages, ranging from supporting circulatory health to providing relief from inflammation and edema. The amazing benefits of this chestnut, whether taken orally, applied topically, or utilized in conventional herbal formulations, are still being discovered and valued. Let’s embrace the majestic tree’s holistic potential and harness its offerings for the body and mind’s well-being as we uncover nature’s treasure.
A1: The horse chestnut tree, a deciduous tree, produces huge, lustrous brown seeds coated in spiky green husks. These seeds are often used in traditional medicine to cure hemorrhoids and varicose veins.
Q2: What are the common side effects of horse chestnut?
A2: It frequently causes nausea, upset stomach, itching, and dizziness as adverse effects.
Q3: Can horse chestnut extract be used topically?
A3: Indeed, topical gels or creams containing this extract are also available. These are put directly onto the skin to alleviate varicose vein or hemorrhoidal irritation, edema, and itching.
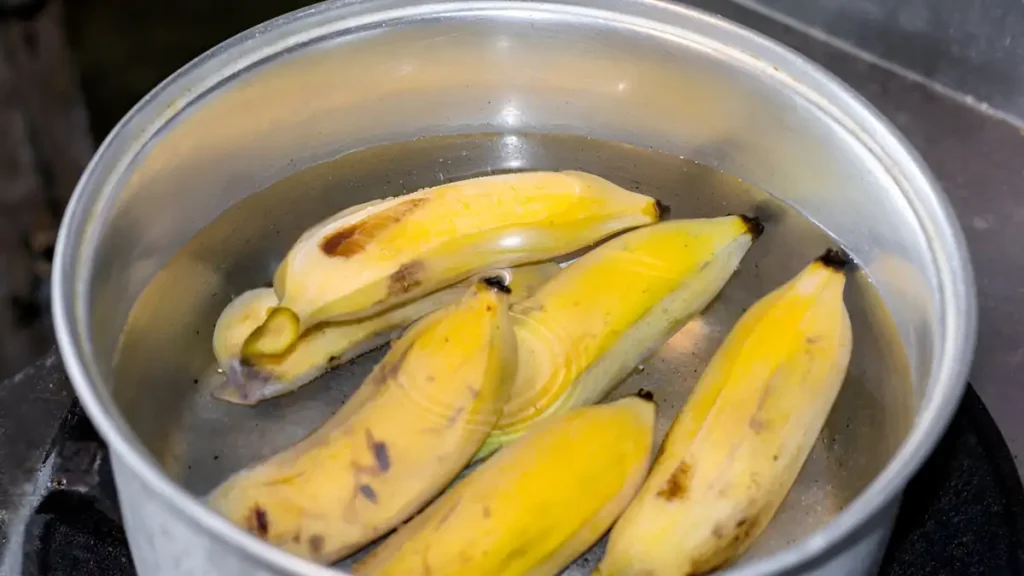
Although most people eat bananas raw or in smoothies, have you ever thought about cooking them? You may be surprised to learn about a whole new level of health advantages that can be unlocked with this easy cooking technique. In addition to softening and improving their nutritional profile, boiling bananas also makes them simpler for some people to stomach. Here are some reasons to think about including boiled bananas in your diet.
Boiled bananas benefits:
Naturally high in magnesium and potassium, bananas are believed to help induce calm and enhance the quality of sleep. These nutrients are released when you boil bananas, which increases their absorption rate by the body. Before going to bed, having a warm dish of boiling bananas will help you relax and sleep better.
Boiled bananas break down the fruit’s fibers, making them simpler to digest. This can be especially helpful for people who have sensitive stomachs or digestive problems.
Vitamin C, which is vital for a strong immune system, is abundant in bananas. The process of boiling bananas retains and even increases their vitamin content, which naturally strengthens your body’s resistance to disease and infection.
Potassium is an essential mineral for heart health since it lowers blood pressure and guards against heart disease. Boiled bananas are a heart-healthy addition to your diet because they’re a great source of potassium.
Boiled bananas’ magnesium content helps lessen anxiety and tension. Because of its well-known soothing qualities, magnesium can enhance your mood and mental health in general.
Boiled bananas recipe:
Begin by choosing firm, ripe bananas. After peeling, chop them into slices or chunks.
Put the banana pieces in a pot and add water to cover them.
After bringing the water to a boil, lower the heat and simmer the bananas until they are tender ten to fifteen minutes.
When the bananas are tender, you may eat them warm straight away or mash them up and serve them with honey or cinnamon for added taste.
Conclusion:
Finally, boiled bananas provide an unexpected health benefit that many people might not have known about. This easy way to cook unleashes the nutritional potential of bananas while also improving their flavor and texture. Adding this tasty and simple treat to your everyday meals or snacks can help you lead a more health-conscious lifestyle. Thus, the next time you’re searching for a filling and healthy snack, think about picking up a boiled banana—you’ll be happy you did.
A1: Indeed, boiling bananas can be used in a variety of recipes, including smoothies, banana bread, and mashed bananas used as a topping for pancakes or oatmeal.
Q2: Can I eat boiled bananas for weight loss?
A2: Yes, eating boiling bananas can aid in weight loss because of their high fiber content, which also aids in controlling bowel motions and boosting fullness.
Q3: Can I add sugar to boiled bananas?
A3: Yes, you can improve the sweetness of boiling bananas to your desired level by adding sugar.
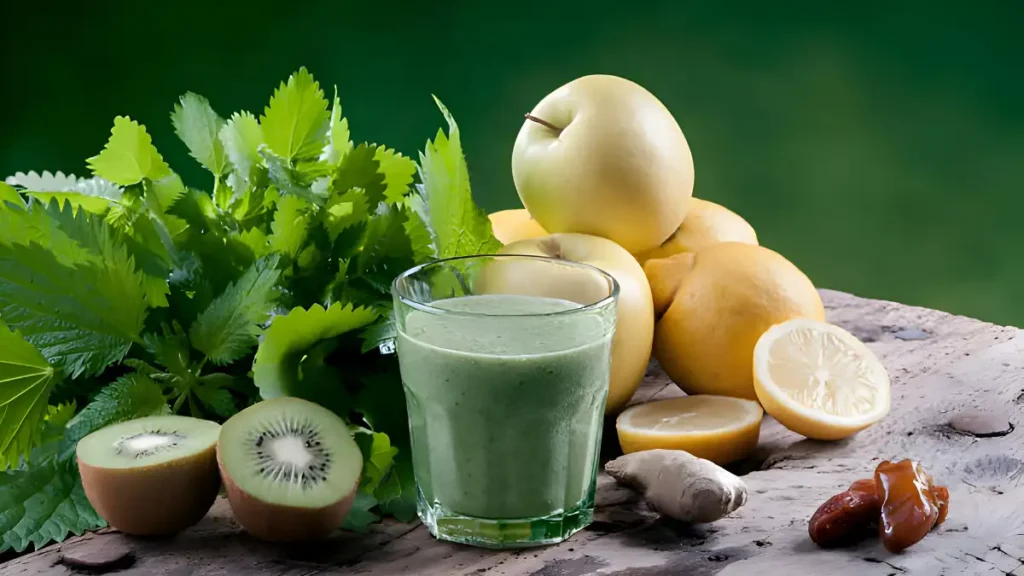
The mornings are crucial when trying to live a healthier lifestyle. They set the tone for the day, and there’s no better way to start your weight reduction journey than with a handcrafted, refreshing beverage in the morning. These mixtures stimulate your metabolism and excite your taste senses while providing your body with the necessary nutrients and helping you lose those extra pounds. Homemade morning drinks provide a fascinating selection of options for your taste preferences and weight loss goals, from zesty citrus combinations to calming herbal infusions. This is a list ofmorning drinks that include beverages that are or were traditionally had for breakfast.
7 homemade morning drinks for weight loss:
Warm Lemon Water: To start your morning off well, squeeze half a lemon into some warm water and sip. Drinking lemon water can improve weight loss by aiding in digestion and cleansing.
Apple cider vinegar drink: Combine one or two tablespoons of apple cider vinegar with one or two cups water. To taste, add honey or cinnamon. Apple cider vinegar has the potential to decrease hunger and encourage weight loss.
Jeera Water: Additionally, jeera has extremely strong antioxidant qualities, which are advantageous while attempting to lose weight. The jeera can be left in a glass of water to soak overnight. Simply strain this and drink it in the morning, or drink it in addition to the jeera. You can put the jeera in a pan with water and bring it to a boil. You can strain and drink this water when it cools down, or you can drink it with the jeera.
Cucumber and Mint Infused Water: In a pitcher, slice a cucumber and add a few mint leaves. After letting it steep overnight, sip it in the morning. This revitalizing beverage can promote weight loss and help with hydration.
Ginger and Turmeric Tea: Make a tea with fresh ginger and turmeric root or powder. Turmeric and ginger both contain anti-inflammatory qualities and can increase metabolism, which can help with weight loss.
Aloe Vera Juice: Combine water, fresh aloe vera gel, and a squeeze of lemon juice in a blender. When taken consistently, aloe vera’s enzymes can aid in better digestion and promote weight loss.
Warm Water with Honey and Cinnamon: Incorporate a small amount of honey and cinnamon powder into warm water. This mixture may aid in blood sugar regulation and desire control, which may facilitate weight loss.
In conclusion, when included in a healthy lifestyle and balanced diet, homemade morning drinks can help promote weight loss. These beverages can increase metabolism, supply vital nutrients, and aid with hunger regulation. But it’s important to keep in mind that consistency and general eating habits are more important than any drink that will miraculously melt away extra weight. Making their own morning drinks at home, together with consistent exercise and mindful eating, can help people lose weight and improve their general health.।
Q1: What are some healthy morning drinks to start the day with?
A1: Herbal teas, fresh fruit smoothies, vegetable juices, green tea, and lemon water are a few nutritious morning beverages to get you started.
Q2: What are the best morning drinks for boosting energy and alertness?
A2: Green tea, which has caffeine and L-theanine, which support focus and tranquility, is one of the greatest morning beverages for increasing energy and alertness. A simple glass of lemon water can also help with wakefulness by hydrating the body and offering a refreshing start to the day.
Q3: What are some homemade morning drinks that can help achieve glowing skin?
A3: For radiant skin in the morning, try green tea with lemon and honey, cucumber and mint juice, carrot and ginger juice, aloe vera juice, and beetroot juice.
Spring is a great time to enjoy the wealth of nature, bringing with it a vivid array of colors and flavors. Edible spring flowers enhance meals visually and add flavors and textures. These flowers are visually appealing and offer many culinary options with their delicate petals and fragrant blossoms. Take a trip with us through the fascinating world of edible spring flowers, where flavor and beauty collide and culinary imagination has no limits.
Here are six edible spring flowers ideal for adding beauty to your culinary preparations:
Nasturtiums: A visual and gastronomic feast, nasturtiums boast vivid colors ranging from flaming oranges to sunny yellows. These vibrant flowers, similar to watercress, enhance salads and sandwiches with their peppery taste.
Violets: Not only are they aesthetically pleasing but also pleasantly tasty due to their delicate and dainty nature. Cakes, cookies, and even ice creams taste great with their sweet, flowery flavor. Violet petals can also crystallize for a sophisticated garnish.
Rose Petals: Roses are a beautiful complement to your culinary creations, and they’re not only for bouquets. Select organic roses that haven’t been sprayed and use their petals to infuse jams, syrups, or even homemade chocolates. Their sweetness and subtle floral scent will enhance any meal.
Chive Blossoms: The beautiful purple blossoms of chives give your dishes a subtle onion taste in addition to a splash of color. For a tasty and novel twist, scatter the blooms over omelets, salads, and soups.
Dandelions: Offer a variety of culinary uses, including their vibrant yellow blooms, bitter honey, and special springtime treats like dandelion wine, jelly, or fritters.
Lavender: known for its soothing aroma, enhances the flavor of both savory and sweet foods, making it a versatile ingredient in preparing various dishes.
Conclusion:
Ediblespring flowers are visually pleasing as well as incredibly versatile in the kitchen, enhancing a variety of recipes with mouthwatering tastes, hues, and textures. They are an excellent addition to seasonal menus because their usage in cooking fosters creative experimentation and improves the dining experience. But before you eat any flowers, make sure you identify them properly and proceed with caution—some blooms might be poisonous. All things considered, adding edible spring flowers to dishes can improve their presentation as well as their flavor, making for a special and unforgettable eating experience.
Q1: How should I prepare edible spring flowers for consumption?
A1: It’s important to wash edible spring flowers well to get rid of any dirt or toxins before eating them. Remove any pistils, stamens, or sepals with a paper towel after gently patting them dry, as they could taste harsh. Edible flowers can be used whole or divided into petals depending on the recipe.
Q2: Can edible spring flowers be used in cooking and baking?
A2: Yes, you may use edible spring flowers in baking and cooking to give meals distinctive flavors and looks. They can be added to soups, salads, sweets, and drinks, and even used as a natural food coloring substitute. But, you must make sure they go well with the other ingredients in the recipe and use them sparingly.
Q3: What are edible flowers?
A3: Flowers that are safe to eat are known as edible flowers, and they can be added to a variety of recipes for flavor, decoration, or garnish.
Natural cures and holistic approaches to health and wellness have gained more attention in recent years. Nettle juice is one of those that has become well-known for its many health advantages. The stinging nettle plant (Urtica dioica) produces this brilliant green juice, which is rich in vitamins, minerals, and phytonutrients. Let’s explore the numerous health advantages of adding nettle juice to your routine.
Nettle juice benefits:
Nettle juice has the potential to alleviate pain and inflammation brought on by ailments including allergies and arthritis.
Nettle’s diuretic qualities help the body eliminate toxins, which supports kidney and urinary tract health.
This juice has well-known health benefits for skin and hair. It can help treat scalp issues like dandruff, encourage hair development, and give the skin a radiant, healthy appearance when applied topically or taken internally.
This juice, high in vitamin C and other antioxidants, boosts immunity and guards against infections and oxidative stress.
Nettle juice’s nutrient-rich makeup helps fight weariness and increase energy, thereby enhancing general vitality and well-being.
Nettle juice may lower the risk of heart disease and stroke by regulating blood pressure and cholesterol levels, according to studies.
Nettle juice recipe:
Ingredients list:
Two cups of fresh nettle leaves (to prevent being stung, always wear gloves when handling nettles)
One or two cups of water
One tablespoon of optionally sweetened maple syrup or honey
One lemon, juiced (optional, for extra flavor)
Guidelines recipe for nettle juice:
To start, give the nettle leaves a good wash to get rid of any dirt or debris.
Put the water and nettle leaves in a blender. Process at a high speed until the mixture is well-combined and smooth.
If you’d like, you may remove any leftover pulp by straining the mixture through a fine-mesh strainer.
If you want to sweeten the juice, you can add honey or maple syrup. For a zesty taste, you can also add the juice of one lemon.
You can chill nettle juice for later use or serve it over ice directly.
Including nettle juice in your daily regimen might be a straightforward yet effective way to maximize your well-being and energy. Its numerous health advantages make it a wonderful supplement to any wellness regimen, whether it is consumed on its own or in combination with other juices and components. Before making any major dietary changes, you should speak with a healthcare provider, especially if you have any underlying medical conditions or are on medication. Use nettle juice to fully realize the benefits of nature’s abundance and go on a path towards overall health.
A1: This juice tastes earthy and grassy, somewhat like green tea or spinach. Any bitterness can be mitigated and the flavor enhanced by adding additional fruits or vegetables.
Q2: What are the benefits of nettle tea?
A2: Nettle tea has many advantages, such as easing the symptoms of allergies, enhancing blood sugar regulation, supporting detoxification, enhancing the health of the skin and hair, and lowering inflammation.
Q3: How can nettle leaf be consumed?
A3: Nettle leaf can be eaten raw or cooked, as a vegetable
Do your feet need some TLC, but you don’t have the time or money to visit a spa? Do not be alarmed! You can treat yourself to an opulent pedicure in the convenience of your own home with a little time and effort. A DIY pedicure is not only affordable but also a wonderful way to decompress and unwind after a demanding day. You’ll also come out looking amazing, polished, and prepared to take on the world—or at least your next trip.
We will walk you through every stage of the DIY pedicure process:
Ingredients:
Warm water
Sea salt or Epsom salt
Foot scrub or DIY sugar scrub (sugar combined with coconut or olive oil)
Clippers for nails
Cuticle oil or cream Nail file
cream or lotion for the feet
Towel
polish for nails (optional)
Base coat, top coat, and nail polish (if applicable)
DIY pedicure recipe you can try at home
To begin, add warm water to a sink or bathtub. Take care that it’s not too hot so that your feet don’t burn.
To the heated water, add a little pinch of sea salt or Epsom salt and allow it to dissolve. These salts aid in easing tense muscles and softening the skin.
Spend ten to fifteen minutes soaking your feet in the warm salt water. If you want to make it feel more like a spa, you can add a few drops of essential oil.
Use a homemade sugar scrub or foot scrub to exfoliate your feet after soaking. Apply the scrub to your soles, heels, and any other rough spots with gentle pressure. After using warm water to rinse, pat dry with a towel.
Using nail clippers, cut your toenails straight across. Then, use a nail file to shape and smooth the edges to your preferred length.
Your cuticles should be massaged with cuticle oil or cream. Cuticles become softer as a result, making it simpler to push them back.
Gently press back your cuticles with an orangewood stick or cuticle pusher. Take care not to exert too much pressure in order to prevent harm.
Put cream or lotion on your feet, paying special attention to any dry or hard spots. For your skin to be nourished and moisturized, give it a good massage.
To preserve your nails and improve the adhesion of the paint, paint your toenails first with a base coat. Apply thin, uniform layers of your preferred nail polish color after the base coat has dried. To add shine and seal in the color, apply a top coat last.
Before donning socks or shoes, let your toenails dry fully.
Conclusion:
Ultimately, doing a DIY pedicure at home can give your feet a revived, pampered sensation without the cost and inconvenience of visiting a salon. You may customize the experience to fit your requirements and preferences in addition to saving time and money. Therefore, for a calming and fulfilling self-care experience, think about doing your own pedicure at home the next time you want to pamper yourself.
A1: It is advised to perform a do-it-yourself pedicure at home once every two to four weeks in order to keep your feet looking good.
Q2: Can I use household ingredients for a DIY pedicure for rough feet?
A2: Yes, you may make your own foot soak by combining warm water with baking soda, vinegar, or Epsom salt. Additionally, you can use sugar or coffee grounds mixed with coconut oil or olive oil to create a natural foot scrub.
Q3: How do I make my DIY pedicure last longer?
A3: Use a clear topcoat every few days to keep your pedicure looking great and safeguard your polish. In order to keep your feet from drying out and cracking, hydrate them frequently.
Thyme is a highly valued herb in both culinary traditions and natural health practices. This little plant is well-known for its strong perfume and medicinal ingredients, as well as its outstanding health benefits. For ages, societies throughout the world have used thyme not just as a tasty element, but also as a natural cure for a variety of health issues.
Thyme is high in antioxidants, vitamins, essential oils, and antibacterial properties, which help to boost immunity, improve digestion, enhance heart health, and contribute to general well-being. By including thyme into our diet on a daily basis, we may take advantage of its great healing properties.
Below, we’ll look at the ten most potent health benefits of thyme and why we should incorporate it into our daily routines.
1. Strengthens the immune system naturally
One of the most striking benefits of thyme is its capacity to nourish and improve the immune system. This plant is strong in vitamin C, vitamin A, and potent antioxidants, which assist the body fight infections and disorders.
Thyme also includes thymol, a natural chemical that has potent antibacterial capabilities. This chemical aids the body’s defense against dangerous bacteria, viruses, and fungus, making thyme a wonderful herb to include in immune-boosting meals and herbal tea.
Thyme ingestion on a regular basis helps the body establish a stronger natural defensive system, which is especially important during seasonal changes when immunity weakens.
2. Powerful antioxidant protection
Oxidative stress is a major cause of aging and chronic illnesses. Thyme contains antioxidants such as flavonoids, thymol, and carvacrol, which assist to neutralize damaging free radicals in the body.
These antioxidants protect cells, decrease inflammation, and promote general health. By include thyme in our diet, we can help reduce cellular aging and sustain long-term wellbeing.
Thyme’s antioxidant qualities also help to maintain healthy skin, improve organ function, and boost energy.
3. Supports respiratory health
Thyme has long been used as a natural remedy for a variety of respiratory disorders due to its antibacterial and anti-inflammatory properties, which help to soothe the respiratory system and remove mucus from the airways. Drinking thyme tea or inhaling thyme-infused steam might help relieve cough, bronchitis, congestion, sore throat, and cold symptoms. The herb acts as a natural expectorant, improving lung function by encouraging mucus removal and allowing for better breathing, making it especially useful during the cold and flu season.
4. Improves digestive health
Healthy digestion is essential for overall health, and thyme can help improve digestive function. It activates digestive enzymes, which aid in food digestion and nutritional absorption. Thyme also helps with typical digestive disorders such bloating, gas, indigestion, and stomach cramps. Additionally, its antibacterial capabilities help to balance intestinal flora, resulting in a healthier digestive tract and better nutritional absorption.
5. Promotes heart health
Thyme includes chemicals that promote cardiovascular health. The plant is high in potassium, which helps control blood pressure and promotes healthy heart function.
Furthermore, the antioxidants in thyme assist to lower oxidative stress and inflammation, both of which are key contributors to cardiovascular disease.
Incorporating thyme into our meals improves healthy blood circulation, helps to maintain regulated blood pressure, and lowers the risk of cardiovascular disease. As a result, thyme is regarded as an important plant for maintaining long-term cardiovascular health.
6. Natural antibacterial and antifungal properties
Thyme has been extensively explored for its potent antibacterial and antifungal properties. Thyme contains essential oils, mainly thymol, which serve to limit the growth of dangerous germs.
Because of these qualities, thyme is frequently used in natural medicines and herbal therapies to combat infections and promote general health.
Thyme includes antimicrobial properties that may help protect against foodborne germs, fungal infections, and dangerous pathogens. This feature distinguishes thyme as a natural protection against a variety of microbiological dangers.
7. Enhances skin health
Thyme can also help promote healthy, glowing skin. The herb’s antibacterial and anti-inflammatory qualities help fight acne-causing germs and soothe skin inflammation.
Thyme extracts are frequently used in natural skincare formulations due to its multiple advantages, which include minimizing acne outbreaks, relaxing skin irritation, protecting against bacterial infections, and promoting smoother skin. Thyme also contains antioxidants, which help protect the skin from environmental harm and prevent premature aging.
8. Supports brain function and mental clarity
Another unique benefits of thyme is its potential to promote brain health and cognitive performance. The plant includes chemicals that promote blood circulation and protect brain cells from oxidative stress.
These characteristics help to boost focus, memory, mental clarity, and reduce weariness. According to some study, thyme may also assist in maintaining long-term brain function, making it an important part of a balanced diet.
9. Helps reduce inflammation
Chronic inflammation is connected to a variety of health issues, including arthritis, heart disease, and metabolic disorders. Thyme includes numerous chemicals that have natural anti-inflammatory properties.
Regular thyme consumption has been related to reduced inflammation throughout the body. This can lead to benefits such as less joint pain, more mobility, and better overall health. The herb’s anti-inflammatory effects also contribute significantly to respiratory, digestive, and cardiovascular health.
10. Supports healthy weight management
Thyme may also help with good weight management. Its components aid digestion and metabolism, both of which are necessary for maintaining a healthy body weight.
The herb’s capacity to decrease inflammation and improve intestinal health strengthens its function in regulating metabolic balance.
Adding thyme to healthy meals may help you make nutritious, tasty foods while also boosting overall wellbeing and living a healthy lifestyle.
How to use thyme for health
There are numerous easy ways to include thyme into your everyday routine:
1.Thyme tea
To produce a calming herbal tea, steep fresh or dried thyme leaves in boiling water for 5–10 minutes.
2. Cooking
Add the thyme to:
Soups
Roasted veggies.
Chicken dishes
Salad dressings
3. Essential oil
Thyme essential oil can be utilized in aromatherapy or diluted for topical applications.
4. Herbal remedies
Thyme extracts and supplements are also available, but it is important to consult a healthcare expert before taking them on a regular basis.
How to include thyme in your daily diet
Incorporating thyme into your daily cooking is simple and enjoyable. This multipurpose herb improves taste and nutritional value. Some of the most common methods to utilize thyme are:
Adding fresh thyme to soups and stews.
Sprinkle dried thyme on roasted veggies.
brewing thyme herbal tea.
Including thyme in salad dressings
Infusing Thyme into Olive Oil
Thyme is very easy to grow in home gardens and containers, making it an ideal herb for individuals who enjoy home gardening and using fresh herbs.
Growing thyme at home
Growing thyme in pots at home is a delightful gardening experience because of its resilience. This plant grows in sunny areas and requires well-drained soil. Planting in broad sunshine, maintaining good soil drainage, watering gently, and pruning periodically are all important recommendations for growing thyme successfully. Thyme is also suited for container gardening, making it great for small areas such as balconies or compact gardens.
Conclusion:
The health benefits of thyme make this humble herb a powerful addition to both your kitchen and wellness routine. Thyme has several natural benefits, including boosting immunity and helping digestion, as well as supporting respiratory and skin health.
Including thyme in your diet or cultivating it in your yard may be a simple but effective method to promote overall health. Thyme, with its complex nutritional profile and therapeutic characteristics, definitely deserves to be considered one of the most helpful herbs for health.
Thyme, whether used in cooking, herbal tea, or natural treatments, demonstrates how little herbs may provide significant health advantages.
Q1. What are the main health benefits of thyme tea?
A1. Thyme tea is recognized for its antioxidant and antibacterial characteristics, which may benefit the immune system, digestion, and overall health.
Q2. What are the main benefits of thyme oil?
A2. Thyme oil is renowned for its potent antibacterial, antifungal, and antioxidant capabilities, which may aid in immunological health, skin issues, and protection against dangerous microorganisms.
Q3. Can thyme oil be used for hair and scalp health?
A3. Thyme oil’s antibacterial qualities may assist to support scalp health and prevent dandruff.
People have cultivated and utilized herbs for their culinary and therapeutic properties for thousands of years. Any landscape is aesthetically beautiful and fragrant by its fragrant and ornamental features. You won’t go back after you’ve experienced the flavor difference between fresh and dried herbs. Fresh herbs taste better and are more nutrient-dense than store-bought varieties. Growing and harvesting your herbs also costs less. Here are some pointers on how to grow herbs in your garden at home.
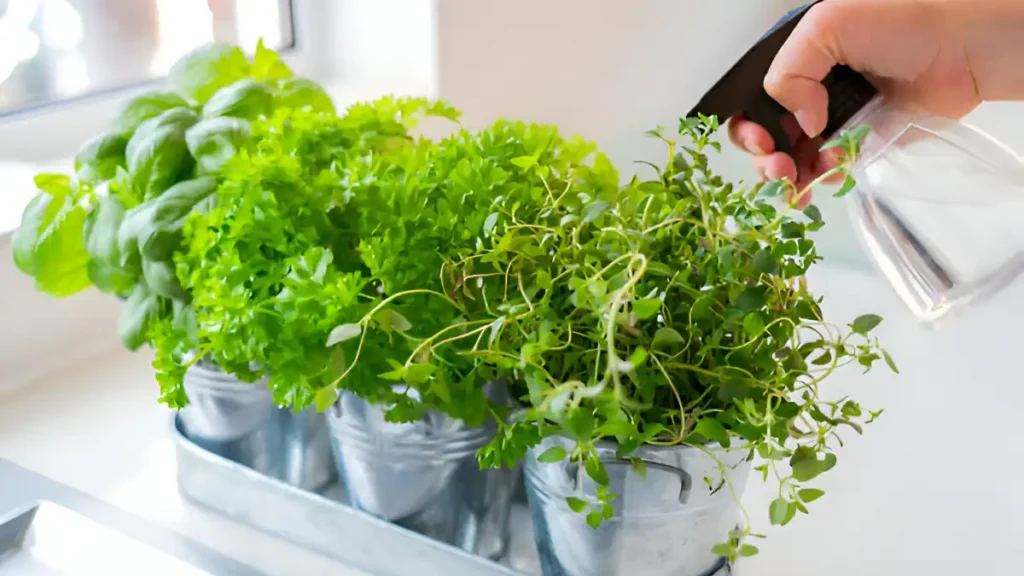
Top herbs to grow indoors or outdoors:
Basil: Known for its potent flavor and scent, basil is a widely used herb. It grows nicely indoors with lots of sunlight and soil that drains properly. Growing basilin your own house, be it on a sunny windowsill, garden, or balcony, maybe a fulfilling experience.
Parsley: Growing parsley indoors is simple and flexible. It likes frequent watering and shaded spots.
Chives: Chives are hardy herbs that thrive in indoor environments. They need wet soil and mild sunlight.
Mint: Mint is a hardy herb that grows well indoors but may easily take over outdoor gardens. It likes soil that is regularly moist and partially shaded.
Rosemary: A fragrant herb, rosemary lends a savory flavor to a variety of meals. It needs well-drained soil and lots of sunshine.
Oregano: With enough sunlight and well-drained soil, oregano is a hardy herb that can grow indoors. Growing oregano indoors is an easy and rewarding process, regardless of your level of gardening experience.
Here are some useful hints for how to grow herbs indoors:
Select an interior location that receives 6 to 8 hours of sunlight per day, such as a window facing south.
As long as they have adequate drainage, use containers with holes for drainage to avoid waterlogging and root rot. Some examples of such containers are repurposed jars, plastic containers, and terracotta pots.
Make sure the potting mix you use is well-drained.
Let the soil dry out a little bit in between waterings. It’s time to water if the soil is dry to a depth of one inch.
Every two weeks, use an all-purpose water-soluble fertilizer at half the suggested strength.
Arrange the herbs in a well-ventilated space with a temperature between 60 and 75 degrees Fahrenheit.
Some helpful tips for how to grow herbs outdoors are as follows:
Select a location in your garden that gets at least 6 to 8 hours of sunlight per day as most herbs prefer full sun. Make sure the soil in the region drains properly to avoid waterlogging.
Add organic matter, like compost or manure, to the garden soil and make sure it has enough drainage. The pH needs of different types of herbs vary. For window boxes, hanging baskets, and containers, use premium, well-draining soil like Proven Winners Premium Potting Soil.
Herbs grown outdoors can need to be watered more frequently, particularly in hot, dry weather. Make sure to keep the soil uniformly moist but not soggy by giving it regular, deep watering.
The majority of herbs require little to no additional fertilizer. When planting, incorporate a slow-acting fertilizer into the soil, such as cottonseed meal, blood meal, or bone meal fertilizer spikes; add more water-soluble fish emulsion as needed.
For the best flavor, pluck outdoor herbs in the morning when their essential oils are concentrated, and trim them frequently to encourage bushy growth and prevent legginess.
Conclusion:
To sum up, there are a few important aspects that need to be considered when learning how to grow herbs. These tips can help you maintain a healthy herb garden that will bring you fresh flavor and aromatic delights all year long, whether you want to grow it indoors or out. Growing herbs is a fun and satisfying project, whether you’re using them to make tea with freshly picked mint or as a garnish for foods made with basil.
Q1: How do I prevent pests and diseases in my indoor herb garden?
A1: To prevent fungal illnesses, regularly check herbs for pests, keep the indoor garden area clean, apply neem oil or insecticidal soap, and refrain from overwatering.
Q2: How to grow herbs in winter?
A2: If you want to cultivate herbs in the winter, you can use grow lights or indoor pots placed near windowsills that receive plenty of sunlight to ensure good growth.
Q3: How often should I water my outdoor herb garden?
A3: Water when the top inch of soil feels dry to the touch since herbs enjoy slightly moist soil. Watering strongly and seldom is preferable to watering softly every day.