Author

Avery Smith

Browsing

Vertical gardening is an excellent alternative for those who have limited space but want to experience the benefits of cultivating their plants, herbs, and veggies. You may create a flourishing garden in even the tiniest spaces by making use of vertical space.

Select the appropriate location

Choose a location where the plants you want to cultivate will get enough sunshine. Make sure the framework you’re employing is well-grounded and strong enough to support the weight of the plants.

Choose the correct plants

Think about how the plants you wish to grow grow. Tomatoes, cucumbers, and peas are excellent vine plants for vertical gardens. Furthermore, herbs that grow vertically, such as cilantro, mint, and basil, do well.

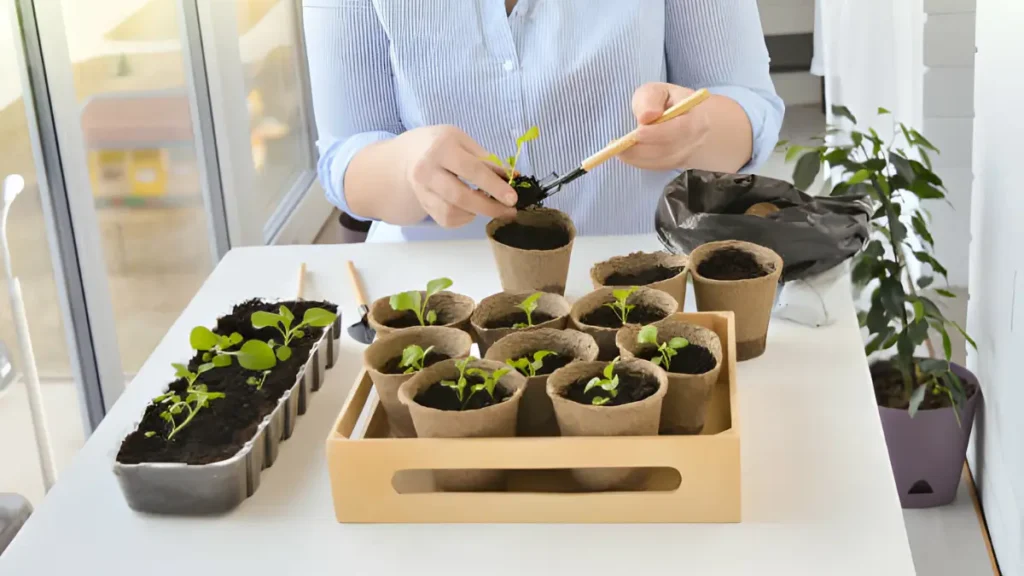
Get your structure ready

Make sure it is strong and able to hold the weight of your plants, regardless of whether you choose a hanging garden, shelves, or a trellis. Think about the distance between each stage to ensure appropriate development.

Maintaining it requires routine care to make sure your plants flourish. The following are some vital care recommendations to remember:

  • Given that gardens can dry up more quickly than typical gardens, give your plants regular irrigations.
  • Make sure your plants have access to the nutrients they need for strong, healthy growth by fertilizing them.
  • To avoid crowding and to encourage improved airflow, prune and train your plants.

Vertical gardening is a great way to incorporate nature into your house, especially if you have limited room. You can make a gorgeous vertical garden that not only brightens your area but also gives you access to fresh herbs and produce by following this beginner’s approach.

Certainly! If you’d like to learn more, please consider following our WhatsApp Channel: Harvest Gardening

Q1: What is vertical gardening?

A1: Vertical gardening is a technique for growing plants upwards rather than outwards, using vertical spaces such as walls or trellises to maximize limited space and provide greenery in urban areas.

Q2: What are the benefits of vertical gardening?

A2: Vertical gardening has various advantages, including utilizing limited space, improving air quality, lowering urban heat, and increasing aesthetic appeal. In addition, it minimizes soil erosion and water consumption and facilitates simpler access for harvesting and maintenance.

Q3: Which plants are best suited for vertical gardening?

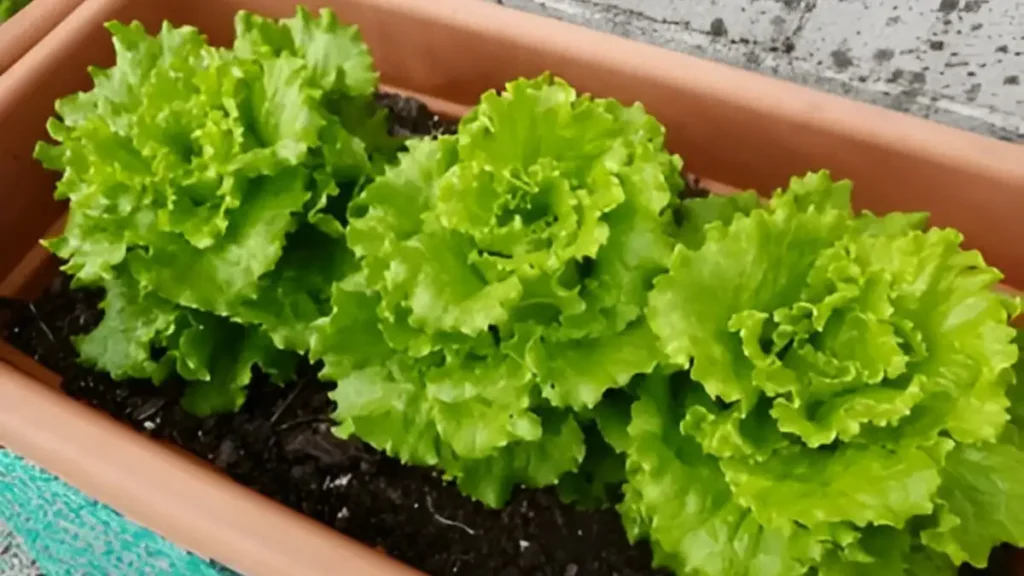
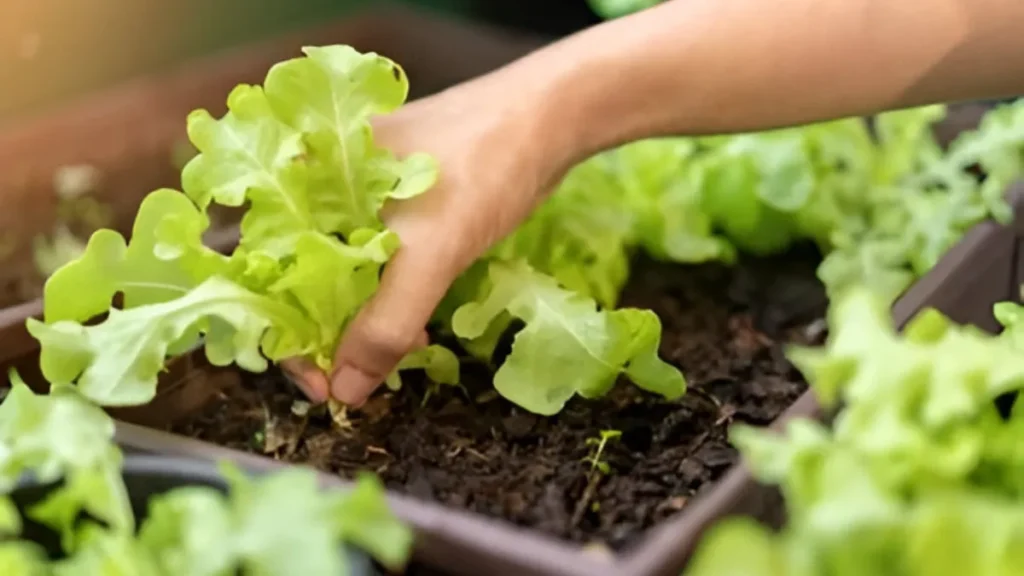
A3: Shallow root systems, compact growth patterns, and tolerance to different light levels are characteristics of the perfect plants for it. Herbs like thyme and basil, leafy greens like spinach and lettuce, trailing vines like philodendron and ivy, and flowering plants like petunias and begonias are a few examples.

Growing lettuce in pots at home is a simple and satisfying way to enjoy fresh, crisp greens straight from your garden, no matter how little your outdoor area is. With container gardening, you can grow wholesome lettuce with little work and little space—whether you have a patio, balcony, or a sunny windowsill.

Choose the correct type of lettuce

Select a type of lettuce that grows well in containers, like romaine or loose-leaf lettuce, which are ideal for container gardening.

Best container for growing lettuce indoors

To avoid waterlogging, use a container with bottom drainage holes and a minimum depth of 6 to 8 inches.

Get the soil ready

Use a potting mix that drains well and is high in organic materials. You can incorporate aged manure or compost into the soil for nutritional provision.

How to plant seeds or seedlings

If you’re starting from scratch, equally distribute the seeds around the earth’s surface and gently cover them with extra dirt. Place seedlings into the container carefully, allowing space between them as recommended by the variety.

Watering

Always ensure that the soil is constantly damp but not soggy. Give the lettuce plenty of water, especially in the summer, but don’t give it too much since this might lead to root rot.

Sunlight

Put the container somewhere that gets at least six hours of sunlight a day. In warmer climes, lettuce prefers some shade to avoid bolting or going to seed, too soon.

Fertilizing for growing lettuce fast

Every two to three weeks, or as recommended by the product label, fertilize your lettuce plants with a balanced, water-soluble fertilizer. Steer clear of overfertilizing as this can result in bitter leaves.

Pruning

Thin seedlings after a few inches to ensure each plant has sufficient space for growth, promote air circulation, and reduce crowding.

Pest and disease management for growing lettuce

Aphids, snails, and caterpillars are among the most common pests that attack lettuce. To safeguard your crop, use organic pesticides such as neem oil or row coverings. To avoid fungal diseases like powdery mildew and root rot, do not overwater your plants.

Gathered

When the lettuce leaves are still young and fragile, which is typically 4-6 weeks after planting, harvest it. You can remove individual leaves as needed, or you can chop off the entire head. Maintain the integrity of the outer leaves to promote ongoing growth.

In addition, growing lettuce in containers promotes a healthy diet because people are more likely to eat what they have grown. By using this technique, people may get fresh, organic lettuce delivered straight to their homes without having to have a sizable outdoor garden.

Certainly! If you’d like to learn more, please consider following our WhatsApp Channel, Facebook, Instagram, YouTube, Twitter, and Pinterest.

Q1. What type of container is suitable for growing lettuce?

A1. Lettuce can be grown in containers that are at least 6 inches deep and roughly 12 inches wide.

Q2. What is the ideal temperature for growing lettuce from seed?

A2. The ideal soil temperatures for lettuce seeds to grow are between 40 and 80°F (4 and 27°C). Temperatures between 60 and 70°F (16 and 21°C) are ideal for growth.

Q3. What temperature is ideal for growing lettuce indoors?

A3. The ideal temperature range for lettuce growth is 60–70°F (15–21°C). Make sure the temperature in your indoor space stays within this range for best growth.

Q4. Can growing lettuce from scraps be done indoors?

A4. It is possible to grow lettuce indoors from scraps if you have the right lighting and attention.

Tomato pruning is a crucial procedure for encouraging robust development and optimizing harvests. Gardeners can improve air circulation, lessen the danger of illness, and direct the plant’s energy toward fruit production by carefully trimming off specific sections of the plant, such as suckers and lower leaves. However, knowing how to prune tomatoes well can lead you to a plentiful harvest and a healthy tomato crop, regardless of whether you’re growing tomatoes in a greenhouse, a backyard garden, or pots on your balcony. Here’s a quick guide on how to prune tomatoes effectively:

Basic strategies for how to prune tomato plants

  • Eliminate suckers: The tiny shoots that grow in the spaces between the main stem and branches are known as suckers. When they are young, pinch them off to stop them from devoting energy to fruit creation.
  • Cut off lower leaves: Cut off any lower leaves in contact with the ground as the tomato plant grows. This enhances airflow around the plant and lowers the danger of illnesses carried by the soil.
  • Thin out overcrowded branches: To let light and air into the canopy, if the plant is too dense, cut off a few branches.

Advanced techniques for how to prune tomatoes

  • Determinate vs. Indeterminate varieties: Recognize how your tomato variety grows. Because they grow more compactly by nature, determinate kinds usually require less pruning, whereas indeterminate varieties benefit from more aggressive pruning to control their rapid development.
  • Pruning separate vs. multiple stems: Choose whether to let your tomato plants produce several stems or direct them to a single main stem. While multi-stem pruning can result in higher overall yields, single-stem pruning focuses energy into one primary vine, producing larger fruits.
  • Pruning for fruit quality and size: Some cultivators use selective pruning to support a certain shape or larger fruit sizes. To concentrate the plant’s resources on a smaller number of larger fruits entails cutting off extra branches and fruit clusters.

Instruments and optimal methods

  • To achieve accurate cuts and reduce the chance of disease transmission, use clean, sharp pruning shears.
  • When the plants are turgid and less likely to wilt, prune in the morning.
  • Pruning material should be disposed of appropriately to stop the spread of disease.
  • Throughout the growing season, keep a close eye on the plants and make necessary adjustments to trimming tactics.

Learning how to prune tomatoes is a skill that can dramatically improve the health, productivity, and quality of your tomato plants. You may have a plentiful crop of tasty, homegrown tomatoes every year by grasping the fundamentals of pruning and using the appropriate methods for your unique growing environment and tastes. Discover the secrets to a bountiful tomato harvest with our expert guide on how to prune tomatoes.

Q1: What are the benefits of pruning tomato plants?

A1: Pruning tomato plants enhances light and air penetration, reduces disease risk, and boosts fruit output, allowing the plant to focus on producing robust fruits.

Q2: How to prune tomatoes for maximum yield?

A2: Pruning involves removing the suckers that develop in the crotch joint between the main stem and branches to maximize tomato yield. Better ventilation is made possible, and more energy is focused on fruit production.

Q3: When is the best time to pruning tomatoes?

A3: Tomato pruning is most effective in the morning or late afternoon when the plants are well-hydrated and not as stressed. To reduce plant shock, avoid trimming in the hottest part of the day.

Q4: How to prune tomato plants when they are flowering or fruiting?

A4: To minimize stress on the plants and decrease fruit output, it is advisable to avoid excessive trimming during the flowering and fruiting seasons. Rather, concentrate on mild pruning to preserve ventilation and get rid of any unhealthy or diseased foliage.

How to kill weeds effectively while ensuring the well-being of your flowers is crucial for a thriving garden. Keeping your garden colorful and prospering is striking a careful balance between providing for your favorite blooms and controlling weeds that keep coming in. In addition to competing with other plants for vital resources like sunlight, water, and nutrients, weeds can detract from your garden’s aesthetic appeal. The challenge lies in finding effective methods how to kill weeds without causing harm to your beloved flowers.

Weeding by hand:

  • Examine your garden frequently, and pull weeds by hand. Make sure to eliminate the entire root system of the weeds by pulling them gently. Hand weeding is most effective when done regularly since it keeps weeds from taking root.

Mulching:

  • Mulching is an easy-to-use but effective way to stop weed growth. Cover your flowers with a layer of organic mulch, like bark, wood chips, or straw. This stops weeds from sprouting and getting the sunlight they require to thrive, in addition to assisting in temperature regulation and soil moisture retention.

Appropriate distance:

  • Plant flowers with sufficient space to prevent weed growth, reduce resource competition, and create an attractive atmosphere that discourages weed growth.

How to kill weeds with vinegar:

  • You may use regular household vinegar to make a natural weed killer. Combine vinegar, water, and a tiny bit of dish soap. Be cautious not to spray this solution directly onto your flowers, but rather on the leaves of weeds. While vinegar is an effective herbicide, it should only be used sparingly to prevent harm to visually appealing plants.

Making use of corn gluten meal:

  • Corn gluten meal is a natural pre-emergent pesticide that prevents weed seed germination in early spring, preventing weed blooms and not working against established weeds.

How to kill weeds by boiling water:

  • Boiling water is an effective way to kill weeds, even those with deep roots. Be careful to target only the weeds and take safety measures to prevent burning.

Use of salt:

  • Weeds can be killed by applying table salt, however, care should be taken since salt can make soil unsanitary over time and shouldn’t come into contact with plants that you want to grow.

Sunlighting and cover crops:

  • When sown in the off-season, cover crops help to improve soil health by inhibiting the growth of weeds. Future plant beds can be prepared with solarization, which successfully kills weed seeds by trapping heat in clear plastic.

How to kill weeds with particular herbicides:

  • Select herbicides selectively targeting weeds without harming flowers, read labels thoroughly, and apply with precision, ensuring compatibility with garden plants and minimizing exposure to flowers.

How to kill weeds without harming your flowers requires a combination of preventive measures, careful selection of products, and consistent maintenance. Regular maintenance and a deliberate weed control approach can effectively eradicate invasive weeds, enhancing the health and aesthetic appeal of your garden. This guide will explore effective methods for eliminating weeds while protecting your flowers, helping you maintain a beautiful and flourishing garden.

Q1: How to kill weeds permanently from my garden?

A1: Weeds can be permanently controlled and eliminated by applying a pre-emergent herbicide in the early spring and using a post-emergent herbicide as needed.

Q2: How to kill weeds in flower beds?

A2: Use a mix of manual weeding, mulching heavily, and spraying a specific herbicide meant for use around ornamental plants to eradicate weeds from flower beds.

Q3: how to kill weeds naturally?

A3: To naturally eradicate weeds, utilize methods such as manual removal, mulching, boiling water, vinegar, or a salt and dish soap mixture.

Rosemary is a fragrant, adaptable plant that enhances food flavor and garden aesthetics. Cuttings are one of the simplest ways to grow rosemary, so you may increase the size of your herb garden without having to buy new plants. Assure a steady supply of this fragrant herb for cooking or decoration by learning how to grow rosemary from cuttings with the correct methods and attention.

Collect rosemary cuttings:

  • Select a robust stalk from a well-established rosemary plant. Seek for a stem devoid of blossoms that measure approximately 4-6 inches in length. Verify that the stem is neither too young nor excessively flexible.

Get the cuttings ready:

  • Cut the chosen stem from the parent plant at a 45-degree angle with pruning shears or a clean, sharp pair of scissors. Just a few leaves remain at the top of the stem after removing any lower leaves from the lowest two inches of the stalk.

Hormone for rooting (optional):

  • Although it’s not technically required, immersing the chopped end of the rosemary stem into powdered rooting hormone can promote quicker root development. While optional, this step can increase the likelihood that rooting will succeed.

How to grow rosemary by sowing the cutting:

  • Put some well-drained potting mix in a small pot. Using a pencil or your finger, make a hole in the ground, and then push the chopped end of the rosemary stem into it. To keep the cutting in place, compact the dirt surrounding it.

Supplying water:

  • Water the cutting well after planting until the soil is uniformly moist but not soggy. While too much moisture might lead to damage, try to keep the soil from drying out entirely.

Providing appropriate conditions:

  • Put the pot somewhere warm and bright that receives some indirect sunshine. Since direct sunlight can be too harsh and may cause the cutting to dry out or wilt, rosemary cuttings do best in bright, indirect light.

Development of roots: 

  • Continue to check the cutting every few weeks after that. After two to three weeks, new roots ought to start to grow. To check for resistance—a sign that roots are forming—you can gently tug on the cutting.

Place in pots:

  • The cutting is ready to be moved into a bigger pot or the garden once it has formed a strong root system, which normally happens in 6 to 8 weeks. For planting, pick a sunny location with soil that drains properly.

How to grow rosemary from cuttings with care and maintenance:

  • Water the just transplanted rosemary as usual, letting the soil become a little dry in between applications. Because rosemary likes its environment to be slightly dry, take care not to overwater it. During the growing season, use a balanced fertilizer sparingly.

Enjoy recently harvested rosemary:

  • You can begin gathering rosemary sprigs for cooking as soon as your plant is well-established and producing copious amounts of foliage. Make sure not to overwork the plant by taking tiny portions at a time.

How to grow rosemary from cuttings is a simple and profitable technique. In your kitchen, you can guarantee a steady supply of fresh rosemary with a little perseverance and attention. This fragrant herb will not only improve the taste of your food but also infuse your house with a hint of greens.

Certainly! If you’d like to learn more, please consider following our WhatsApp Channel, Facebook, Instagram, YouTube, Twitter, and Pinterest.

Q1: Can I propagate rosemary from cuttings all year round?

A1: Although propagation is best done in the spring and early summer, you can try rooting rosemary cuttings inside at any time of year, either in a greenhouse or under grow lights.

Q2: How to grow rosemary indoors?

A2: Indeed, rosemary grows well inside, but it needs well-drained soil and a sunny window. To guarantee even development, rotate the pot often and take care not to overwater.

Q3: How to grow rosemary from seed at the best time?

A3: Rosemary seeds can be started inside at any time of year, but to give them a head start before the outside growth season starts, it is preferable to start them in late win.

Q4: How long does rosemary take to grow from cuttings?

A4: Rosemary cuttings usually take 2-4 weeks to grow roots in water or soil, depending on the temperature and humidity. Once rooted, they require a few months to establish before being transferred.

Q5: Can you put rosemary cuttings straight into soil?

A5: Yes, you may put rosemary cuttings directly into the soil. Simply dip the cut end in rooting hormone, plant it in well-drained soil, and keep it moist until the roots appear, which should take around 2-4 weeks.

Knowing how to wash strawberries properly is key to preserving their flavor and texture. Making sure strawberries are clean and safe to consume is crucial when savoring their juicy and sweet flavor. Strawberries may retain their wonderful flavor and be kept free of chemicals and grime if they are cleaned properly. In this comprehensive guide, we will walk you through the steps on how to wash strawberries effectively to keep them fresh and clean for your enjoyment.

1: Compile your materials

Make sure you have the necessary supplies before you begin the washing process:

  • strawberry fresh
  • Strainer or colander
  • Bowl
  • Water

2: Preparing for how to wash strawberries

  • Pour some cold water into the bowl.
  • In the sink, place the strainer or colander.

3: Clean the Strawberries

  • Strawberries should be put in the colander.
  • Keep the colander under cold running water.
  • Rinse the strawberries gently, making sure they get all dirty by moving them around.

4: Let the strawberries soak

  • Pour the cold water into the basin and immerse the strawberries.
  • To aid in the removal of any dirt or pesticide residues, let them soak for a few minutes.

5: Last washing

  • Strawberries should be lifted out of the basin and returned to the colander.
  • Give them a last rinse with cold running water.

6: Let the strawberries air dry

  • To get rid of extra water, gently wipe the strawberries dry with a paper towel or clean cloth.
  • Before storing or using, let them air dry for a few minutes.

In conclusion, washing strawberries correctly ensures they are clean and ready to eat without losing their natural flavor. You may always enjoy fresh, clean, and delicious strawberries by following these instructions on how to wash strawberries properly. Keep in mind that washing strawberries is worthwhile for your taste buds and overall wellness. So wash those strawberries now and enjoy every delicious taste! Apart from this, growing strawberries in pots is a delightful way to enjoy fresh, homegrown fruit even if you have limited space.

Q1: How long should I rinse strawberries under water?

A1: Strawberries can be completely cleaned by rinsing them under cold, running water for 20 to 30 seconds.

Q2:  How to wash strawberries with a vegetable brush?

A2: Using a vegetable brush, gently scrub the strawberries under running water to get rid of any dirt or debris. Lightly massage the surface of the berries to ensure a complete cleaning.

Q3: How to wash strawberries with vinegar?

A3: To wash strawberries, mix one part vinegar with three parts water, let the strawberries soak for around five minutes, and then give them a last rinse under running water before eating.

Q4: How to wash strawberries using baking soda?

A4: In order to clean strawberries with baking soda, mix one part baking soda to eight parts water, soak the strawberries for five minutes, and then give them a thorough rinse with cold water.

Since sugar beets have a high sugar content, they are important to the manufacturing of commercial sugar. However, for those seeking a more hands-on approach to sugar production, cultivating this beet at home provides a rewarding and sustainable alternative. This guide offers a thorough road map for both beginning and seasoned gardeners, delving into the art and science of sugar beet growing for homemade sugar.

  • Select the appropriate Variety: Choose a kind of sugar beet that is appropriate for your soil type and environment. Beta vulgaris and Beta vulgaris subsp. vulgaris are common variations.
  • Soil and planting: A sandy loam with sufficient drainage is optimal for sugar beet development. Between 6.0 and 8.0 is their ideal pH range, which is slightly acidic to slightly alkaline. Till the soil and remove any debris, such as weeds and pebbles. After the last frost, the ideal soil temperature for spring planting is about 60°F.
  • Planting seeds: Starting at a depth of about 1.5 inches, arrange the seeds in rows eighteen inches apart. Seeds can be planted 1 inch apart at first, then clipped 4-5 inches apart once a few true leaf pairs form.
  • Care and upkeep: It requires full sunlight and modest irrigation for soil moisture. They are hardy in temperate zones, so add mulch or partial shade for cooler temperatures.
  • Fertilization and weed control: Use a balanced fertilizer that contains potassium, phosphate, and nitrogen by the results of a soil test.  Mulch the area surrounding the plants to keep the soil moist and discourage weed growth. To avoid competition for nutrients, perform routine inspections and hand weeding.
  • Harvesting: It takes 90–100 days for sugar beets to achieve maturity. Gather them by removing them from the soil and thoroughly cleaning them.
  • Preparation: Cut off the greens and give the beets a good cleaning after harvesting. To increase the surface area for sugar extraction, chop or shred the beets into tiny cubes.
  • Boiling: Put the chopped beets in a big pot and add enough water to cover them. Bring to the boil and boil for around one hour. Strain the beet pulp out of the liquid, saving the liquid with your sugar.
  • Reduce the liquid: Return the filtered liquid to the saucepan and cook it until it becomes syrupy, which may take several hours to complete.
  • Grinding and drying: After the decreased syrup has dried on trays, it is broken up into bits and ground into granules.
  • Production: The recipe suggests producing one pound of sugar for every ten pounds of beets, resulting in a dark brown molasses-like texture.

To sum up, growing sugar beets for your use can be a sustainable and fulfilling enterprise. This comprehensive guide offers insightful information on every step of the process, from choosing the best variety of sugar beets to harvesting and turning the plants into sugar.

Q1: What are sugar beets?

A1: Sugar beets, a root vegetable with a high sucrose content, are a valuable source for sugar extraction due to their high concentration.

Q2: What are the nutritional benefits of sugar beets?

A2: These beets are high in fiber, low in calories and fat, and a good source of manganese and folate. They also have modest levels of B6 and C vitamins.

Q3: What are sugar beets used for?

A3: The main purpose of cultivating sugar beet is to harvest sugar. This is then processed and used in a range of culinary and beverage products.

Q4: Where are sugar beets commonly grown?

A4: These beets are primarily grown in temperate regions. particularly Europe, North America, and Asia, due to their ideal soils and climates.

Mealworms are a great addition to a chicken’s diet because they are a high-protein, nutrient snack. A healthy and affordable approach to giving your chickens this important food source is to start a mealworm farm at home. In this in-depth guide, we’ll lead you through setting up and running a mealworm farm for your feathered friends. By growing your own, you ensure a fresh, natural food source that can improve your chickens’ health, boost egg production, and reduce feed costs. Whether you’re new to poultry keeping or an experienced chicken owner, a mealworm farm is a sustainable and cost-effective way to enhance your flock’s diet.

To begin your mealworm farm, you’ll need the following supplies:

  • Plastic storage containers (ideally lidded)
  • Oatmeal or Wheat Bran
  • Raw fruits and veggies
  • Cut potatoes
  • Mealworms (available at pet stores or online)
  • Airflow-facilitating ventilation mesh or tiny holes
  • For moisture, use cotton balls or a water dispenser

How to establish a mealworm farm:

  • The size of your operation should determine which plastic storage containers you need. To provide enough airflow and prevent moisture buildup, drill tiny holes or use a hot nail to create ventilation in the lids and sides of the containers.

Making the habitat:

  • Fill each container with a layer of oatmeal or wheat bran. This is going to be your mealworms’ bedding. Add some raw fruits or vegetables, like apple or carrot slices, to provide the mealworms some moisture and nourishment. A few potato slices can be added to the bedding to provide extra nourishment and moisture.

Introduction to mealworms:

  • Spread out the mealworms evenly as you carefully move them into the containers. Take care not to hurt the mealworms. Make sure they have enough space to walk about without restriction.

How to make a mealworm farm with correct care:

  • Maintain your farm in a warm, dark place, preferably between 21°C and 27°C (70°F and 80°F). To keep the bedding just barely damp but not drenched, check the moisture levels frequently and add water as necessary. As the fruits, veggies, and potato slices are eaten or begin to mold, replace them.

Gathering mealworms:

  • Your mealworms will grow into black pupae after two to three months. They are now prepared for harvesting. To distinguish the pupae from the mealworms, carefully sort through the bedding. Then, move the pupae to a different container. While the pupae can be utilized to generate a new generation of mealworms, the mealworms can be fed straight to your hens.

In conclusion, establishing a mealworm farm at home for chicken feed can be an economical and fruitful venture. To keep your mealworm colony healthy and productive throughout the process, it’s imperative to maintain cleanliness, the right temperature, and the right amount of moisture. In addition, keeping an eye out for illnesses and pests is crucial to preventing contamination and preserving feed quality.

Q1: How do I maintain my DIY mealworm farm?

A1: To keep your homemade mealworm farm in good condition, make sure it has enough ventilation and temperature, remove trash and uneaten food regularly, and supply fresh food and water. Keep an eye on the moisture content to avoid mold formation and maintain a mealworm-growing environment.

Q2: How often should I clean my self-sorting mealworm farm?

A2: Regular cleaning of your farm is crucial to prevent bacteria and debris accumulation, and should involve removing uneaten food, dead mealworms, and frass every week.

Q3: Can I use a self-sorting mealworm farm for breeding?

A3: It is possible to breed mealworms in a self-sorting mealworm farm. Make sure the colony has enough beetles for mating to take place.

Biochar, a type of charcoal made from the pyrolysis of organic waste, has been used for generations to improve soil quality and plant growth. The purpose of this book is to provide gardeners with the information and abilities they need to maximize the advantages of making their biochar.  By creating biochar at home, you can recycle organic waste into a valuable resource that enhances soil health and contributes to more sustainable gardening or farming practices.

List of materials

  1. Biomass (such as sawdust, wood chips, crop leftovers, or other plant waste)
  2. Metal drum or barrel, or any other type of lidded container made of metal
  3. Drill
  4. Pot made of metal or ceramic with a snug-fitting lid
  5. A plate made of metal or ceramic
  6. Source of fire (such as an outdoor stove or bonfire)
  7. Tongs or a shovel
  8. Source of water (for precautions)

How to make biochar at home: the process

  • Drill a few tiny holes in the bottom of any metal drum or barrel you plan to use so that air may circulate throughout the pyrolysis process.
  • Add the organic material to the metal container. Loosely packing the material is crucial to ensure adequate air circulation.
  • To guarantee that very little oxygen can enter the container throughout the heating process. Then, cover it with a lid that fits tightly.
  • Create a vent hole in the lid to release gases, which helps regulate the container’s internal temperature.
  • The container should be placed outside in a secure area apart from combustible objects. To provide airflow underneath, raise the container a little with bricks or stones.
  • Sort of light a fire under the container. Inside, the biomass will pyrolyze and warm up. To keep the fire from dying out or becoming too hot, monitor the operation. Maintaining a steady, smoldering burn as opposed to a raging fire is the aim.
  • Carefully open the container after a few hours (usually 4–8 hours), when the smoke and flames have subsided and the container has cooled. It should contain biochar.
  • Allow it to cool before handling it and store it in an airtight, dry container for future use.

Garden trash may be converted into a useful resource for plant development and soil health by making biochar. Try a variety of biomass sources and application techniques to find the most effective approach to include this black gold in your gardening practice. Making it at home is an effective way to transform organic waste into a beneficial soil amendment. This simple, eco-friendly practice not only enhances your soil’s quality but also helps reduce waste, making it a valuable addition to any sustainable living efforts. So, Elevate your garden game with our Homemade Biochar! Nourish your plants naturally and watch them thrive.

Q1: What is biochar?

A1: It is a form of charcoal made from organic materials via a process called pyrolysis, which involves high temperatures in the absence of oxygen. It is applied to boost plant growth, increase soil fertility, and sequester carbon.

Q2: How does biochar benefits soil fertility?

A2: Biochar enhances soil fertility by increasing nutrient retention, stimulating microbial activity, and providing carbon, while retaining water and reducing nutrient leaching, promoting plant growth.

Q3: Is biochar fertilizer suitable for all types of soil?

A3: Biochar fertilizer is suitable for various soil types, improving structure in sandy soils and increasing water retention in clayey soils.

Learning how to grow strawberries can be a delightful addition to your gardening skills. Are you ready to establish a thriving strawberry farm in your area? This comprehensive book delves into the fascinating world of strawberry pot gardening. No matter how inexperienced you are with gardening, something is appealing about the idea of producing your own sweet, juicy strawberries. How can you successfully care for these ruby jewels in a pot’s limited area? Let’s now discuss how to grow strawberries in pots in more detail.

1: Collect materials

Collect the required materials before you start:

  • A large pot or container
  • High-quality potting mix
  • Strawberry Plants
  • Fertilizer
  • Mulch
Growing strawberries in pots offers space efficiency, improved pest control, and ease of maintenance. It's suitable for small gardens, patios, and balconies, and can be moved to maximize sunlight exposure.

2: Choose strawberry varieties

  • Select strawberry cultivars that are appropriate for growing in containers. Day-neutral or everbearing cultivars are frequently chosen because they provide fruit all during the growing season.

3: How to grow strawberries with appropriate planting

  • The potting mix should be added, leaving 1-2 inches at the top.
  • Strawberry plants should be spaced about 8-12 inches apart, with the crowns (where the leaves meet the roots) level with the soil surface.
  • After planting, give the plants plenty of water to let the soil settle.

4: Allow enough sunlight

  • The strawberries need at least 6 to 8 hours of sunlight per day, so place the pot where they will receive this light. It’s best on a sunny patio or balcony.

5: How to grow strawberries with proper care

  • Always keep the soil moist is ideal for strawberries. Water the plants when it appears that the top inch of soil is dry. Then, check that there is enough drainage to avoid flooding, which can cause root rot.
  • Throughout the growing season, feed your strawberry plants with a balanced fertilizer every four to six weeks. Visit the product for details on the application rate.
  • Straw or pine straw mulch around the bushes to retain moisture. So, keep weeds at bay, and maintain the cleanliness of the berries.
  • Yellowing or damaged leaves should be removed regularly to improve air circulation and avoid disease. Pinch off runners to promote more fruit yield.

6: Harvesting

  • Pick ripe strawberries while still attached to the stem. This keeps the fruit’s freshness. Pick berries during the growing season as they get ripe.
To care for potted strawberries in winter, relocate them to a safe location, cover them with burlap and straw mulch, and reduce watering but don't let the soil dry completely.

Overall, knowing how to grow strawberries in a pot is not only a practical answer for individuals with little space but also a fun and instructive experience. Observing the transition from tiny seeds or seedlings to colorful, fruit-bearing plants is evidence of the satisfaction that comes from growing one’s food, even in a small area. Anyone who loves gardening and has the patience and attention to detail to cultivate their strawberries can savor the delicious flavor of freshly picked strawberries in their own house.

Certainly! If you’d like to learn more, please consider following our WhatsApp Channel, Facebook, Instagram, YouTube, Twitter, and Pinterest.

Q1:  What time of year is ideal for growing strawberries?

A1: Strawberry planting is best done in early spring when the soil can be worked and frost has passed, which is usually between March and May.

Q2: How to grow strawberries from a strawberry?

A2: A1: To plant strawberries, remove the seeds from a ripe strawberry, dry them, and then plant them in soil that is high in nutrients. For best growth, make sure you have enough water and sunlight.

Q3: How to grow strawberries hydroponically?

A3: A fertilizer solution, a suitable hydroponic system, strawberry plants, and a regulated environment with the right lighting and temperature are all needed to start producing strawberries hydroponically.

Growing sweet potatoes in your yard may be quite satisfying, in addition to being a tasty addition to any meal. It can be rewarding and helpful to learn how to grow sweet potatoes quickly, regardless of experience level in gardening. You may quickly reap the benefits of a plentiful harvest of these nutrient-dense tubers if you have the appropriate knowledge and skills.

Selecting the appropriate sweet potato types:

  • Pick sweet potatoes that are renowned for growing quickly. Beauregard, Georgia Jet, and Vardaman are good to choose from since they mature faster than other cultivars.

Make use of high-quality slips:

  • Typically, “slips,” or sprouts developed from a mature sweet potato, are used to grow sweet potatoes. To give your plants a head start, make sure you start with healthy slips from a reliable supplier.

Give enough sunlight:

  • For optimum growth, sweet potatoes need full light. In your garden, pick a spot that gets at least 6 to 8 hours of direct sunlight each day.

Get the soil well-drained:

  • Sweet potatoes like rich, well-draining soil. To guarantee that the soil is rich in nutrients and has good drainage, work with a lot of compost.

How to grow sweet potatoes using plant slips at the proper time:

  • Once the risk of frost has passed and the soil has warmed to at least 55°F (13°C), plant your sweet potato slips in the spring. Faster growth is encouraged by warmer soil temperatures.

Plants in the right spot:

  • Plant slips in rows three feet apart, spaced roughly 12 to 18 inches apart. Enough room between plants promotes healthy air circulation and better nutrient and water uptake by each one.

Regular watering:

  • Watering regularly is essential, particularly in the early phases of growth. Ensure that the soil is continually moist and give the plants plenty of water.

Apply fertilizer correctly:

  • Since sweet potatoes are moderate eaters, frequent fertilizing is beneficial. Before planting, apply a balanced fertilizer (such as 10-10-10), and during the growing season, side-dress with compost or a fertilizer that is high in nitrogen.

How to grow sweet potatoes while managing weeds and space:

  • To retain soil moisture, control weed growth, and adjust soil temperature, surround the plants with a layer of organic mulch, such as straw or crushed leaves. Giving the roots a more solid environment also promotes faster growth.

Observe for diseases and pests:

  • Check out for common illnesses and pests. The key to managing them is early discovery and natural control techniques.

Harvest timely:

  • 90–120 days after planting, sweet potatoes are usually available for harvesting, depending on the cultivar and growing circumstances. Harvesting shouldn’t happen until the foliage starts to turn yellow and die back. To guarantee that the tubers are stored properly, take care not to harm them during harvest.
Sweet potatoes are cold sensitive, therefore they require care during the winter. If you live in a cold climate, pick them before the first frost, cure them in a warm, humid environment for approximately 10 days, and store them in a cool, dry location. If grown indoors, keep slips in a warm location with lots of light. Mulching outdoor beds might help insulate any roots that overwinter in moderate areas.

How to grow sweet potatoes quickly requires proper growing conditions. This entails choosing the sweet potato variety that is best for your soil and climate, making sure they get enough sunlight, and giving them soil that drains well and is rich in organic matter. Furthermore, consistent fertilization and watering can encourage quick development. You can have a plentiful harvest of sweet potatoes in a comparatively short amount of time with the right care and attention.

Certainly! If you’d like to learn more, please consider following our WhatsApp Channel, Facebook, Instagram, YouTube, Twitter, and Pinterest.

Q1: What kind of soil do I need to grow sweet potatoes?

A1: Sweet potatoes thrive in well-draining, pH 5.8-6.2 sand loam soil, but struggle in clay-heavy soils. Composting can improve soil texture and fertility.

Q2: Can I grow sweet potatoes in containers?

A2: Yes, sweet potatoes can be grown in containers; however, they must have adequate drainage and be big enough to fit the vines.

Q3: How to grow sweet potatoes in containers?

A3: Sweet potato slips should be planted in a large container with well-draining soil, and the container should receive regular sunlight and watering.

Q4: How long does it take to grow sweet potatoes?

A4: From planting to harvest, sweet potatoes normally take three to four months to mature.

Q5: Can I grow sweet potatoes from a sweet potato?

A5: Yes, sweet potatoes may be grown from a sweet potato by sprouting “slips.” Cut a sweet potato in half, set it in water or soil, and when the sprouts appear, remove and plant them in the ground.

Money plant, often called Devil’s Ivy or Epipremnum aureum, is more than a pretty plant. Plant aficionados often choose it because of its reputation for bringing wealth and luck. Although it requires little care in general, there are techniques to boost their growth. With its heart-shaped leaves and trailing vines, it’s a popular choice for beginners and experienced plant enthusiasts. It is a low-maintenance houseplant admired for its lush, trailing vines and heart-shaped leaves. It’s an ideal choice for beginners due to its adaptability to various light conditions and minimal watering needs.

  • Money plants do well in partial sunlight. Avoid placing them in full sunlight since this will scorch their leaves; instead, put them in a spot where they receive brilliant, filtered light. To ensure the plant receives equal light exposure on all sides, rotate it frequently.
  • When the top inch of soil appears dry, water it. A typical issue with this plant is root rot, which can be brought on by overwatering. To prevent water stagnation, make sure the pot has adequate drainage.
  • To ensure efficient potting, use a balanced mix of organic materials and perlite or orchid bark for indoor plants, ensuring efficient drainage.
  • এThe ideal indoor temperature range for these plants is 65–80°F (18–27°C). Keep the humidity at a reasonable level. Consider spraying the plant regularly if the air is too dry.
  • During the growing season (spring and summer), fertilize your money plant monthly with a balanced liquid fertilizer. When the plant’s growth slows down in the fall and winter, fertilizer application should be reduced or stopped.
  • Pinching off vine tips for bushier growth and pruning leaves to maintain plant robustness and health by removing yellowed or damaged ones.
  • Money plants are elementary to multiply. To start new plants, take cuttings and root them directly in the soil or water.
  • Look out for pests such as mealybugs and spider mites. Use neem oil or insecticidal soap to treat the plant if you find any infection.
  • When the money plant outgrows its container, report it. It is often required every one to two years. When repotting, use a new potting mix and check the roots.

Things To Remember:

Rotting roots can result from overwatering.

Watch out for signs of excessive watering, such as money plants curling up and becoming yellow.

You can repot your money plant in a bigger container if you see that it is outgrowing its current pot. Additionally, it will give your home extra greenery.

In conclusion, cultivating a money plant for quick and healthy growth requires a mix of good maintenance, ideal surroundings, and calculated strategies. Essential elements of caring for a healthy money plant are regular watering, making sure the soil drains properly, and giving it enough sunlight. When used sparingly, organic fertilizers can help it grow even more. By using these many techniques, one may foster an atmosphere that makes the plant grow quickly and easily, transforming it into a stunning and lucrative addition to any area.

Certainly! If you’d like to learn more, please consider following our WhatsApp Channel, Facebook, Instagram, YouTube, Twitter, and Pinterest.

Q1: Why is it called the money plant?

A1: According to Feng Shui, this plant will bring wealth, prosperity, and good fortune to the house. Because of its rounded, coin-shaped leaves, the plant is sometimes known as the “money plant.”

Q2: Can I keep my money plant indoor?

A2: Yes, money plants thrive best in indoor environments. Simply ensure that they have appropriate lighting.

Q3: How to take care of a money plant?

A3: This plant needs bright, indirect light, moderate watering, well-draining soil, and the ability to dry out the top inch of the soil in between waterings.